
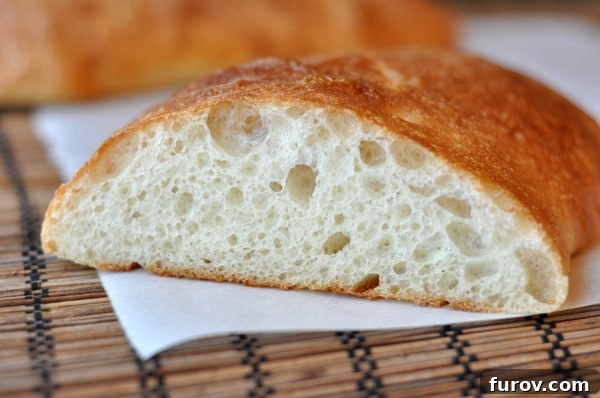
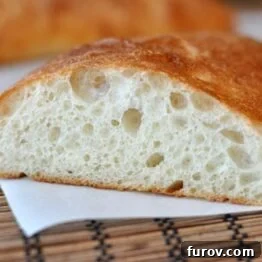
Imagine a bread with a golden, slightly crispy crust, giving way to an interior that is tender, impossibly airy, and riddled with large, irregular holes – the hallmark of true artisan quality. This, my friends, is ciabatta, and making it at home is not only incredibly satisfying but also surprisingly achievable and far more economical than sourcing it from a specialty bakery. This guide will walk you through crafting your very own perfect ciabatta, a bread so versatile it will elevate every meal.
Mastering Homemade Ciabatta Bread: A Guide to Italian Perfection
What exactly is ciabatta bread, and why should you invest your time in baking it yourself? These are excellent questions, and the answers lie in its rich history, unique characteristics, and unparalleled versatility.
The Essence of Ciabatta: A “Slipper” from Italy
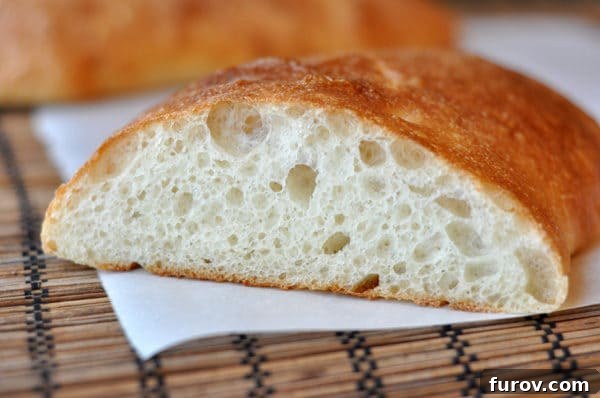
Ciabatta, an iconic Italian bread, derives its name from the Italian word for “slipper,” a fitting description for its distinctive long, flat, and somewhat irregular shape. Originating in the Veneto region in the early 1980s, ciabatta was created as an answer to the popular French baguette, quickly earning its place in the pantheon of beloved artisanal breads. What truly sets ciabatta apart is its textural marvel: a delightfully crisp and chewy crust that encases an interior celebrated for its moist, tender, and incredibly open crumb, often featuring large, irregular air pockets known as alveoli. This unique structure is a testament to its high hydration and careful fermentation process, delivering a sensory experience unlike any other bread.
For me, the allure of ciabatta is undeniable. Its rustic charm and incredible flavor make it a bread I could happily devour a whole loaf of. But beyond personal indulgence, there are compelling reasons to bring the art of ciabatta baking into your own kitchen.
The Irresistible Advantages of Baking Ciabatta at Home
Making ciabatta from scratch offers a multitude of benefits that extend far beyond simply having fresh bread. Firstly, it’s significantly more budget-friendly than purchasing it from a gourmet bakery, especially if you seek an authentic, high-quality loaf. Many regions lack bakeries that truly master the art of ciabatta, making homemade your best, if not only, option for genuine excellence. But the primary motivation for many home bakers boils down to two simple yet profound words: flavor and versatility. Specifically:
- Panini: There is arguably no better bread for creating the perfect panini. Ciabatta’s robust crust holds up beautifully to grilling, while its soft interior compresses just enough to meld with your fillings without becoming dense or soggy.
- Garlic Bread: Prepare to redefine your expectations of garlic bread. The large, airy holes in ciabatta are perfect for soaking up a rich garlic-butter mixture, resulting in a garlic bread that is incredibly flavorful, irresistibly crunchy on the outside, and wonderfully soft within. You’ll find the details for this transcendent garlic bread below the main recipe.
Seriously, I’ve conducted extensive culinary research, and I can confidently attest to the supremacy of ciabatta in these applications. But even if these specific uses don’t immediately ignite your baking passion, ciabatta shines in countless other ways. I often bake this bread simply for the sheer pleasure of tearing off large, rustic hunks – in a wonderfully uncivilized manner – and dipping them into the aromatic drippings of a buttery garlic shrimp scampi, or any other equally delightful sauce or stew. Its ability to absorb flavors while maintaining its structural integrity is truly remarkable.
So, what are you waiting for? Let’s get baking! I’ve included detailed step-by-step photos, similar to my popular homemade bagels guide. Be prepared to embrace a dough that defies conventional expectations – it will be much wetter and stickier than you might anticipate. Forget what a normal yeast dough should feel and look like, and accept that your hands might get a little “crazy-dough-sticky” at some point. If you can approach it with this adventurous spirit, you’ll undoubtedly succeed in creating an exceptional loaf.
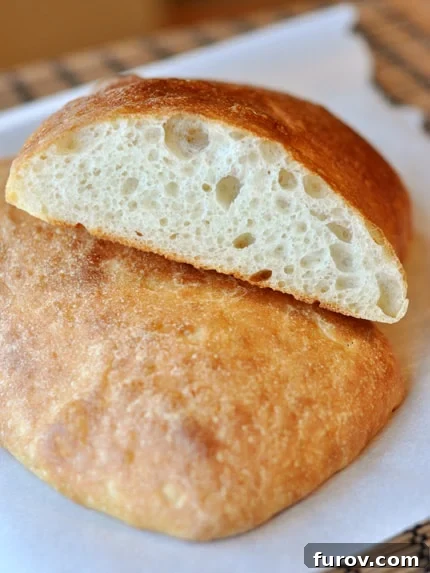
The Secret to Ciabatta: Embracing the Biga
The foundation of an outstanding ciabatta lies in its pre-ferment, known as a “biga.” This overnight starter is crucial for developing the deep, complex flavors and the characteristic open crumb that defines ciabatta. While it adds a bit of planning to your baking schedule, the actual preparation of the biga takes mere seconds to stir together. Don’t be tempted to skip or rush this step; it is absolutely essential for the ultimate taste and texture of your finished bread. Allowing the biga to ferment slowly at room temperature overnight builds strength, extensibility, and a nuanced flavor profile that simple direct-dough methods cannot replicate. Think of it as a flavor engine for your bread.
Working with ciabatta dough also requires a gentle hand, particularly when it comes to measuring flour. If you don’t have a kitchen scale to weigh your ingredients, which is highly recommended for bread baking, be sure to measure your flour with a light, aerated touch. Over-measuring flour can lead to a dense, tough bread, detracting from ciabatta’s signature airy lightness. The dough’s high hydration is what gives ciabatta its unique texture, so maintaining that delicate balance is key.
Recipe Source: This exceptional ciabatta recipe is adapted from the trusted experts at King Arthur Flour, renowned for their dedication to quality baking.
Homemade Ciabatta Bread
Pin
Rate
Ingredients
Overnight Starter (Biga):
- 1 ½ cups (213 g) unbleached or regular all-purpose flour
- 1 cup cool water
- 1/16 teaspoon instant yeast
Dough:
- All of the starter, from above
- 1 teaspoon instant yeast
- 1 ½ cups (213 g) unbleached or regular all-purpose flour
- 1 ¼ teaspoons salt
- 1 teaspoon sugar
- 1 tablespoon nonfat dry milk
- ¼ cup lukewarm water
- 2 tablespoons olive oil
Topping for The Best Garlic Bread:
- 1 medium head of garlic, cloves separated and peeled (about 15 medium cloves) and finely minced
- ½ cup (113 g) butter, melted
- ⅓ cup olive oil
- Pinch 1/16 teaspoon of salt
- 1 cup freshly grated Parmesan cheese
- Snipped fresh parsley, for garnish (optional)
Instructions
-
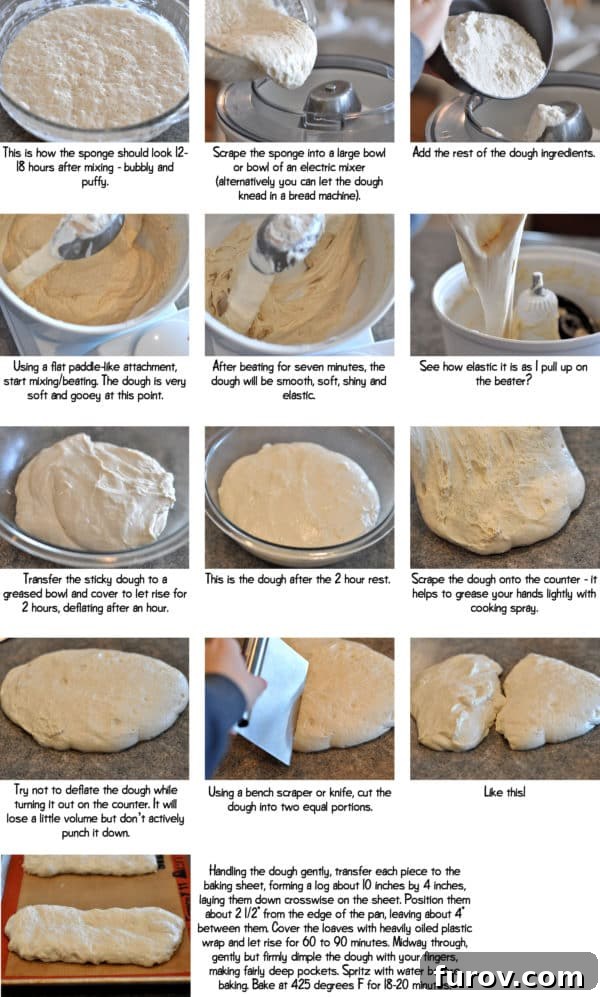
For the Biga (Starter): In a small bowl, combine the flour, cool water, and instant yeast for the starter until thoroughly mixed. Cover the bowl and allow this mixture to rest at room temperature overnight, or for up to 15 hours. During this time, the starter will become visibly bubbly and puffy, indicating active fermentation and flavor development.
-
For the Dough: Transfer all of the dough ingredients, including the prepared starter, into the bowl of your stand mixer. Using the flat/paddle beater attachment, beat the mixture at medium speed for 7 minutes. Initially, the dough will be exceptionally wet and sticky – this is normal for high-hydration ciabatta dough. As it mixes, scrape down the sides of the bowl as needed to ensure all ingredients are incorporated. After 7 minutes, the dough should transform into a smooth, soft, shiny, and elastic consistency. If you prefer, you can also knead the dough ingredients in your bread machine using its dedicated dough cycle.
-
First Rise: With greased or lightly oiled hands, carefully transfer the sticky dough to a greased bowl or other suitable rising container. Cover it tightly and let it rise for a total of 2 hours. Approximately halfway through this rising period (after about 1 hour), gently deflate the dough by folding it over itself a few times. Recover it and allow it to continue rising for the remaining hour. If using a bread machine, let the dough rise for an additional hour after its dough cycle has completed.
-
Preparation for Shaping: Lightly grease your work surface or kitchen counter. Prepare a half-sheet baking pan (approximately 18″ x 13″) or a similarly large baking sheet by lightly greasing it or lining it with parchment paper or a silicone baking mat (Silpat). Ensure your hands are also lightly greased to prevent sticking when handling the delicate dough.
-
Shaping the Loaves: Very gently turn the risen dough out of its bowl onto your prepared work surface. It is crucial not to deflate the dough actively; it will naturally lose a bit of volume, but avoid punching it down. Using a bowl scraper, bench knife, or simply your well-oiled fingers, carefully divide the dough into two equal halves. Each half should naturally form into a fat, rustic log, roughly 10″ long by 4″ wide.
-
Second Rise & Dimpling: With the utmost gentleness, transfer each dough piece to the baking sheet, arranging them crosswise with about 2 ½” clearance from the pan edges and approximately 4″ between the loaves. Lightly cover the dough with heavily oiled plastic wrap or a proofing cover, and allow it to undergo its second rise for 60 to 90 minutes. Halfway through this rise, use your fingers to gently but firmly dimple the dough, creating fairly deep indentations across the surface. Toward the end of the rising time, preheat your oven to 425°F (220°C).
-
Baking: Just before baking, lightly spritz the risen loaves with lukewarm water. You’ll observe that the dimples have softened somewhat but haven’t completely disappeared. Bake the loaves in the preheated oven for approximately 18 to 20 minutes, or until they achieve a beautiful golden-brown color and sound hollow when tapped on the bottom. Once baked, remove them from the oven and transfer them to a wire rack to cool completely.
-
To Make The Best Garlic Bread: Prepare the garlic topping by combining the finely minced garlic cloves, melted butter, olive oil, and a pinch of salt in a small bowl. Take a cooled ciabatta loaf and carefully cut it in half lengthwise, as if you were preparing to make a colossal sandwich. Generously spread the cut halves with the prepared garlic mixture. Bake the garlic bread in a preheated 400°F (200°C) oven for about 10 minutes, or until the topping is delightfully bubbly and the edges of the bread begin to crisp and brown. Remove the bread from the oven and immediately sprinkle it with freshly grated Parmesan cheese and snipped fresh parsley, if desired. Cut into crosswise slices for easy serving and enjoy the ultimate garlic bread experience.
Notes for Success
Accurate Flour Measurement: If you do not possess a kitchen scale to weigh your flour, which is always the most accurate method for baking, exercise extreme care when measuring with cups. Use a light hand, spooning the flour into the measuring cup and leveling it off gently, rather than scooping directly. Over-flouring can result in a dense biga and a tough, less airy final dough, compromising the ciabatta’s desired texture.
Recommended Products for Ciabatta Baking
Exploring More Artisan Bread Creations
Once you’ve mastered the art of ciabatta, you might find yourself eager to explore other delightful homemade bread recipes. The satisfaction of baking your own bread from scratch is truly unmatched. Here are a few more recipes to inspire your culinary journey, offering a range of textures and flavors that are perfect for any occasion: