
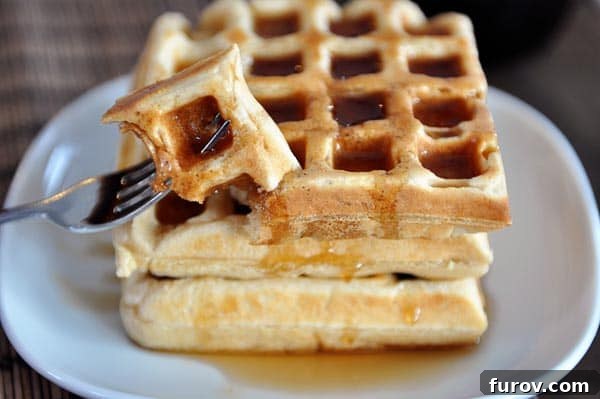
The fluffiest, lightest waffles made with a yeasted batter that rests overnight. These are the best waffles ever!
Overnight Raised Waffles: Your New Favorite Fluffy Breakfast Staple
Imagine waking up on a lazy weekend morning, the aroma of freshly cooked waffles filling your home, yet you barely lifted a finger. This isn’t a dream – it’s the reality of Overnight Raised Waffles. If you’ve never experienced the delight of a yeasted waffle, prepare for a breakfast revelation. These aren’t just any waffles; they are exceptionally light, incredibly fluffy, and boast a depth of flavor that sets them apart from all others.
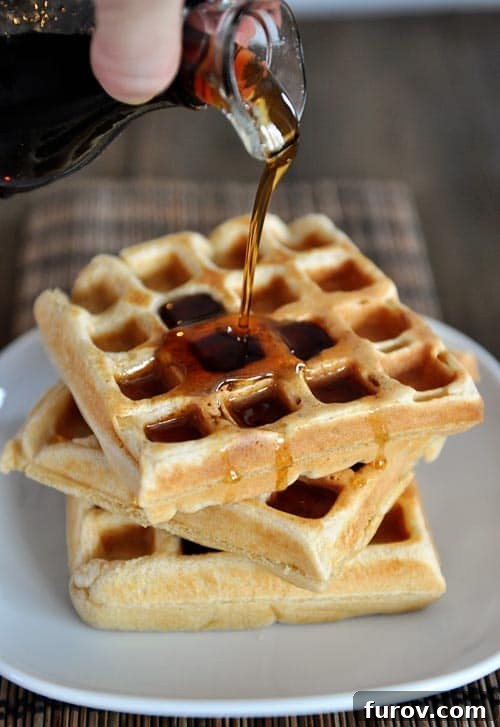
Why Overnight Raised Waffles Are a Must-Try
The secret to these truly superior waffles lies in a simple yet transformative step: an overnight rest for the yeasted batter. This extended fermentation time allows the yeast to work its magic, developing a complex flavor profile that is subtly tangy and incredibly rich. More importantly, it creates an unparalleled texture – light as air with a delicate crisp exterior and a tender, airy interior. This isn’t just a slight improvement; it’s a completely different league of waffle experience.
Unlike traditional quick-mix waffle recipes, these raised waffles develop an intricate flavor and a remarkable structure that simply cannot be rushed. The batter, prepared the night before, is not just convenient; it’s essential for achieving that characteristic light and airy crumb. While our beloved classic buttermilk waffles offer a delicate lightness, these overnight raised waffles are distinctively tender yet sturdy. They hold their shape beautifully, making them ideal for soaking up generous amounts of syrup and toppings, without ever feeling dense or heavy.
The Magic of an Overnight Yeasted Batter
The overnight fermentation process is where the true enchantment happens. As the yeast slowly works in the refrigerator, it not only leavens the batter but also breaks down starches, creating more complex sugars. This contributes to a deeper, more nuanced flavor and helps to achieve that desired golden-brown crispness when cooked. The resulting batter is alive and bubbly, ready to transform into delightful waffles with minimal effort on your part the next morning. It’s truly a testament to the power of patience in cooking, yielding a reward far greater than the small initial investment of time.
Transform Your Weekend Mornings with Make-Ahead Ease
One of the most appealing aspects of these raised waffles is the incredible convenience they offer. Whisking the batter together the night before means your morning prep is almost unbelievably fast. Imagine waking up, pulling the already-risen batter from the fridge, and within minutes, you’re cooking up fresh, hot waffles for your family. This takes away the usual morning rush, allowing you to truly savor your breakfast and enjoy quality time with loved ones, rather than being stuck in the kitchen. It’s the perfect way to make any Saturday feel a little more special and a lot less chaotic, even if there are chore lists waiting!
Looking for more delightful breakfast ideas? Check out some of our past favorites:
- One Year Ago: Soft Chocolate Sugar Cookies
- Two Years Ago: Crepes, Crepes, Crepes!
- Three Years Ago: Syrup Solution: Homemade Maple Syrup
Overnight Raised Waffles
12
Waffles (Makes 8-12)
12 hours
10 minutes
5 minutes
12 hours
15 minutes
Pin
Ingredients
- 3 ½ cups milk
- 6 tablespoons (85 g) salted butter, cut into pieces
- 4 large eggs
- 2 teaspoons vanilla extract
- 4 cups (568 g) all-purpose or white whole wheat flour (or a combination, see note below)
- 2 tablespoons granulated sugar
- 1 teaspoon salt
- 1 tablespoon instant yeast
Instructions
-
**Prepare the Batter (12-24 hours in advance):** In a medium saucepan, gently combine the milk and butter. Warm over medium-low heat until the butter is just melted and the mixture is warm to the touch (around 100-110°F or 38-43°C). Do not boil. Set aside to cool slightly if too hot.
-
In a small bowl, whisk together the eggs and vanilla until well combined. Set aside.
-
In a large mixing bowl (ensure it has at least double the capacity of the batter to allow for rising), whisk together the flour, granulated sugar, salt, and instant yeast.
-
Pour the warm milk/butter mixture into the dry ingredients, stirring gently with a whisk or spatula until just combined. Next, whisk in the egg and vanilla mixture, stirring only until thoroughly incorporated. Avoid overmixing.
-
Cover the bowl tightly with plastic wrap and refrigerate for at least 12 hours, and up to 24 hours. The batter will rise and become bubbly during this time.
-
**Cooking the Waffles:** When ready to cook, gently stir the batter down with a spoon or spatula. Do not aggressively whisk or beat the air out of it. Heat your waffle iron according to the manufacturer’s instructions.
-
Pour the appropriate amount of batter onto the hot waffle iron (the quantity will vary based on your waffle iron model). Cook until golden brown and crisp, usually 3-5 minutes depending on your iron and desired crispness.
-
Serve immediately with your favorite toppings, or keep warm in a low oven (around 200°F/95°C) while you finish cooking the remaining waffles.
Notes & Tips for Success
Flour Choices: The beauty of this recipe is its versatility with flour.
— For an incredibly light and traditional waffle, use 100% all-purpose white flour.
— For a heartier, slightly denser waffle with added nutritional benefits, use 100% white whole wheat flour.
— Our personal favorite balance is a 50% all-purpose flour and 50% white whole wheat flour combination, offering the best of both worlds in terms of texture and flavor.
Quantity Adjustments: This recipe can easily be halved if you’re cooking for a smaller group. Just remember to adjust all ingredients proportionally.
Waffle Iron Care: Always make sure your waffle iron is properly preheated and lightly greased (if not non-stick) before adding batter. This ensures a beautifully crispy exterior and prevents sticking.
Don’t Overmix: Once the wet and dry ingredients are combined, stir just enough to incorporate. Overmixing can develop the gluten too much, leading to tougher waffles.
Storage & Reheating: Leftover cooked waffles can be stored in an airtight container in the refrigerator for up to 3-4 days, or frozen for up to 2 months. To reheat, toast them in a toaster or toaster oven until crisp and warm, or pop them back into a hot waffle iron for a few minutes.
Mel
Breakfast
American
Nutritional Information (per Waffle)
Serving: 1 Waffle
,
Calories: 265kcal
,
Carbohydrates: 38g
,
Protein: 9g
,
Fat: 8g
,
Saturated Fat: 5g
,
Cholesterol: 80mg
,
Sodium: 299mg
,
Fiber: 1g
,
Sugar: 6g
Recommended Products
To help you create these delightful waffles, here are a few recommended items:
Recipe Source: adapted from a cherished recipe my Aunt Marilyn shared with me years ago.
Serving Suggestions for Your Fluffy Masterpiece
While classic maple syrup is always a winner with these fluffy waffles, don’t limit your culinary imagination! Consider topping your overnight raised waffles with fresh seasonal berries (strawberries, blueberries, raspberries), a dollop of homemade whipped cream, a sprinkle of chocolate chips, or a dusting of powdered sugar. For a more indulgent treat, try a fruit compote or even a scoop of ice cream for a dessert-for-breakfast experience. For those who enjoy a savory twist, a fried egg and a slice of crispy bacon can transform these into a heartier meal.
Frequently Asked Questions About Yeasted Waffles
Can I skip the overnight resting period?
While you technically *can* make waffles with yeast without an overnight rest, it defeats the purpose of “raised” or “yeasted” waffles. The extended rest is crucial for developing the unique airy texture and complex, tangy flavor that sets this recipe apart. Without it, you’d end up with a denser, less flavorful waffle more akin to a quick-bread style.
How long can the batter be stored in the refrigerator?
The batter is best used within 24 hours of being prepared. While it might last a little longer, the yeast activity will eventually diminish, and the flavor could become too sour. For optimal results, stick to the 12-24 hour window.
What kind of yeast should I use?
Instant yeast is recommended for this recipe as it can be mixed directly with the dry ingredients and doesn’t require proofing. Active dry yeast can also be used, but you might need to proof it first in a portion of the warm milk before combining with other ingredients. Always check the package instructions for your specific yeast.
Can I make these waffles gluten-free?
Adapting yeasted recipes to be gluten-free can be tricky, as gluten is essential for the structure and rise. While it might be possible with a specialized gluten-free flour blend designed for yeast baking, it would significantly alter the texture and may require adjustments to liquid amounts. For best results, it’s often better to seek out a dedicated gluten-free waffle recipe.
Other Delicious Breakfast Recipes You’ll Love: