
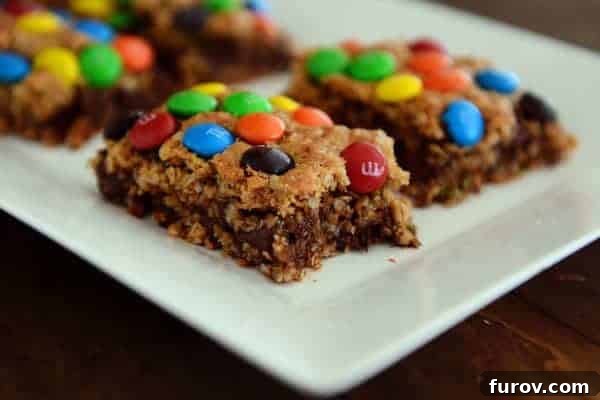
Irresistibly Easy Gluten-Free Monster Cookie Bars: Your New Favorite Dessert!
When the craving for a homemade cookie strikes but time is short, nothing beats a fantastic cookie bar. And if you’re a fan of the classic “monster cookie” – that delightful blend of peanut butter, oats, chocolate chips, and M&Ms – then these gluten-free Monster Cookie Bars are about to become your absolute obsession. They capture all the beloved flavors and textures of traditional monster cookies, but in a convenient, sliceable bar format that’s significantly quicker and easier to prepare than baking individual cookies.
Say goodbye to endless trays of cookies cycling in and out of the oven! With this recipe, you get a generous batch of soft, chewy, and gloriously colorful bars from a single 9×13-inch pan. It’s the perfect solution for busy bakers, potlucks, parties, or simply satisfying that sweet tooth with minimal fuss.
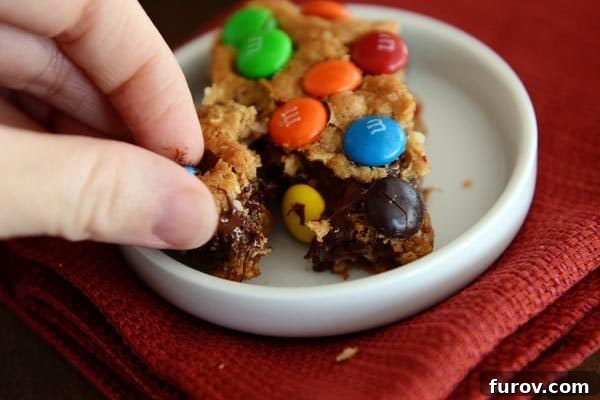
From Cookies to Bars: A Perfect Transformation
While transforming a classic cookie recipe into a bar form might seem as simple as baking the dough in a pan, it often requires a few thoughtful adjustments to achieve the ideal texture and consistency. We’ve taken our favorite gluten-free monster cookie recipe and meticulously adapted it, ensuring these bars are not just easy, but absolutely perfect in every bite. The result is a treat that’s wonderfully soft and chewy, with a delightful richness from the peanut butter and a satisfying sweetness from the sugars and chocolate. The vibrant M&Ms scattered generously on top don’t just add a burst of color, but also a fun crunch that makes these bars truly special.
The secret to their incredible texture lies in slightly underbaking them. This technique ensures a gooey, tender center that makes them melt-in-your-mouth delicious, especially when warm. Imagine serving a warm square of these bars with a scoop of vanilla ice cream – pure heaven! But they are equally delightful cooled and cut into neat squares, making them an excellent grab-and-go snack or a welcome addition to any dessert platter.
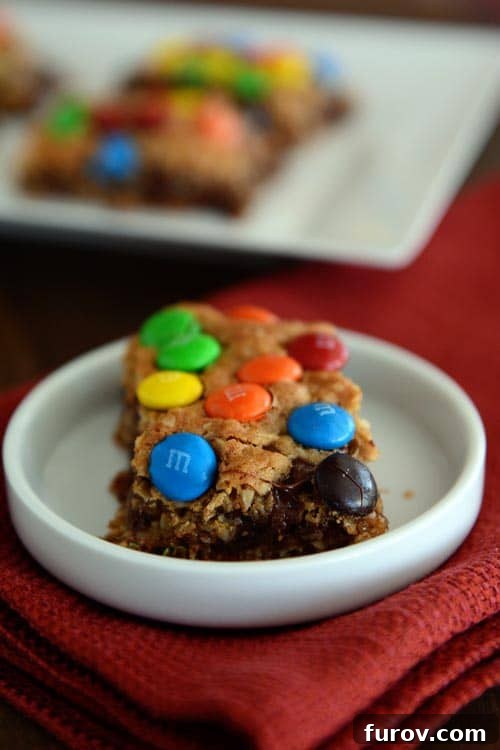
Why These Gluten-Free Monster Cookie Bars Are a Game Changer
These Monster Cookie Bars aren’t just a dessert; they’re a celebration of flavor and convenience. They combine the best elements of classic monster cookies – the hearty texture of oats, the creamy richness of peanut butter, and the delightful burst of chocolate and candy-coated goodness – into an easy-to-manage bar. Whether you’re a seasoned baker or just starting, this recipe offers a foolproof way to create a memorable treat. The gluten-free aspect makes them accessible to even more people, without compromising on taste or texture. You get all the chewiness and flavor you expect from a traditional cookie, but with the added benefit of being naturally gluten-free thanks to the use of oats and peanut butter as primary binders.
The Magic of Gluten-Free Baking with Oats
One of the fantastic things about monster cookies is their reliance on naturally gluten-free ingredients like oats and peanut butter. This recipe embraces that, using quick oats to provide structure and a wonderfully chewy texture without the need for traditional flour. This makes them an excellent option for those with gluten sensitivities or anyone looking to reduce their gluten intake, without sacrificing the joy of a truly satisfying dessert. Always ensure you use certified gluten-free oats if cross-contamination is a concern for severe allergies.
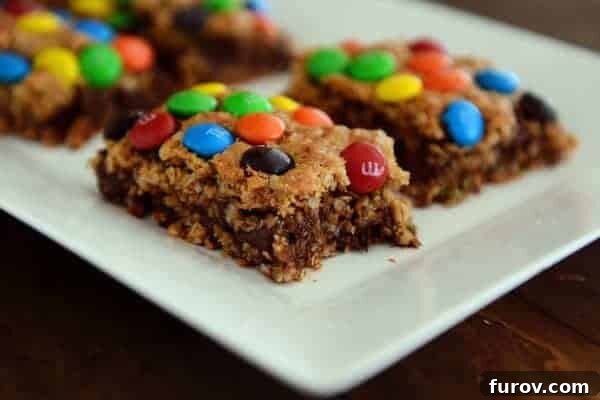
Mastering Your Monster Cookie Bars: Ingredient Deep Dive & Tips for Success
Creating these delightful bars is straightforward, but understanding the role of each ingredient and following a few key tips will ensure your success every time. The simplicity of the ingredients belies the complexity of flavor they create when combined.
Essential Ingredients and Their Roles:
- Eggs: Provide structure and bind the ingredients together, contributing to the bar’s chewy texture.
- Granulated & Brown Sugar: A combination of sugars ensures both sweetness and moisture. Brown sugar adds a lovely depth of flavor and keeps the bars soft.
- Salt: Balances the sweetness and enhances all the other flavors.
- Vanilla Extract: A crucial flavor enhancer, adding warmth and depth.
- Creamy Peanut Butter: The star of the show! It provides richness, moisture, and that signature monster cookie flavor. Use a good quality, creamy peanut butter for the best results. Avoid natural peanut butter that separates easily, as it can affect texture.
- Salted Butter: Adds more richness and helps create a tender crumb. Ensure it’s softened to room temperature for easy creaming.
- Chocolate Chips: Classic addition for bursts of chocolatey goodness. Any variety works well, from semi-sweet to milk chocolate.
- Baking Soda: The leavening agent that helps the bars rise slightly and contributes to their soft texture.
- Quick Oats: The base of our gluten-free bars, providing a wonderful chewy texture and hearty structure. Quick oats are preferred over old-fashioned as they absorb liquid faster and create a more uniform bar.
- M&M’s: Add a festive pop of color, extra sweetness, and a delightful candy crunch.
Top Tips for Perfect Bars:
- Don’t Overbake: This is perhaps the most important tip. Bake until the edges are just golden and set, but the center still looks slightly soft. The bars will continue to set as they cool, resulting in that desirable soft and chewy texture.
- Proper Cooling: Allow the bars to cool completely in the pan. This not only makes them easier to cut but also allows them to fully set and develop their rich flavor. For even cleaner slices, refrigerate the pan for about 30 minutes before cutting.
- Room Temperature Butter: Ensure your butter is properly softened. This helps it cream beautifully with the sugars, creating a smooth, well-incorporated dough.
- Even Spreading: When pressing the dough into the pan, aim for an even layer. This ensures uniform baking and consistent texture throughout the batch.
- M&M Placement: While the recipe calls for pressing M&Ms into the dough before baking, if you prefer vibrant, uncracked M&Ms, you can sprinkle them on top immediately after taking the bars out of the oven. They might not sink in as much, but their color will be perfectly preserved.
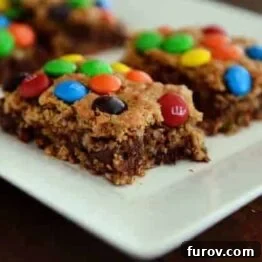
Monster Cookie Bars
Pin
Rate
Ingredients
- 2 large eggs
- ⅔ cup (141 g) granulated sugar
- ⅔ cup (141 g) packed light brown sugar
- ¼ teaspoon salt
- 1 teaspoon vanilla extract
- 1 cup (255 g) creamy peanut butter
- ⅓ cup (75 g) salted butter, softened to room temperature
- 1 ½ cups (255 g) chocolate chips
- 1 teaspoon baking soda
- 3 cups (300 g) quick oats
- 1 cup (198 g) M&M’s
Instructions
-
Preheat the oven to 350 degrees F (175 C). Lightly grease a 9X13-inch baking pan with cooking spray or butter.
-
In a large mixing bowl, beat together the eggs and both granulated and brown sugars until well combined and lightened. Add the salt, vanilla extract, creamy peanut butter, and softened butter. Mix thoroughly until the mixture is creamy and perfectly smooth. Gradually stir in the chocolate chips, baking soda, and quick oats until just combined, being careful not to overmix.
-
Evenly spread the thick cookie dough into the prepared baking pan. Gently press the dough into an even layer using the back of a spoon or your hands. Sprinkle the M&M’s uniformly across the top surface of the dough, then lightly press them in so they adhere to the cookie base.
-
Bake for 20-25 minutes, or until the edges are beautifully golden and set, but the center still appears slightly soft. Avoid overbaking to maintain a wonderfully chewy texture. Once baked, remove the pan from the oven and let the bars cool completely in the pan on a wire rack. For the cleanest, most precise cuts, chill the cooled bars in the refrigerator for at least 30 minutes before slicing into squares and serving.
Notes
Recommended Products
Recipe Source: adapted from this favorite Gluten-Free Monster Cookies recipe
Customization and Variations
While the classic Monster Cookie Bar is a masterpiece on its own, don’t hesitate to get creative with add-ins! Here are a few ideas to inspire you:
- Nutty Additions: For an extra layer of texture and flavor, try incorporating chopped peanuts, pecans, or walnuts into the dough alongside the chocolate chips.
- Different Candies: Swap out some of the M&Ms for other small candies like Reese’s Pieces, chopped peanut butter cups, or even seasonal M&Ms for holiday themes.
- White Chocolate: A mix of milk or semi-sweet chocolate chips with white chocolate chips can add a lovely creamy contrast.
- Butterscotch Chips: For a different kind of sweetness, butterscotch chips are a fantastic complement to the peanut butter base.
- Coconut Flakes: A touch of shredded coconut can add another chewy element and a subtle tropical note.
Storage and Freezing Instructions
These Monster Cookie Bars are so delicious, they rarely last long! But for those rare occasions you have leftovers, or if you want to make a batch ahead of time, here’s how to store them:
- At Room Temperature: Store cooled and cut bars in an airtight container at room temperature for up to 3-4 days. Placing a piece of parchment paper between layers can prevent sticking.
- In the Refrigerator: For a slightly firmer texture and extended freshness, store them in an airtight container in the refrigerator for up to a week. This is also ideal if you live in a warmer climate where chocolate might melt.
- Freezing: These bars freeze beautifully! Once completely cooled and cut, place them in a single layer on a baking sheet and freeze until solid. Then, transfer the frozen bars to a freezer-safe airtight container or a heavy-duty freezer bag. They will keep for up to 2-3 months. Thaw at room temperature or warm briefly in the microwave for a fresh-baked taste.
Serving Suggestions
These versatile bars can be enjoyed in many ways:
- Warm with Ice Cream: As mentioned, a warm square with a scoop of vanilla bean ice cream is an absolute dream, creating a mini skillet-cookie experience.
- With a Glass of Milk: The classic pairing! The richness of the bars is perfectly balanced by cold milk.
- Coffee or Tea Companion: A delightful treat to accompany your morning coffee or afternoon tea.
- Party Dessert: Cut into smaller squares, they make excellent additions to dessert platters for parties, potlucks, or family gatherings.
- Lunchbox Treat: A perfectly satisfying and portionable treat for school or work lunches.
Frequently Asked Questions (FAQs)
Q: Can I use old-fashioned rolled oats instead of quick oats?
A: While quick oats are recommended for their finer texture and ability to absorb moisture evenly, you can use old-fashioned rolled oats. However, the texture of the bars might be slightly chewier and less uniform. You might also need to slightly increase the baking time by a minute or two.
Q: Do I need to use gluten-free specific M&Ms?
A: Original M&M’s Plain Chocolate Candies are generally considered gluten-free in the US, but it’s always best to check the most current ingredient list and allergen statements from the manufacturer if you have a severe allergy. Many other M&M varieties and flavors may contain gluten, so choose carefully.
Q: My M&Ms cracked on top. What happened?
A: It’s quite common for M&Ms to crack or for their colors to bleed slightly during baking due to the heat. This is normal and doesn’t affect the taste. If you prefer to avoid this, you can sprinkle the M&Ms on top of the bars immediately after they come out of the oven. They will stick as the bars are still warm and soft.
Q: Can I use natural peanut butter for this recipe?
A: It’s generally recommended to use creamy, processed peanut butter (like Jif or Skippy) for baking, especially in recipes like this. Natural peanut butter, which often separates and is thinner, can alter the consistency of the dough and the final texture of the bars. If you do use natural peanut butter, make sure it’s well-stirred and doesn’t contain too much oil.
Indulge in the Simplicity and Flavor
These Gluten-Free Monster Cookie Bars offer a delightful blend of convenience, rich flavors, and satisfying textures, all wrapped up in an easy-to-make package. Perfect for any occasion or simply as a treat for yourself, they embody everything you love about monster cookies without the extra effort of shaping individual cookies. So go ahead, whip up a batch, and enjoy the pure joy of these irresistible bars!