
The Ultimate Guide to Perfect Mini Cheesecakes: Easy, Creamy, and Customizable
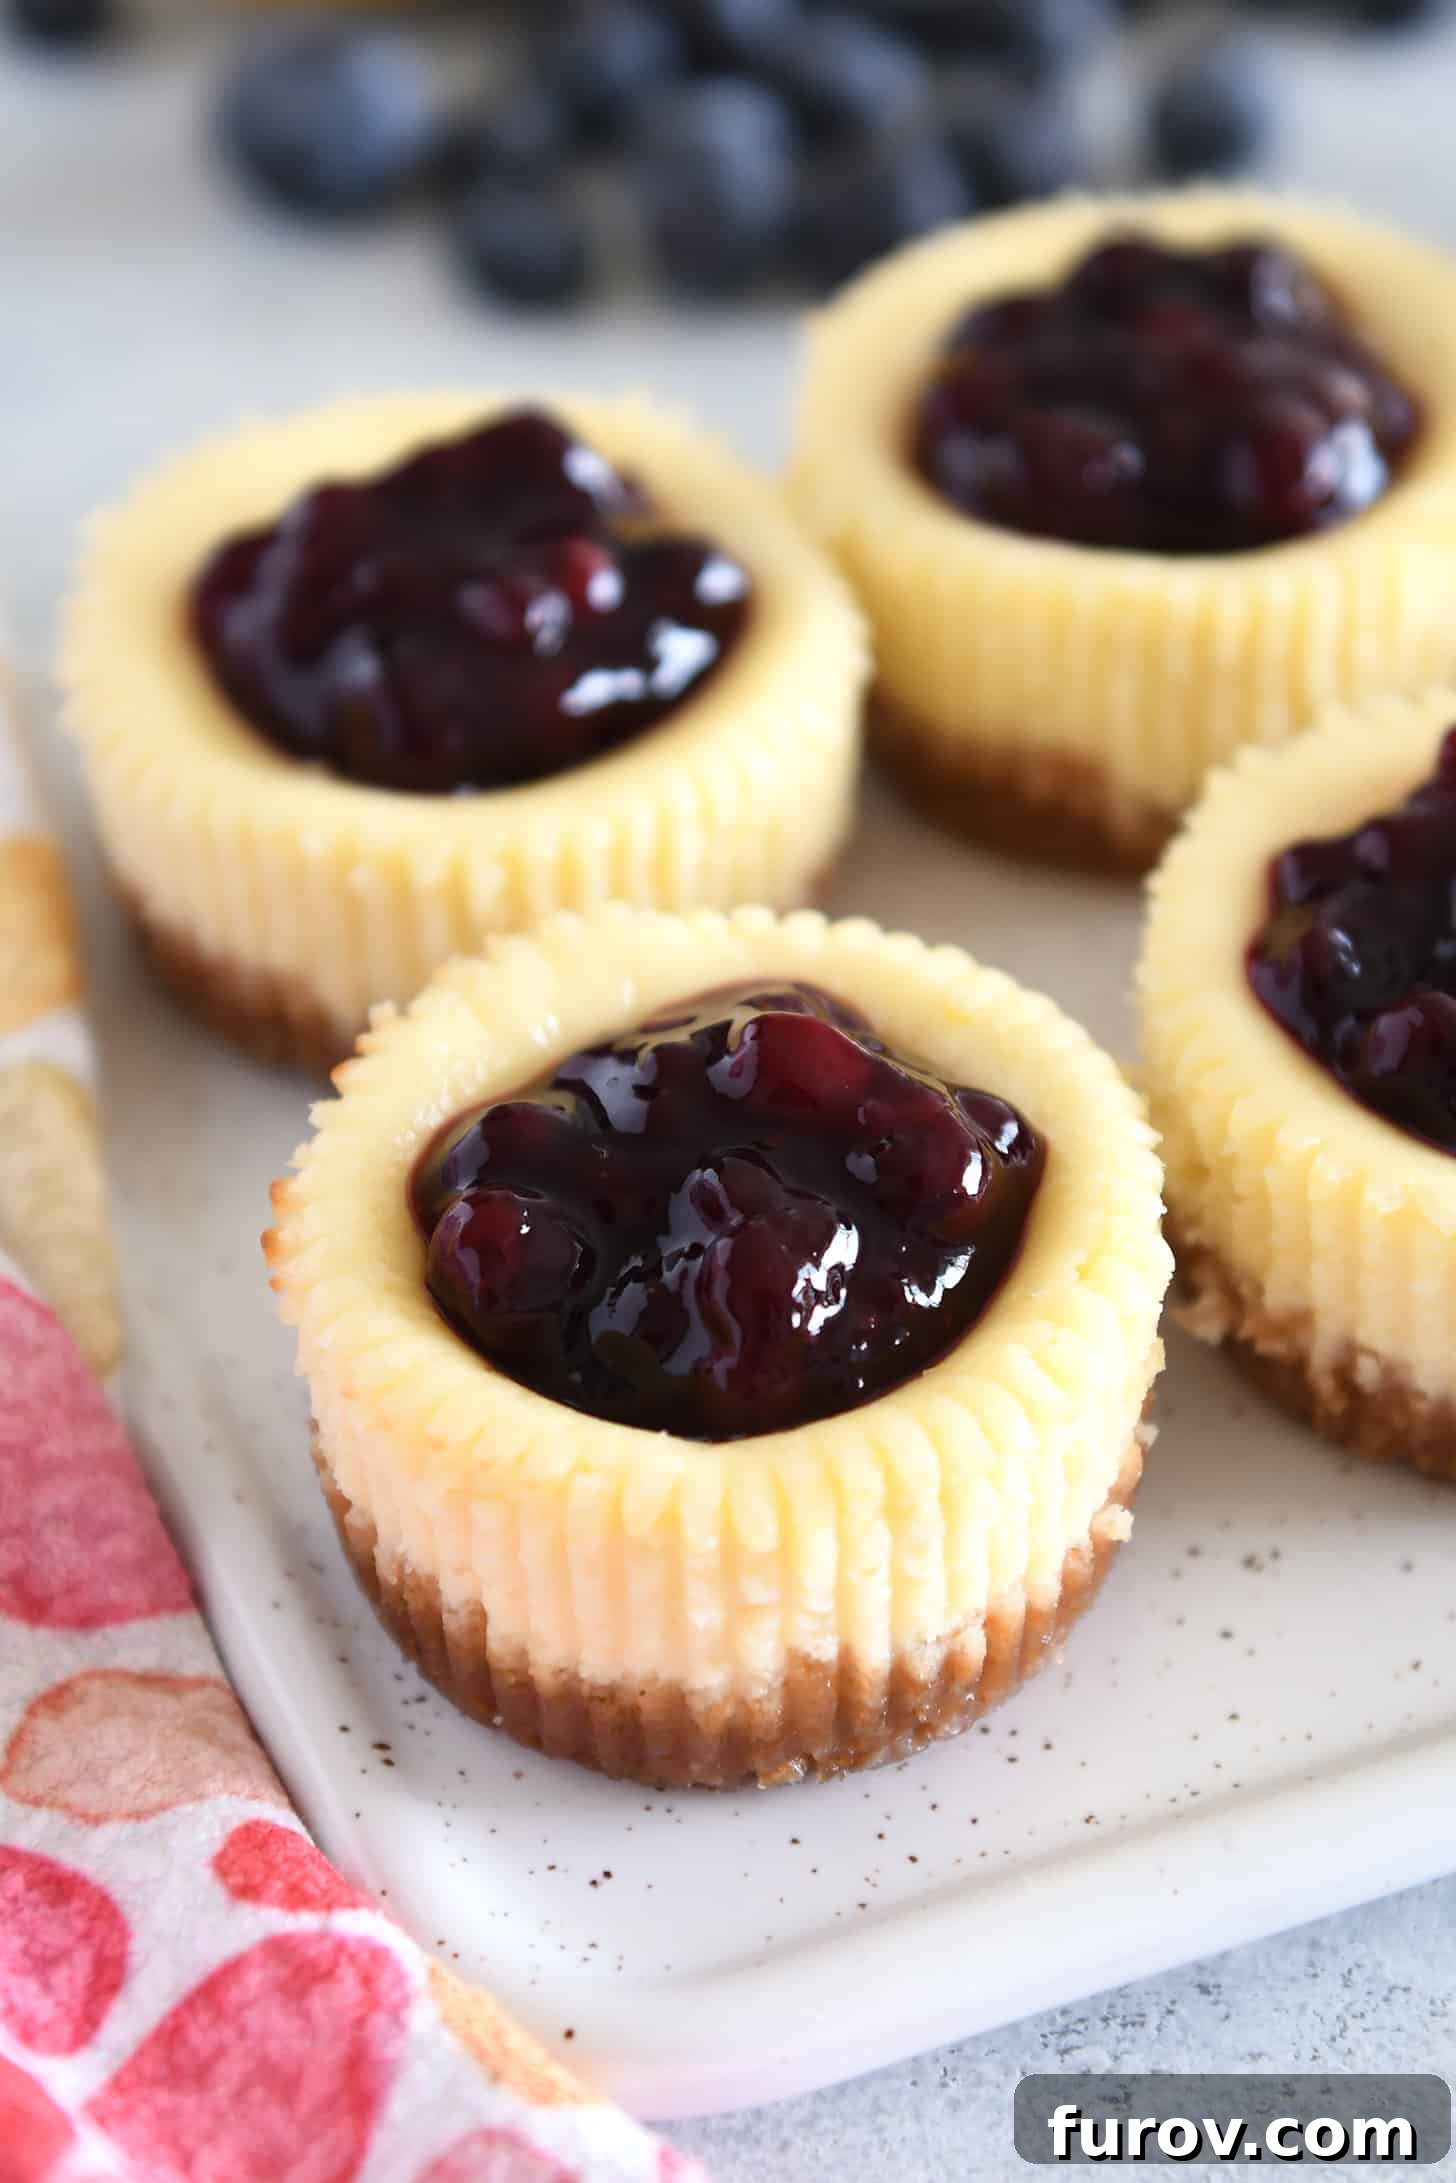
Prepare to be enchanted by these exceptionally creamy and utterly delicious mini cheesecakes. They are truly perfect for any occasion, offering a sophisticated yet simple dessert solution. The best part? You don’t need specialized equipment; they can be effortlessly made in a standard muffin tin, a mini muffin tin, or even a dedicated mini cheesecake pan.
These adorable and incredibly tasty mini cheesecakes are a wonderful addition to weddings, baby or bridal showers, birthday parties, holiday gatherings, or simply when you’re craving that classic cheesecake indulgence in a convenient, individual portion. Their elegant presentation and rich flavor make them an instant crowd-plepleaser, while their manageable size ensures there’s no need for messy slicing or elaborate serving.
Why Choose Mini Cheesecakes? The Benefits of Bite-Sized Bliss
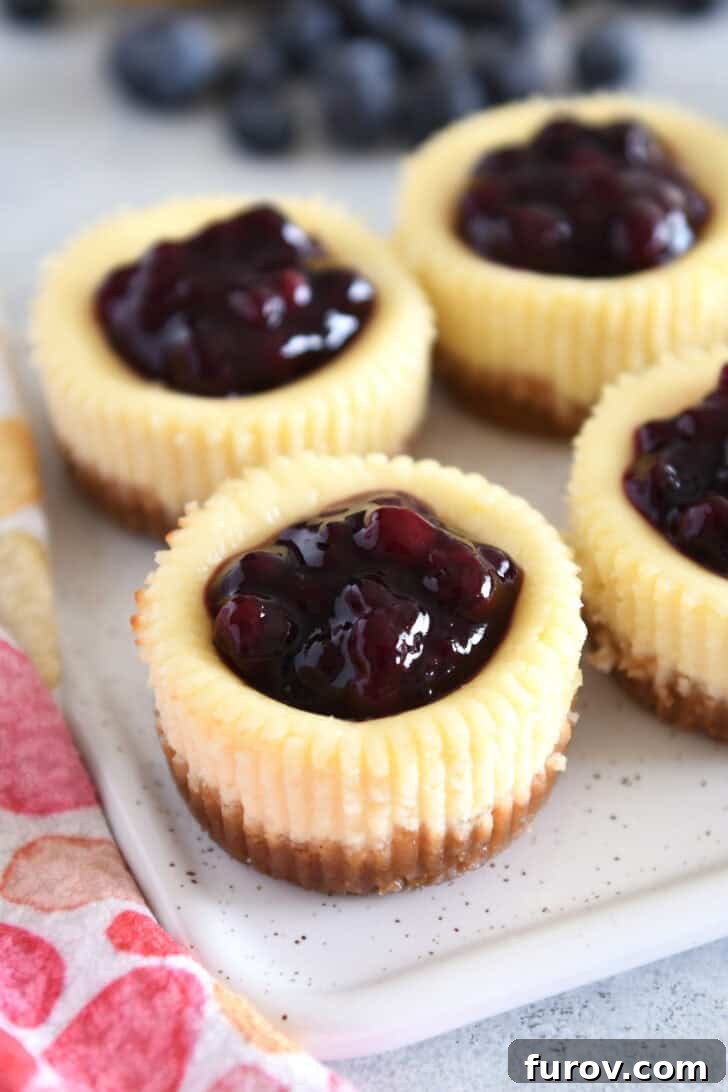
While a full-sized cheesecake is undeniably impressive, mini cheesecakes offer a host of advantages that make them a superior choice for many occasions:
- Perfect Portion Control: Each guest receives their own delightful serving, eliminating the guesswork of slicing and ensuring everyone gets a consistent piece.
- No Slicing Stress: Forget about jagged edges or sticky knives. Mini cheesecakes are ready to serve directly from the pan.
- Faster Baking Time: Their smaller size means a significantly shorter baking duration compared to a large cheesecake, saving you valuable time.
- Individual Customization: Offer a variety of toppings, allowing guests to personalize their cheesecake experience. This is especially fun for parties!
- Elegant Presentation: These charming desserts look incredibly professional and appealing when arranged on a platter.
- Less Intimidating to Make: For many home bakers, a full cheesecake can seem daunting. Mini versions are more forgiving and build confidence.
The Foundation: First, Prep the Crust for Ultimate Flavor
Every great cheesecake starts with a fantastic crust, and these mini cheesecakes are no exception. Our crust recipe is incredibly simple, requiring just three basic ingredients that come together to form a perfectly buttery, sweet, and crunchy base:
- Graham Cracker Crumbs: The classic choice for cheesecake, offering a delicate sweetness and a wonderfully crisp texture. You’ll need about 5 full rectangle graham crackers, finely crushed, to achieve the required amount.
- A Touch of Granulated Sugar: This adds just the right amount of sweetness to balance the richness of the cheesecake batter and enhances the crust’s browning during baking.
- Melted Butter: The essential binder that holds the crumbs together, infusing the crust with a rich, irresistible flavor and ensuring it sets firmly.
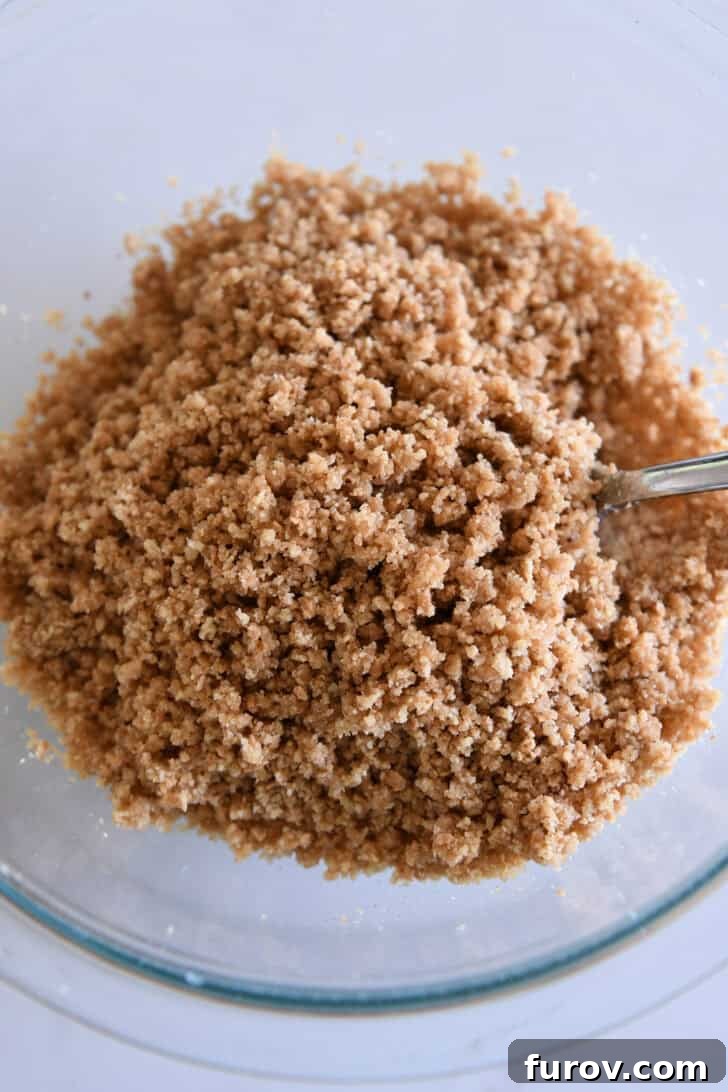
To prepare, simply combine the graham cracker crumbs and sugar in a medium bowl. Pour in the melted butter and stir thoroughly until every crumb is evenly moistened, resembling wet sand. This ensures a cohesive crust that won’t crumble apart.
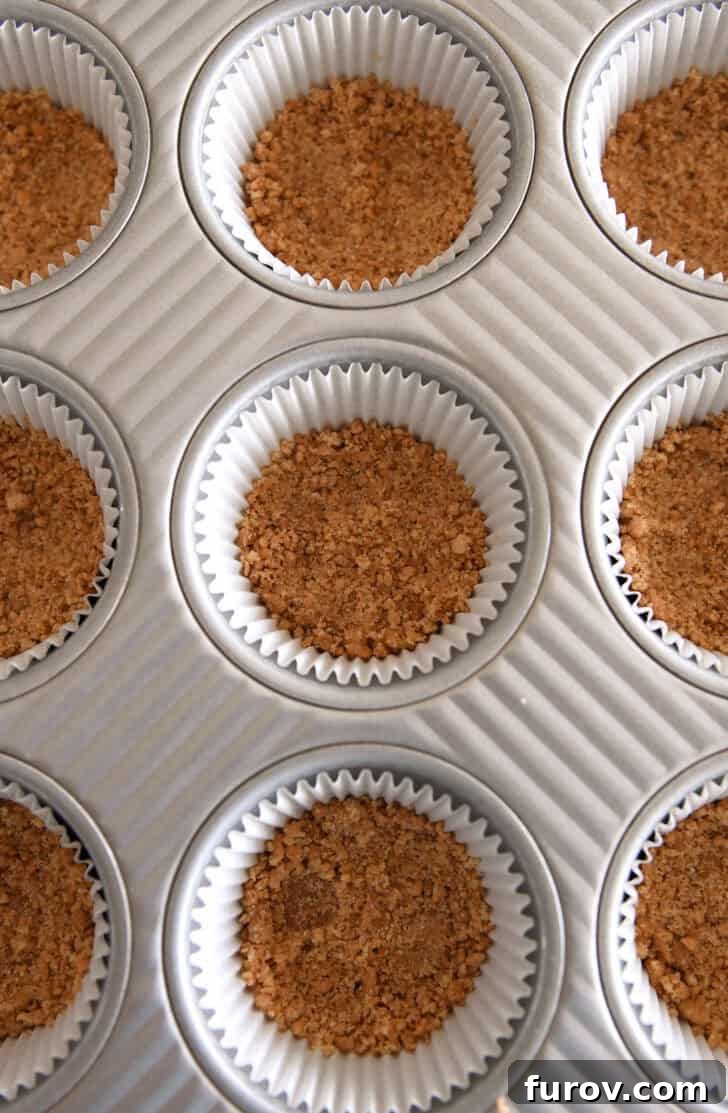
Next, press a generous tablespoon of this mixture into the bottom of each lined muffin cup. It’s crucial to press the crumbs firmly and evenly across the bottom to create a solid foundation for your cheesecake. You can use the back of a spoon, your fingers, or a small tamper for this task.
A vital step for success is to parbake these crusts. Baking them for just a few minutes before adding the filling helps them set and become wonderfully crisp. This prevents them from becoming soggy once the moist cheesecake batter is introduced and baked, ensuring a delightful textural contrast with every bite. This quick bake seals in the butter and sugar, creating a barrier against moisture from the filling.
Crafting the Silky Smooth Batter: Second, Whip Up the Cheesecake Batter
The secret to these cheesecakes’ luxuriously velvety and soft texture lies in the batter. Achieving that ultra-creamy consistency is simpler than you might think, but it hinges on one critical factor: ingredient temperature.
The Golden Rule: Room Temperature Ingredients are Non-Negotiable!
This is arguably the most important tip for any cheesecake, especially these mini wonders. Ensure your full-fat cream cheese, eggs, and sour cream are all at room temperature before you begin mixing. Why is this so crucial?
- Seamless Blending: Room temperature ingredients incorporate much more quickly and smoothly than cold ones. Cold cream cheese, for instance, will resist mixing and form lumps, requiring excessive beating to smooth out.
- Preventing Overmixing: The key to a foolproof, crack-free cheesecake is to avoid overmixing the batter, particularly once the eggs are added. Overmixing introduces too much air, which can cause the cheesecake to puff up excessively in the oven, then crack as it cools and deflates. Room temperature ingredients blend easily, minimizing the need for prolonged mixing.
- Uniform Texture: Properly emulsified, room temperature ingredients result in a beautifully uniform and creamy texture throughout the baked cheesecake, free from pockets of unmixed ingredients.
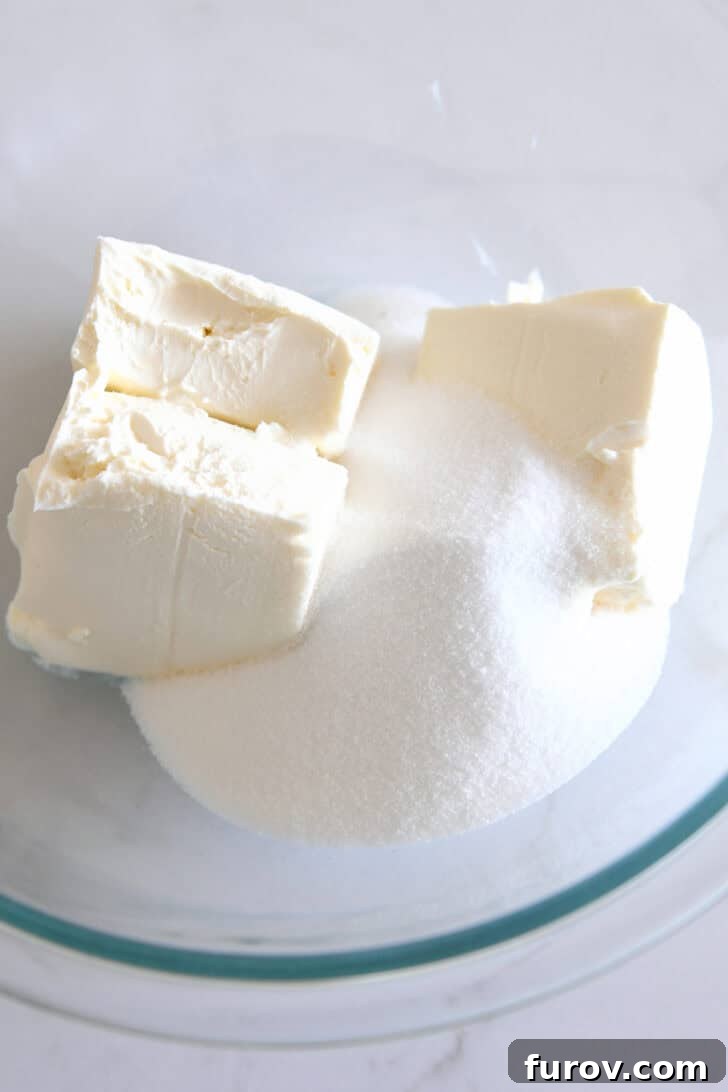
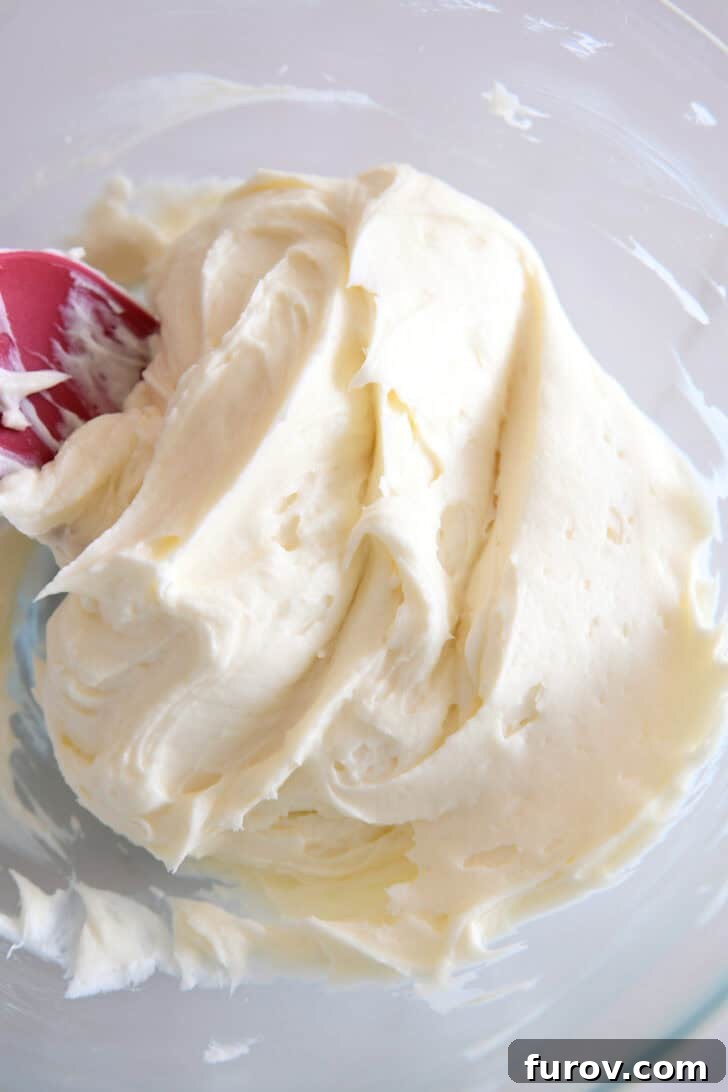
Start by creaming the softened cream cheese and granulated sugar together until they are light, fluffy, and completely smooth – typically 1 to 2 minutes with an electric mixer. This step dissolves the sugar and aerates the cream cheese, building the creamy foundation.
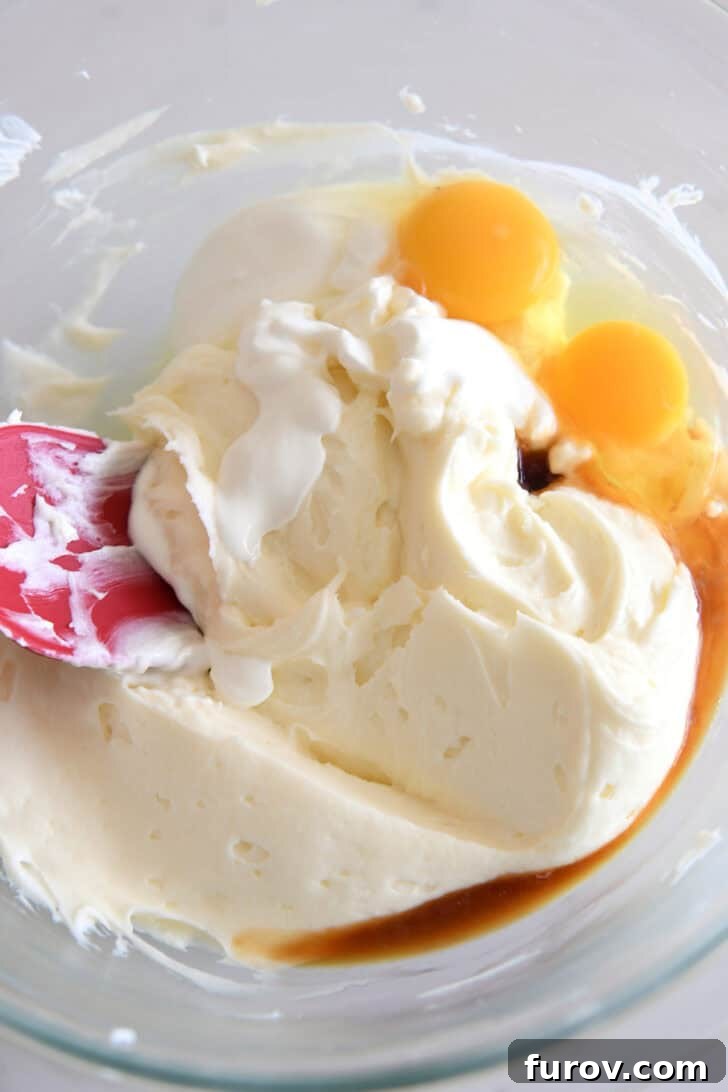
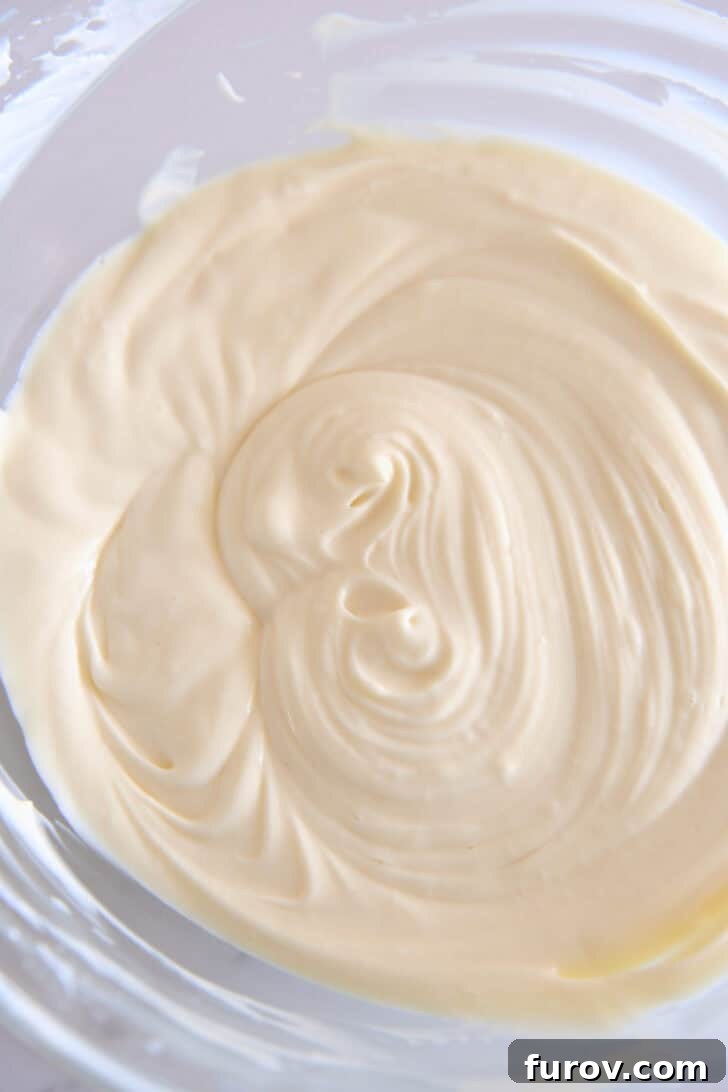
Next, gently add the sour cream, egg, egg yolk, fresh lemon juice, and vanilla extract. Mix on low speed *just* until everything is fully combined and no streaks remain. Stop mixing as soon as the ingredients are incorporated. Remember, prolonged mixing after the eggs are in can lead to those undesirable cracks and a less creamy, denser texture. The egg yolk adds extra richness and helps with the smooth consistency.
Baking Your Mini Masterpieces: Third, Divide and Bake
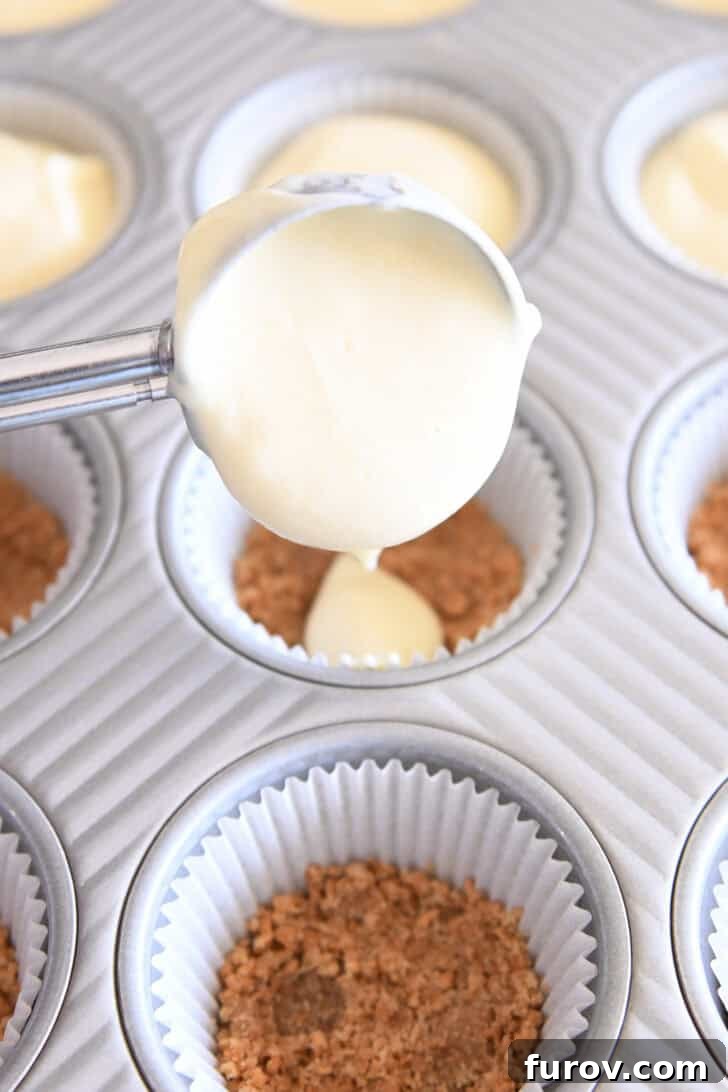
Once your luscious cheesecake batter is ready, it’s time to fill those prepared muffin cups. Don’t be shy – the cheesecake batter can and should fill each muffin tin quite full, almost to the top of the liner. This might seem counterintuitive if you’re used to baking regular muffins or cupcakes that rise significantly and can overflow if filled too high.
However, unlike quick bread muffins, cheesecake batter behaves differently in the oven. It will puff up slightly, but it won’t overflow and spread excessively. Filling the muffin cups generously ensures you achieve the perfect crust-to-cheesecake ratio, resulting in a substantial and satisfying bite every time.
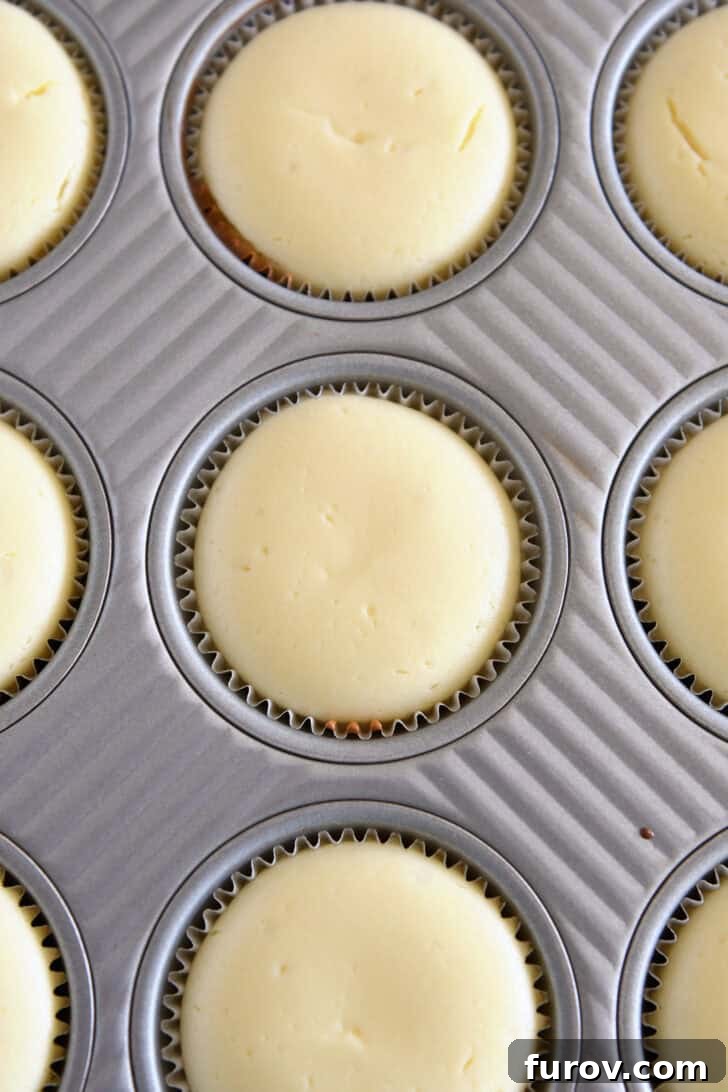
Bake the cheesecakes until the centers are gently puffed, and the edges appear set and slightly firm. The very center might still have a slight jiggle, which is perfectly normal and indicates a perfectly baked, creamy interior. Overbaking can lead to dry cheesecakes and increase the likelihood of cracks.
Once baked, resist the urge to immediately remove them from the pan. Let the cheesecakes cool completely in the muffin tin on a wire rack. This gradual cooling process is crucial for preventing cracks that can occur from a sudden temperature change. After they’ve cooled to room temperature, gently remove them from the pan (or lift out the liners) and refrigerate them for at least 4 hours, or ideally overnight. Chilling allows the cheesecakes to fully set and develop their rich, dense, and creamy texture. They taste infinitely better when thoroughly chilled!
Versatile Pan Options for Every Baker
One of the beauties of this mini cheesecake recipe is its adaptability. While the primary recipe is designed for a standard 12-cup muffin tin, it works incredibly well across various pan sizes, allowing you to choose the perfect “mini” for your needs. Who knew there were so many delightful ways to make mini cheesecakes? We’ve got you covered!
Standard Muffin Tin (12-cup)
This is the most common and accessible option for many home bakers. When using a standard 12-cup muffin tin, you’ll want to line each well with paper liners. Lightly grease the liners with nonstick cooking spray before adding the crust and batter; this ensures the cheesecakes release easily and cleanly once chilled. The recipe yields 12 perfectly sized mini cheesecakes, each with a generous tablespoon of crust mixture and a full muffin cup of batter. Baking time for these is approximately 22-25 minutes.
Mini Muffin Tin (24-cup or 48-cup)
For truly bite-sized treats, a mini muffin tin is an excellent choice. This option is fantastic for large gatherings, tasting platters, or when you want just a tiny sweet indulgence. You’ll need mini paper liners for these, also lightly greased. A mini muffin tin typically yields between 32 to 40 cheesecakes, with about a heaping teaspoon of crust mixture per cup. Due to their smaller size, the baking time is significantly reduced to about 13-15 minutes.
Mini Cheesecake Pan (Individual removable bottoms)
If you’re aiming for that classic cheesecake look with perfectly smooth sides and no paper liner, a mini cheesecake pan (which typically features removable bottoms) is ideal. These pans often yield 16 to 18 cheesecakes. With this type of pan, there’s no need for liners! Simply grease each well generously with nonstick cooking spray or butter. The removable bottoms make extraction effortless, ensuring your mini cheesecakes remain pristine and lovely. Baking time for a mini cheesecake pan is usually around 18-19 minutes.
Regardless of your chosen pan, preparing it correctly is key to a smooth release. Always ensure you line and lightly grease muffin tins, or thoroughly grease the wells of a mini cheesecake pan. Refer to the recipe notes below for precise crust amounts and baking times tailored to each pan size.
Topping Ideas for Mini Cheesecakes: Elevate Your Dessert
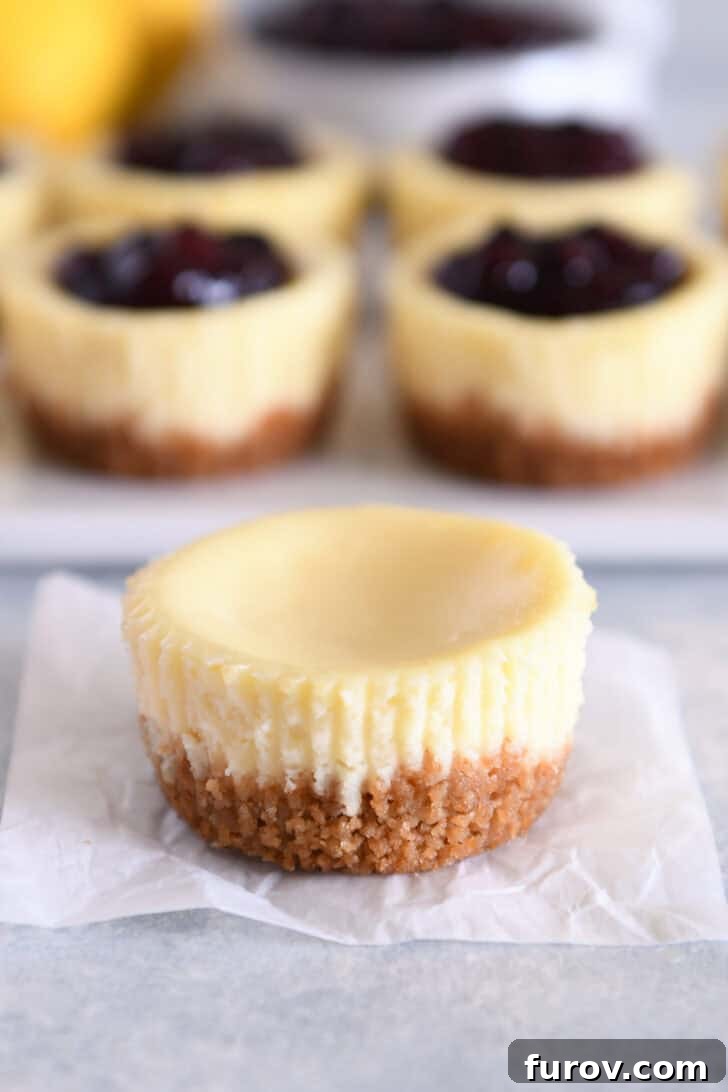
These delightful little cheesecakes are truly fantastic served plain, allowing their rich, creamy flavor to shine. However, they also serve as a perfect canvas for an endless array of delicious toppings! Customizing your mini cheesecakes with different garnishes can transform them for any season or celebration.
Popular Mini Cheesecake Topping Ideas:
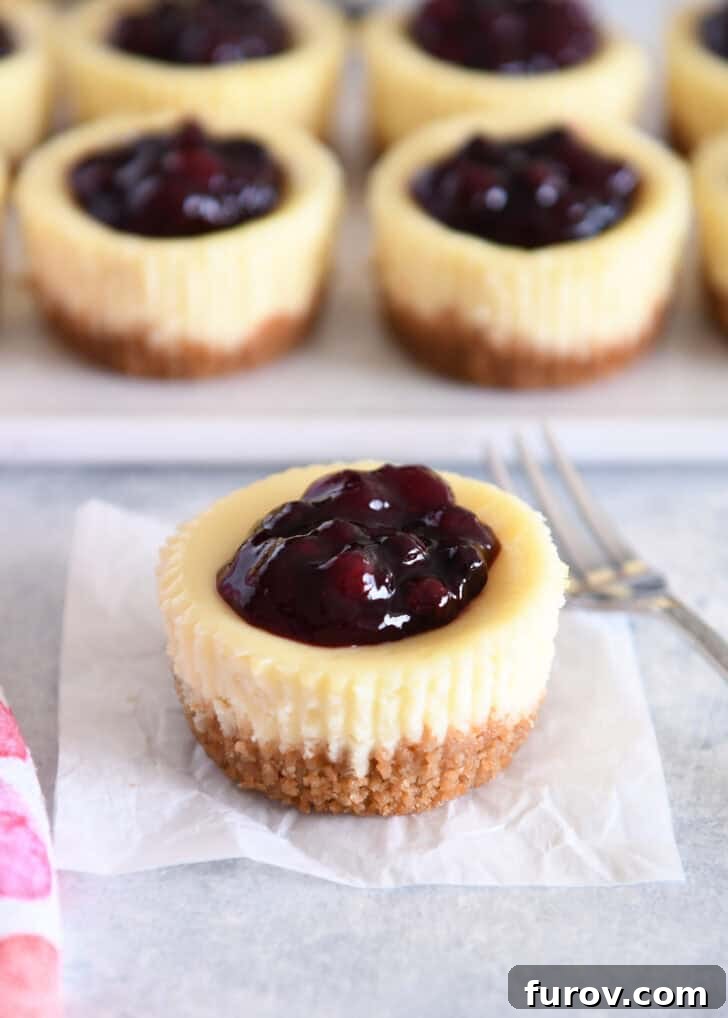
- Easy Fruit Topping: A homemade fruit sauce is simple to prepare and adds a burst of freshness and color. Berries like huckleberries, blueberries, raspberries, or sliced strawberries work wonderfully. (See our simple recipe below for a quick fruit topping!)
- Chocolate Drizzle or Chocolate Ganache: A rich chocolate topping is always a hit. A simple drizzle adds elegance, while a thicker ganache creates a more decadent experience. Pair it with a fresh strawberry for a classic combo!
- Fluffy Whipped Cream: A dollop of homemade whipped cream is light, airy, and beautifully complements the dense cheesecake.
- Fresh Berries: Simple, elegant, and vibrant. A scattering of fresh blueberries, raspberries, or thinly sliced strawberries adds natural sweetness and a lovely pop of color.
- Tangy Lemon Curd: For a bright, zesty contrast, a spoonful of smooth lemon curd is irresistible.
- Rich Salted Caramel Sauce: Drizzled caramel sauce provides a sweet and salty depth of flavor that’s utterly addictive. Or try a luscious butterscotch sauce.
- Classic Pie Fillings: Store-bought or homemade blueberry, cherry, or other fruit pie fillings make for a quick and flavorful topping.
Feel free to get creative and combine any of the above! Imagine a mini cheesecake with a layer of fruit topping, a dollop of whipped cream, and a chocolate drizzle – the possibilities are truly endless.
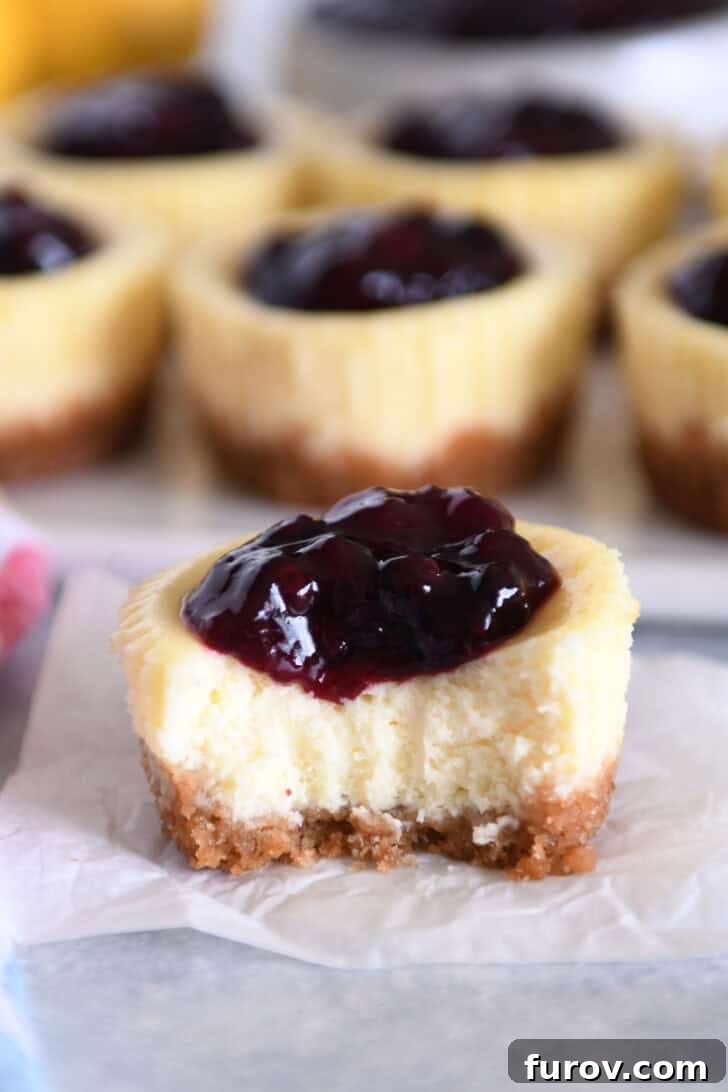
Perfect Mini Cheesecakes
12 mini cheesecakes
25 mins
30 mins
4 hrs
4 hrs 55 mins
Pin Recipe
Ingredients
Crust:
- ¾ cup (83 g) graham cracker crumbs (about 5 rectangle graham crackers, crushed)
- 2 tablespoons (27 g) granulated sugar
- 3 tablespoons (43 g) butter, melted
Cheesecake Batter:
- 12 ounces (340 g) full fat cream cheese, softened to room temperature
- ⅔ cup (141 g) granulated sugar
- ⅓ cup (80 g) sour cream, at room temperature
- 1 large (50 g) egg, at room temperature
- 1 large (18 g) egg yolk, at room temperature
- 1 tablespoon fresh lemon juice
- ½ teaspoon vanilla extract
Instructions
- Preheat the oven to 325 degrees F. Line a 12-cup muffin tin with paper liners. Lightly grease the liners with nonstick cooking spray. Set aside. (See notes below for alternate pan sizes.)
- For the crust, in a medium bowl, stir together the graham cracker crumbs and granulated sugar. Add the melted butter and stir until all the crumbs are evenly moistened.
- Divide the crust evenly among the prepared muffin tin – about a heaping tablespoon of crumbs per muffin cup. Press the crumbs firmly into an even layer in each liner.
- Bake for 6 minutes. Set aside to cool completely.
- For the cheesecake batter, in a medium bowl with a handheld electric mixer or in the bowl of a stand mixer fitted with the paddle attachment, mix the cream cheese and sugar together until well-combined and creamy, 1 to 2 minutes.
- Add the sour cream, egg, egg yolk, lemon juice and vanilla. Mix just until all the ingredients are fully incorporated (do not overmix).
- Divide the batter evenly on top of the cooled crusts. The muffin tins will be quite full (unlike regular muffins, the cheesecake batter will not overflow).
- Bake the cheesecakes for 22 to 25 minutes until puffed and lightly set around the edges. Remove from the oven and let the cheesecakes cool completely in the pan.
- Once cooled, gently remove the cheesecakes from the pan and refrigerate until chilled and ready to serve.
- Serve with an easy fruit topping (see note below), whipped cream, chocolate drizzle, or plain.
Notes and Expert Tips
Room Temperature Ingredients: Using room temperature ingredients is paramount for a fluffy, creamy cheesecake batter. It ensures ingredients incorporate smoothly, minimizing the need to overmix. Overmixing can incorporate too much air, leading to cracks during baking and a less desirable, tougher texture. Plan ahead and take your cream cheese, eggs, and sour cream out of the fridge at least an hour before baking.
Pan Options & Adjustments:
- Standard Muffin Tin: Yields 12 cheesecakes. Use a heaping 1 tablespoon of crust per muffin cup. Bake as directed (22-25 minutes).
- Mini Muffin Tin: Yields 32 to 40 cheesecakes. Use a heaping 1 teaspoon of crust per mini muffin cup. Bake for 13-15 minutes.
- Mini Cheesecake Pan: Yields 16 to 18 cheesecakes. Use 1 tablespoon of crust per muffin cup. Bake for 18-19 minutes.
For both the standard and mini muffin tins, always line them with paper liners and lightly grease the liners for easy removal. If using a mini cheesecake pan, simply grease each well thoroughly; the removable bottoms eliminate the need for liners, ensuring a clean, polished finish.
Easy Fruit Topping Recipe: To make a quick and delicious fruit topping, combine 6 to 8 ounces (about 1 cup) of fresh or frozen fruit (e.g., berries, peaches), ½ cup water, ⅓ cup granulated sugar (adjust to your fruit’s sweetness), 1 tablespoon cornstarch, and a squeeze of fresh lemon juice in a small saucepan. Bring the mixture to a simmer over medium heat, stirring constantly, for 2 to 3 minutes until it becomes bubbly and thickens. Remove from heat, cool completely, and then refrigerate until you’re ready to serve.
Mel Gunnell
Dessert
American
Bake
Calories: 221kcal,
Carbohydrates: 19g,
Protein: 3g,
Fat: 15g,
Saturated Fat: 9g,
Cholesterol: 71mg,
Sodium: 155mg,
Fiber: 0.2g,
Sugar: 16g
Recommended Products to Make Mini Cheesecakes
Having the right tools can make your mini cheesecake baking experience even smoother. Here are some recommended products:
Storage and Make-Ahead Tips for Convenience
Mini cheesecakes are fantastic for entertaining because they can be made well in advance. Once fully chilled, they are firm and stable, making them easy to transport and serve. Store them in an airtight container in the refrigerator for up to 3-4 days. For best flavor and texture, allow them to sit at room temperature for about 10-15 minutes before serving, especially if topped with a fruit sauce or chocolate.
You can also freeze these mini cheesecakes for longer storage! Once thoroughly chilled and firm, place them on a baking sheet and freeze until solid (about 1-2 hours). Then, transfer them to an airtight freezer-safe container or bag. They will keep well in the freezer for up to 1 month. Thaw them overnight in the refrigerator before serving. Add fresh toppings just before serving for the best presentation.
Conclusion: Your New Go-To Dessert
These perfect mini cheesecakes offer an unparalleled combination of creamy texture, rich flavor, and effortless elegance. Whether you’re a seasoned baker or just starting out, this recipe is designed for success, yielding beautiful, crack-free, and utterly delicious individual desserts every single time. With customizable crusts, versatile pan options, and an endless array of topping ideas, these mini cheesecakes are sure to become a beloved staple in your recipe collection for all celebrations, big or small.
So, gather your ingredients, follow our simple steps, and prepare to impress everyone with these bite-sized wonders. Happy baking!
Other Cheesecake Recipes You’ll Love: