
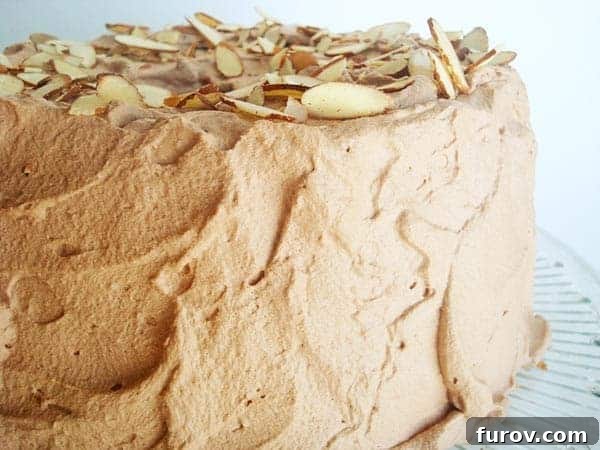
Light, airy, and utterly divine, this Chocolate Cream Angel Food Cake is the quintessential spring dessert, elevating a classic to new heights of deliciousness!
There are some desserts that simply define a childhood, and for me, this was it. This exquisite cake graced almost every family birthday celebration throughout my growing-up years, a beloved tradition that rarely deviated (unless a momentary lapse in judgment led to a request for something less timeless, like a Funfetti cake, which, in hindsight, was always a regret).
As the days lengthen and temperatures warm, our thoughts naturally turn to lighter, brighter flavors. This elegant cake is the perfect addition to any spring menu, particularly for Easter gatherings or Mother’s Day brunch. Over the next few weeks, I’m dedicated to filling your recipe collection with the freshest and most delightful spring-inspired dishes, and this one certainly tops the list.
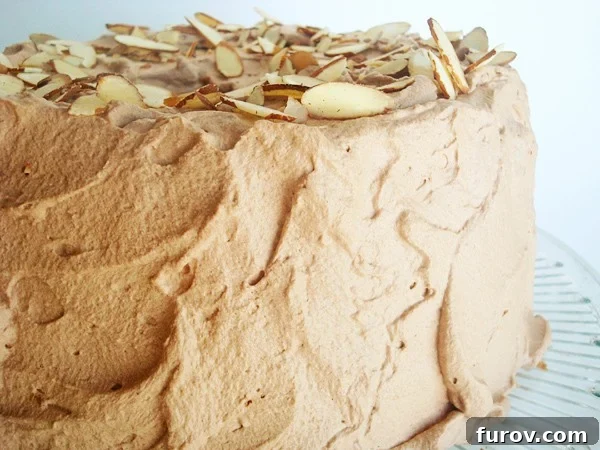
The beauty of this Chocolate Cream Angel Food Cake lies in its surprising simplicity. A perfectly baked angel food cake serves as the delicate foundation, its cloud-like texture providing a delightful contrast to the rich, creamy elements. After a clever bit of preparation (detailed with step-by-step photos further down), this pristine cake is generously filled and frosted with a luscious chocolate whipped cream frosting, then finished with a sprinkle of crunchy toasted almonds. The result is a symphony of textures and flavors – a masterpiece that looks intricate but is wonderfully easy to achieve.
Every bite of this confection is pure bliss. It’s wonderfully smooth and intensely chocolatey, yet retains the characteristic soft and airy quality of angel food cake. The frosting adds a silky, creamy dimension that is simply irresistible. What truly sets this cake apart is the ingenious “tunnel” created in its center. This clever design allows for a generous, thick layer of chocolate cream frosting not just on the exterior, but also hidden deep within the heart of the cake, ensuring a burst of chocolatey goodness with every single slice.
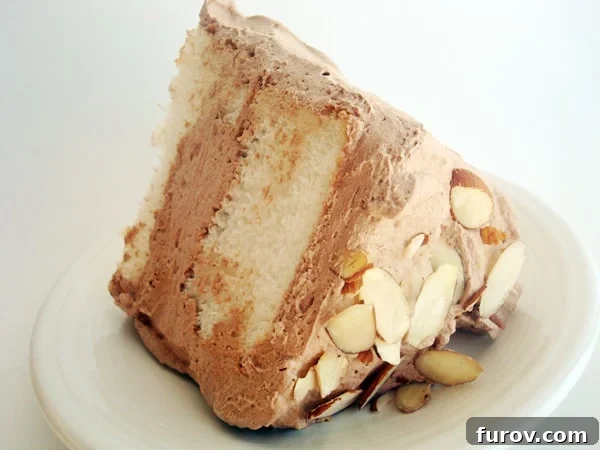
This cake is more than just a dessert; it’s a vessel for cherished memories. For me, it brings back vivid recollections of countless birthdays. I still remember the excitement of my 10th birthday, marked by this very cake, when I received a vibrant purple ten-speed bicycle. It had those cool, curvy ram-like handlebars and pencil-thin wheels – it was the epitome of cool back then! I’d ride around the neighborhood feeling like the queen of the world, adorned with my tinted, rather large, blue-framed glasses and braces. A queen, nonetheless, with a heart full of joy and a belly full of chocolate angel food cake.
This cake embodies the essence of spring with its lightness and fresh appeal. It’s a versatile dessert that can grace any table, from a casual family dinner to a grand holiday feast. The delicate balance of a feathery cake and a rich, yet not heavy, chocolate frosting makes it a crowd-pleaser for all ages. It’s a recipe that has stood the test of time in my family, proving that some classics are truly irreplaceable, especially when given a delightful chocolate twist.
Why Angel Food Cake is the Perfect Spring Dessert
Angel food cake, by its very nature, is an ideal choice for springtime. Its incredibly light, airy texture and delicate flavor provide a refreshing contrast to the heavier, richer desserts often enjoyed during colder months. Made primarily from egg whites, it’s virtually fat-free, making it a guilt-free indulgence that won’t weigh you down. The absence of butter and yolks gives it a pure, unadulterated sweetness that pairs beautifully with fresh seasonal fruits. When combined with a decadent chocolate cream frosting, as in this recipe, it transforms into a dessert that’s both comforting and elegant, perfect for welcoming the brighter days of spring and summer.
This particular Chocolate Cream Angel Food Cake recipe takes all the best qualities of a traditional angel food cake and infuses it with the universally loved flavor of chocolate. The simple preparation of the cake and frosting belies the impressive presentation and taste. It’s a dessert that speaks of celebration, new beginnings, and the simple joy of sharing something homemade and utterly delicious with loved ones.
Chocolate Cream Angel Food Cake
10
-12 servings
20
20
★
★
★
★
Pin
Ingredients
-
1
Angel Food cake,
baked and cooled completely -
3
cups
heavy whipping cream -
⅔
cup
powdered sugar -
½
cup
cocoa -
½
cup
toasted,
slivered almonds
Instructions
-
Prepare the Chocolate Whipped Cream Frosting: In a large, chilled glass bowl, beat the cold heavy whipping cream with an electric hand mixer on medium-high speed until it starts to visibly thicken and hold soft peaks. Gradually add the powdered sugar and cocoa powder. To prevent a cocoa cloud and mess, you might find it helpful to place the bowl in the kitchen sink while mixing. Continue whipping until stiff peaks form. At first, the cocoa may appear lumpy or separated, but keep beating; it will combine evenly as the cream stiffens. For the silkiest frosting, consider sifting the cocoa and powdered sugar through a fine mesh sieve before adding them. The goal is a thick, spreadable frosting – be careful not to over-whip, or it can become grainy or curdled. Stop immediately once stiff peaks are achieved.
-
Prepare the Angel Food Cake for Filling: Once your angel food cake is fully baked and completely cooled (this is crucial for proper handling), prepare it as shown in the step-by-step pictures below. Using a serrated knife, carefully slice the cake horizontally, about halfway up, to create two separate round layers. Gently set the top half aside. Now, using your fingers or a small spoon, carefully remove pieces of cake from the center of the bottom layer to form a “ditch” or trench. Be mindful not to dig all the way through to the bottom; you want to leave a solid layer of cake at the base to hold the generous filling. Spoon a significant amount of the prepared chocolate whipped cream frosting into this ditch, filling it generously.
-
Assemble and Frost: Carefully place the top layer of the angel food cake back onto the bottom layer, aligning it as best as possible. Now, frost the entire cake – the sides, the top, and especially the middle where the two layers meet, ensuring the cake is completely covered in the rich chocolate whipped cream. Finish by garnishing the top with the toasted slivered almonds. The almonds add a wonderful textural contrast and a beautiful presentation.
-
Chill and Serve: Refrigerate the cake for at least 30 minutes (or until ready to serve) to allow the frosting to firm up slightly, which makes for cleaner slicing. When it’s time to serve, use a sharp serrated knife for the cleanest cuts. Enjoy this light and decadent dessert!
Mel
Dessert
American
Bake
Serving:
1
Serving
,
Calories:
496
kcal
,
Carbohydrates:
49
g
,
Protein:
6
g
,
Fat:
33
g
,
Saturated Fat:
18
g
,
Cholesterol:
98
mg
,
Sodium:
458
mg
,
Fiber:
2
g
,
Sugar:
27
g
Recipe Source: Mel’s Kitchen Cafe
Step-by-Step Guide to Assembling Your Chocolate Cream Angel Food Cake
Once you have a beautifully baked and completely cooled angel food cake, the magic truly begins. The unique structure of angel food cake, which traditionally cools upside down to prevent collapse and maintain its airy texture, makes it perfectly suited for this creative filling method.
Here’s what your lovely, cooled cake should look like before we begin the transformation:
A pristine angel food cake, ready for its chocolate makeover.
Creating the Tunnel for Your Chocolate Cream Filling
Now, let’s prepare the cake to receive its delicious chocolate cream filling. This step is easier than it looks and is key to achieving that generous layer of frosting in the middle.
Take your serrated knife and gently insert it horizontally into the cake, approximately halfway up its height. Begin to carefully saw your way around the cake, maintaining an even level. The goal is to slice the cake into two distinct, concentric circles.
Starting the horizontal cut to divide the angel food cake.
As you work your way around, it helps to gently hold the top portion of the cake to stabilize it. Exercise caution and take your time to avoid any mishaps with the knife – we want perfect cake, not precious fingers!
Steadying the cake as you complete the horizontal cut.
Once you’ve completed the full circle, gently lift off the top half of the cake and set it carefully aside. This will reveal the bottom layer, ready for the next step.
Top layer separated, revealing the base for filling.
Now comes the most enjoyable part – making the tunnel! Using your fingers, or a small spoon, gently start peeling away sections of the cake from the bottom half, creating a circular ditch around the inner core of the cake. It’s crucial not to dig all the way down to the bottom of the cake pan. You need to leave a solid, intact layer of cake at the base to act as a barrier and prevent all that wonderful frosting from escaping.
Scooping out the interior to form the frosting tunnel.
Don’t be afraid to get your fingers in there and work at it! This process is quite tactile and forgiving. And honestly, I won’t tell if you “sample” some of those delicious, fluffy cake bits you’re pulling out – it’s practically a chef’s perk! My own children love to “help” with this part, ensuring no crumb goes uneaten. Continue creating a neat ditch all the way around the inner ring of the cake, leaving a consistent wall and bottom layer.
Continuing to hollow out the cake’s core.
The bottom layer of your angel food cake should now have a perfect channel, ready to be filled, looking something like this:
The completed tunnel, ready for its creamy filling.
Filling and Frosting Your Masterpiece
Now for the truly delectable part! Take your bowl of rich, fluffy chocolate whipped cream frosting and begin dolloping generous spoonfuls into the cake ditch you’ve just created. Don’t be shy here; the more frosting in the middle, the better the surprise with each slice!
Generously filling the cake’s tunnel with chocolate cream.
Keep going until the ditch is overflowing. This is not the time to skimp! The beauty of this cake is the balance between the light cake and the abundant, luscious chocolate cream.
Ensuring the tunnel is packed with rich frosting.
It won’t take long before your chocolatey ditch is completely filled to the brim, ready for its top layer.
The tunnel, now completely filled with chocolate goodness.
Now, carefully place the reserved top layer of the cake back onto the bottom layer, gently pressing it down to secure it. Don’t worry if it looks a little “skewompis” or uneven at this point – that’s part of its charm, and the frosting will smooth everything out!
The top layer is back on, ready for final frosting.
The remainder of the frosting process is delightfully straightforward. Grab your handy offset spatula, or simply use an everyday rubber spatula, and begin frosting the cake. I often start by filling the central hole at the top first, ensuring it’s completely covered.
Starting to frost, focusing on the center.
Once the center is filled, I move onto the top surface of the cake, spreading the frosting evenly and smoothly. Feel free to follow your own creative instincts here – there’s no right or wrong way to spread happiness!
Smoothly covering the top with creamy chocolate.
Finally, frost the sides of the cake. Use large, confident sweeping strokes. This cake isn’t about achieving a perfectly smooth, professional finish; its beauty lies in its homemade, rustic charm. This makes it perfect for home bakers and non-cake-decorators like myself! Embrace the swirls and textures.
Frosting the sides with easy, confident strokes.
Once the entire cake is beautifully frosted with its luscious chocolate cream, it’s time for the crowning touch: generously sprinkle the top with toasted slivered almonds. The nutty crunch provides a wonderful textural contrast to the soft cake and creamy frosting, making each bite even more delightful.
The finished cake, adorned with toasted almonds.
Serving Suggestions & Variations for Your Angel Food Cake
While this Chocolate Cream Angel Food Cake is absolutely perfect as is, you can certainly personalize it further! For an extra touch of decadence, consider serving each slice with a few fresh raspberries or strawberries, whose tartness would beautifully complement the rich chocolate. A light dusting of cocoa powder or extra powdered sugar just before serving can also elevate the presentation. If you’re feeling adventurous, a drizzle of chocolate ganache or a sprinkle of mini chocolate chips could be added to the top or inside the tunnel for even more chocolate intensity. For a different nutty flavor, try toasted pecans or walnuts instead of almonds. Regardless of how you choose to serve it, this cake promises to be a memorable and much-loved dessert. Just try not to dig in right away – give it a moment to chill and let those flavors meld! Hope you and your loved ones enjoy this delightful spring treat.