
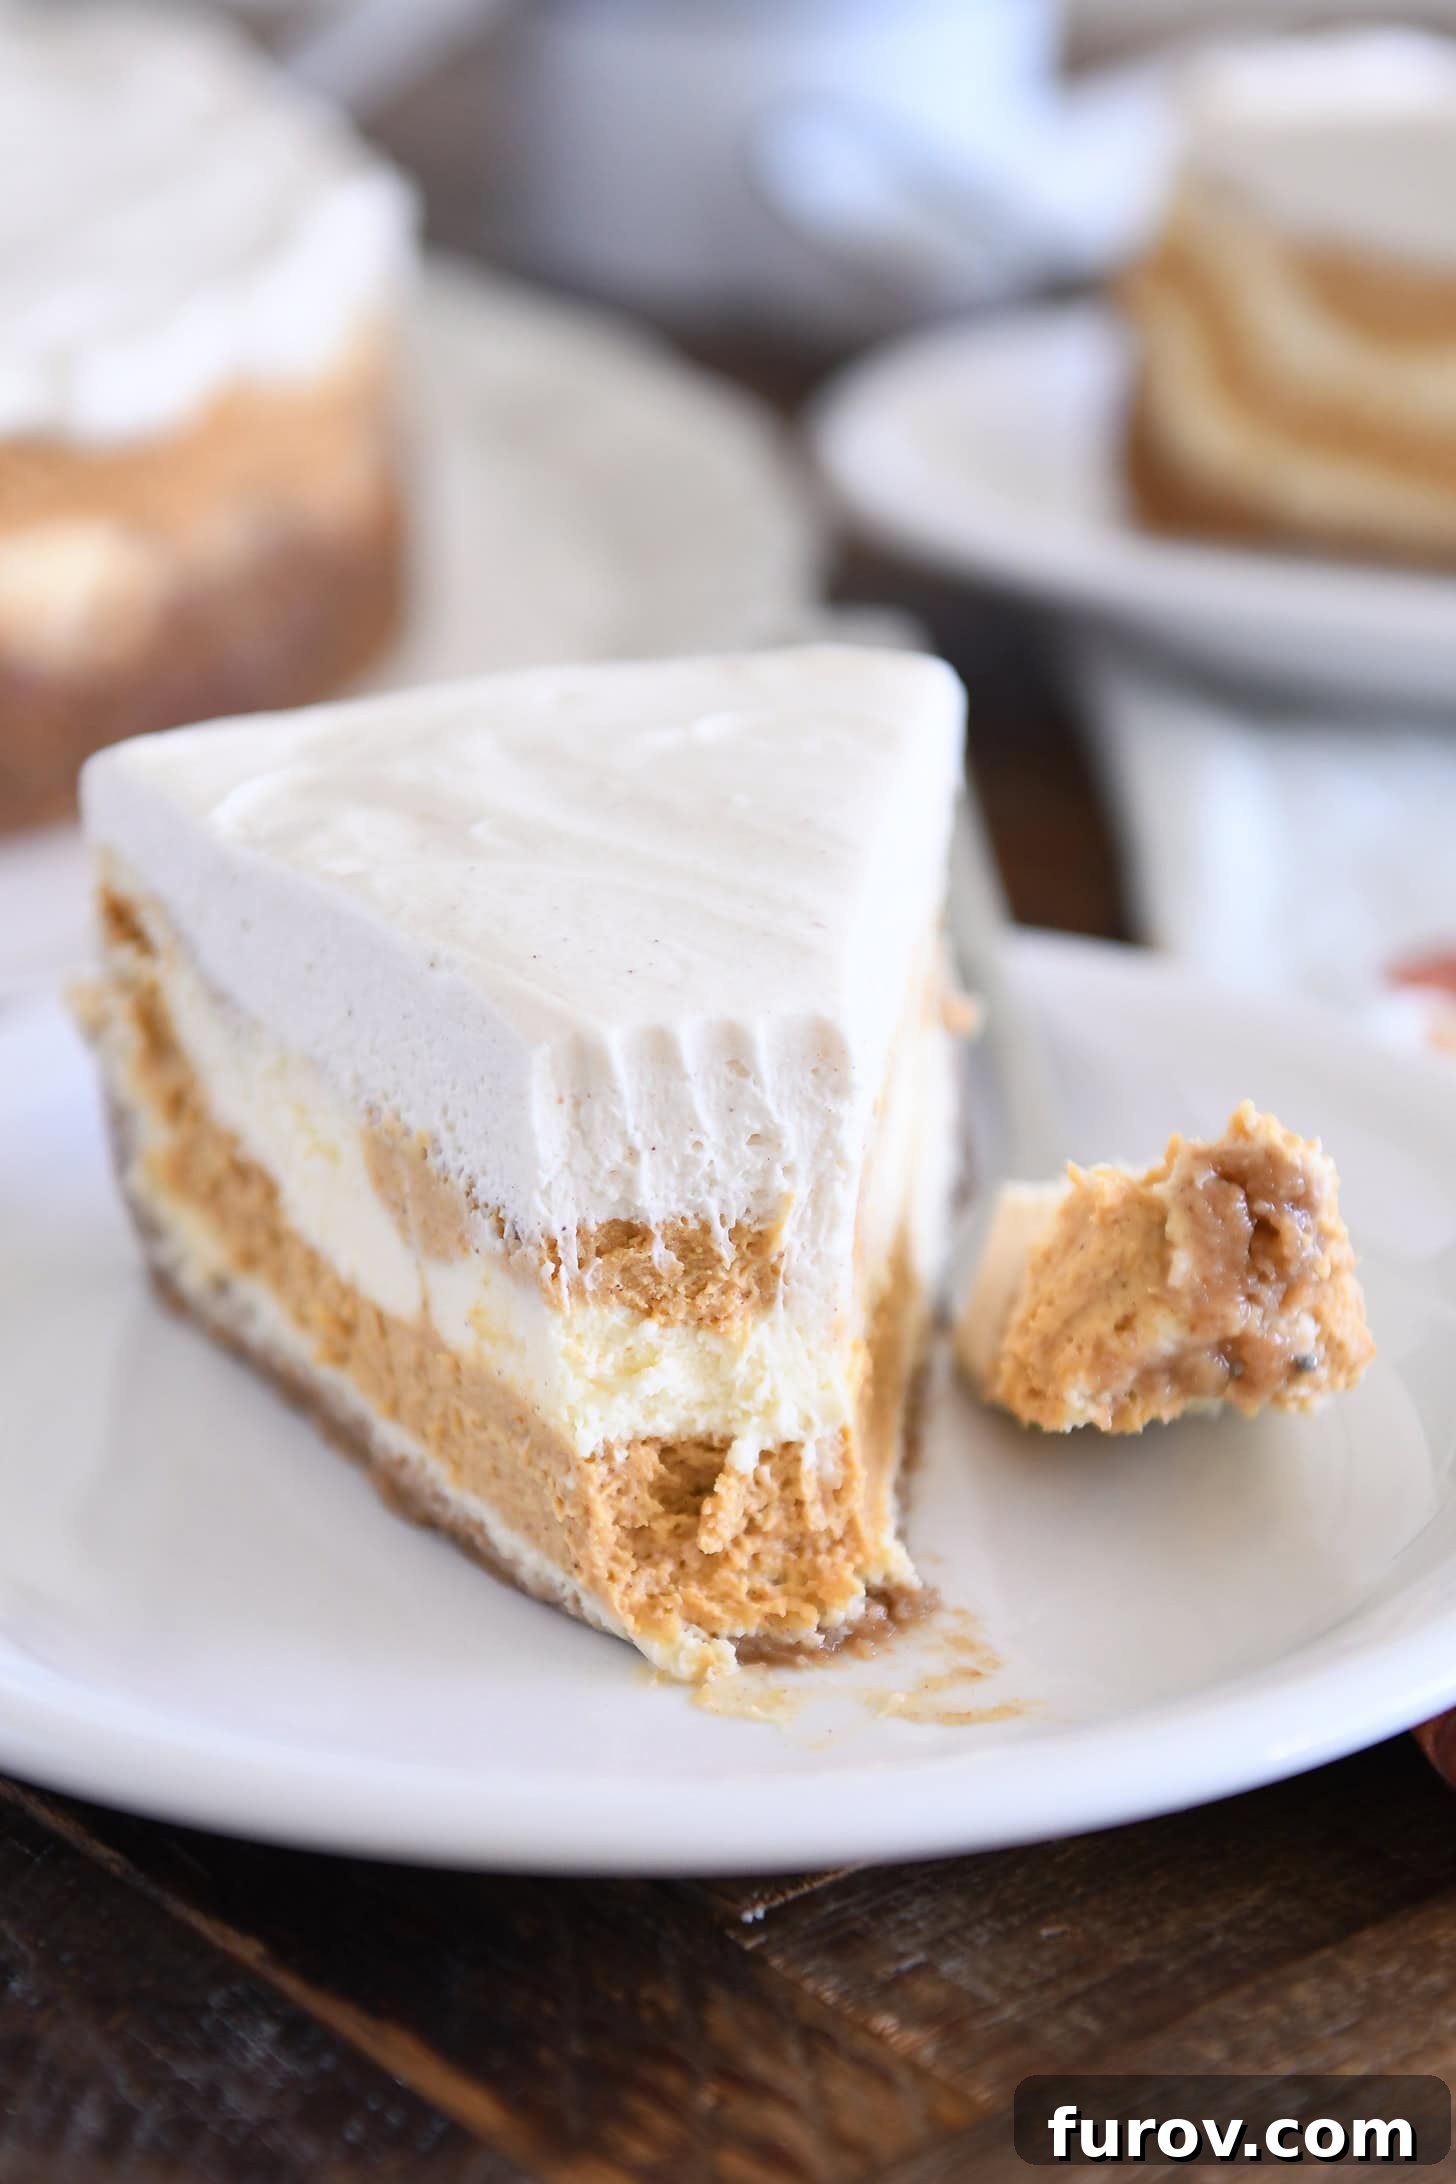
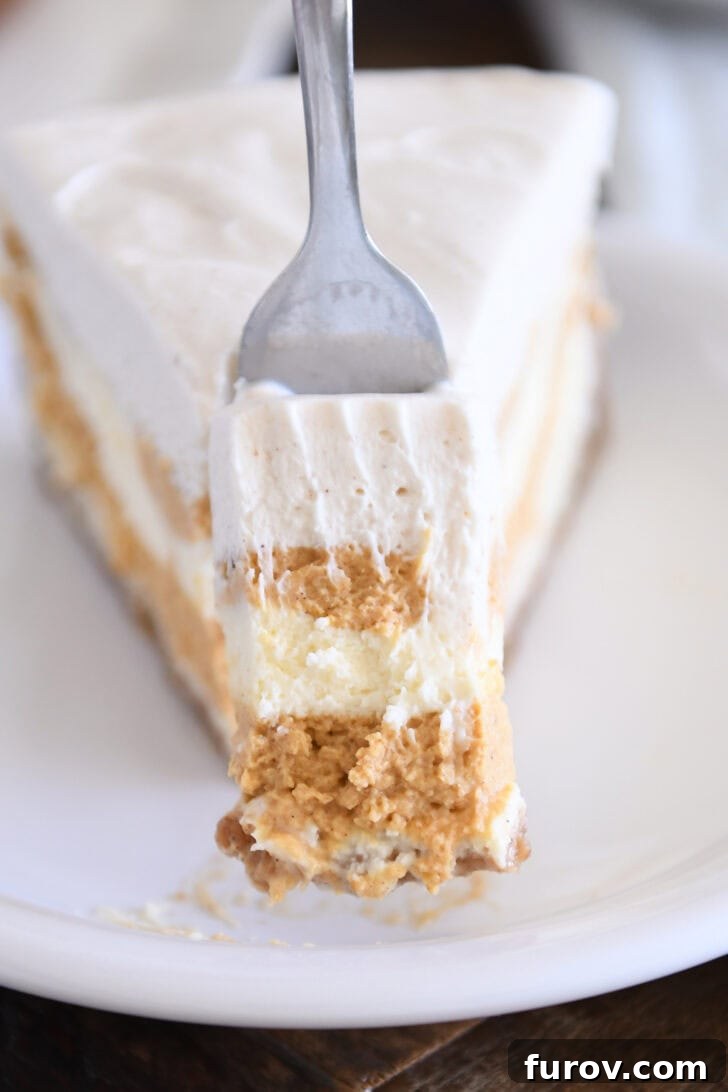
Indulge in the ultimate fall dessert with this exquisite Layered Pumpkin Swirl Cheesecake, a masterpiece of creamy texture, perfectly balanced spices, and a dreamy white chocolate mousse topping. This recipe is designed to impress, offering a sophisticated twist on classic pumpkin flavors.
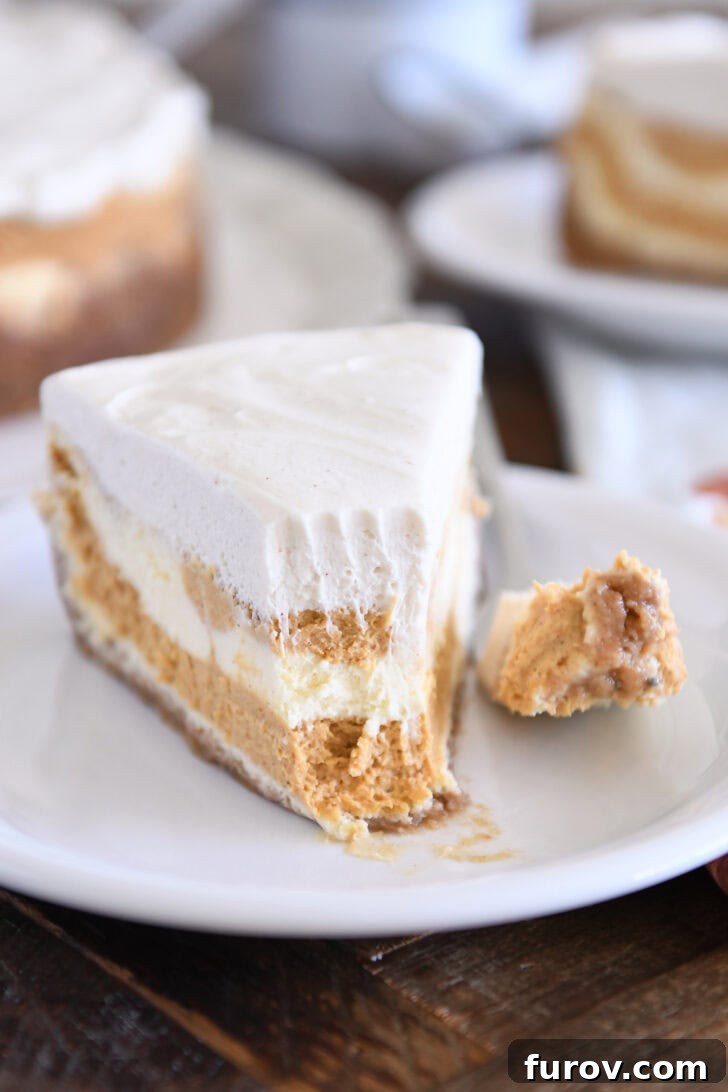
Prepare to captivate your taste buds and dazzle your guests with a dessert that is as visually stunning as it is incredibly delicious. Every single element of this festive cheesecake—from its rich, buttery graham cracker crust to the two distinct pumpkin-spiced cheesecake layers, culminating in a luxuriously smooth white chocolate mousse—has been meticulously crafted for absolute perfection. It’s more than just a dessert; it’s an experience that celebrates the cozy essence of autumn and holiday gatherings.
Crafting Perfection: Key Ingredients for Your Pumpkin Swirl Cheesecake
Creating an exceptional pumpkin swirl cheesecake begins with understanding the role of each high-quality ingredient. While you’ll recognize many classic cheesecake staples, the thoughtful selection and preparation of these components are what elevate this recipe, especially the unforgettable white chocolate mousse topping. Here’s a closer look at the essential elements:
- Full-Fat Cream Cheese: The foundation of any truly creamy cheesecake. Opting for full-fat cream cheese is non-negotiable for achieving that rich, dense, and velvety texture we all crave. Brands like light or Neufchâtel cream cheese contain more water and less fat, which can result in a drier, less luxurious cheesecake prone to cracking. Ensure your cream cheese is softened to room temperature for smooth, lump-free mixing.
- Full-Fat Sour Cream: This ingredient plays a critical role in balancing the richness of the cream cheese while adding a subtle tang and contributing to the cheesecake’s overall tender, moist texture. Just like with cream cheese, full-fat sour cream is essential for the best results, preventing a watery batter and promoting a superior consistency.
- Room Temperature Eggs: Eggs are crucial for structure and binding the cheesecake batter. Using room temperature eggs is important for two reasons: they incorporate more smoothly into the batter, reducing the need for excessive mixing, and they contribute to a more even bake. Overmixing cheesecake batter is a common culprit for deep cracks during baking, as it incorporates too much air. Lightly beating the eggs separately before adding them minimizes this risk.
- Canned Pumpkin Puree (Not Pie Filling!): For authentic pumpkin flavor and the correct texture, always reach for pure canned pumpkin puree. It’s vital to avoid pumpkin pie filling, which contains added sugars and spices that will disrupt the carefully balanced flavor profile of this cheesecake. If your pumpkin puree appears overly liquidy, you can gently blot out excess moisture with paper towels. However, many quality brands like Libby’s are perfectly fine to use directly without this extra step.
- High-Quality White Chocolate: This is the secret to the exquisite white chocolate mousse topping. For optimal melting and a truly silky smooth mousse, it’s crucial to use actual white chocolate bars, not almond bark or white chocolate chips. These alternatives often contain stabilizers that prevent them from melting smoothly and can result in a grainy or waxy texture. Look for premium white chocolate bars (often 4-ounce sizes) in the baking aisle of most grocery stores; Ghirardelli is a widely available and reliable choice.
Beyond these core components, a few other essential pantry staples tie everything together. These include classic ingredients like aromatic vanilla extract, which enhances all the sweet flavors; fine granulated sugar and rich brown sugar for balanced sweetness; crunchy graham cracker crumbs for the perfect crust; creamy butter to bind the crust; and a medley of warming spices such as fragrant cinnamon, pungent ginger, earthy nutmeg, and aromatic allspice, all carefully selected to complement the pumpkin’s natural sweetness and create a truly inviting flavor.
A Step-by-Step Guide: How to Make and Assemble Your Pumpkin Swirl Cheesecake
Creating this stunning layered pumpkin swirl cheesecake is a delightful process that, while appearing intricate, is surprisingly straightforward with these clear steps. Follow along to achieve perfectly distinct layers and that signature swirl:
- Prepare the Graham Cracker Crust: Begin by combining graham cracker crumbs, brown sugar, and melted butter. Press this buttery mixture firmly into the bottom of a 9-inch springform pan, extending about 1 inch up the sides. For a slightly thinner cheesecake with more delicate layers, a 10-inch pan can also be used. A well-pressed crust forms a sturdy base for your magnificent dessert.
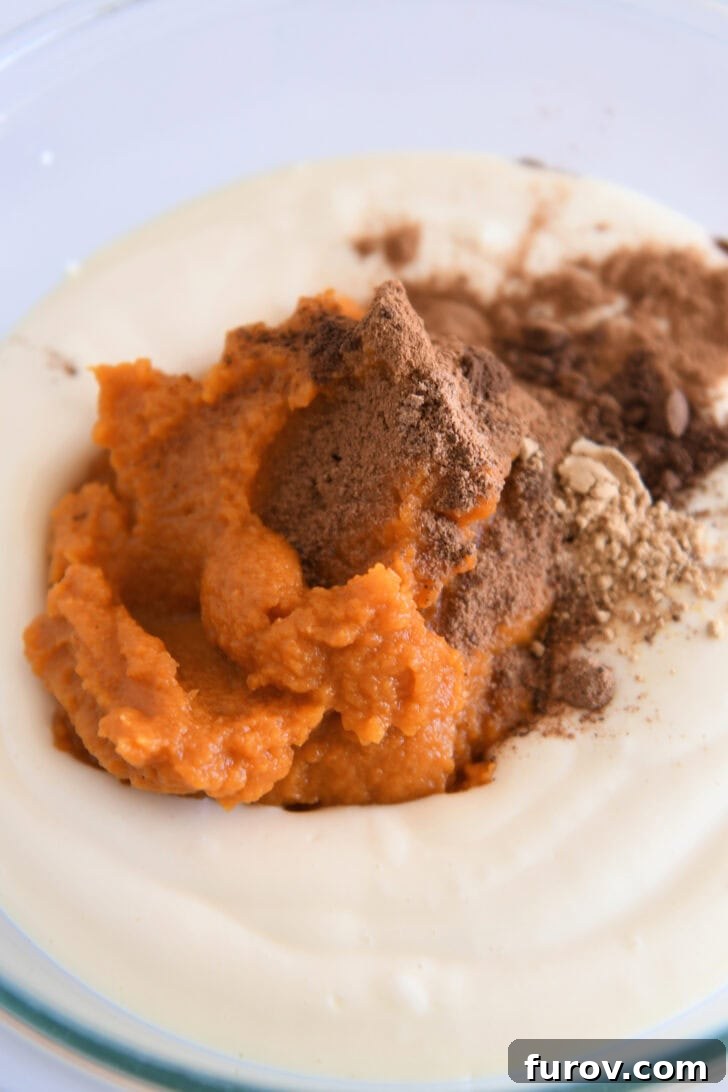
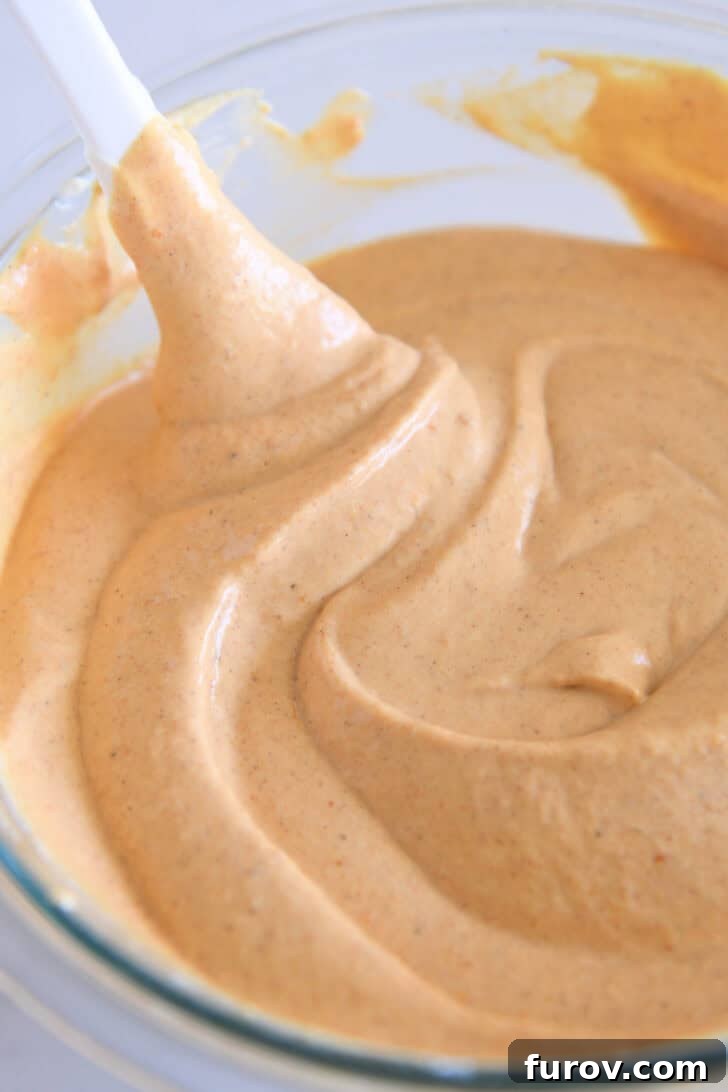
- Craft the Dual Batters: After preparing the main, plain cheesecake batter according to the recipe, carefully scoop out approximately two cups of this batter into a separate bowl. To this reserved portion, incorporate the canned pumpkin puree, along with a blend of warming spices: cinnamon, nutmeg, ginger, and allspice. Mix gently until just combined, ensuring the pumpkin batter is vibrant and smooth without overmixing.
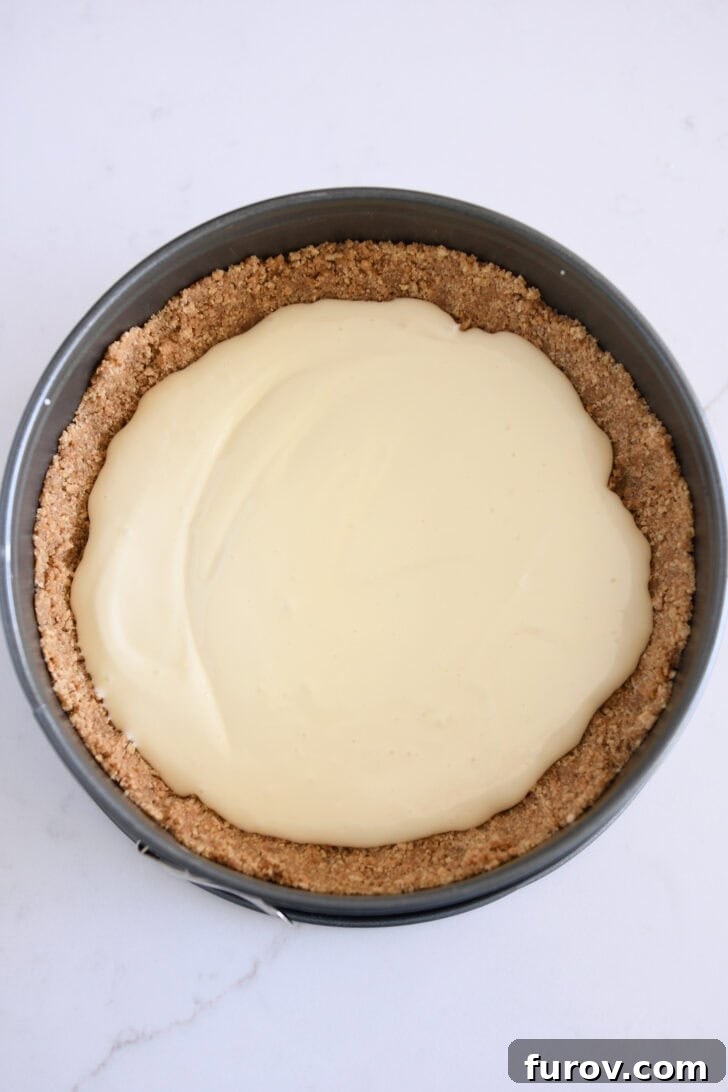
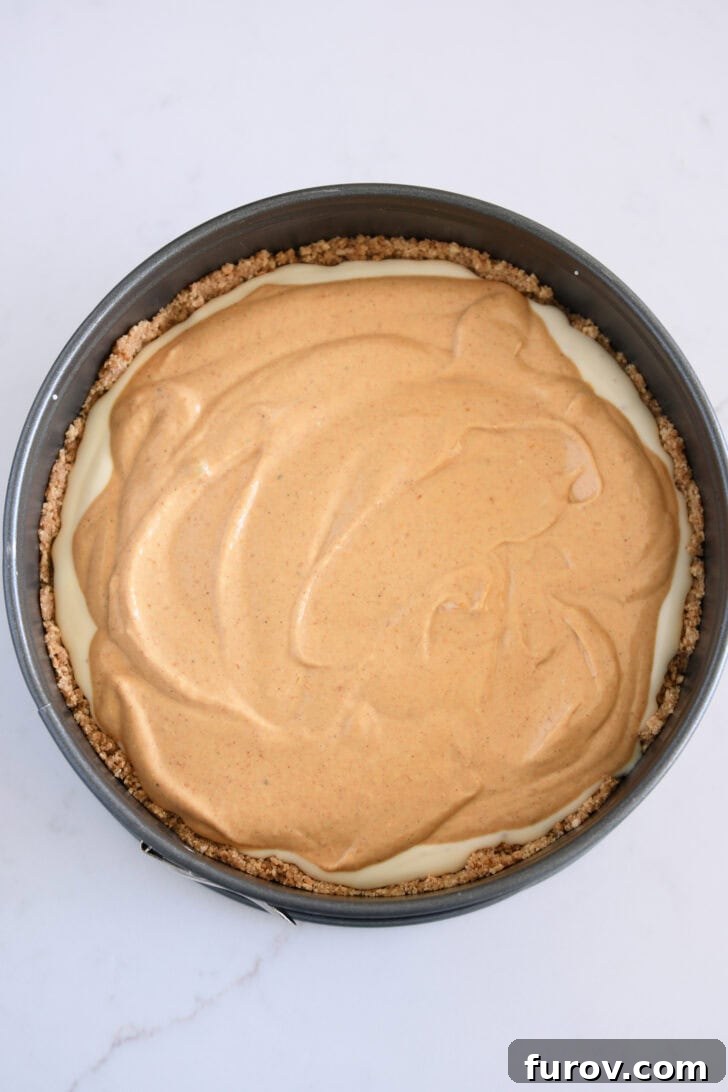
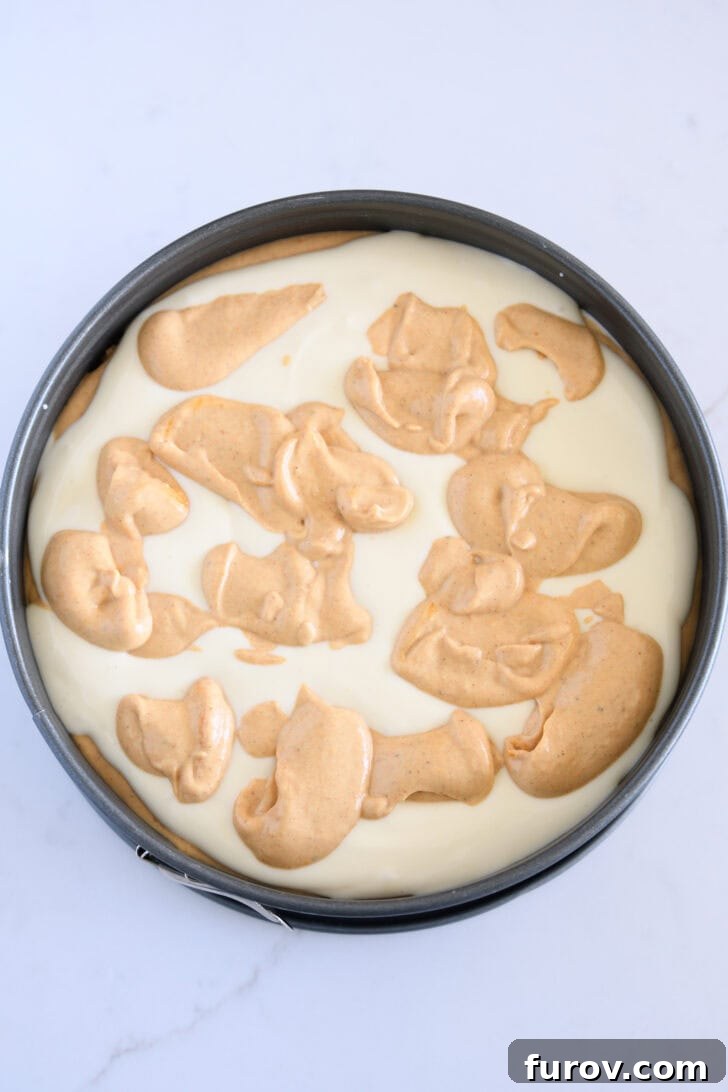
- Artful Layering Technique: This is where the “swirl” magic begins. Start by spreading half of the plain cheesecake batter evenly over your prepared graham cracker crust. Next, carefully spoon about two cups of the pumpkin cheesecake batter over the plain layer, spreading it gently to create an even second layer. Follow this by spreading the remaining plain cheesecake batter over the pumpkin layer. Finally, take the last remaining pumpkin cheesecake batter and dollop it artfully across the top of the plain layer. This precise layering ensures you have enough batter for a beautiful, defined swirl.
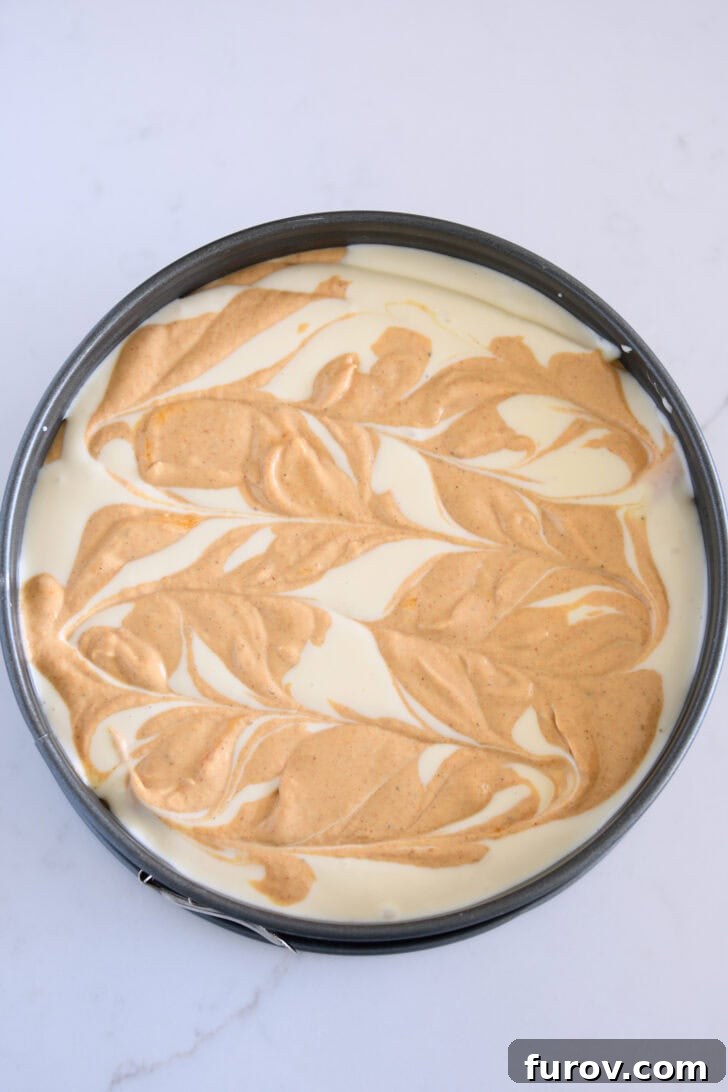
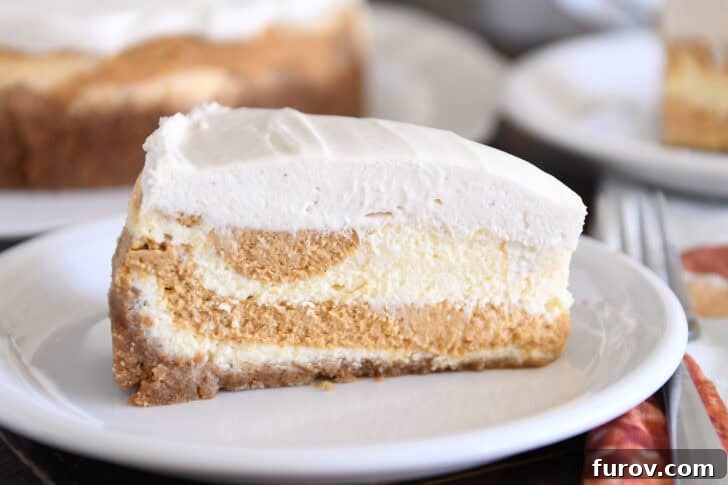
- The Signature Swirl: With your batters layered, it’s time to create the iconic swirl. Take a thin knife or a skewer and gently draw it through the layers, making sure the tip reaches all the way down to the crust without piercing it. Move the knife in gentle, S-shaped or circular patterns across the surface. This technique allows the plain and pumpkin batters to beautifully intermingle, creating an elegant marbled effect that will be revealed when sliced.
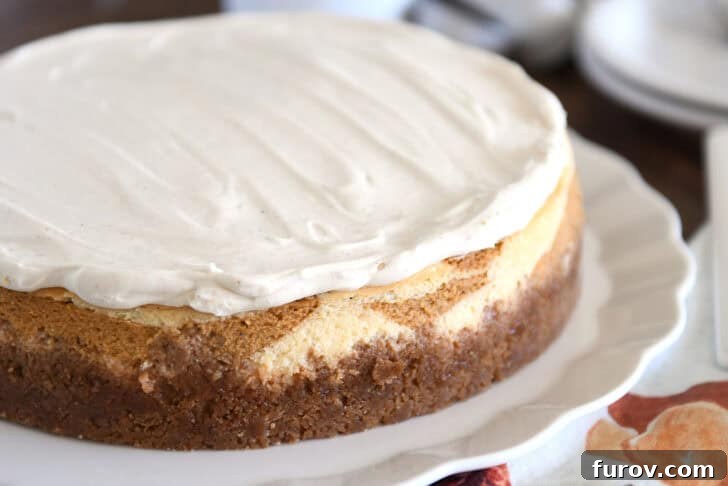
- Bake, Cool, and Crown with Mousse: Bake the cheesecake as directed, allowing it to cool completely once baked. Patience during the cooling phase is key, as it allows the cheesecake to set properly and prevents cracking from rapid temperature changes. Once thoroughly cooled, the grand finale is the luscious white chocolate mousse topping, which will spread generously over the cheesecake, adding an extra layer of decadence and visual appeal.
Baking Bonus Tip: One of the many joys of this particular cheesecake recipe is its forgiving nature regarding minor imperfections. Because it’s generously crowned with a thick, creamy white chocolate mousse topping, any small cracks that might appear on the surface during baking will be beautifully concealed. This feature alleviates much of the pressure often associated with baking cheesecakes, making the process more enjoyable and stress-free.
The Unbeatable White Chocolate Mousse: Why This Topping is a Game Changer
For those who have experienced the sheer delight of cheesecakes featuring a white chocolate mousse topping, such as the vanilla bean mousse cheesecake, the white chocolate cranberry cheesecake, or even the un-swirled pumpkin cheesecake and peppermint bark cheesecake, you already understand the profound appeal and transformative power of this glorious addition. It’s simply unbelievably delicious on almost any cheesecake, adding a layer of sophistication and flavor that takes your dessert to new heights.
This incredible white chocolate mousse topping does more than just enhance the flavor profile of our Pumpkin Swirl Cheesecake; it serves multiple vital functions. Primarily, it introduces an extra dimension of sweet, airy, and creamy goodness, contrasting beautifully with the dense cheesecake layers. The delicate sweetness of the white chocolate perfectly complements the spiced pumpkin, creating a harmonious and unforgettable bite.
But beyond its culinary contribution, the mousse offers a significant practical benefit for the home baker: it elegantly conceals any minor cracks that might have developed during the baking process. Cheesecake cracks are a common occurrence, often caused by rapid temperature changes or overmixing. With this luscious topping, you can bake with confidence, knowing that any superficial imperfections will be covered by a beautiful, smooth finish. This effectively eliminates the traditional necessity of baking the cheesecake in a water bath to prevent cracks. While I still recommend placing a pan of hot water in the oven below the cheesecake—as this gentle steam helps minimize crack size if they do occur—the mousse topping grants you a wonderful safety net, simplifying the baking process considerably without compromising on a picture-perfect presentation.
Seamless Planning: Make-Ahead Instructions for Your Cheesecake
One of the best qualities of a well-made cheesecake is its ability to be prepared in advance. In fact, both the texture and the complex flavors of this pumpkin swirl cheesecake truly benefit from a period of chilling, allowing all the components to meld and the cheesecake to set perfectly. This makes it an ideal dessert for entertaining, as it frees up valuable time on the day of your event. Here are some detailed make-ahead strategies to ensure your cheesecake is at its peak when served:
Optimize Your Holiday Schedule with These Make-Ahead Tips for Pumpkin Swirl Cheesecake:
- Prepare and Chill Up to 24 Hours in Advance: For optimal freshness and flavor, you can bake and fully assemble your pumpkin swirl cheesecake, including the white chocolate mousse topping, a full day before you plan to serve it. Once cooled and topped, gently loosen the cheesecake from the edges of the springform pan. You can store it covered directly in the pan or carefully transfer it to a serving platter. Ensure it is tightly covered with plastic wrap to prevent it from absorbing any refrigerator odors and to maintain its moisture. Keep it chilled in the refrigerator until ready to serve. Serving a well-chilled cheesecake ensures the best texture and taste. Keep in mind that the graham cracker crust may soften slightly the longer it is stored, but its flavor will remain delicious.
- Freeze for Long-Term Storage (Up to Three Months): This cheesecake freezes beautifully, making it an excellent option for extended make-ahead planning. Once your cheesecake is baked, cooled, and topped with the mousse, gently loosen its edges from the springform pan. For the best protection against freezer burn and to prevent it from absorbing other freezer odors, it is highly recommended to freeze the cheesecake directly in its pan. Wrap the entire cheesecake, still in its pan, first with a layer of plastic wrap pressed tightly against the surface, followed by a layer of heavy-duty aluminum foil. This double-layer protection is crucial. When you’re ready to enjoy it, simply transfer the frozen cheesecake to the refrigerator and allow it to thaw slowly for 24 to 36 hours. This gradual thawing process ensures the cheesecake retains its creamy texture and prevents any weeping.
Your Ultimate Fall and Thanksgiving Cheesecake
As the leaves turn golden and the air grows crisp, the search for the quintessential fall or Thanksgiving dessert begins. Look no further! This delightful pumpkin swirl cheesecake, with its captivating layers and beautiful swirls of pumpkin-infused batter, is undeniably the perfect choice. It embodies the essence of the season, making it an ideal centerpiece for any autumn celebration or holiday feast.
Many home bakers find the idea of making a homemade cheesecake intimidating, often associating it with complicated water baths and dreaded cracks. However, this recipe is designed to be an enjoyable and surprisingly stress-free baking experience. I promise, you’ll have fun making it, and I pinkie swear, you won’t be constantly worrying about perfection. The brilliant white chocolate mousse topping acts as your secret weapon, allowing you to bypass the traditional water bath technique without sacrificing presentation. Its creamy embrace covers any minor surface imperfections, ensuring your cheesecake looks flawless every time.
The true charm of this two-toned cheesecake lies in its exquisite balance. It offers all the comforting, warm “pumpkin vibes” that are synonymous with fall, but without being overwhelmingly one-noted. Each bite delivers the rich, spiced notes of pumpkin perfectly harmonized with the familiar, luxurious creaminess of classic cheesecake. This delightful interplay of flavors ensures a sophisticated dessert that pleases a wide array of palates. It’s a guaranteed winner that will earn rave reviews and become a cherished part of your holiday traditions, bringing warmth and joy to your table.
Pumpkin Swirl Cheesecake
12
servings
35 mins
1 hr
6 hrs
7 hrs
35 mins
Pin
Rate
Save
Saved!
Ingredients
Graham Cracker Crust:
-
1 ½ cups
graham cracker crumbs (approx. 12 to 13 rectangle crackers) -
3 tablespoons
brown sugar -
6 tablespoons
butter, melted
Cheesecake:
-
3 (8-ounce) packages
full-fat cream cheese, softened to room temperature -
1 cup
granulated sugar -
⅔ cup
full-fat sour cream -
1 teaspoon
vanilla extract -
3 large
eggs, room temperature, lightly beaten -
1 ¼ cups
canned pumpkin puree -
1 teaspoon
ground cinnamon -
¼ teaspoon
ground ginger -
¼ teaspoon
ground nutmeg -
¼ teaspoon
ground allspice
White Chocolate Mousse Topping:
-
4 ounces
white chocolate (NOT almond bark or white chocolate chips) – see note -
4 ounces
cream cheese, softened to room temperature -
1 cup
heavy cream -
2 tablespoons
powdered sugar -
½ teaspoon
vanilla extract -
¼ teaspoon
ground cinnamon
Instructions
-
To prepare your oven for baking, position one oven rack in the center. Place another oven rack several inches below this. On the bottom rack, place a 9×13-inch pan and fill it with a few inches of water. This creates a steamy environment, which helps prevent cracks in the cheesecake. Preheat your oven to 325 degrees F (160 degrees C).
-
To prevent any butter from leaking from your crust during baking, wrap the bottom exterior of a 9-inch springform pan tightly with heavy-duty aluminum foil. Ensure the foil goes up the sides of the pan as well.
-
For the Graham Cracker Crust: In a medium-sized mixing bowl, combine the graham cracker crumbs and brown sugar. Toss them together until uniformly mixed. Pour in the melted butter and stir thoroughly until all the crumbs are evenly moistened and resemble wet sand. Press this mixture firmly into the bottom and approximately 1 inch up the sides of your prepared springform pan. Use the flat bottom of a glass or your fingers to create a compact, even layer. Set the crust aside.
-
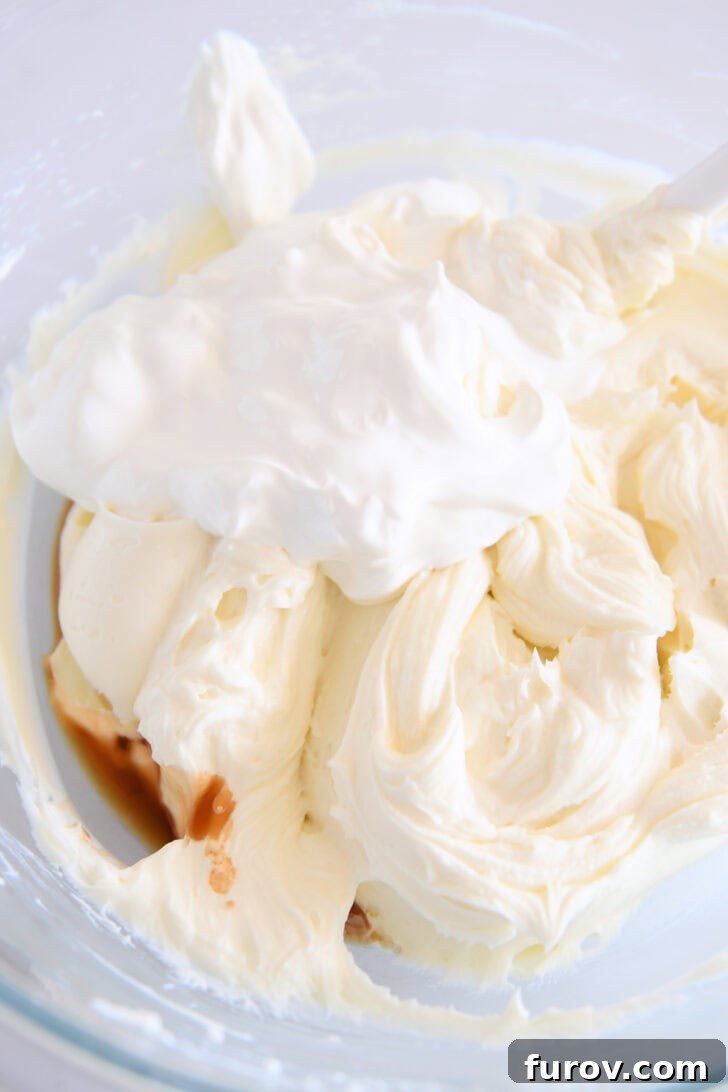
For the Cheesecake Batter: Using a handheld electric mixer or a stand mixer fitted with the paddle attachment, add the softened full-fat cream cheese and granulated sugar to the bowl. Beat on medium speed until the mixture is completely smooth, creamy, and well-combined, typically for 1 to 2 minutes. Scrape down the sides and bottom of the bowl to ensure everything is incorporated. Next, add the full-fat sour cream and vanilla extract, mixing until just combined and smooth, again scraping the bowl as needed.
-
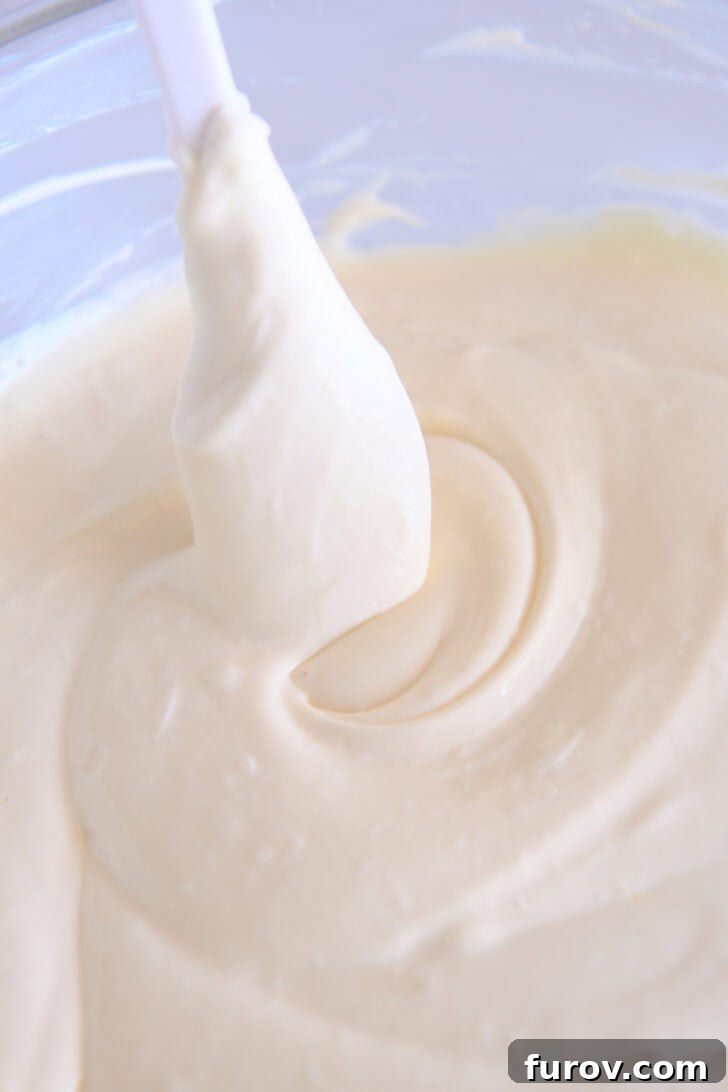
Gently add the lightly beaten, room temperature eggs to the batter. Mix on low speed until they are *just* combined. It is crucial not to overmix at this stage, as incorporating too much air can cause the cheesecake to puff up excessively and lead to large cracks during baking and cooling. While minor cracks are acceptable due to the topping, minimizing them will result in a more uniformly textured cheesecake.
-
Measure out about 2 cups (approximately 285g) of the plain cheesecake batter into a separate medium bowl. To this portion, add the canned pumpkin puree, ground cinnamon, ground ginger, ground nutmeg, and ground allspice. Mix gently until all the ingredients are evenly combined and the pumpkin batter has a consistent color and texture. Again, avoid overmixing to keep the batter airy.
-
Carefully spread half of the plain cheesecake batter evenly over the prepared graham cracker crust in the springform pan. Use an offset spatula to create a smooth, level layer.
-
Spoon about 2 cups of the pumpkin batter over the plain cheesecake layer. Gently spread it out evenly across the surface. Make sure to reserve at least 1 cup of the pumpkin batter for the final dolloping step to achieve the beautiful swirl effect.
-
Spread the remaining plain cheesecake batter over the top of the pumpkin cheesecake layer. Again, use care to keep the layers distinct as much as possible at this stage.
-
Now, take the last reserved pumpkin cheesecake batter and carefully dollop it in several spots across the top of the plain cheesecake layer. Using a thin knife or a skewer, gently swirl the layers together. Ensure the knife reaches all the way to the crust to create deep, dramatic swirls through all the layers, but be careful not to gouge the crust itself. Create elegant S-patterns or figure-eights for a beautiful marbled appearance.
-
Place the springform pan on the middle oven rack, directly above the pan of hot water. Bake for 60-70 minutes. The cheesecake is ready when the edges appear set and firm, but the middle 2-3 inches still have a slight jiggle when the pan is gently nudged. If necessary, add a bit more baking time. Remember, it’s perfectly fine if some small cracks appear on the surface; the topping will cover them beautifully.
-
Once baked, carefully remove the cheesecake from the oven. Place it on a wire rack and allow it to cool completely in the pan to room temperature. This slow cooling prevents sudden temperature changes that can cause major cracks. Once at room temperature, it’s ready for the topping.
-
For the White Chocolate Mousse Topping: In a medium, microwave-safe bowl, melt the high-quality white chocolate. Heat it in 1-minute increments at 50% power, stirring well after each interval, until the chocolate is smooth and fully melted. Be careful not to overheat the chocolate, as it can seize.
-
Add the softened cream cheese to the melted white chocolate. Using a handheld electric mixer, or the paddle attachment of a stand mixer, beat until the mixture is completely smooth and well-combined. It’s crucial to let this mixture cool down to room temperature before proceeding. If the mixture or the bowl is warm, the heavy cream added in the next step may not whip and thicken properly.
-
Once the white chocolate and cream cheese mixture is at room temperature, add the cold heavy cream (see note on heavy cream), powdered sugar, vanilla extract, and ground cinnamon to the bowl. Begin mixing on low speed to combine the ingredients, then gradually increase the speed to medium. Continue beating until the mixture thickens significantly and forms soft, billowy peaks. Be careful not to overbeat, or it may curdle.
-
Carefully spread the prepared white chocolate mousse topping evenly over the completely cooled pumpkin swirl cheesecake. Loosely cover the entire cheesecake with plastic wrap or foil. Refrigerate for a minimum of 6 to 8 hours, or preferably overnight, until the cheesecake is thoroughly chilled and the mousse topping is fully set. Serve chilled for the best flavor and texture.
Notes
Choosing the Right White Chocolate: For an exceptionally smooth and melt-in-your-mouth white chocolate mousse topping, it is absolutely essential to use high-quality white chocolate bars. Avoid white chocolate chips and almond bark, as these often contain stabilizers and less cocoa butter, which can lead to a grainy texture and make them difficult to melt smoothly. Most major grocery stores carry reliable brands like Ghirardelli white chocolate bars, typically in 4-ounce sizes, in the baking aisle. This is what is recommended for consistent, superior results.
Heavy Cream Whipping Tips: The success of your white chocolate mousse largely depends on the heavy cream’s fat content. If the heavy cream you are using has less than 40% milkfat, it might struggle to thicken sufficiently when mixed directly with the white chocolate and cream cheese. In such cases, it’s best practice to whip the heavy cream, powdered sugar, vanilla, and cinnamon in a separate bowl until it forms sturdy, soft peaks. Once whipped, gently fold this mixture into the cooled white chocolate and cream cheese base. If you’re using a richer heavy cream (like Darigold from Costco, which often has a higher milkfat percentage), you can usually mix it directly into the white chocolate mixture without issue.
Mel Gunnell
Dessert
American
Bake
Recommended Products
Recipe Source: Adapted from Mel’s Kitchen Cafe