
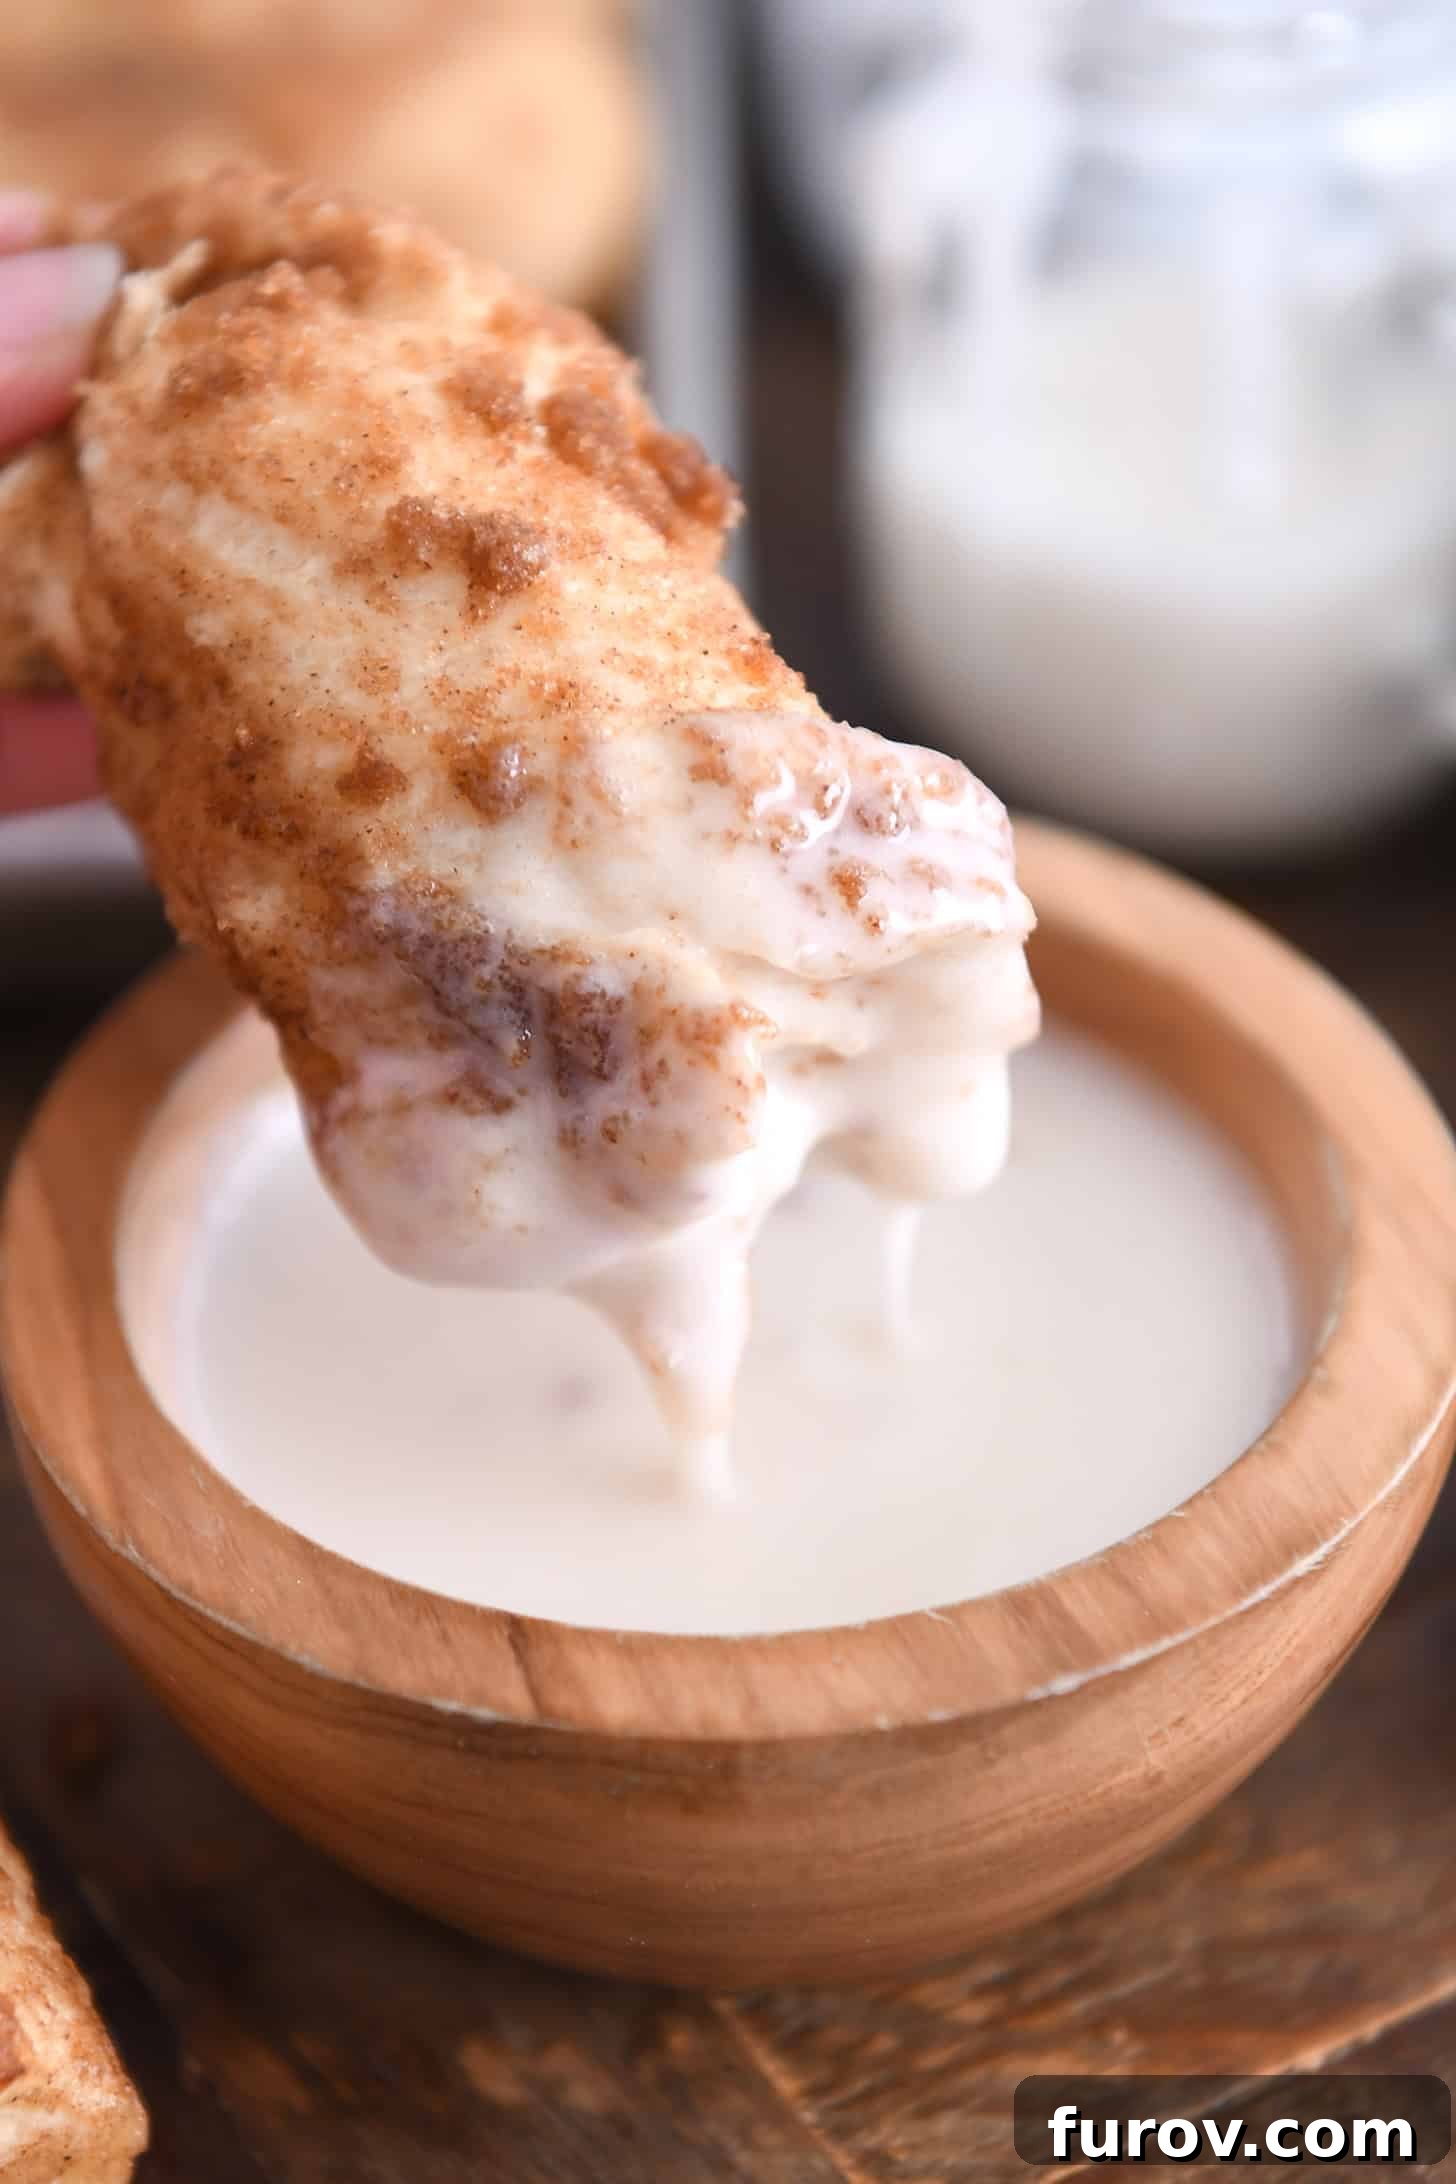
Prepare to be amazed by these buttery, incredibly soft, and utterly delicious cinnamon sugar twists! Offering all the comforting flavor of classic cinnamon rolls but with significantly less effort, these fluffy delights are a true game-changer. Whether you enjoy them fresh out of the oven, plain, or adorned with a luscious sweet icing, they promise a melt-in-your-mouth experience that will leave you craving more.
I genuinely cannot get enough of these cinnamon twists. Their extraordinary fluffiness is matched only by their incredible ease of preparation. The inspiration for this recipe came from a dear friend, Kim, who once shared a version of these with high schoolers after a tennis match. The reaction was unanimous: everyone, myself included, instantly fell in love. This recipe quickly earned its place as a cherished keeper in my kitchen, and it’s bound to become a favorite in yours too!
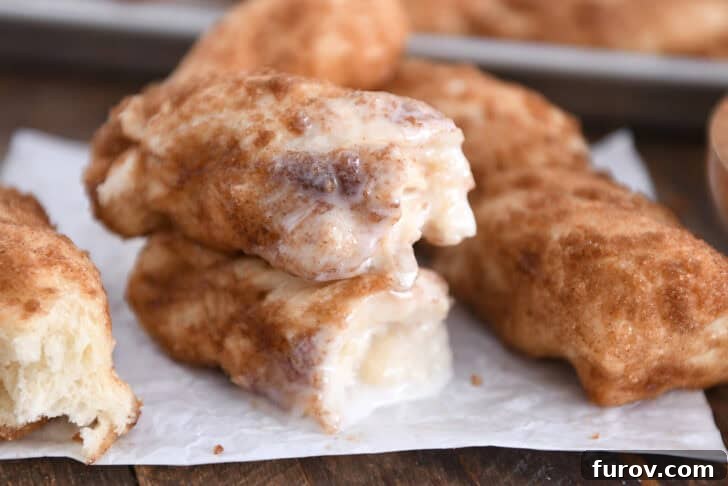
Why You’ll Fall in Love with This Easy Cinnamon Twist Recipe
These homemade cinnamon sugar twists aren’t just a treat for your taste buds; they’re a joy to make and share. Here’s why this recipe stands out and is guaranteed to become a staple in your baking repertoire:
- Effortless Preparation: Forget complicated techniques! This recipe is incredibly straightforward, making it perfect for bakers of all skill levels. From start to finish, you’ll find the process simple and rewarding.
- Reliable Dough Base: The foundation of these twists is a tried-and-true, perfectly soft and fluffy roll dough. Using a proven dough recipe ensures consistent, delicious results every time, guaranteeing that signature tender texture.
- Pantry-Friendly Ingredients: You likely already have all the necessary components in your kitchen. Common staples like brown sugar, cinnamon, butter, flour, and yeast mean you can whip up a batch of these delectable treats without a special trip to the grocery store.
- Perfect for On-the-Go: These twists are incredibly convenient to serve and eat. No need for plates or forks; simply grab one (or a few!) and enjoy. They’re ideal for busy mornings, school lunches, picnics, or as a quick snack anytime.
- Easily Adaptable: Whether you’re baking for a small family gathering or a larger crowd, this recipe scales beautifully. It can be effortlessly halved for a smaller batch or doubled to accommodate more eager hands, ensuring you always have enough for everyone.
- A Holiday Favorite: Imagine these warm, fragrant twists gracing your holiday breakfast table. They make a wonderfully festive and comforting addition to any special occasion, creating cherished memories with every bite.
- Fantastic Make-Ahead Options: Plan ahead with ease! This recipe offers excellent make-ahead possibilities, allowing you to prepare the dough in advance and bake fresh twists whenever the craving strikes. (See detailed notes below for how to do this!)
Ask anyone who has tried these cinnamon sugar twists, and they’ll likely tell you they are just as delicious, if not more delicious, than a beloved cinnamon roll – and undoubtedly much simpler to make!
How to Make These Easy Cinnamon Sugar Twists: Step-by-Step
Creating these divine cinnamon sugar twists is a straightforward and enjoyable process. The key to their incredible fluffiness lies in a great dough base and a few simple steps. Follow this guide to bake your own batch of irresistible treats.
Part 1: Preparing and Shaping the Dough
- Begin by preparing the roll dough according to the recipe instructions (refer to the full recipe card below for precise measurements and steps). Allow the dough to rise in a warm place until it has visibly doubled in size. This initial rise is crucial for developing its airy texture.
- Once risen, gently turn the dough out onto a lightly greased countertop. Using your hands or a rolling pin, press or roll the dough into a thick, uniform rectangle, approximately 15×10 inches. Aim for an even thickness to ensure uniform baking.
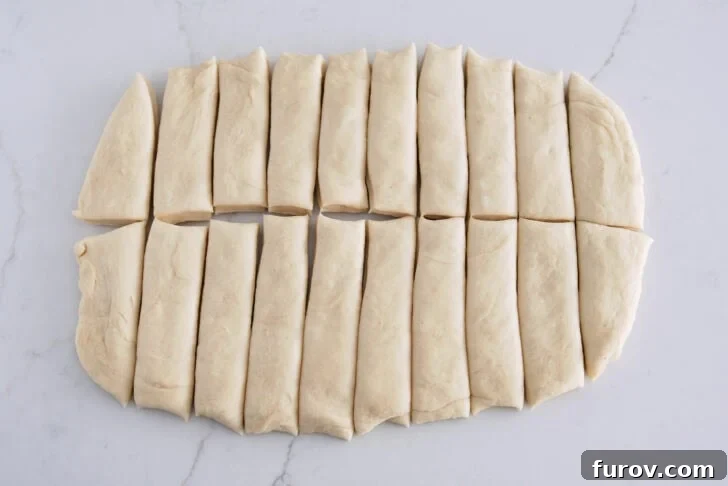
- With a pizza cutter or sharp knife, cut the dough in half lengthwise. Imagine cutting it like a hot dog bun, creating two long, parallel strips.
- Next, cut each of these long strips into 10 smaller strips, each about 1 to 1.5 inches wide. This will result in a total of 20 dough strips, ready for their cinnamon-sugar coating.
Part 2: Coating, Twisting, and Baking
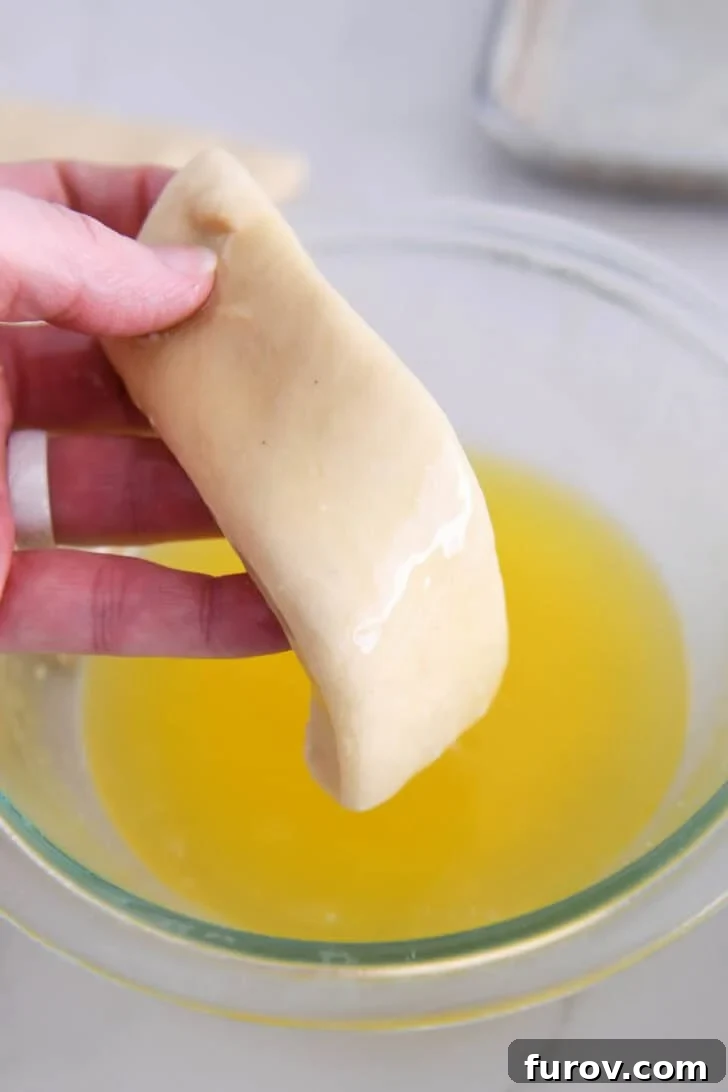
- Melt your butter in a shallow dish, and in another dish, combine the brown sugar and cinnamon. Take each dough strip and generously dip it completely into the melted butter, ensuring full coverage.
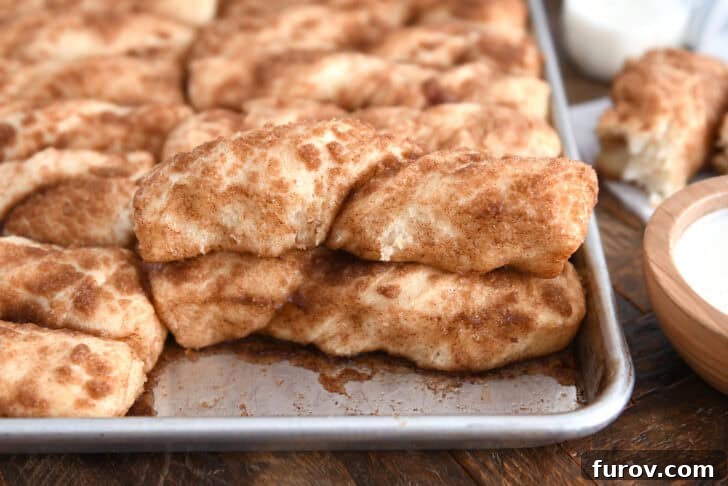
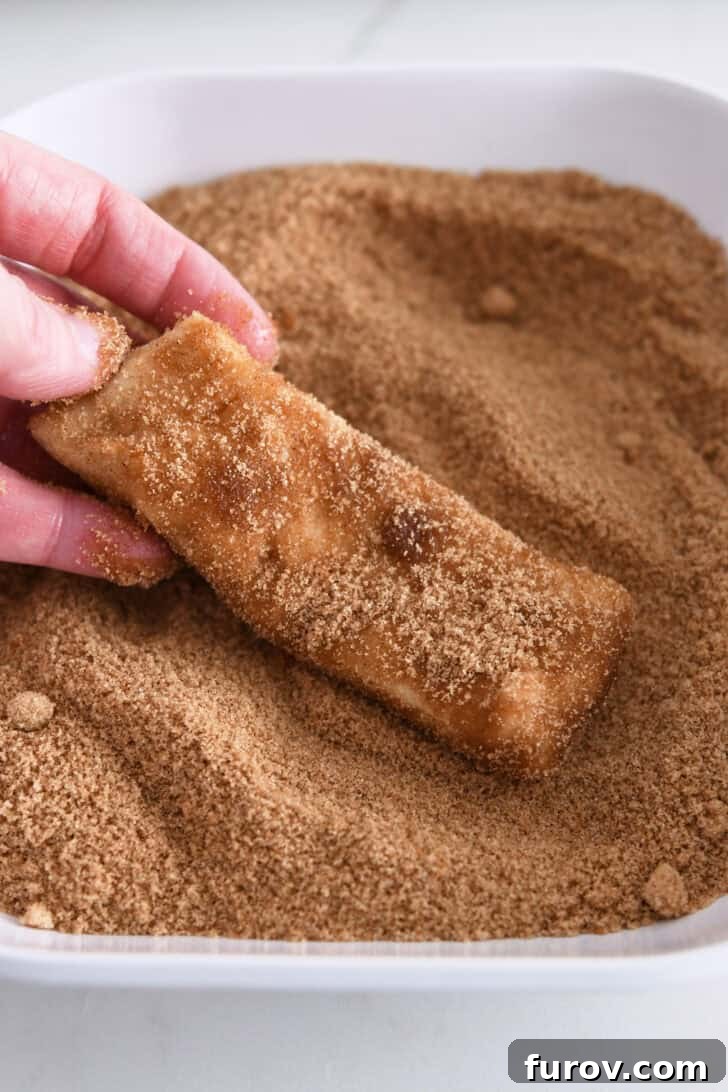
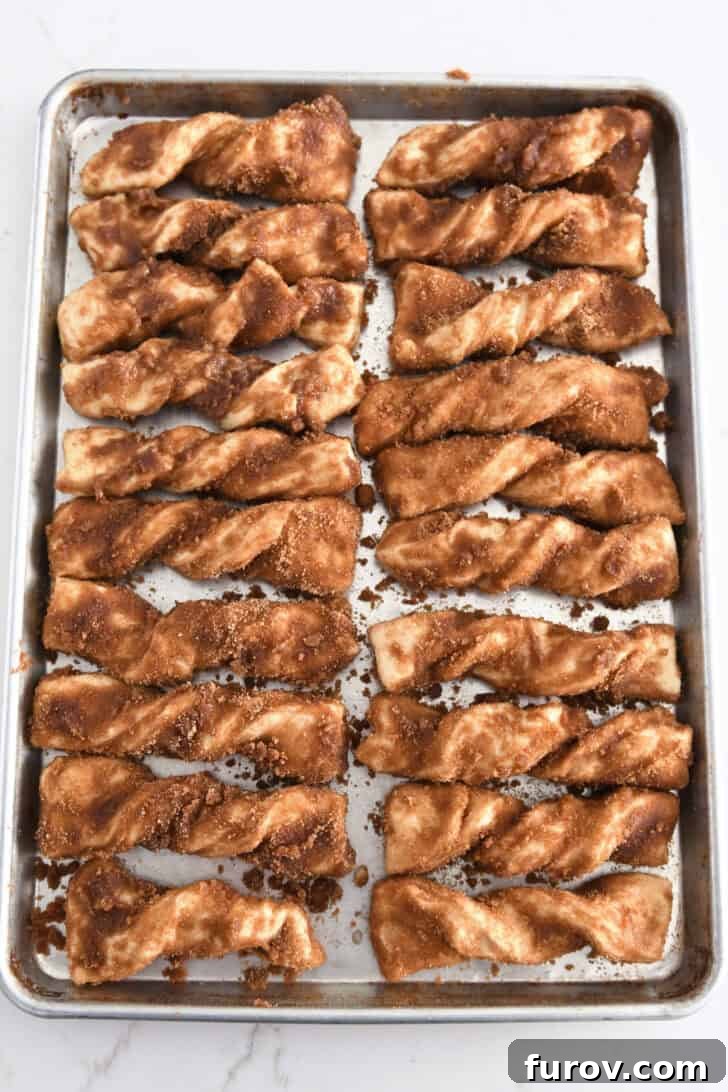
- After its butter bath, thoroughly coat the strip in the brown sugar and cinnamon mixture. Make sure it’s well-covered! Then, gently give each coated strip one or two twists. The key here is to twist gently without stretching the dough too thin. Place these twisted strips in two long, neat rows on a prepared half sheet pan.
- Once all twists are arranged, cover the pan and let them rise again in a warm spot until they look noticeably puffy. This second rise contributes significantly to their final fluffy texture.
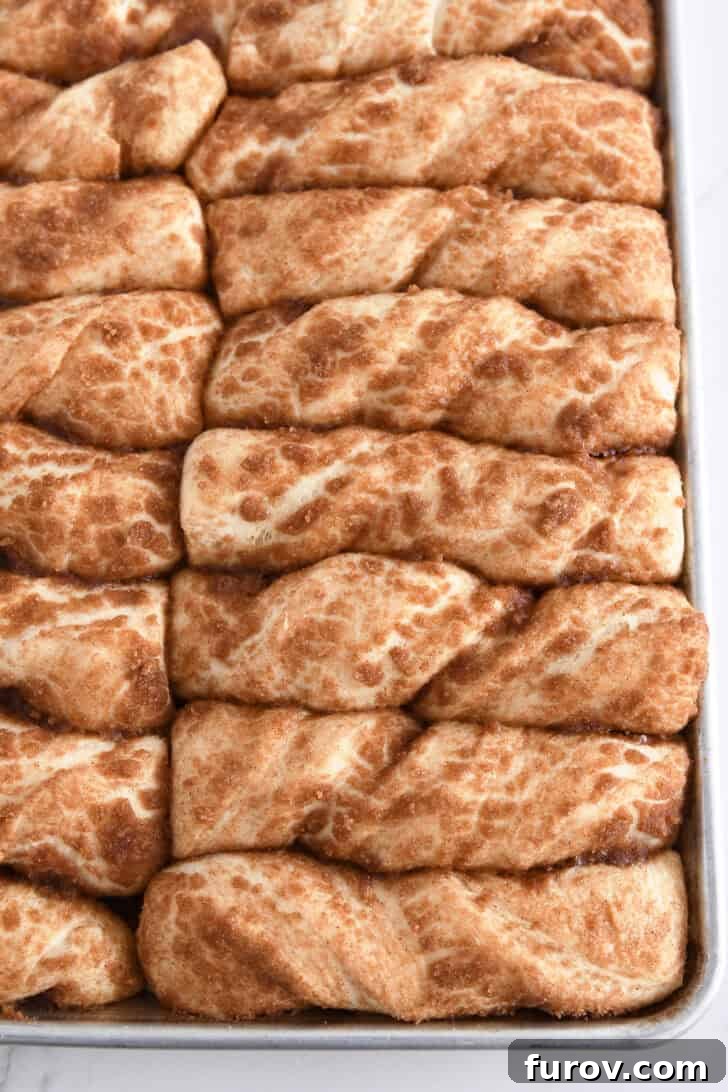
- Preheat your oven to the specified temperature (check the recipe card for exact details). Bake the twists until they are beautifully puffed up and lightly golden brown, indicating they are baked through and perfectly caramelized.
A crucial tip for ultimate fluffiness: As you dip the dough pieces into the butter and cinnamon-sugar mixture, try your best not to stretch the dough. It should retain its thick strip shape. This seemingly small detail ensures the best texture, leading to an ultra-fluffy interior once baked!
Additional Notes and Pro Tips for Perfect Cinnamon Sugar Twists
Maximize your enjoyment of these incredible cinnamon sugar twists with these helpful tips and serving suggestions:
- Serving Temperature is Key: These delectable, chubby cinnamon sugar twists are phenomenal whether served warm or at room temperature. While both are incredibly delicious, there’s truly nothing quite like indulging in one (or three!) warm, straight from the oven. The warmth enhances their buttery aroma and soft texture.
- Mastering Make-Ahead: For ultimate convenience and to enjoy fresh-baked goodness whenever you desire, consider these make-ahead options:
- Refrigerate Overnight: Follow the recipe through the twisting and arrangement on the pan (step #10). Before letting the twists rise on the pan, cover them tightly with plastic wrap and refrigerate for 8 to 12 hours. The dough will likely have a slow, gentle rise in the fridge. About an hour before you plan to bake, remove the pan from the refrigerator to allow the twists to come to room temperature and finish rising. Then, bake according to the recipe instructions. This method is perfect for a stress-free morning!
- Freeze for Later: For longer storage, follow the recipe through step #10 (twisting and arranging on the pan). Instead of refrigerating, cover the pan tightly with plastic wrap and aluminum foil, then freeze the unbaked twists. When you’re ready to bake, transfer the pan from the freezer to the refrigerator the night before, or place it on the countertop 6 to 8 hours before baking. This extended thawing and rising period is essential to achieve that perfect fluffy texture. Bake as directed once fully thawed and puffy.
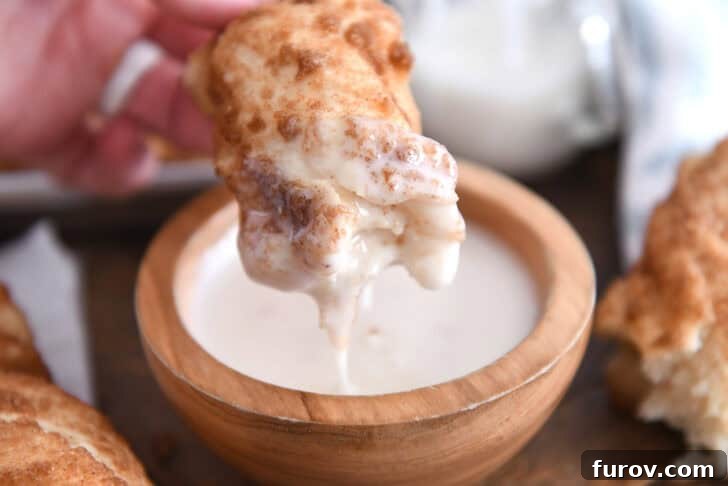
- Icing or No Icing? Your Choice! These twists are wonderfully versatile. For a simple, grab-and-go treat or snack, they are absolutely delicious served plain, straight off the pan, without any icing. However, if you crave a touch more sweetness, they are equally superb drizzled with a simple sweet icing (recipe provided in the recipe card) or served with a bowl of icing on the side for dipping. Both options are fantastic!

My entire family, myself included, is completely smitten with these cinnamon sugar twists. They possess a universal appeal; honestly, I can’t imagine anyone not loving them! They strike the perfect balance between sweetness, warmth, and a comforting, fluffy texture that’s hard to resist.
In fact, brace yourself now, because you are almost guaranteed to be showered with rave reviews and high praise over this recipe. Just repeat after me: “I will not let it go to my head, I will not let it go to my head.” It’s a tough job to stay humble when you’re an absolute rock star in the kitchen, but someone has to do it! 😉
The true magic behind these incredibly soft and fluffy cinnamon twists happens by cutting the dough into thick strips and allowing them to rise fully on the pan before baking. Do not short-cut either of these vital steps! Adhering to these instructions will reward you with the softest, most ethereal cinnamon twists that will undoubtedly rock your world and become a cherished family favorite.
Cinnamon Sugar Twists
Yield: 20 twists
Prep Time: 20 mins
Cook Time: 20 mins
Rising Time: 1 hr 30 mins
Total Time: 2 hrs 10 mins
Pin Recipe
Ingredients
Dough:
- 1 ¼ cups milk (preferably not skim milk)
- ¼ cup room temperature water
- 6 tablespoons butter, cut into tablespoon-size pieces
- ¼ cup granulated sugar
- 1 tablespoon instant or active dry yeast
- 1 large egg
- 1 ¼ teaspoons salt
- 4 ½ cups all-purpose flour
Cinnamon/Sugar Coating:
- 1 ½ cups packed light brown sugar
- 1 ½ tablespoons cinnamon
- 12 tablespoons butter, melted
Icing:
- 1 ½ cups powdered sugar
- 2 tablespoons milk
- ¼ teaspoon vanilla extract
Instructions
- For the dough: Heat the milk in a saucepan until tiny bubbles form around the edges and it’s steaming. Pour the heated milk into the bowl of a stand mixer fitted with the dough hook attachment.
- Add the water, butter pieces, and granulated sugar to the mixer bowl. Let the mixture cool until it’s comfortably warm to the touch (an instant-read thermometer should register between 110 to 115 degrees F). This temperature is crucial for activating the yeast without killing it.
- Add 2 cups of the all-purpose flour to the warm liquid mixture, then sprinkle the yeast evenly over the top. Mix on low speed until just combined. The dough will appear thin at this stage. Cover the bowl loosely and let the dough rest for 5-10 minutes; it should become slightly puffy and bubbly, indicating the yeast is active.
- After the rest, add the large egg and salt to the bowl. Begin adding the remaining flour, starting with 1 ¾ to 2 cups, and mix on low speed. Gradually add more flour, a tablespoon at a time, until the dough begins to clear the sides of the bowl and forms a soft, slightly sticky ball. Be careful not to over-flour the dough, as this can make the twists dry.
- Increase the mixer speed to medium-low and knead the dough for 5-6 minutes. The dough should become soft, smooth, and elastic.
- Lightly grease a large bowl with cooking spray or a thin layer of oil. Transfer the kneaded dough to this bowl, turning it once to coat the entire surface. Cover the bowl tightly with plastic wrap or a clean kitchen towel and let the dough rise in a warm, draft-free spot until it has doubled in size. This usually takes 45 to 60 minutes, depending on the warmth of your environment. While the dough rises, lightly grease a half sheet pan with cooking spray and set it aside.
- Once the dough has doubled, gently punch it down to release the air. Turn the dough out onto a lightly greased countertop. Using your hands or a rolling pin, pat or roll the dough into a uniform 15×10-inch thick rectangle. Maintain an even thickness throughout.
- Using a pizza cutter or a sharp knife, cut the dough in half lengthwise (parallel to the longer side), like you would cut a hot dog bun. Then, cut each of these long halves into approximately 1 ½-inch wide strips. You should end up with about 20 strips in total (refer to the pictures in the post for a visual guide on strip size).
- For the cinnamon and sugar coating: In a medium bowl or a shallow dish (like a pie plate), thoroughly stir together the packed light brown sugar and ground cinnamon until well combined. In a separate shallow dish, melt the 12 tablespoons of butter.
- Take each dough strip and fully immerse it in the melted butter, ensuring it’s completely coated. Then, transfer the buttered strip to the cinnamon-sugar mixture and coat it generously on all sides. Gently twist each coated strip one or two times. It’s important to try not to stretch the dough too much during the dipping and twisting process to maintain its thickness. Arrange the twisted strips side-by-side on the prepared sheet pan, forming two long rows of 10 strips each. Leave a little space between each twist, as they will expand.
- Cover the sheet pan loosely with plastic wrap or a clean towel and let the twists rise in a warm spot until they appear noticeably puffy and almost doubled in size, which typically takes 30 to 45 minutes. This final rise is crucial for their light and airy texture.
- While the twists are rising, preheat your oven to 375 degrees F (190 degrees C).
- Bake the cinnamon sugar twists for 20 to 22 minutes, or until they are baked through and have achieved a very lightly golden-brown color on top and bottom. Keep an eye on them to prevent over-browning.
- For the icing: While the twists are baking or cooling, whisk together the powdered sugar, milk, and vanilla extract in a small bowl until smooth. If the icing is too thick, add a tiny bit more milk, a half teaspoon at a time, until it reaches a thick but pourable consistency. If it’s too thin, add a bit more powdered sugar.
- Serve the cinnamon twists warm or at room temperature. They are delicious served plain, or you can offer the icing on the side for dipping. Alternatively, drizzle the icing generously over the top of the warm twists for an extra layer of sweetness. Enjoy your homemade fluffy cinnamon sugar twists!
Author: Mel Gunnell
Course: Bread, Breakfast, Dessert, Snack
Cuisine: American
Method: Bake
Nutrition Information (per 1 cinnamon twist)
Serving: 1 cinnamon twist, Calories: 316kcal, Carbohydrates: 51g, Protein: 4g, Fat: 11g, Saturated Fat: 7g, Cholesterol: 38mg, Sodium: 242mg, Fiber: 1g, Sugar: 28g
Recommended Products
Recipe Source: Adapted from Mel’s Kitchen Cafe (using her fantastic roll dough recipe as the base). This recipe was beautifully inspired by a version my friend, Kim R., brought to a tennis match last year; she distributed them to the high schoolers (without icing!), and everyone, myself included, couldn’t stop raving about how incredibly good they were!