
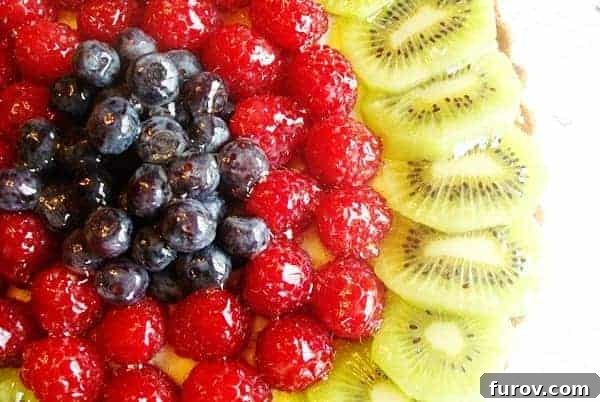
Indulge in the timeless elegance of a Classic Fresh Fruit Tart – a dessert that truly elevates any occasion. While it requires a touch more effort than your everyday bake, every step is a delightful investment in a truly stunning and unforgettable treat.
Do you often find yourself searching for that perfect dessert that’s a cut above the rest? Something beyond a simple chocolate brownie or a traditional vanilla cake? You desire a dessert that not only tastes incredible but also makes a grand visual statement – something truly impressive and perhaps a little extravagant. Look no further than the exquisite Classic Fresh Fruit Tart.
This dessert is a radiant example of a light yet luxurious treat, showcasing vibrant seasonal fruits nestled atop a rich, creamy filling within a perfectly crisp, sweet crust. It’s a harmonious blend of textures and flavors that captivates from the first glance to the last bite. While it asks for a bit more dedication than whipping up a batch of cookies, the sheer beauty and delicate flavor profile of this tart make every moment spent in the kitchen utterly worthwhile.
Why a Classic Fresh Fruit Tart is the Ultimate Elegant Dessert
Beyond its undeniable aesthetic appeal, this Classic Fresh Fruit Tart is, without exaggeration, one of the most delectable desserts you’ll ever encounter. It’s a symphony of flavors and textures, meticulously crafted to deliver a sophisticated experience that appeals to all senses. The magic lies in the interplay of its three core components: the buttery tart shell, the luscious pastry cream, and the fresh, vibrant fruit topping.
The Perfect Sweet Tart Crust: A Foundation of Flavor
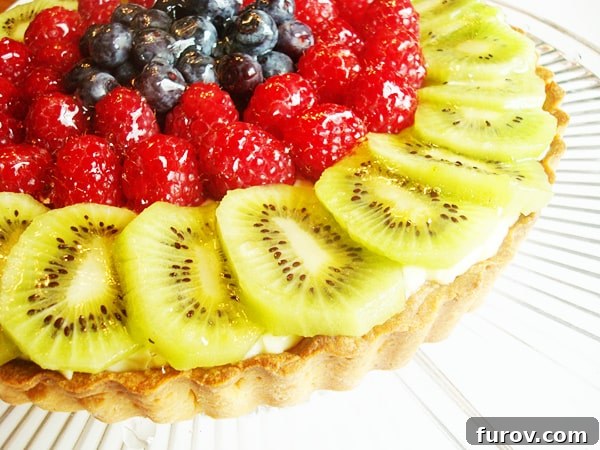
Unlike a traditional savory pie crust, the foundation of this tart is a delicate, buttery sweet pastry shell, often referred to as pâte sucrée. This crust is intentionally sweeter, providing a perfect counterpoint to the tartness of the fruit and the richness of the cream. Many home bakers, myself included, often dread making pie crusts. However, this particular tart pastry recipe is surprisingly forgiving. While you might find yourself re-rolling the dough once or twice (a common baker’s tale!), the result is a gloriously crisp, melt-in-your-mouth crust that’s utterly irresistible. Its sweetness and tender texture set it apart, making it an ideal vessel for the creamy filling and fresh fruit.
Silky, Decadent Pastry Cream: The Heart of the Tart
The true star hidden beneath the colorful fruit is the silky, rich pastry cream (also known as crème pâtissière). This decadent filling nestles perfectly within the baked tart shell, making its creamy, smooth presence known with every single bite. The taste is so profoundly delicious that you might, like me, find it hard to resist licking the remnants from the saucepan! Its creamy texture and rich flavor are expertly balanced by the natural sweetness and slight tang of the fresh fruit, creating a dessert that feels both indulgent and refreshing.
Vibrant Fresh Fruit: Nature’s Edible Jewels
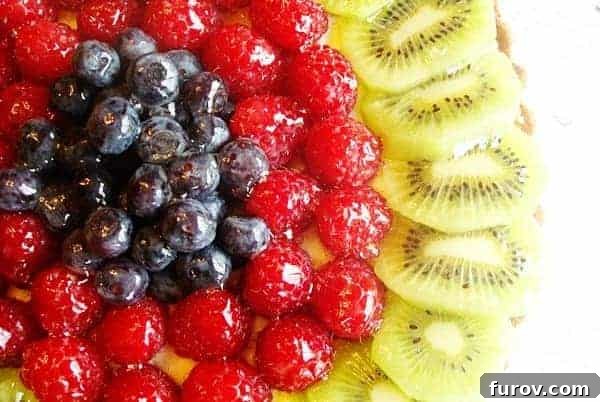
The crowning glory of any fresh fruit tart is, of course, the fruit itself. Opting for the freshest, ripest seasonal fruits not only enhances the flavor but also transforms the tart into a visual masterpiece. The selection of colorful berries and bright kiwi in this recipe provides a beautiful contrast against the pale pastry cream, making the tart truly pop. Each fruit contributes its unique sweetness and tartness, ensuring a dynamic and enjoyable experience with every forkful. The combination isn’t just delicious; it’s an edible work of art.
Making This Masterpiece: Effort That Pays Off
It’s true that crafting this tart demands a bit more time than simpler desserts. You’ll invest moments in preparing the pastry cream, chilling the dough, and carefully arranging the fruit. It might also require a few extra pennies to procure the finest, most vibrant fruits available. And for those less experienced with pastry, there might be a moment or two of gentle persuasion (or perhaps a silent curse!) while rolling out the delicate dough. But I assure you, the final result is an overwhelmingly rewarding experience that pays off immensely.
One of the most practical advantages of this recipe is its make-ahead potential. The delectable pastry cream can be prepared up to two days in advance, allowing its flavors to deepen and its texture to perfectly set. Similarly, the dough for the tart shell can be made and refrigerated for up to 48 hours, or even frozen for longer. This advance preparation significantly streamlines the assembly process, making it a breeze to put everything together right before dinner or an event. This flexibility ensures you can enjoy a fresh, impressive dessert without last-minute stress.
While this is certainly not an everyday indulgence, this Classic Fresh Fruit Tart has firmly earned its place in my culinary repertoire of “impress my guests… or just my kids” desserts. Even my toddlers, who are easily enchanted by simple things like a curvy ketchup design on their hot dog, were utterly captivated, oohing and aahing at the spectacular presentation of this vibrant tart.
One Year Ago: Black and White Cheesecake Squares
Two Years Ago: The Ultimate Beef Stroganoff
Classic Fresh Fruit Tart
Yield:
8 servings (one 9-inch tart)
Prep Time:
5 hrs 20 mins
Cook Time:
50 mins
Total Time:
6 hrs 10 mins
Pin
Ingredients
Pastry Cream:
- 2 cups whole milk or half-and-half
- ½ cup (106 g) granulated sugar
- Pinch table salt
- 5 large egg yolks, chalazae removed (see note below)
- 3 tablespoons cornstarch
- 4 tablespoons (56 g) unsalted cold butter, cut into 4 pieces
- 1 ½ teaspoons vanilla extract
Tart Pastry:
- 1 large egg yolk
- 1 tablespoon heavy cream, with 1-2 tablespoons additional, as needed
- ½ teaspoon vanilla extract
- 1 ¼ cups (178 g) all-purpose flour
- ⅔ cup (76 g) confectioners’ sugar
- ¼ teaspoon salt
- ½ cup (113 g) very cold butter, cut into 1/2-inch cubes
Fruit and Glaze:
- 2 large kiwis, peeled, halved and cut into half-moon slices
- 1 pint raspberries, blemished berries discarded
- ½ pint blueberries, sorted, discarding any stems or blemished berries
- ½ cup apple jelly
Instructions
-
For the Pastry Cream: Begin by gently heating the whole milk or half-and-half, 6 tablespoons of granulated sugar, and a pinch of salt in a medium heavy-bottomed saucepan over medium heat. Stir occasionally to ensure the sugar fully dissolves. Continue heating until the mixture reaches a gentle simmer. Meanwhile, in a separate medium bowl, thoroughly whisk the egg yolks until smooth. Add the remaining 2 tablespoons of sugar to the yolks and whisk vigorously for about 15 seconds, until the sugar begins to dissolve and the mixture becomes creamy and pale. Finally, whisk in the cornstarch until it’s fully combined, creating a thick, pale yellow mixture in about 30 seconds.
-
Once the milk mixture reaches a full simmer, carefully temper the egg yolk mixture. To do this, gradually whisk about half of the hot milk mixture into the egg yolks in a slow, steady stream. This slowly raises the temperature of the eggs without scrambling them. Once tempered, pour the entire egg-milk mixture back into the saucepan, scraping the bowl with a rubber spatula to ensure all ingredients are included. Return the saucepan to medium heat, and whisk constantly (this step is crucial – do not stop stirring!) until 3 or 4 large bubbles burst on the surface, indicating the cream has thickened and become glossy, which usually takes about 30 seconds to one minute. Immediately remove from heat and whisk in the cold butter pieces and vanilla extract until fully incorporated and smooth. Transfer the hot pastry cream to a clean medium bowl. To prevent a skin from forming, press plastic wrap directly onto the surface of the cream. Refrigerate for at least 3 hours, or up to 48 hours, until the pastry cream is thoroughly cold and set.
-
For the Tart Pastry: While the pastry cream chills, prepare your tart dough. In a small bowl, whisk together the egg yolk, 1 tablespoon of heavy cream, and vanilla extract; set this aside. In a larger bowl, combine the all-purpose flour, confectioners’ sugar, and salt. Scatter the very cold, cubed butter pieces over the dry ingredients. Using two knives or a pastry blender (or pulse briefly in a food processor), cut the butter into the flour mixture until it resembles coarse meal with some pea-sized pieces of butter remaining. Add the egg mixture to the flour and butter. Using your fingertips or a wooden spoon, gently mix the ingredients just until they come together to form a cohesive dough. If the dough appears too dry and crumbly, add additional heavy cream, ½ tablespoon at a time, until the dough is just moistened enough to hold together. Turn the dough out onto a sheet of plastic wrap and press it into a 6-inch disk. Wrap it completely in the plastic and refrigerate for at least 1 hour, or up to 48 hours, to allow the butter to firm up and the gluten to relax.
-
Remove the chilled dough from the refrigerator. If it has been refrigerated for longer than an hour, let it stand at room temperature for about 10-15 minutes until it softens slightly and is pliable enough to roll without cracking. Unwrap the dough and place it between two lightly floured large sheets of parchment paper or plastic wrap. Roll the dough out evenly until it forms a 13-inch diameter circle. Carefully transfer the rolled dough to a 9- to 9½-inch tart pan with a removable bottom. The easiest way is to loosely roll the dough around your rolling pin and then unroll it over the tart pan. Gently ease the dough into the pan corners, lifting the dough with one hand while pressing it into the fluted sides of the pan with the other. Ensure the dough is pressed firmly against the sides without stretching. If any edges appear too thin, reinforce them by folding excess dough back onto itself. Once the dough is properly seated, run the rolling pin over the top edge of the tart pan to cleanly remove any excess dough. Place the dough-lined tart pan on a large plate and freeze for 30 minutes. This freezing step is crucial for preventing shrinkage during baking. (Alternatively, the unbaked tart shell can be sealed in a gallon-sized zipper-lock plastic bag and frozen for up to 1 month for future use.)
-
While the tart shell is freezing, adjust an oven rack to the middle position and preheat your oven to 375°F (190°C). Once the tart shell is frozen, place the dough-lined tart pan on a sturdy baking sheet. Press a large piece of aluminum foil snugly inside the frozen shell, extending it over the edges of the pan (use two overlapping pieces of foil if one isn’t large enough). Fill the foil-lined shell with pie weights or dry beans (which are a great, reusable alternative if you don’t have pie weights). This technique, known as blind baking, prevents the crust from puffing up and ensures an even bake. Bake the shell for about 30 minutes, or until the edges are golden brown. Carefully remove the tart from the oven and, by gathering the edges of the foil, lift out the foil and pie weights. Return the crust to the oven and continue to bake for another 3-5 minutes, or until the bottom is light and golden brown. This second bake ensures a fully cooked and crisp crust. Transfer the baking sheet with the tart shell to a wire rack and allow it to cool completely to room temperature, which will take approximately 30 minutes.
-
To Assemble and Glaze the Tart: Once the tart shell has cooled completely, retrieve the chilled pastry cream from the refrigerator. Spread the cold pastry cream evenly over the bottom of the cooled tart shell using an offset spatula or a large spoon, creating a smooth layer. At this point, if you’re not serving immediately, you can press plastic wrap directly onto the surface of the pastry cream and refrigerate the filled shell for up to 30 minutes. Now, it’s time for the artistic part: arranging the fresh fruit on top of the pastry cream. Start by arranging the kiwi slices in an overlapping circle along the outside edge of the tart. Next, create two tight rings of raspberries just inside the kiwi circle, using the taller berries to form the inner ring for added dimension. Finally, pile the blueberries generously in the center of the tart, creating a beautiful domed effect. Feel free to be creative with your fruit arrangement using any combination of seasonal fruits you love!
-
For the final glistening touch, prepare the apple jelly glaze. In a small saucepan, bring the apple jelly to a boil over medium-high heat, stirring occasionally to smooth out any lumps. Once it is boiling and completely melted into a liquid consistency, gently apply the warm jelly to the fruit on the tart. Use a pastry brush to dab and flick the glaze onto the fruit, ensuring an even, glossy coat. The glaze not only adds a beautiful shine but also helps to preserve the fruit’s freshness and adds a subtle layer of sweetness. If the jelly becomes too thick to drizzle or brush during application, simply add 1 teaspoon of water and return it to a boil briefly to thin it out. The finished tart can be refrigerated, uncovered, for up to 30 minutes before serving.
-
To serve your stunning Classic Fresh Fruit Tart, carefully remove the outer metal ring of the tart pan. Then, slide a thin metal spatula between the bottom of the crust and the tart pan bottom to gently release it. Carefully transfer the tart onto a cardboard round or your preferred serving platter. Using a sharp, serrated knife, cut the tart into individual pieces and serve immediately to enjoy its fresh, vibrant flavors and textures.
Notes
Chalazae: The recipe instructs to remove the chalazae from the egg yolks. If you’re wondering what these are, don’t be alarmed! Chalazae are simply the two spiral, cord-like strands of egg white protein that anchor the yolk in the center of the egg. They can be easily removed with your fingers or a fork. Removing them ensures an even smoother, silkier pastry cream, eliminating the need to strain the cream after it’s cooked.
Pastry Cream Storage: The pastry cream is wonderfully versatile and can be made up to 48 hours in advance. Just be sure to keep it refrigerated with plastic wrap pressed directly on its surface. However, to maintain the crispness of the tart shell and the freshness of the fruit, do not fill the prebaked tart shell with the pastry cream until 30 minutes or less before you plan to serve.
Serving Presentation & Pan Types: For the best experience, once filled, topped with fruit, and glazed, the tart should be served within about 30 minutes to an hour. This recipe is designed for a traditional tart pan with a removable bottom, which allows for that elegant, freestanding presentation. While it’s possible to make this tart in a similar-sized pie plate, keep in mind that the presentation won’t be quite as refined since the sides of a pie plate cannot be removed.
Author:
Mel
Course:
Dessert
Cuisine:
American
Method:
Bake
Nutrition Information (Approximate per serving)
Serving:
1 Serving
,
Calories:
530 kcal
,
Carbohydrates:
73 g
,
Protein:
7 g
,
Fat:
24 g
,
Saturated Fat:
14 g
,
Cholesterol:
193 mg
,
Sodium:
217 mg
,
Fiber:
6 g
,
Sugar:
44 g
Recommended Products
Recipe Source: adapted from Cook’s Illustrated Entertaining Spring 2010
Other Recipes You Might Enjoy: