
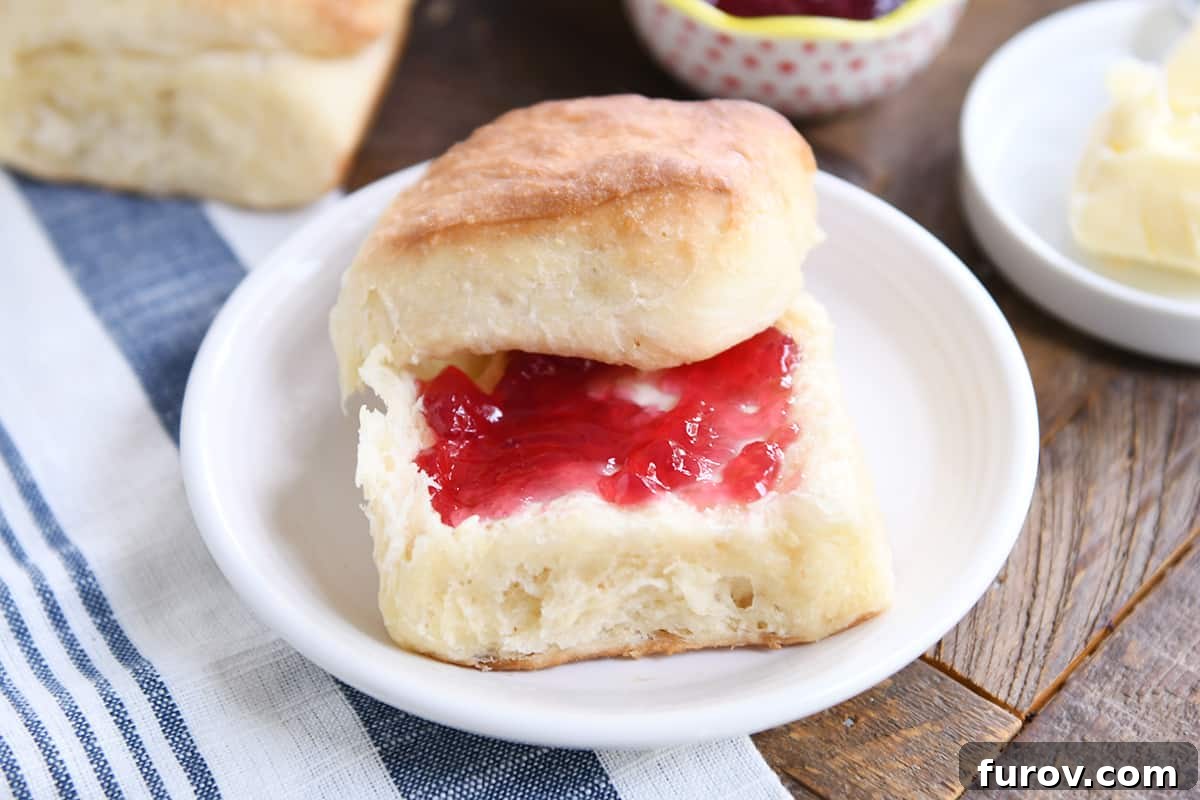
Discover the secret to incredibly soft, fluffy, and effortlessly easy dinner rolls with this game-changing blender recipe. No kneading, no stand mixer – just perfect homemade rolls every time!
For home bakers, the quest for the ultimate dinner roll can be a lifelong journey. Many recipes promise ease, but few deliver the truly light and fluffy texture without demanding extensive kneading or specialized equipment. If you’ve been searching for that magical recipe, your search ends here. Prepare to be amazed by these easy fluffy blender rolls – a recipe so revolutionary, it deserves to be shared with everyone.
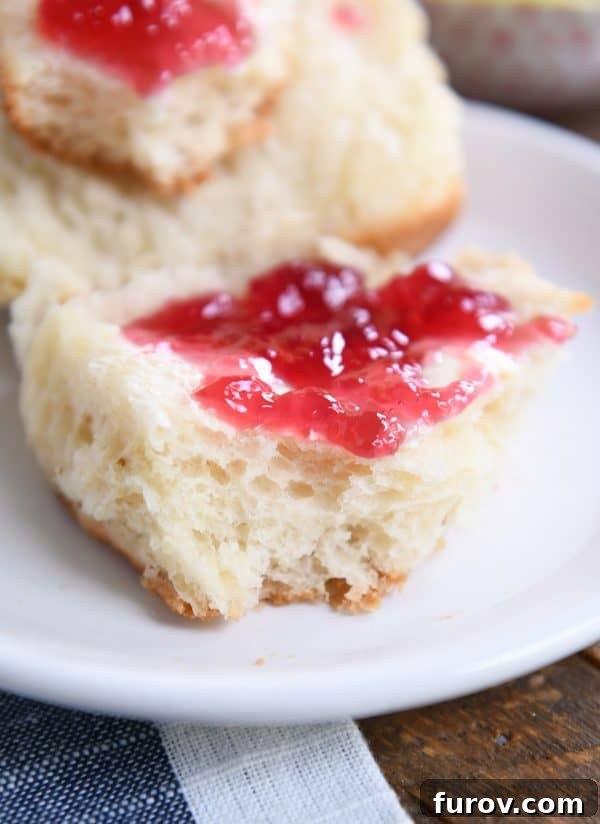
Truly, this roll recipe is a revelation. Given the minimal effort required – we’re talking about roughly 10 minutes of active preparation time for the dough – the results are simply astounding. These are, without a doubt, the fluffiest rolls you will ever bake at home, rivaling those from your favorite bakery.
The magic lies in the method: the wet ingredients are quickly emulsified in a blender, then everything is gently combined by hand in a large bowl. No arduous kneading. No heavy stand mixer. The process is so straightforward, even novice bakers will feel like seasoned pros. This hands-off approach not only saves time but also makes the entire baking experience incredibly enjoyable.
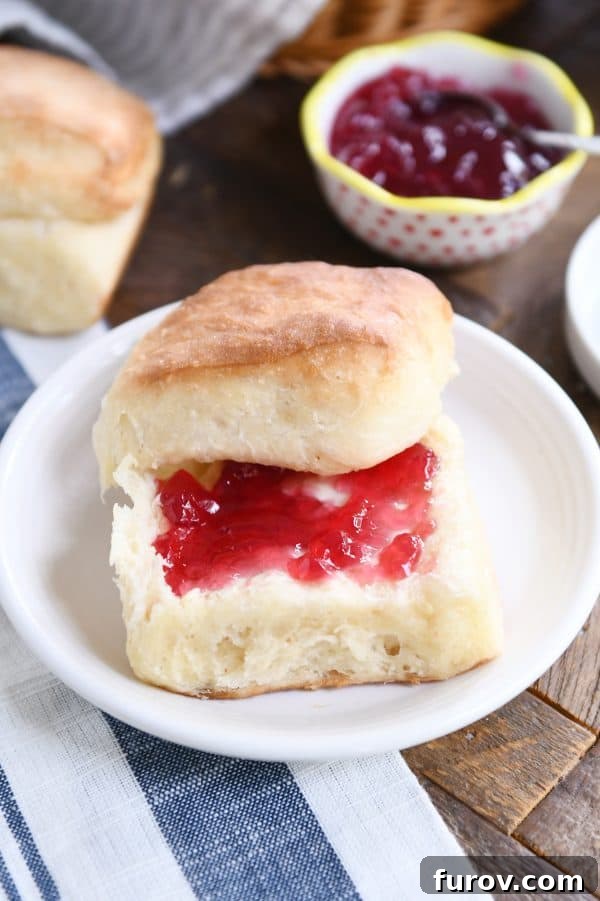
This extraordinary recipe was generously shared by a fantastic reader, Marci T., who sent in her “blender rolls” recipe. Initially, I noted similarities to classic Parker House rolls in terms of ingredients. However, I was immediately captivated by two key differences: the complete elimination of a stand mixer and the clever integration of a blender. It didn’t take long for me to be utterly won over.
These easy fluffy blender rolls are truly extraordinary. I’ve made them countless times over the past year, and each batch consistently impresses with its incredible softness and airy texture. They’ve quickly become a staple in my kitchen, perfect for everyday meals and special occasions alike. In fact, these will be the undisputed stars of my Thanksgiving table this year. Their delicate structure makes them ideal for splitting and buttering, and I can already envision them forming the base of the most fantastic leftover turkey sandwiches.
The Genius of Blender Dinner Rolls: Crafting Perfect Dough with Ease
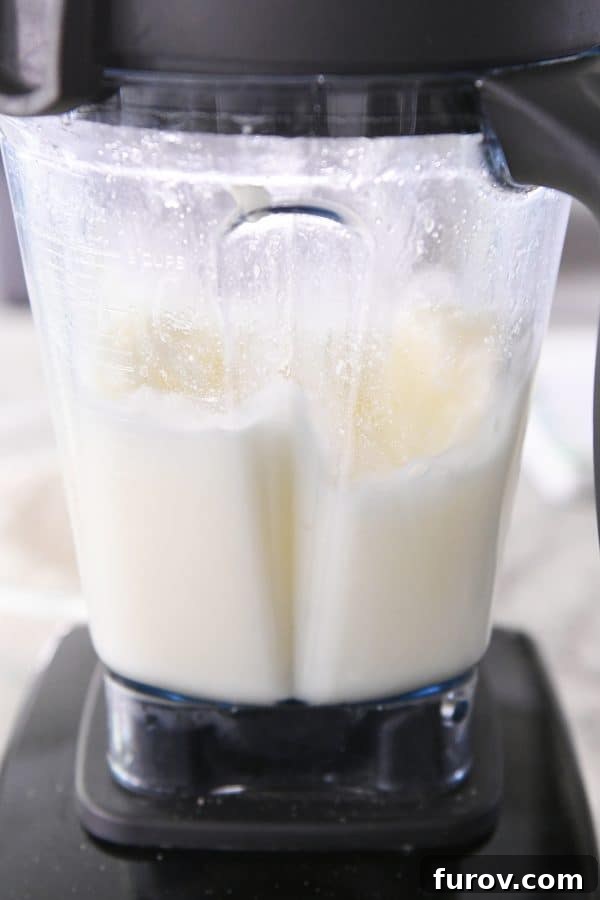
The innovation of this recipe begins with the blender. All wet ingredients, along with sugar and salt, are quickly combined there, creating a smooth and cohesive base that would typically require extensive mixing and kneading. This step is crucial for the rolls’ signature fluffiness.
Blending the Foundation
Into your blender, combine:
- Hot water (directly from the tap is usually sufficient – aim for very warm, not boiling)
- Butter (no need to soften or cut; toss it in straight from the fridge!)
- Granulated sugar
- Salt
- Eggs (add these after the initial blend of the first four ingredients for a few seconds)
The blender truly makes a remarkable difference here. By blending these ingredients until they are frothy and perfectly emulsified, you create a smooth, homogenous mixture that lays the groundwork for incredibly light and airy rolls. This aeration process, combined with the gentle melting of the butter, contributes significantly to the final fluffy texture, eliminating the need for vigorous kneading.
Combining and Rising the Dough
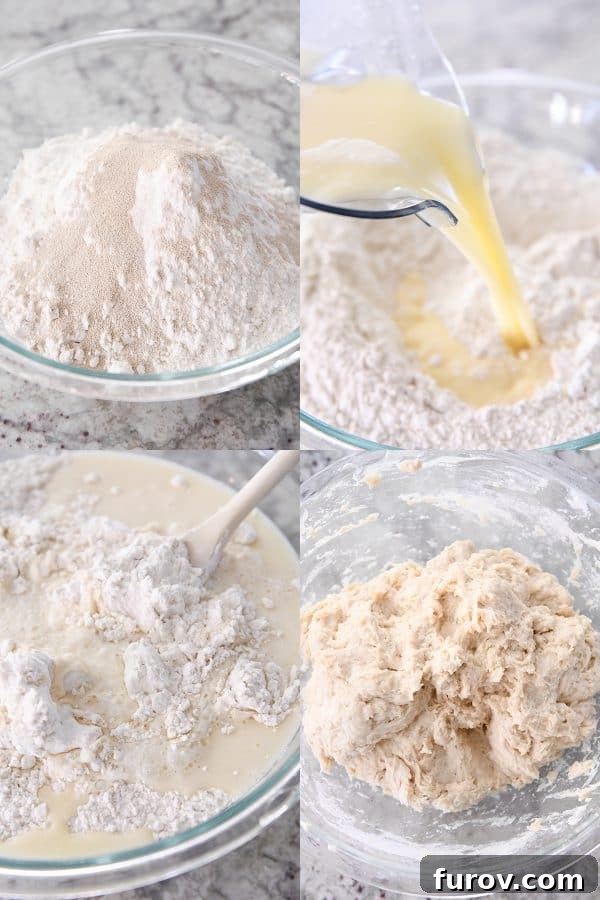
Once your wet ingredients are perfectly blended, pour this mixture directly over the flour and yeast in a large mixing bowl. Gently stir everything together by hand with a spoon or spatula until all dry streaks of flour have disappeared. It’s important not to overmix or knead the dough at this stage; a gentle stir is all that’s needed.
The resulting dough will be noticeably soft, slightly sticky, and might have a few small bumps – this is exactly what you want. Cover the bowl and let it rise in a warm spot until it has become visibly puffy and approximately doubled in size. This usually takes about 1.5 to 2 hours, depending on the warmth of your kitchen environment. A slightly warmer kitchen can expedite the rising process.
Shaping Options: Classic Parker House Style
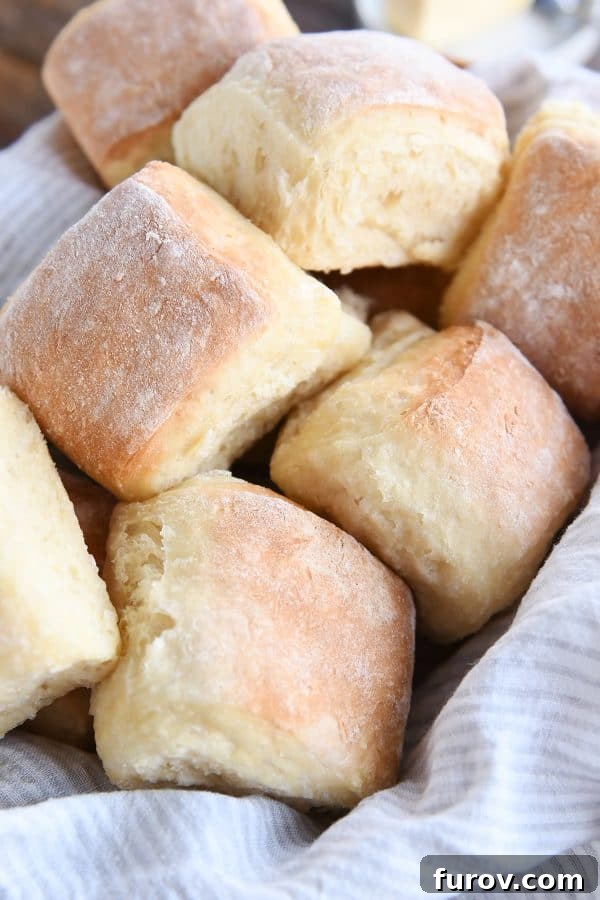
While classic Parker House rolls are often cut into circles, I prefer a slightly easier and equally delightful approach: rectangular rolls. This simple modification still yields that iconic folded appearance but streamlines the shaping process significantly. This method ensures uniform size and a beautiful presentation.
Step-by-Step Parker House Shaping
- Begin by dividing your risen dough into two equal pieces.
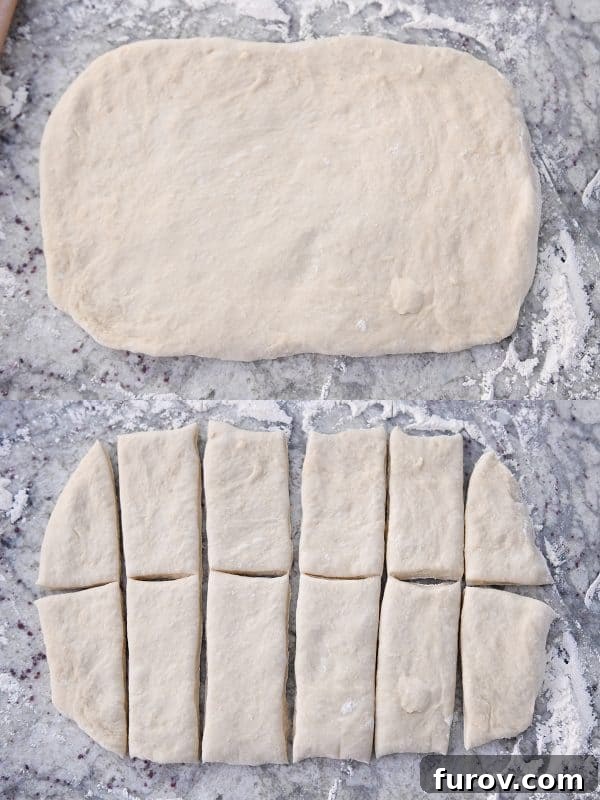
- The dough will be quite soft and sticky, so lightly flour your work surface. Roll one piece of dough into a thick rectangle, aiming for dimensions of approximately 9×14 inches. Remember, a slightly thicker rectangle will result in fluffier rolls, so aim for about 1/4-inch thick or a touch more.
- Using a pizza cutter or a sharp knife, cut the rectangle in half lengthwise. Then, cut each of these halves into six equal rectangle pieces. This will give you 12 pieces from each half of the dough.
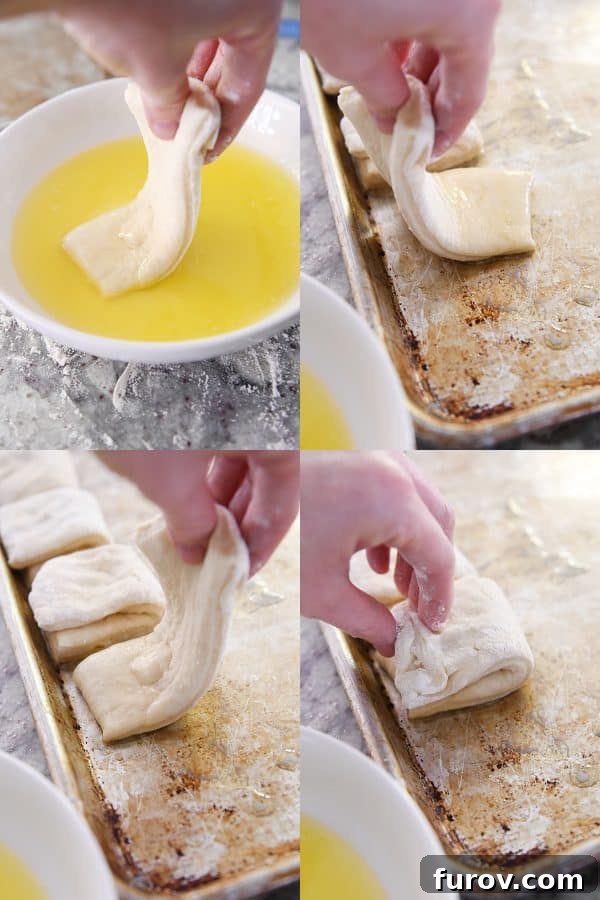
- Melt 6 tablespoons of butter (as specified in the recipe card). Dip the bottom of each rectangular piece of dough into the melted butter.
- Transfer the buttered dough piece to a half-sheet pan. Swipe the buttered end back and forth a few times on the pan to ensure a good butter coating, then fold the dough in half. Arrange the folded rolls about 1/4-inch apart on the baking sheet to allow for expansion. Repeat with the remaining dough.
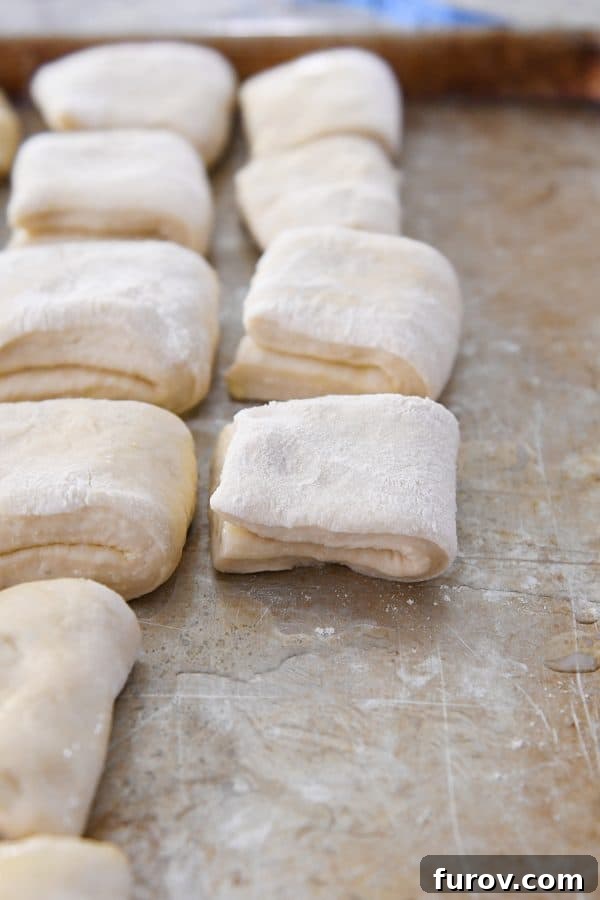
Shaping Options: Elegant Crescent Style
For those times you desire a slightly more elegant presentation, these rolls can also be shaped into beautiful crescents. This method is equally simple and yields a stunning result that’s perfect for a fancier meal or holiday spread.
Step-by-Step Crescent Shaping
- Again, on a lightly floured counter, split your dough in half.
- Roll each half into a thick circle, approximately 14 inches in diameter.
- Brush the entire surface of the rolled dough with melted butter.
- Using a pizza cutter, cut the circle into 12 equal triangles, much like slicing a pizza.
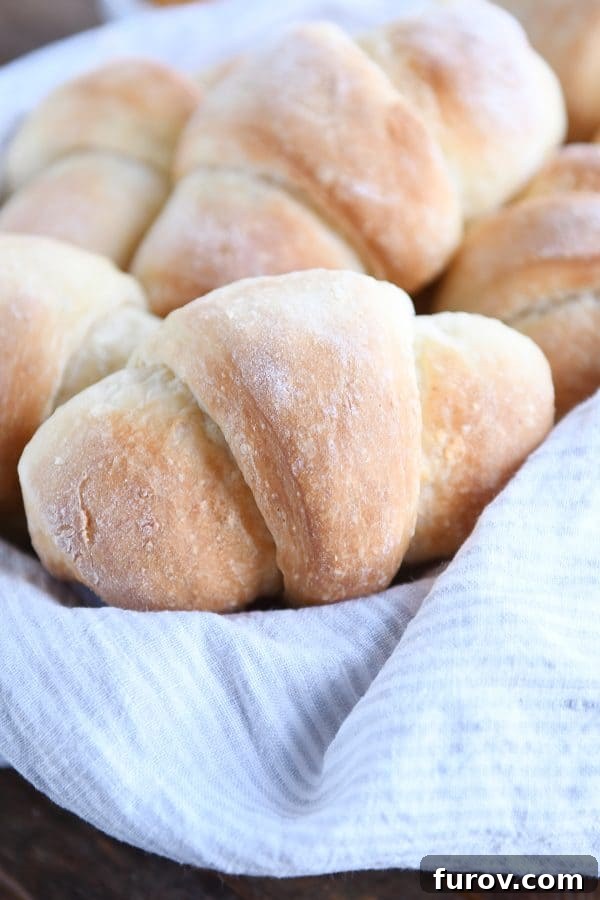
- Starting from the wide end of each triangle, gently roll it up towards the point, forming a crescent shape.
- Place the crescent rolls on a parchment-lined half sheet pan, ensuring they have a little space between them for rising. Repeat with the remaining dough.
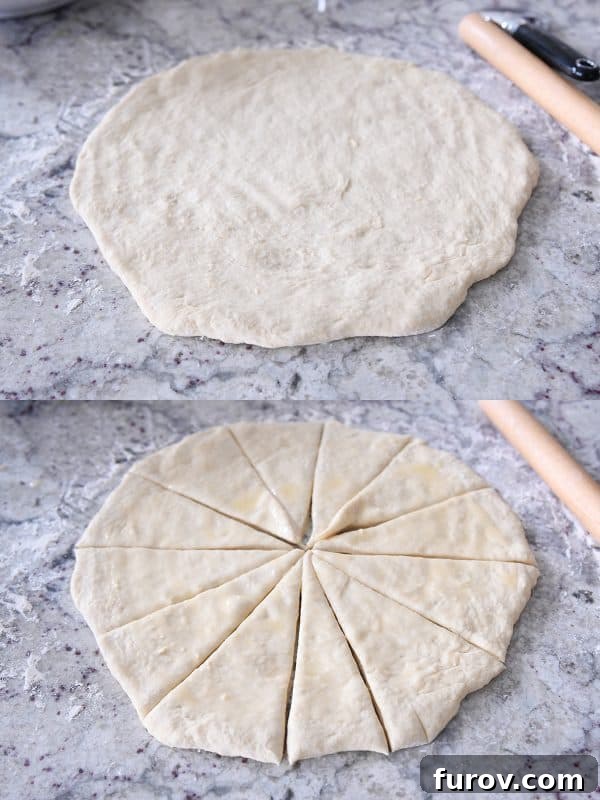
Final Rise and Baking Perfection
After shaping, your rolls need one last crucial rise to develop their full potential for fluffiness. Cover the shaped rolls lightly and allow them to rise again until they are noticeably puffy. They might not quite double in size again, but they should look full and airy. This usually takes about 1.5 hours.
Preheat your oven to 375 degrees Fahrenheit (190°C). Bake the rolls for 15-18 minutes, or until they turn a beautiful golden brown on top and around the edges. Keep a close eye on them during the final minutes to prevent over-browning.
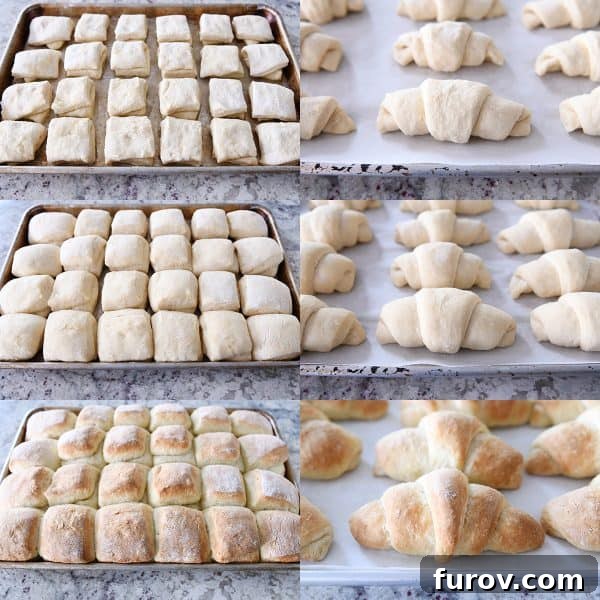
Once your irresistible rolls emerge from the oven, you have a choice: either brush their warm tops with a little extra melted butter for an added touch of richness and shine, or leave them as is for that delightful, lightly floured bakery-style finish. Either way, they’re guaranteed to be a hit!
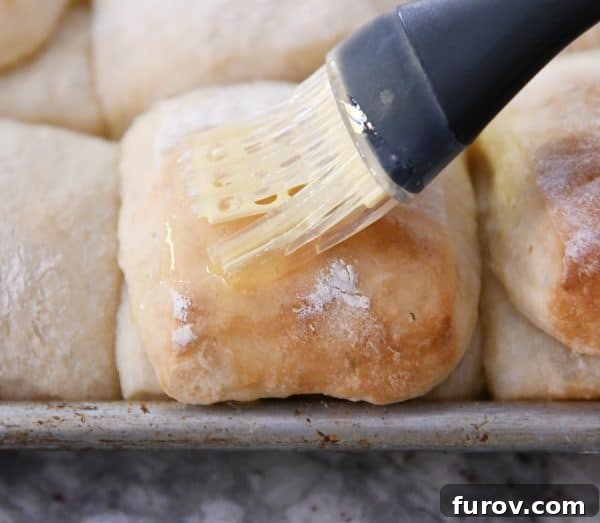
Tips for Achieving Perfectly Golden Rolls
It’s a common baking dilemma: your rolls taste fantastic, but they emerge from the oven looking a bit pale. Fear not! Achieving that desirable golden-brown crust is easily within reach with a few simple adjustments. Here are some reliable tips to help your easy fluffy blender rolls achieve their full golden potential:
- Increase Oven Temperature: Many ovens vary, and sometimes a slightly higher temperature can make all the difference. Try baking your rolls at 375°F (190°C) or even 400°F (200°C). Always monitor closely to prevent burning, especially at higher temperatures.
- Resist Opening the Oven Door: Every time you open the oven door, a significant amount of heat escapes, dropping the internal temperature and hindering the browning process. Use your oven light to check on the rolls, and only open the door when necessary.
- Adjust Oven Rack Position: Bread and rolls tend to brown more effectively when positioned slightly above the middle rack. Experiment by moving your oven rack up one notch from the center to see if it improves coloration.
- Extend Baking Time Slightly: If your rolls are cooked through but still lack color, simply add an extra 1-2 minutes to the baking time. This small adjustment can often lead to that perfect golden hue without drying them out.
- Egg Wash (Optional): For an even richer, glossier golden finish, you can lightly brush the tops of the rolls with an egg wash (one egg whisked with a tablespoon of water or milk) before baking.
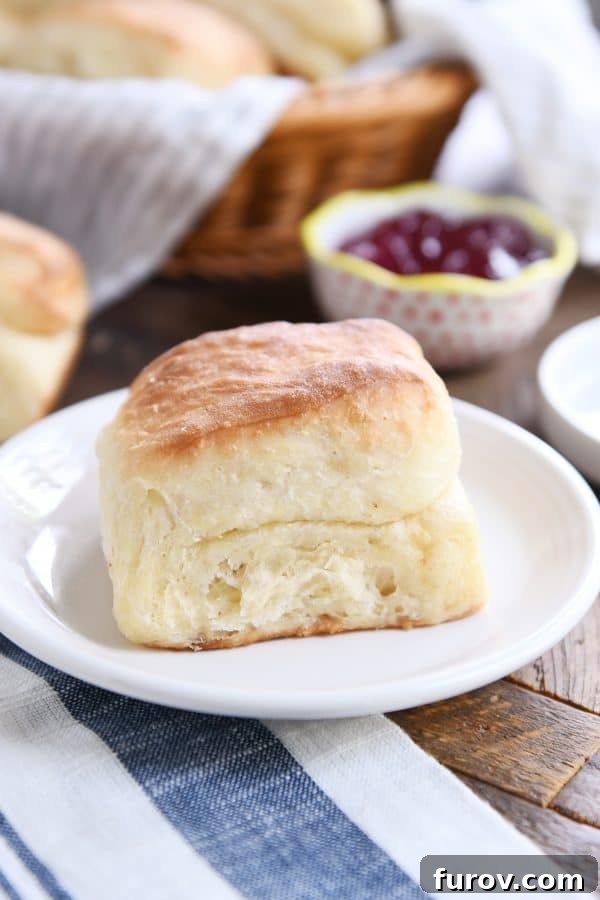
I hope the images and detailed descriptions vividly convey just how wonderfully fluffy and truly amazing these easy blender rolls are. The consistent softness and delicate crumb are unmatched, making them a standout recipe.
My Aunt Marilyn, whose culinary opinions are always held in high regard, declared these the best rolls she had ever tasted. Coming from a seasoned home cook, that’s an endorsement that speaks volumes!
Beyond being exceptional dinner rolls, the versatility of this dough is another highlight. Marci, the brilliant reader who shared this recipe, revealed that this very dough makes fantastic cinnamon rolls and even orange rolls. Imagine the possibilities!
These easy fluffy blender rolls are, without exaggeration, some of the most overachieving, perfect rolls you’ll ever encounter. They’re straightforward enough for those new to bread making, yet exciting and rewarding for even the most expert bakers. I genuinely hope you give them a try and fall in love with them as much as I have!
Frequently Asked Questions About Fluffy Blender Rolls
Do these rolls freeze well?
Yes, the baked and completely cooled rolls freeze exceptionally well! Simply place them in an airtight freezer-safe bag or container. I haven’t experimented with freezing the dough unbaked or freezing shaped rolls before their final rise, so I recommend freezing them after baking for best results.
How can I make them ahead of time?
You can prepare the dough, shape the rolls, and then place them on a sheet pan. Cover them tightly with plastic wrap and refrigerate immediately (before they have their second rise) for up to 24 hours. The rolls may undergo a slight rise in the refrigerator. Before baking, take them out to come to room temperature and finish rising, then bake as directed in the recipe.
How come my rolls aren’t browning on top?
Several factors can affect browning. Try baking at a slightly higher temperature, such as 375°F or 400°F (190-200°C). Avoid opening the oven door frequently, as this releases crucial heat. You might also try placing an oven rack a little higher in the oven, as bread and rolls often brown better above the halfway point. Finally, adding just 1-2 minutes to the total baking time can make a significant difference to achieve that golden finish.
Can I double the recipe?
Absolutely! This recipe doubles beautifully, and I often make a double batch myself. When doubling, simply double all ingredients straight across, with one exception: for the yeast, use 2.5 tablespoons of instant yeast for a double batch instead of a full 3 tablespoons (which would be double the original 1.5 tablespoons).
Can I use active dry yeast instead of instant yeast?
Yes, you can! The key difference is that active dry yeast typically needs to be dissolved and “proofed” in warm liquid before being combined with dry ingredients, whereas instant yeast can be added directly. To adapt this recipe for active dry yeast, follow these steps: after blending the water, butter, sugar, salt, and eggs, add the active dry yeast to the blender mixture and blend for just a few seconds to dissolve it before pouring it over the flour.
Can I use whole wheat flour?
While I haven’t tested this recipe with 100% whole wheat flour, I have successfully substituted two cups of white all-purpose flour with two cups of whole wheat flour. The results were great! For a lighter and less dense roll, I highly recommend using white whole wheat flour rather than red whole wheat flour, as it tends to have a milder flavor and softer texture.
More Delicious Roll Recipes You Might Love:
Easy Fluffy Blender Rolls Recipe
Yield: 24 rolls
Prep Time: 3 hours
Cook Time: 17 minutes
Total Time: 4 hours 17 minutes
Ingredients
- 2 ½ cups hot water (not boiling; just the hottest water from your tap)
- ½ cup (113 g) salted butter
- ⅓ cup (71 g) granulated sugar
- 2 teaspoons salt
- 2 large eggs
- 7 cups (994 g) all-purpose flour (see notes for measuring and flour types)
- 1 ½ tablespoons instant yeast (see notes for active dry yeast conversion)
- 6 tablespoons butter, melted (for dipping/brushing rolls)
Instructions
- To a blender, add the hot water, butter (you can add the whole stick), sugar, and salt. Blend for 10-15 seconds until the butter is mostly melted and ingredients are well-combined. Add the eggs and blend until the mixture is smooth and frothy.
- In a large mixing bowl, whisk together the flour and instant yeast until thoroughly combined.
- Pour the blended wet ingredients over the flour and yeast mixture. Stir with a spoon or your hands until all ingredients are just combined and no dry streaks of flour remain. The dough will be soft, sticky, and slightly bumpy. Avoid overmixing.
- Cover the bowl loosely with plastic wrap or a clean kitchen towel. Let the dough rise in a warm place until it is noticeably puffy and has approximately doubled in size, typically 1 ½ to 2 hours, depending on your kitchen’s temperature.
- Once risen, gently divide the dough in half.
- For Folded Square Rolls (Parker House Style): On a lightly floured counter, roll one half of the dough into a thick rectangle, about 9×14 inches. Cut this rectangle in half lengthwise, then cut each half into six rectangular pieces (totaling 12 pieces from this half of the dough). Dip the bottom of each piece into the 6 tablespoons of melted butter. Place the buttered end on a half-sheet pan and fold the dough in half, arranging the rolls about ¼-inch apart. Repeat with the remaining dough.
- For Crescent Rolls: On a lightly floured counter, roll one half of the dough into a thick circle, approximately 14 inches in diameter. Brush the surface with melted butter. Using a pizza cutter, cut the circle into 12 equal triangles. Starting from the wide end of each triangle, roll it up towards the point to form a crescent. Place these on a parchment-lined half-sheet pan. Repeat with the remaining dough.
- Cover the shaped rolls lightly and let them rise again in a warm spot until they are puffy, which usually takes about 1 ½ hours.
- Preheat your oven to 375°F (190°C). Bake the rolls for 15-18 minutes, or until they are golden brown on top. If desired, brush the tops of the warm, baked rolls with extra melted butter for shine and flavor.
Notes
- Yeast: This recipe uses instant yeast. If using active dry yeast, incorporate it into the blender at the very end after adding the eggs, and blend for just a second or two to ensure it dissolves before combining with the flour.
- Flour: For best results with unbleached all-purpose flour, measure it by fluffing it first, then spooning it into a measuring cup and leveling off with a straight edge. Packing the flour can lead to dry, dense rolls. For a whole wheat option, substituting up to two cups of white flour with white whole wheat flour works well for a lighter result than red whole wheat flour.
- Freezing: Baked and cooled rolls freeze excellently. Thaw at room temperature. To gently warm, place in a 200°F (95°C) oven for 10-15 minutes, being careful not to dry them out. Freezing unbaked dough or shaped rolls has not been tested for this recipe.
- Doubling: This recipe is easily doubled. For a double batch, use 2 ½ tablespoons of instant yeast and double all other ingredients directly.
Author: Mel
Course: Bread
Cuisine: American
Method: Bake
Nutrition Facts (per serving)
Serving: 1 Roll, Calories: 186kcal, Carbohydrates: 31g, Protein: 4g, Fat: 5g, Saturated Fat: 3g, Cholesterol: 24mg, Sodium: 239mg, Fiber: 1g, Sugar: 3g
Recommended Baking Products
- Mixing Bowl
- Rolling Pin
- Pizza Cutter
- Cookie Sheet (Half Sheet Pan)
Recipe Source: Adapted slightly from a fantastic home baker, Marci T. (Thank you, Marci, for this life-changing recipe!)