
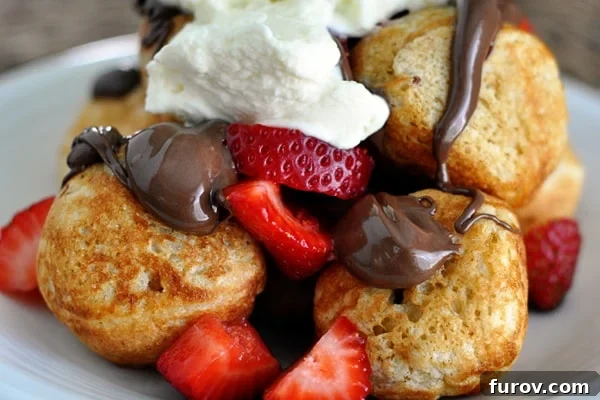
Ebelskivers, the delightful Danish puffed pancakes, are a culinary revelation waiting to be discovered. Perfectly round, golden, and often filled with sweet or savory surprises, these spherical treats elevate any breakfast or brunch. This comprehensive guide will walk you through everything you need to know about making ebelskivers, from mastering the technique to exploring various filling and topping ideas.
A few years ago, when I casually posed the question, “Do you ebelskiver?” on social media, I was genuinely astonished by the enthusiastic response. Many of you instantly recognized these unique Danish delicacies, a clear sign that we share a deep appreciation for exceptional breakfast fare.
For those unfamiliar, a wave of curiosity washed over the comments, and for that, I adore you. Trust me, embarking on the journey of ebelskiver-making is a decision you won’t regret. These aren’t just pancakes; they’re an experience, a delightful fusion of tradition and innovation that promises to become a cherished part of your culinary repertoire.
The Genesis of a Breakfast Obsession: My Ebelskiver Story
My own love affair with ebelskivers began many years ago, during our annual cross-country migrations from Texas to Idaho to visit my incredible Uncle Dan and Aunt Marilyn. I must have been around nine years old, a time when imagination knows no bounds, and the world is full of wonder. I vividly remember sitting at their breakfast table, watching Uncle Dan skillfully turn these magical, puffy spheres in a special pan. To my young mind, knowing how to transform liquid batter into perfect, fluffy pancake balls was nothing short of a superpower. Uncle Dan and Aunt Marilyn, in that moment, became the coolest people in the universe.
Since that transformative childhood experience, ebelskivers have been a beloved staple in our family. They were a regular feature in the home I grew up in, and now, they bring joy to my own little family. While many associate ebelskivers with elaborate holiday brunches or special Christmas morning traditions, we’ve integrated them into our regular routine. They frequently grace our table on lazy Sunday afternoons, offering a simple yet satisfying alternative to a large, traditional Sunday meal.
It seems the allure of ebelskivers is hereditary. My nine-year-old son, Jackson (perhaps it’s the age!), has developed a keen interest in “ebelskivering” – yes, we’ve coined a term for it! He’s become quite adept at rotating the pancakes in the specialized pan, freeing me up for other crucial tasks, such as, you know, ensuring no trace of Nutella is left in the jar.
What Exactly Are Ebelskivers? A Danish Delight Explained
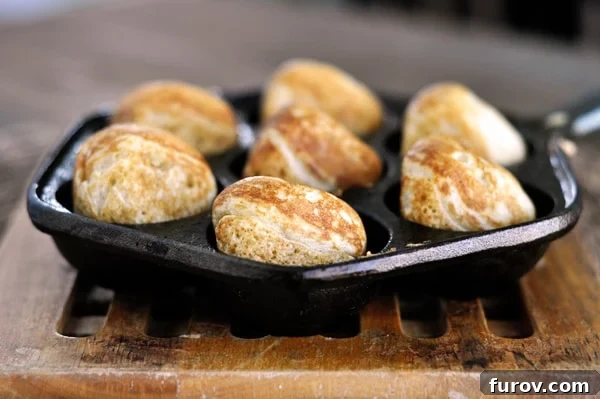
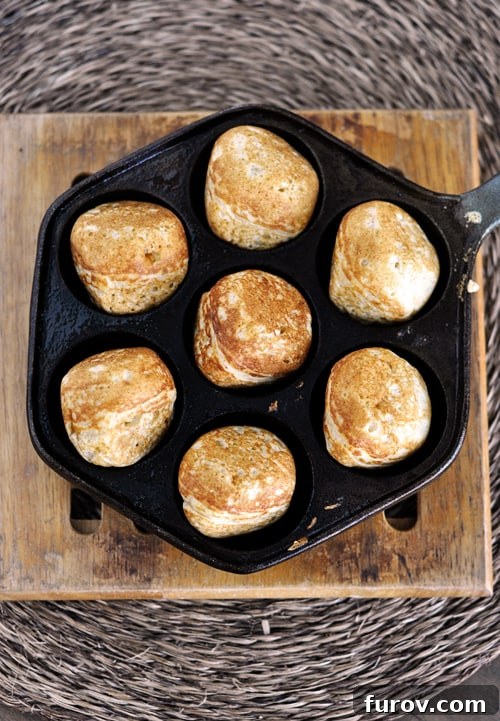
At its heart, an ebelskiver is a Danish pancake, but it’s far from your average flat flapjack. These delightful treats are cooked in a unique cast iron pan, featuring several hemispherical indentations that transform liquid batter into wonderfully fluffy, spherical pillows. The beauty of ebelskivers lies not only in their charming appearance but also in their versatility. They can be savored simply, drizzled with warm maple syrup or dusted with powdered sugar, offering a taste of pure, fluffy bliss. However, their true magic often comes from what lies within.
Endless Possibilities: Filling and Topping Your Ebelskivers
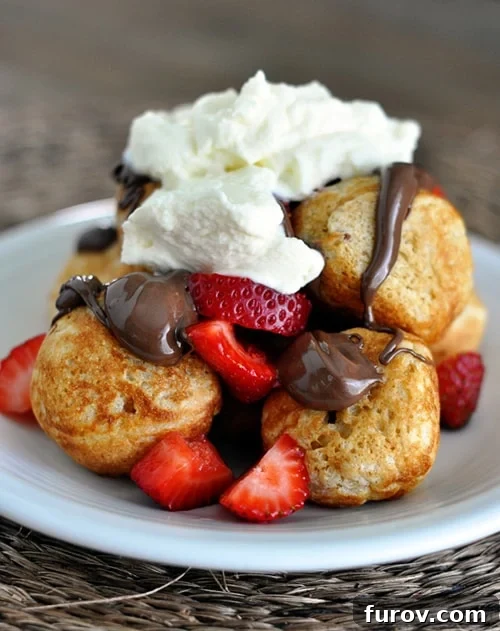
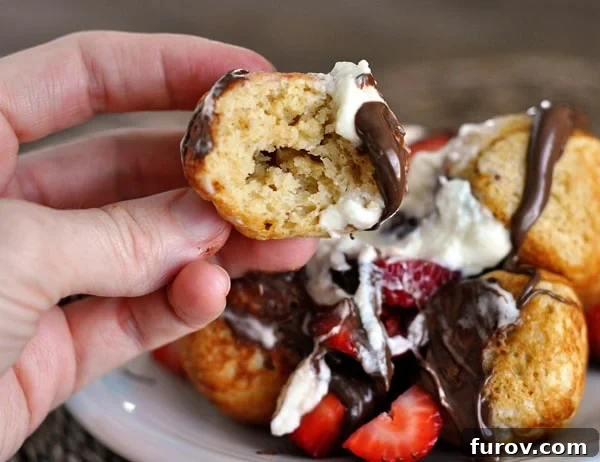
The spherical shape of ebelskivers makes them perfect for stuffing. Imagine biting into a warm, tender pancake ball to discover a molten core of sweetened cream cheese, a burst of fresh fruit, or a luscious dollop of Nutella or other chocolatey decadence. The possibilities for customization are truly endless. You can go all out with gourmet fillings and elaborate toppings, or keep it wonderfully simple with a sprinkle of sugar and a side of fresh berries. Whether you prefer sweet or savory, ebelskivers provide the perfect canvas for your culinary creativity.
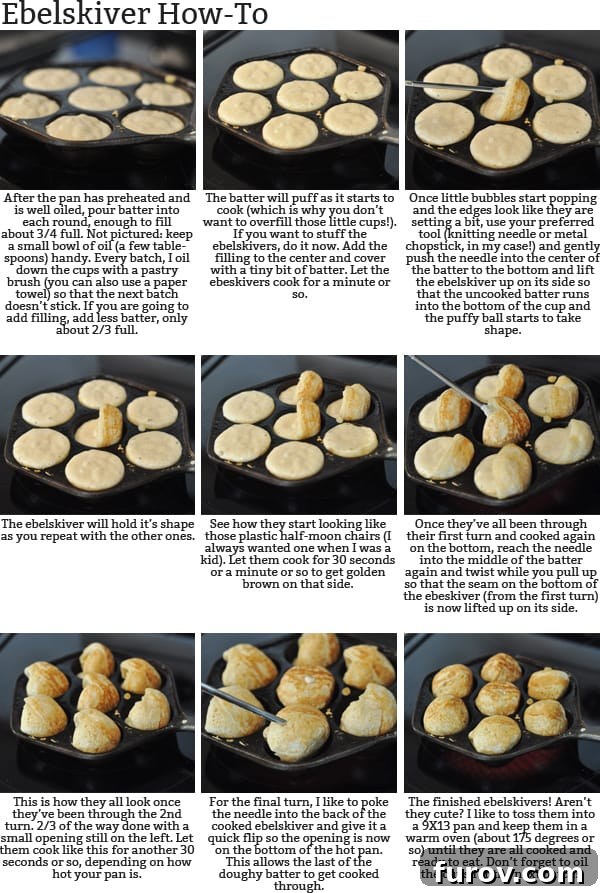
As you’ll see in the step-by-step pictures below, the transformation is quite captivating. The runny batter slowly puffs up, forming perfect golden spheres that are cooked to perfection. The process itself is part of the fun, a testament to the simple joy of creating something beautiful and delicious from scratch.
The Art of the Turn: Tools and Technique
A crucial part of making ebelskivers is turning them at just the right moment to ensure even cooking and their signature spherical shape. Over the years, we’ve experimented with various tools. Our go-to implements are often a trusty knitting needle – a fitting choice, perhaps, given my numerous (and failed) attempts at knitting. At least these needles serve a far better purpose than being flung across the room in frustration! Alternatively, the metal chopsticks my brother brought back from Korea years ago also work wonders. It just goes to show you how resourceful one can be with slender metal objects, doesn’t it?
Ebelskivers: More Than Just Food, It’s a Connection
If you’ve spent any significant time with our family, chances are you’ve enjoyed ebelskivers at our house. There’s something inherently bonding about sharing these unique treats. It’s been said that the best friendships are forged over good food, and in our experience, nothing solidifies a connection quite like “ebelskivering” together.
A Journey Through Time: More From Our Archives
One Year Ago: Cheesy Zucchini Rice
Two Years Ago: Oreo Cheesecake Bites
Three Years Ago: Herb-Roasted Potatoes
Ebelskivers {Puffy Danish Pancakes}
Pin
Ingredients
- 3 large eggs
- 2 tablespoons granulated sugar
- 3 cups buttermilk
- 1 teaspoon vanilla extract
- ¼ cup plus 2 tablespoons vegetable or canola oil
- 3 cups (426 g) all-purpose flour (see note)
- 1 ½ teaspoons baking soda
- ½ teaspoon baking powder
- ½ teaspoon salt
Instructions
-
In a large bowl, whisk together the eggs and granulated sugar until well combined. Gradually mix in the buttermilk, vanilla extract, and vegetable or canola oil until smooth. In a separate bowl, whisk together the flour, baking soda, baking powder, and salt. Add the dry ingredients to the wet ingredients, stirring until just combined. Be careful not to overmix the batter; a few lumps are perfectly fine.
-
Pour about 3-4 tablespoons of vegetable or canola oil into a small cup and keep it near your stove. You’ll need a pastry brush or a folded paper towel to lightly oil the ebelskiver pan between batches. This step is crucial for preventing sticking and ensuring beautifully golden pancakes.
-
Preheat your ebelskiver pan over medium heat for approximately 4-5 minutes. The pan should be hot enough that the batter sizzles immediately upon contact, but not so hot that it burns the ebelskivers. Once heated, lightly brush each cup of the pan with a tiny bit of the oil you prepared.
-
Carefully pour the ebelskiver batter into each cup, filling it about three-quarters of the way. If you plan to add a filling (such as fruit, jam, or chocolate), fill the cups slightly less to accommodate it. Allow the ebelskivers to cook for about a minute, or until you start to see tiny bubbles forming on the surface and the edges appear set. If adding a filling, now is the time to gently place it into the center of the batter, then cover with a tiny bit more batter if needed.
-
Using a knitting needle, skewer, or similar long, thin tool, gently push the tip into the middle of the ebelskiver batter, reaching towards the bottom of the cup. With a gentle motion, lift and rotate the ebelskiver approximately 90 degrees so that the cooked portion is lifted out of the pan. The uncooked batter will then flow into the bottom of the cup, beginning the spherical formation.
-
Continue to cook the ebelskiver for a bit longer, adjusting the heat as necessary to prevent burning. Turn it again, slightly twisting with your tool, to lift the seam created from the first turn out of the cup. This helps the ebelskiver gradually form its perfect ball shape (refer to the step-by-step pictures for visual guidance). Don’t worry if the turning process feels a bit awkward at first; the key is to keep rotating the ebelskivers so they cook evenly on all sides without scorching. Patience and a light touch are your best friends here.
-
After another minute or so, give the ebelskiver a final turn. Position the opening that remains from the batter pour downwards into the hot pan. This ensures that the last bit of uncooked batter is fully cooked, resulting in a completely puffed, golden sphere. Cook until each ebelskiver is uniformly golden brown and thoroughly cooked through.
-
As each batch of ebelskivers finishes cooking, transfer them to a 9×13-inch pan and keep them warm in a preheated oven at a low temperature (around 175 degrees Fahrenheit or 80 degrees Celsius) until all ebelskivers are ready to serve. Present them warm with a variety of toppings: classic maple syrup, fresh fruit with a dollop of whipped cream, rich Nutella, a simple dusting of powdered sugar, or your favorite fruit jam. The topping options are truly endless, allowing you to customize each serving to perfection!
Notes
Ebelskiver Pan: If you’re using a cast iron ebelskiver pan, like the one shown in my pictures, proper seasoning is paramount. A well-seasoned pan ensures your ebelskivers won’t stick, making the cooking process much smoother and more enjoyable. You can easily find guides online for how to properly season a cast iron pan – it truly makes all the difference!
Recommended Products
Recipe Source: This cherished ebelskiver recipe comes directly from my Aunt Marilyn, who, along with my Uncle Dan, first introduced my parents to these delightful Danish pancakes many years ago, sparking a family tradition!