
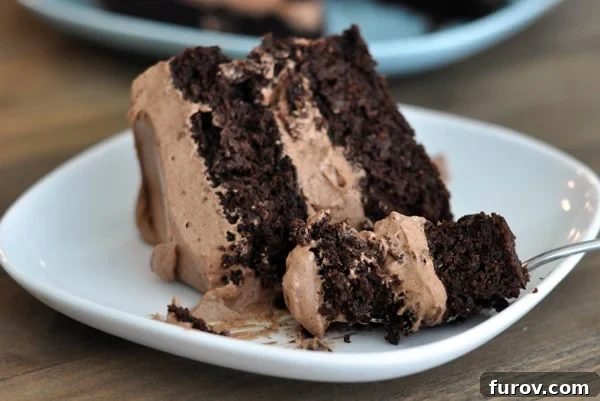
Discover the ultimate gluten-free chocolate cake recipe that will revolutionize your dessert experience. This incredible cake batter secretly incorporates cooked quinoa, delivering an unbelievably moist, fudgy texture that will surprise even the most discerning palates. You’d never guess it was gluten-free! Prepare to be amazed by this truly decadent creation.
For too long, the quest for a truly sensational gluten-free chocolate cake has been a culinary challenge. Many recipes fall short, sacrificing texture or flavor in the absence of traditional flour. However, my journey changed profoundly after encountering this particular recipe on Sally’s blog. Sally, with unwavering confidence, promised a life-changing cake – one that was super moist, intensely rich, and utterly decadent. Her description alone was enough to pique my interest, but it was the unconventional secret ingredient that truly captivated my imagination.
The most intriguing aspect of this remarkable cake? It’s made with quinoa.
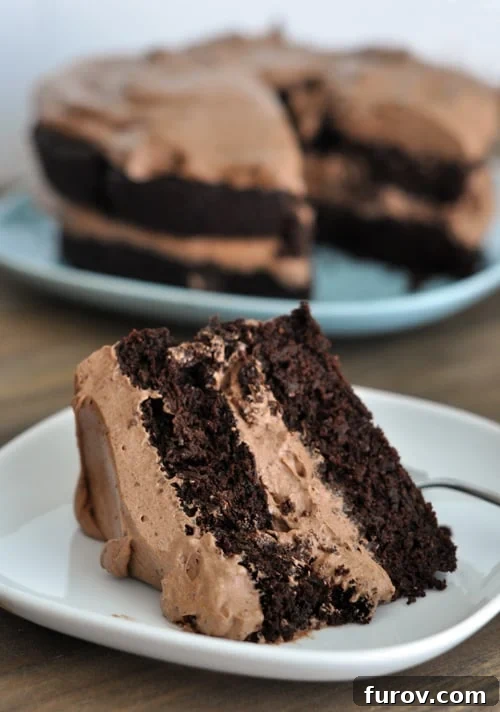
Yes, you read that correctly – no traditional flour in sight! Just cooked quinoa, blended seamlessly with a selection of other basic cake ingredients. Quinoa in a cake? Without flour? It sounded almost too good to be true, especially for someone living in a small town where specialty gluten-free flour mixes are often hard to come by. Most gluten-free recipes rely on complex flour blends, making them inaccessible for many. This recipe, with its humble quinoa base, offered a refreshing and exciting alternative.
Given my constant supply of quinoa in the pantry, and the irresistible allure of this cake, I decided to embark on a culinary experiment one peaceful Saturday afternoon. While my husband, Brian, kept the kids entertained, I quietly retreated to the kitchen, blissfully unaware of the chocolate revelation I was about to unleash. Blending cooked quinoa and eggs for a cake felt delightfully subversive.
The finished masterpiece, though intentionally rustic with unfrosted sides, was an impressive spectacle of chocolate decadence. Brian and the boys, drawn by the irresistible aroma, couldn’t resist sneaking glances, their eyes wide with anticipation. Against all odds, the cake survived the night, remaining untouched until Sunday afternoon. Finally, I presented the stunning creation, sliced it generously, and we all eagerly dug in, preparing for a taste test unlike any other.
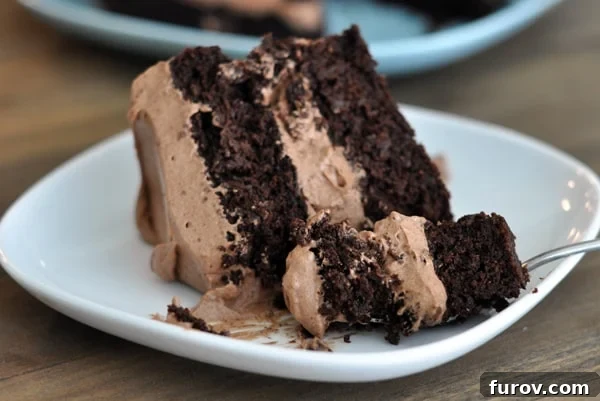
The Unexpected Secret: Quinoa’s Role in a Truly Moist Chocolate Cake
After just a few bites – each one a moment of pure chocolate cake bliss – I paused our family’s indulgence. “I’ll give you a second piece,” I declared to my eager audience, “if you can guess the secret ingredient.” This wasn’t our first culinary game, so I anticipated the usual suspects: “coconut oil,” “spinach,” or even “black beans.” These common health-conscious additions often make their way into our treats.
With a knowing, almost mischievous smile (partly because I fully intended to claim the second piece for myself), I revealed the unexpected truth: the cake was made with quinoa. The reaction was priceless. Brian nearly toppled from his chair, his expression a perfect blend of disbelief and utter astonishment. I truly regret not having a video camera rolling; his reaction alone would have been a strong contender for a prize on “America’s Funniest Home Videos.” It was a moment that perfectly encapsulated the magic of this recipe – transforming a humble grain into an extraordinary dessert.
How It Works: Unlocking Unbeatable Moisture and Fudgy Texture
Unlike traditional cake recipes that involve separate dry and wet ingredient bowls, this method takes an innovative approach. The magic begins with cooked and cooled quinoa. This is then combined with milk, eggs, vanilla extract, and melted butter in a blender or food processor. The key here is to blend thoroughly until the mixture achieves an ultra-smooth consistency. My Vitamix handles this task beautifully, ensuring no tell-tale quinoa texture remains.
Once the liquid base is velvety smooth, cocoa powder, baking powder, baking soda, and a touch of salt are whisked in. That’s it! The batter is then ready to be poured into pans and baked. The quinoa doesn’t just replace flour; it actively contributes to the cake’s phenomenal texture. It’s what gives this gluten-free chocolate quinoa cake its incredibly soft, moist, and remarkably fudgy character. The grain acts as a binder, creating a dense yet tender crumb that is often elusive in gluten-free baking. This ingenious use of quinoa results in one of the most decadent, rich, and moist cakes I have ever had the pleasure of tasting.
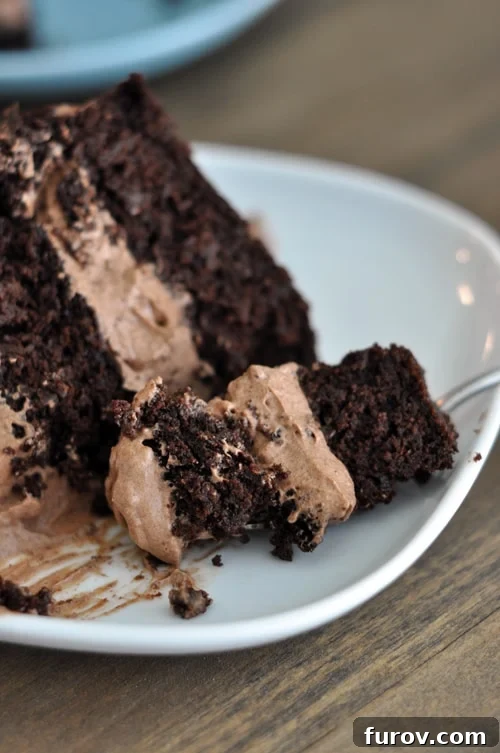
Why This Gluten-Free Chocolate Cake Stands Out: A Symphony of Flavor and Texture
Beyond its innovative use of quinoa, this gluten-free chocolate cake truly excels in several aspects. The depth of chocolate flavor is profound, thanks to a generous amount of unsweetened cocoa powder. This isn’t a cake that merely hints at chocolate; it celebrates it. The fudgy texture, a direct benefit of the quinoa, is akin to a rich brownie and a classic cake rolled into one delightful experience. It’s incredibly satisfying without being overly heavy.
Furthermore, the preparation method is surprisingly straightforward. The blender does most of the heavy lifting, making this a much less intimidating recipe than many complex layered cakes. For those hesitant about gluten-free baking, this recipe offers a foolproof path to success, proving that delicious, show-stopping desserts don’t require gluten or obscure ingredients. The resulting cake holds its moisture beautifully for days, making it an excellent choice for meal prepping desserts or for occasions where you need to bake ahead.
Perfecting the Whipped Chocolate Frosting: A Cloud of Decadence
No truly decadent chocolate cake is complete without an equally impressive frosting, and this whipped chocolate frosting is the ideal companion. Unlike heavy buttercream, this frosting is light, airy, and intensely chocolatey, providing a perfect contrast to the dense cake layers. Made with just two ingredients – heavy whipping cream and chocolate chips – it’s deceptively simple to prepare yet yields professional results.
The process involves gently simmering cream and pouring it over chocolate chips, allowing the residual heat to melt the chocolate into a glossy ganache. After chilling until thoroughly cold, this ganache is whipped to soft peaks, transforming it into a luxurious, spreadable cloud. This technique ensures a stable yet delicate frosting that doesn’t overwhelm the cake. The slight bitterness from the semisweet or bittersweet chocolate chips perfectly balances the sweetness of the cake, creating a harmonious flavor profile that will have everyone asking for the recipe.
Tips for Success: Achieving Bakery-Quality Results at Home
To ensure your gluten-free quinoa chocolate cake turns out perfectly every time, here are a few key tips:
- **Quinoa Preparation:** Always use cooked and *cooled* quinoa. Warm quinoa can affect the temperature of your batter and alter the baking time. Cooking it in water, not broth, is crucial to maintain a neutral flavor that allows the chocolate to shine.
- **Blending for Smoothness:** Invest in a good quality blender or food processor. The goal is an absolutely smooth, lump-free quinoa mixture. Any graininess will detract from the fudgy texture.
- **Don’t Overmix Dry Ingredients:** Once the wet and dry ingredients are combined, mix only until just incorporated. Overmixing can develop gluten (even if minimal in this context) and lead to a tougher cake, though quinoa is much more forgiving than wheat flour.
- **Cooling is Key:** Allow the cake layers to cool completely before frosting. Attempting to frost a warm cake is a recipe for disaster, resulting in melted, sliding frosting.
- **Chilling the Frosting:** For the whipped chocolate frosting, ensure the ganache is thoroughly chilled before whipping. This is essential for achieving light, airy peaks. Patience here will be rewarded. An ice bath can expedite this process if you’re short on time.
Frequently Asked Questions for Gluten-Free Chocolate Quinoa Cake
Absolutely! Many bakers have successfully adapted this recipe to be dairy-free. You can easily substitute the milk with a non-dairy alternative like almond milk or oat milk. For the butter, coconut oil or a high-quality dairy-free margarine (like Earth Balance) works wonderfully. One clever commenter suggested using 1/4 cup coconut oil and 1/2 cup Earth Balance margarine for the butter, paired with a chocolate coconut cream whipped frosting. The result? Pure deliciousness!
Yes, this cake freezes exceptionally well! For best results, allow the cake to cool completely, then frost as desired. You can freeze individual slices or the entire cake. Wrap it tightly in plastic wrap, then a layer of aluminum foil, and place it in an airtight container to prevent freezer burn. Thaw in the refrigerator overnight before serving. The texture and moisture hold up beautifully.
Yes, this recipe is incredibly versatile and converts beautifully into cupcakes! When tested, it yielded approximately 24 delicious cupcakes, which baked perfectly in about 15 minutes. While they might not develop the perfectly domed top of traditional bakery cupcakes, they maintain an incredible flavor and moist texture. Their slightly flatter tops make them easy to frost and decorate.
I consistently use white quinoa for this recipe. White quinoa tends to have a milder flavor compared to red or black varieties, making it ideal for baking where you want the quinoa to be undetectable in terms of taste and texture. Ensure it’s thoroughly rinsed before cooking to remove any bitterness.
My initial attempt to transform this rich chocolate cake into a yellow cake was, admittedly, a total disaster. The chocolate plays a significant role in masking the subtle quinoa flavor. However, a brilliant commenter named Nadja shared her successful adaptation: “I just tried to adapt the recipe so it would be a yellow cake version. I simply added the same amount of gluten-free flour instead of cocoa powder. It turned out beautifully!!! The only thing to note is that without the cocoa, you can taste the quinoa much stronger, so I will experiment with some more flavors to make it less dominant.” This suggests that while possible, some flavor adjustments (like adding lemon zest, almond extract, or more vanilla) might be needed to balance the quinoa flavor in a non-chocolate version.
One Year Ago: Skillet Cilantro and Lime Fish Tacos
Two Years Ago: Grilled Steak Burgers
Three Years Ago: Savory Spiral Stuffed Rolls
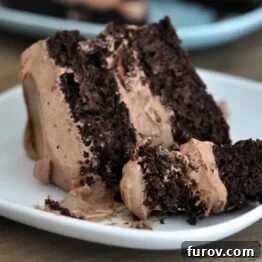
Decadent Gluten-Free Chocolate Quinoa Cake with Whipped Chocolate Frosting
Pin
Rate
Ingredients
Cake:
- 2 cups cooked and cooled quinoa (see note)
- ⅓ cup milk
- 4 large eggs
- 1 teaspoon pure vanilla extract
- ¾ cup (170 g) salted butter, melted and cooled
- 1 ½ cups (318 g) granulated sugar
- 1 cup (85 g) unsweetened cocoa powder
- 1 ½ teaspoons baking powder
- ½ teaspoon baking soda
- ½ teaspoon salt
Frosting:
- 2 ¼ cups heavy whipping cream
- 1 ¼ cups (213 g) semisweet or bittersweet chocolate chips
Instructions
-
For the cake, preheat your oven to 350 degrees F (175 degrees C). Lightly grease two 8-inch round cake pans. For easy removal, line the bottoms of the pans with parchment paper circles.
-
In a powerful blender or food processor, combine the milk, large eggs, and pure vanilla extract. Process briefly until just combined. Add the thoroughly cooked and cooled quinoa along with the melted and cooled butter. Blend until the mixture is completely smooth and no quinoa grains are visible. This step is crucial for the cake’s ultimate texture.
-
In a separate large mixing bowl, whisk together the granulated sugar, unsweetened cocoa powder, baking powder, baking soda, and salt. Ensure these dry ingredients are well combined. Pour the smooth quinoa mixture from the blender into the bowl with the dry ingredients. Mix with a wooden spoon or a whisk until the batter is just combined. Be careful not to overmix.
-
Divide the prepared batter evenly between the two lined cake pans. Bake on a rack placed in the middle position of your preheated oven for 28-30 minutes, or until a knife or wooden toothpick inserted into the center of a cake layer comes out clean. Remove the cakes from the oven and allow them to cool in their pans for 10 minutes. After 10 minutes, carefully invert the cakes onto cooling racks, removing the parchment paper from the bottoms, and let them cool completely before frosting.
-
For the frosting, place the semisweet or bittersweet chocolate chips in a medium, heatproof bowl. In a small saucepan, heat the heavy whipping cream over medium heat until it gently simmers (do not boil). Once simmering, immediately pour the hot cream over the chocolate chips. Let the mixture sit undisturbed for five minutes to allow the chocolate to melt. After five minutes, whisk vigorously until the mixture is glossy and smooth, forming a rich ganache. Cover the bowl tightly with plastic wrap and refrigerate until the ganache is completely chilled and very cold, which typically takes 2-3 hours. To expedite this chilling process, you can place the bottom of the bowl into an ice water bath and stir occasionally until cooled. Once fully chilled, use an electric mixer (either a stand mixer with the whisk attachment or a handheld mixer) to whip the ganache until it reaches soft peaks, becoming light and airy.
-
To assemble the cake, place one cooled cake layer upside down on your chosen serving platter or cake stand. Top this layer with a generous portion (approximately half) of the whipped chocolate frosting. Spread the frosting evenly, leaving about a 1/2-inch border from the edge of the cake. This allows for the frosting to gently spread to the edge when the second cake layer is placed on top.
-
Gently place the second cooled cake layer, also upside down, directly on top of the frosted bottom layer. Carefully spread the remaining whipped frosting over the entire top surface of the cake. While you could certainly frost the sides for a more polished look, I find the rustic charm of frosting only the middle and top to be quite appealing for this particular cake.
-
Once frosted, chill the cake in the refrigerator for at least 2 hours before slicing and serving. This crucial step allows the whipped chocolate frosting to firm up slightly and set, making for cleaner slices and a more enjoyable texture.
You can find a helpful video demonstrating the process of making this amazing gluten-free chocolate cake here:
Notes
Cooking the Quinoa: Always cook the quinoa in plain water, not broth or any flavored liquid. This ensures the quinoa’s natural, mild taste doesn’t interfere with the rich chocolate flavor of the cake. Rinse the dry quinoa thoroughly before cooking to remove any saponins that can cause bitterness.
Recommended Products
Recipe Source: Cake adapted from Good Dinner Mom (a huge thank you to Sally for the inspiration!) and frosting adapted from Sips and Spoonfuls.