
Unleash Your Inner Baker: Easy & Vibrant Tie-Dye Frosting for Cupcakes
Transform ordinary cupcakes into extraordinary masterpieces with this simple guide to tie-dye frosting. Get ready to impress and delight!
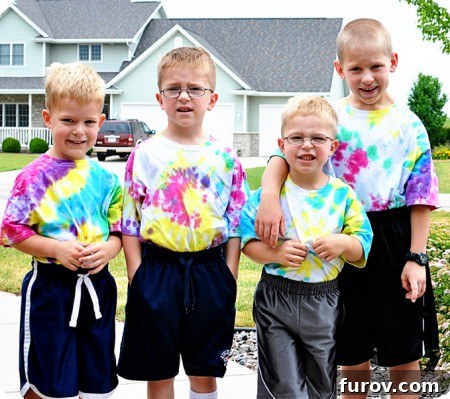
There’s a vibrant trend that has swept through homes and fashion alike, captivating hearts with its playful burst of color: tie-dye! In our home, this past season wasn’t just a summer; it was “The Summer of the Tie-Dye.” From custom-made shirts proudly worn day in and day out to a general atmosphere of joyful chaos, this retro aesthetic has become an unexpected staple. It seems the free-spirited charm of tie-dye resonates deeply, bringing a touch of whimsical fun into everyday life. And if something brings that much happiness, why limit it to just clothing?
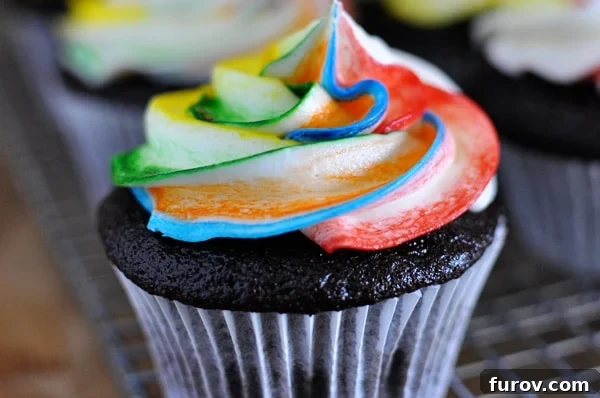
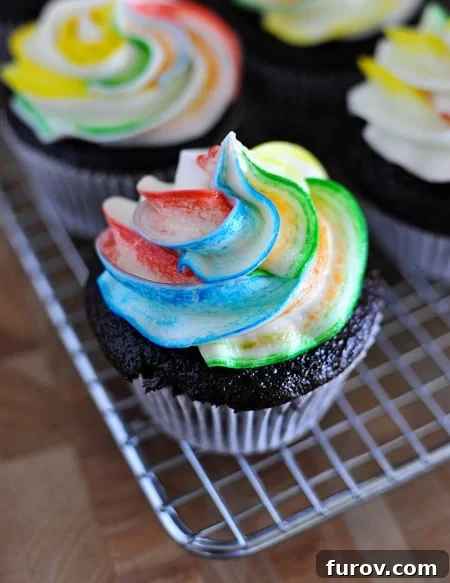
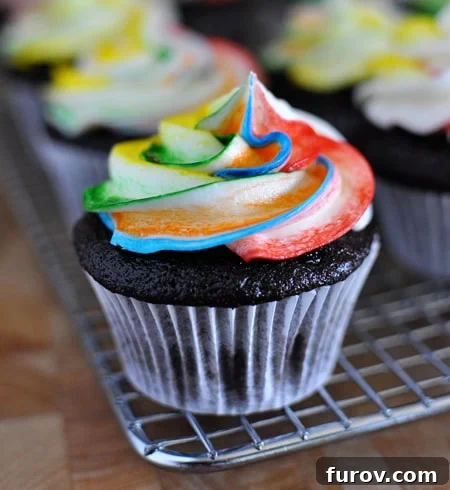
Inspired by this colorful craze, we decided it was time to bring the magic of tie-dye into the kitchen, specifically to our dessert table. What started as a simple birthday request from my adventurous third eldest son for “tie-dyed cupcakes” quickly turned into a delightful culinary experiment. The mission was clear: figure out how to translate the iconic swirl and blend of tie-dye into a beautiful, edible frosting. While the result might resemble a vibrant rainbow or charming stripes to some, my boys wholeheartedly declared it tie-dye, showering me with accolades typically reserved for master pastry chefs. So, “tie-dye frosting” it is! Regardless of what you call it, this method is undeniably cute, remarkably easy, and guaranteed to earn rave reviews.
Why Tie-Dye Frosting is Your Next Baking Adventure
Tie-dye frosting offers an irresistible blend of visual appeal and creative expression, making it a fantastic choice for a multitude of occasions. It’s more than just colorful; it’s a statement. Imagine the delight on children’s faces when they see a swirl of blues, yellows, and pinks on their birthday cupcake. Think about the vibrant spread at a summer party, a baby shower (customized with pastel hues!), or even a school event. This frosting technique is incredibly versatile, allowing you to tailor the color palette to any theme imaginable.
Beyond the sheer aesthetic pleasure, the simplicity of this method is its greatest selling point. You don’t need to be a professional baker to achieve stunning results. With just a few basic ingredients, some gel food coloring, and a clever piping bag trick, you can create cupcakes that look professionally decorated. It’s an empowering experience for home bakers, transforming a seemingly complex design into an approachable and fun project. Plus, the process itself is a joy – mixing colors, preparing the piping bag, and watching the magic unfold with each swirl of frosting. It’s a sensory experience that adds an extra layer of enjoyment to your baking journey.
The Essential Ingredients for Perfect Tie-Dye Cupcakes
Before diving into the creative process, let’s ensure you have all the components for truly spectacular tie-dye cupcakes. While this guide focuses on the frosting, the foundation of a delicious cupcake cannot be overlooked. For the cupcake base, I often turn to my favorite chocolate cupcake recipe, which provides a rich, moist canvas for the vibrant frosting. However, any sturdy cupcake recipe you love will work perfectly.
For the Frosting: Your Go-To Buttercream Base
The star of our show, the tie-dye frosting, begins with a reliable and utterly delicious buttercream. My personal preference is a fantastic, easy buttercream frosting recipe, known for its smooth texture and ability to hold vibrant colors beautifully. Here’s what you’ll typically need:
- Unsalted Butter: Softened to room temperature, crucial for a smooth consistency.
- Powdered Sugar (Confectioners’ Sugar): Sifted to avoid lumps.
- Vanilla Extract: High-quality vanilla for the best flavor.
- Milk or Cream: A splash helps achieve the perfect spreadable consistency.
- Pinch of Salt: Balances the sweetness.
Once you have your buttercream made, the real fun begins with the coloring process. You’ll need a selection of gel food colorings. Gel colors are superior to liquid food coloring for frosting because they are highly concentrated, meaning you achieve vibrant hues without thinning out your frosting. Choose a rainbow of colors, or select a specific palette to match your theme – the possibilities are endless!
How to Create Stunning Tie-Dye Frosting: A Step-by-Step Guide
The magic of tie-dye frosting lies in a simple yet effective technique for loading your piping bag. This method not only creates those beautiful, swirled colors but also makes cleanup incredibly easy. Prepare to revolutionize your frosting game!
Step 1: Prepare Your Buttercream
First, ensure your buttercream is perfectly smooth and at a good piping consistency. If it’s too stiff, add a tiny bit more milk or cream; if it’s too soft, chill it for a few minutes. Divide your buttercream into separate bowls – one for each color you plan to use. Aim for at least three to four colors for a true tie-dye effect.
Step 2: Color Your Frosting
Add a small amount of gel food coloring to each bowl of buttercream. Mix thoroughly until you achieve your desired vibrant shades. Remember, a little gel color goes a long way! Use a different spoon or spatula for each color to prevent them from mixing prematurely.
Step 3: The Revolutionary Plastic Wrap Method
This is where the tie-dye magic truly begins. Lay out a large piece of plastic wrap (about 12-18 inches long) flat on your counter. Using a spoon, dollop stripes or blobs of each colored frosting lengthwise down the center of the plastic wrap, side by side. Don’t worry about perfection; organic shapes often yield the best results.
Step 4: Roll and Twist
Carefully gather the edges of the plastic wrap and gently roll the frosting into a log shape. Twist the ends of the plastic wrap tightly to seal the frosting log. This creates a neat package of multicolored buttercream.
Step 5: Prepare Your Piping Bag
Fit a piping bag with your desired piping tip (a large star tip or round tip works wonderfully for swirls). Snip one end of your frosting log, removing the twisted plastic wrap. Carefully insert the untwisted, snipped end of the plastic wrap log into the piping bag. Push it down until the frosting is visible at the tip opening.
Step 6: Frost Your Cupcakes!
Now you’re ready to create masterpieces! Hold the piping bag directly over the center of a cupcake and apply even pressure. Swirl the frosting outwards and upwards, or create beautiful rosettes. As you pipe, the different colors from the plastic wrap log will emerge, blending together to create that stunning tie-dye effect. Keep piping until all your cupcakes are beautifully adorned.
For those who are visual learners, here’s a short video that beautifully demonstrates the technique for getting those gorgeous swirls of frosting onto your cupcakes. While this video focuses on the general swirling technique, remember to apply the plastic wrap method beforehand for the tie-dye effect!
Tips and Tricks for Flawless Tie-Dye Frosting
- Gel Food Coloring is Key: Always opt for gel food coloring over liquid. It provides intense, vibrant colors without altering the consistency of your buttercream, which is essential for perfect piping.
- Consistency Matters: Your buttercream should be smooth and pliable, not too stiff or too runny. A good test is to scoop some with a spoon; it should hold its shape but still be easy to stir.
- Don’t Overmix Colors: When loading your plastic wrap, don’t mix the colors too much. The beauty of tie-dye is in the gentle swirls and distinct color separations that happen naturally as you pipe.
- Practice Makes Perfect: If you’re new to piping, don’t hesitate to practice on a piece of parchment paper or a plate first. You can even scrape the frosting back into your bowl and reuse it for practice!
- Room Temperature Matters: Ensure your cupcakes are completely cooled before frosting. Warm cupcakes will cause your beautiful tie-dye frosting to melt and slide off.
- Storage: Frosted cupcakes can typically be stored at room temperature in an airtight container for up to 2-3 days, or in the refrigerator for longer, depending on your buttercream recipe. Let them come to room temperature before serving for the best texture.
Creative Variations and Customization
The beauty of this tie-dye frosting technique is its incredible adaptability. You are not limited to a rainbow of colors; you can tailor your palette to fit any theme or occasion:
- Themed Colors: Think red, white, and blue for patriotic holidays, pastels for Easter or baby showers, or even school colors for graduation celebrations.
- Monochromatic Magic: Instead of multiple colors, try using different shades of a single color (e.g., light blue, medium blue, dark blue) for a sophisticated ombre or layered striped effect.
- Tie-Dye Cake Batter: For the truly ambitious, take the tie-dye theme to the next level by creating tie-dyed cake batter! Divide your plain cake batter into separate bowls, color each section, and then gently spoon alternating colors into your cupcake liners or cake pan. Swirl gently with a skewer for a marbled effect before baking. This will make your cupcakes a tie-dye surprise both inside and out!
- Accessorize: Once frosted, enhance your tie-dye cupcakes with sprinkles, edible glitter, or small themed toppers for an extra touch of flair.
Conclusion: Embrace the Color and Creativity!
Creating tie-dye frosting for your cupcakes is more than just a baking project; it’s an invitation to unleash your creativity and bring a little extra joy to your kitchen. Whether you’re celebrating a birthday, hosting a party, or simply want to brighten an ordinary day, these vibrant, easy-to-make cupcakes are sure to be a hit. The process is straightforward, the cleanup is minimal thanks to our clever plastic wrap trick, and the results are consistently stunning. So, gather your ingredients, pick your favorite colors, and get ready to pipe some happiness. You’ll be amazed at what you can create, and your guests (especially the little ones!) will be absolutely delighted. Happy tie-dyeing, and happy baking!