
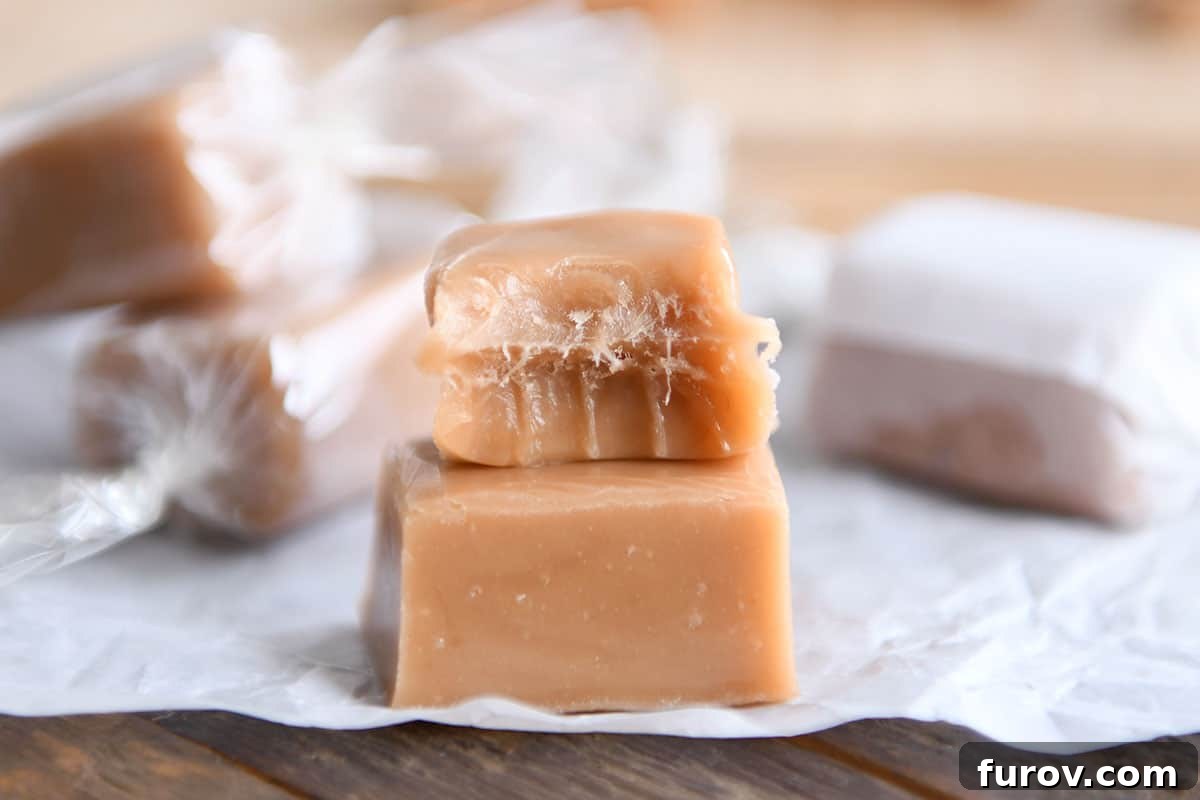
Discover the ultimate guide to crafting the most exquisite homemade caramels you’ve ever tasted! This comprehensive tutorial includes step-by-step instructions, expert tips on candy thermometers and wrapping, and all the essential details for consistent, foolproof success.
For years, I’ve envisioned a definitive, all-encompassing resource for making homemade caramels – a single place where every question is answered, and every trick is revealed. Today, that vision comes to life with this guide, designed to empower you to create truly exceptional caramels right in your own kitchen.
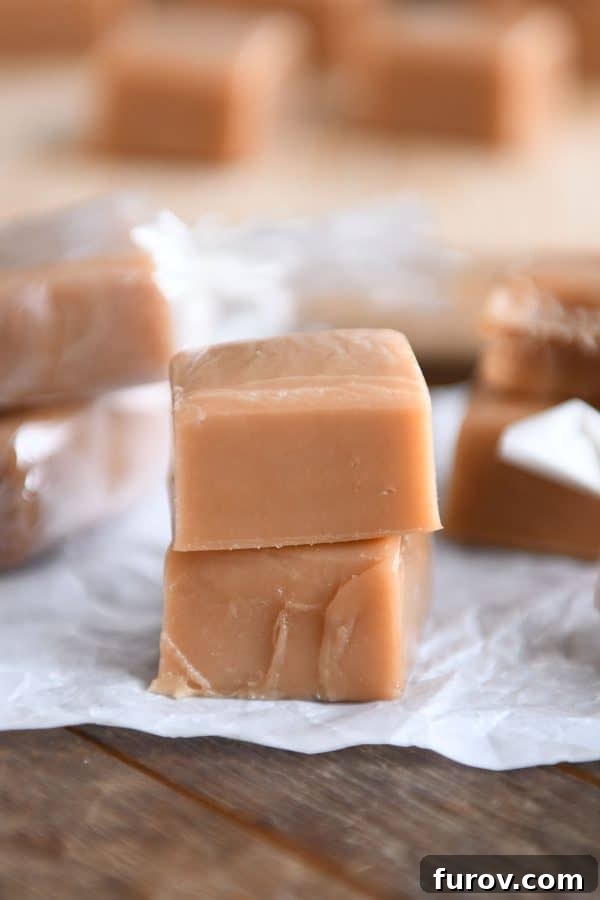
My culinary journey has led to many delightful caramel recipes on this site, each cherished for its unique charm and flavor profile:
- Cinnamon Caramels (imagine a cinnamon bear, but infinitely better)
- Licorice Caramels (a must-try for all black licorice aficionados!)
- Foolproof No-Stir Caramels (a reliably delicious classic)
- Soft Chocolate Caramels (decadently rich and irresistible)
- My Mom’s Famous Caramels (a beloved family recipe featuring sweetened condensed milk)
Among these fantastic options, this particular recipe holds a special place as my all-time favorite. Since its initial publication three years ago, it has become my exclusive homemade caramel recipe. Its rich flavor, wonderfully soft, chewy texture, and straightforward preparation (I know it by heart!) make it truly stand out. Over time, I’ve made only minor adjustments, such as using vanilla extract for convenience instead of vanilla beans, without compromising its perfect essence.
This recipe has truly become my go-to for homemade caramels, consistently delivering exceptional results.
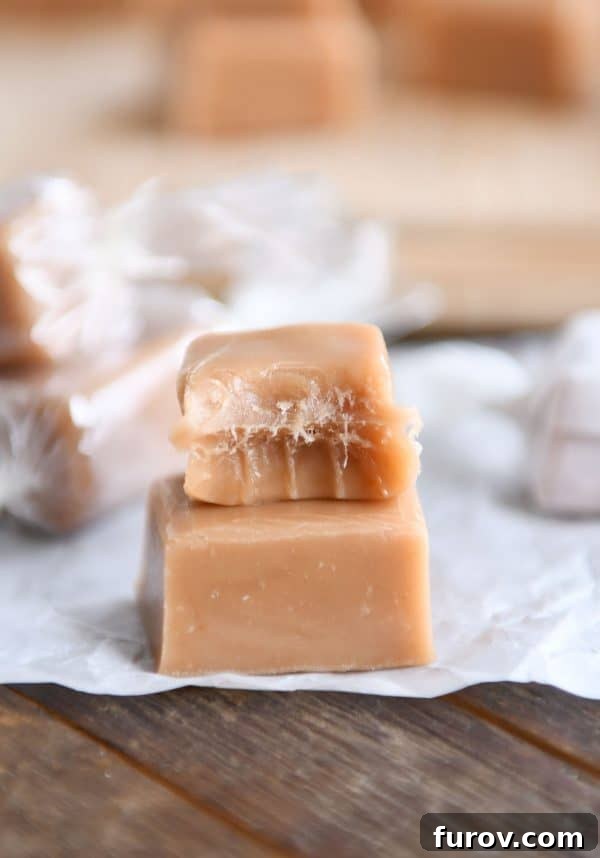
Today, we embark on a detailed, step-by-step journey to master the art of homemade caramels. From selecting the ideal candy thermometer to perfect wrapping techniques, this guide covers every aspect to ensure your success. I’ve even created a concise 1-minute 15-second video demonstrating the entire caramel-making process, offering a visual aid to complement these instructions. While real-life cooking takes a bit longer, these minutes are a worthy investment for such a delicious reward.
Essential Tools for Perfect Caramels
Having the right equipment is fundamental to caramel making. Here’s a list of basic yet crucial tools:
- A heavy-bottomed 4- or 5-quart pot
- A flat-edge spatula for effective stirring
- A pastry brush for cleaning the sides of the pan
- A reliable candy thermometer (more details on this below!)
- A bench scraper for neat cutting of cooled caramels
- Wax paper or cellophane squares for wrapping (detailed below)
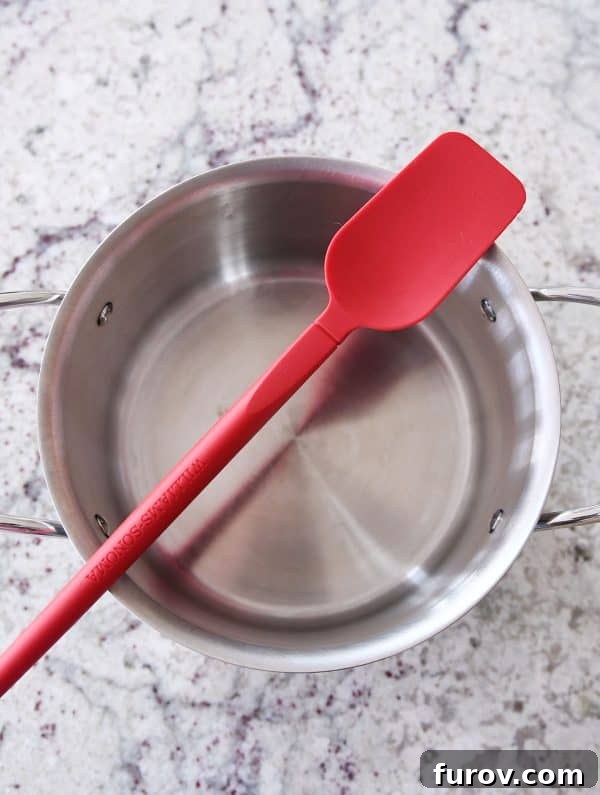
The pan you choose is arguably the most critical piece of equipment for any homemade candy. For caramels, a heavy-bottomed stainless steel pan is essential. I strongly advise against nonstick coatings. A “heavy-bottomed” pot simply means it has a thick base, which evenly distributes heat and prevents scorching, a common pitfall in caramel making. While I currently use an All-Clad pot, a high-end brand isn’t necessary; my trusty heavy-bottomed Farberware pans served me wonderfully for many years.
Equally important is a flat-edge rubber spatula for stirring. Its design allows for thorough scraping of the pot’s bottom and corners, effectively preventing caramel from sticking and burning, a task a rounded spoon or spatula cannot achieve as efficiently.
Selecting the Best Candy Thermometer
The quest for the “perfect” candy thermometer is a journey many home candy makers understand. If I had a dollar for every thermometer that promised accuracy and failed, I’d have a small fortune (though perhaps offset by the cost of those very thermometers!).
In my extensive experience, a truly perfect candy thermometer remains elusive. Traditional flat-back thermometers designed to clip to the side of the pan often prove inaccurate, and their temperature markings tend to fade over time. The old-fashioned glass bulb thermometers are best retired; they are fragile and notoriously unreliable.
I once highly recommended a popular digital candy thermometer for years, only to be let down by its inconsistent performance over time. My hopes were dashed more than once, leading me to seek a better solution.
My Trusted Candy Thermometer Solution
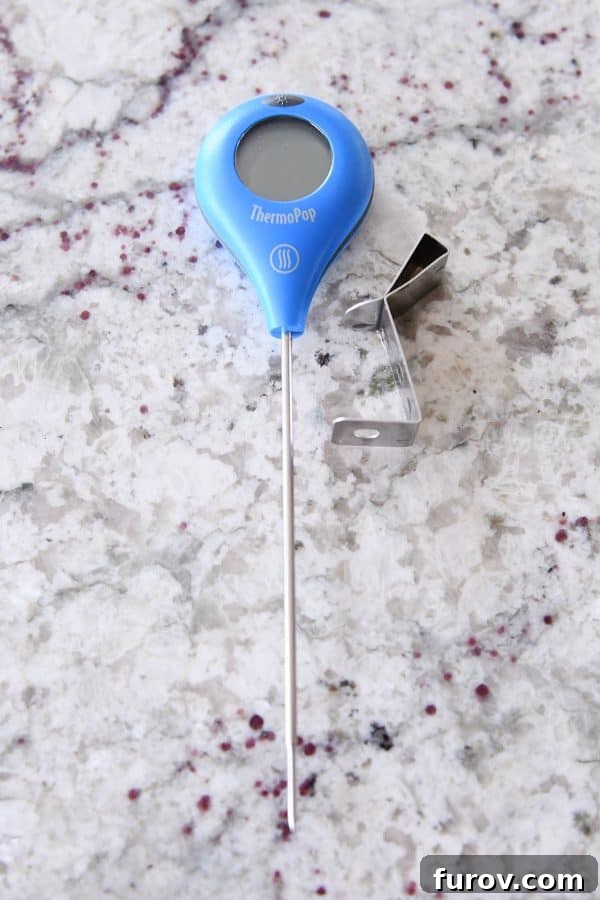
My current solution, while not flawless, is the most reliable I’ve found: a straight instant-read thermometer paired with a pan clip. This versatile tool is also fantastic for other kitchen tasks, like checking meat temperatures.
I personally use the ThermoPop thermometer from Thermoworks, but many excellent and affordable instant-read thermometers are available on Amazon. To secure it, I use a pot clip, such as this silicone version or a sturdy metal clip.
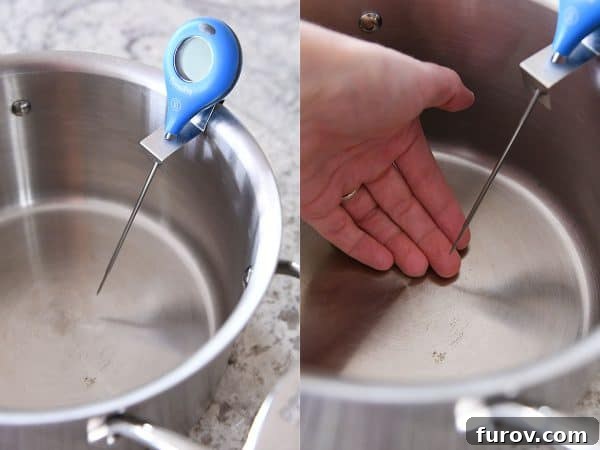
A crucial tip: ensure there’s a small gap between the thermometer’s probe tip and the bottom of the pan when clipped. If the probe touches the pan’s bottom, it will give an inaccurate reading. The unparalleled accuracy and speed of instant-read thermometers outweigh their minor drawbacks:
- It may occasionally turn off during long cooking times, but a quick press of the button (on this specific model) reactivates it, which is hardly an inconvenience.
- Finding a pan clip that positions the thermometer perfectly flush with the pan’s edge can be tricky. This means the probe might slightly obstruct stirring. If using this setup, always stir thoroughly underneath and around the thermometer to prevent scorching in those areas.
How to Calibrate a Candy Thermometer
Accurate calibration is vital for consistent candy making. Here’s how to do it:
Bring a pan of water to a rolling boil and immerse the tip of your thermometer in the boiling water for at least a full minute. Note the temperature displayed by your thermometer.
Key Principles:
– We assume the caramel recipe is developed and tested at sea level. (I will explain how to adjust for other elevations below.)
– At sea level, water boils precisely at 212 degrees F (100 degrees C).
If your thermometer reads below 212 degrees F in boiling water, you must subtract the difference from the target cooking temperature stated in the recipe. Conversely, if it reads above 212 degrees F, add the difference to the recipe’s cooking temperature. The temperature your thermometer registers in boiling water becomes your new “212 degrees F” reference point.
For example: If your thermometer shows 205 degrees F in boiling water, you’ll subtract 7 degrees (212 – 205 = 7) from the recipe’s cooking temperature. For this caramel recipe, which typically cooks to 245 degrees F, you would aim for 238 degrees F (245 – 7 = 238).
If your thermometer registers 215 degrees F in boiling water, you would add 3 degrees to the recipe’s cooking temperature.
Advanced Adjustments for Elevation:
If the recipe was tested at an elevation other than sea level (this information is usually provided by the recipe author), further adjustments might be necessary based on the difference between your elevation and the recipe’s testing elevation. A simple rule of thumb is to adjust the final cooking temperature by 2 degrees F for every 1,000 feet of elevation difference: add 2 degrees F for every 1,000 feet *decrease* in elevation, and subtract 2 degrees F for every 1,000 feet *increase* in elevation.
Example 1: If a caramel recipe was developed at 3,000 feet elevation and suggests cooking to 238 degrees F, but you live at sea level (a 3,000-foot decrease), you would add an additional 6 degrees F (2 degrees per 1,000 feet) to the final temperature, bringing it to 246 degrees F. This adjustment is *in addition* to any calibration based on your boiling water test.
Example 2: If a caramel recipe was tested at sea level and specifies cooking to 245 degrees F, but you live at 5,000 feet elevation (a 5,000-foot increase), you would subtract 10 degrees F (2 degrees per 1,000 feet) from the final temperature, aiming for 235 degrees F. Again, this is *in addition* to your boiling water test calibration.
Remember, candy making often involves a bit of trial and error! Even with these precise adjustments, you might find subtle variations are needed for certain recipes to achieve your desired texture. Generally, a 2 to 3-degree difference won’t ruin a batch, so apply these guidelines, have fun, and don’t be afraid to fine-tune in future batches!
Now that we’ve thoroughly discussed thermometers, let’s move on to the next crucial step: preparation.
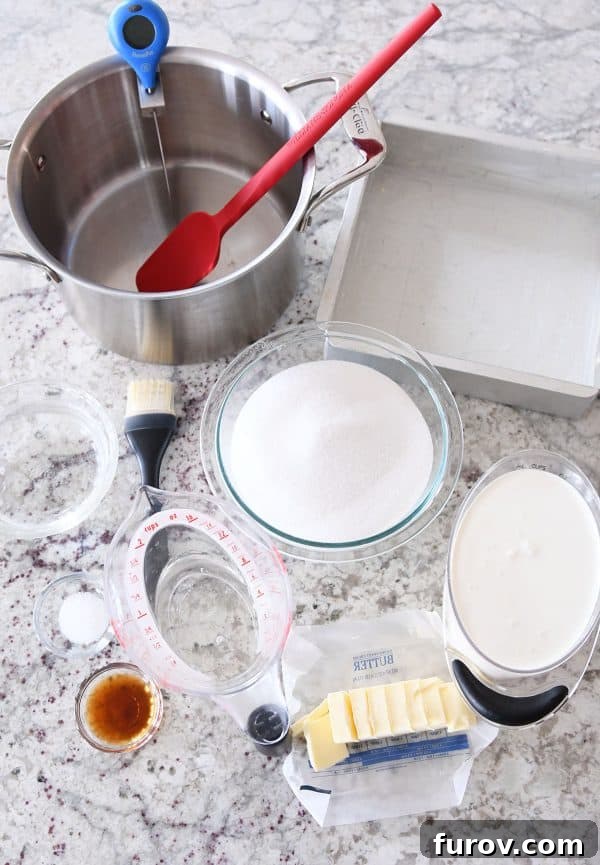
The single biggest secret to successful homemade caramel is meticulously organizing your cooking supplies and ingredients before you begin. Think of it like a professional cooking show: everything measured, prepped, and within arm’s reach. This “mise en place” approach is critical.
Prepare Your Ingredients and Pan in Advance
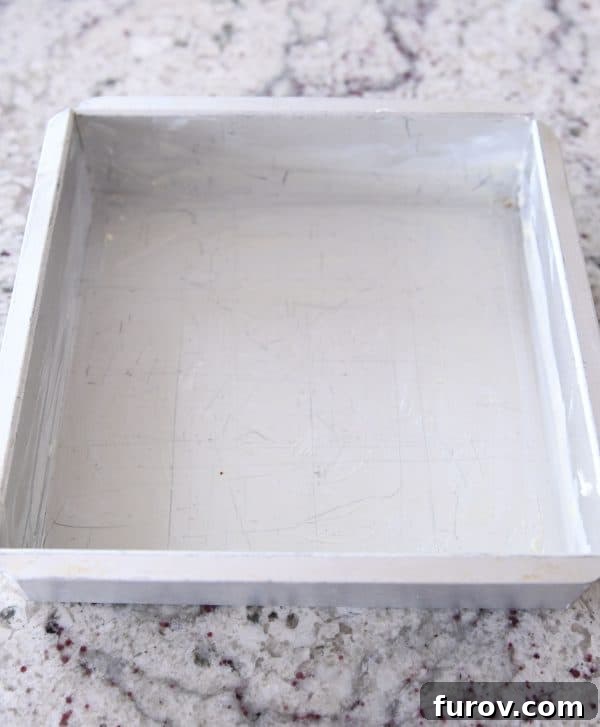
Measure out every ingredient and have them ready. Equally important, prepare your baking pan *before* you start cooking the caramel. Imagine having a perfectly cooked, bubbling hot batch of caramel reaching its ideal temperature, only to frantically realize your pan isn’t buttered! Caramels continue to cook even off the heat, and that extra time spent buttering a pan could lead to an overly hard, tooth-shattering caramel.
For this recipe, I typically generously butter all corners, creases, and sides of an 8×8-inch straight-sided pan. If you’re doubling the recipe, a 9×13-inch pan works wonderfully. For even easier removal of the cooled caramels, you can line the pan with parchment paper and then butter the parchment.
The Art of Making Homemade Caramels: A Step-by-Step Guide
Finally, the exciting part – bringing your caramels to life!
In your trusty, heavy-bottomed pot, combine the granulated sugar, water, and corn syrup. Be gentle when adding these ingredients; avoid splashing them up the sides of the pan. Splashed sugar can dry and crystallize, and if these crystals fall back into your cooking caramel, they can trigger a chain reaction, ruining the entire batch with a grainy texture. While this sounds daunting, fear not! I’ll show you an easy method to prevent sugar crystals and ensure your caramels are perfectly smooth.
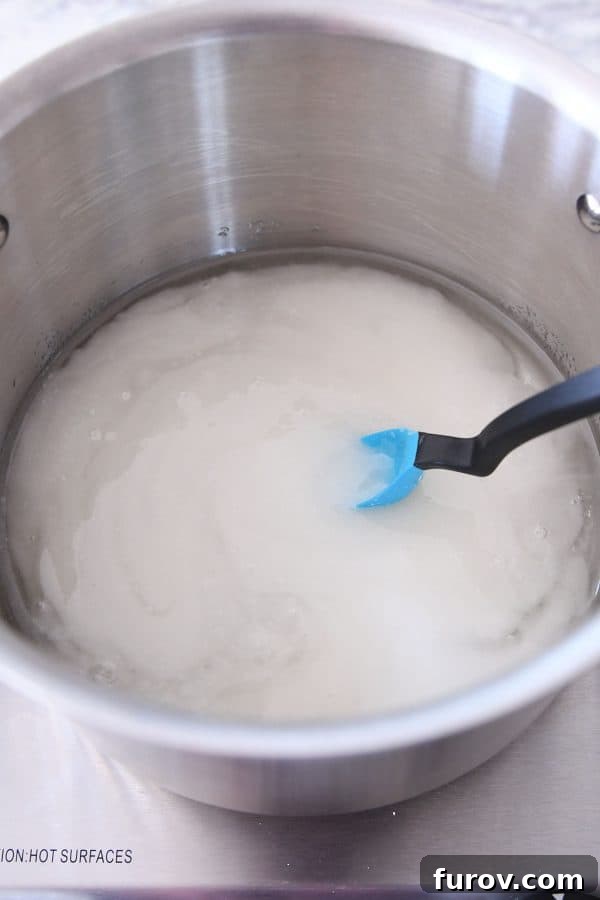
Place this mixture over medium to medium-high heat. It will initially foam and rise, but quickly settle into a captivating display of pretty, glassy bubbles as it comes to a boil.
Why this initial step? Many caramel recipes call for combining all ingredients—cream, butter, sugar, and corn syrup—from the start. However, cooking the sugar and corn syrup separately first allows for intense flavor development and quicker cooking without the constant stirring required to prevent milky or creamy ingredients from scorching on the bottom of the pan. It’s a brilliant technique for a deeper, richer caramel flavor and easier process.
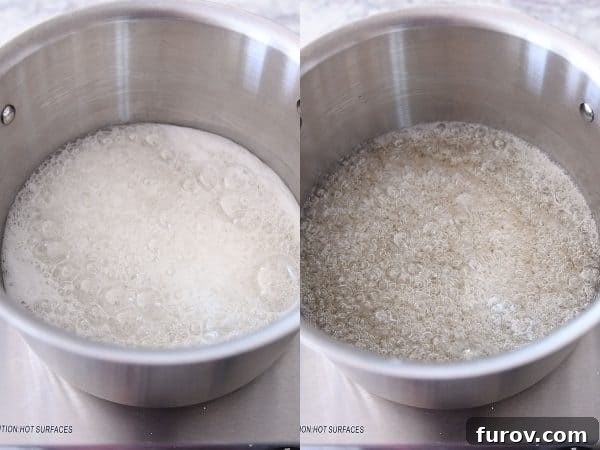
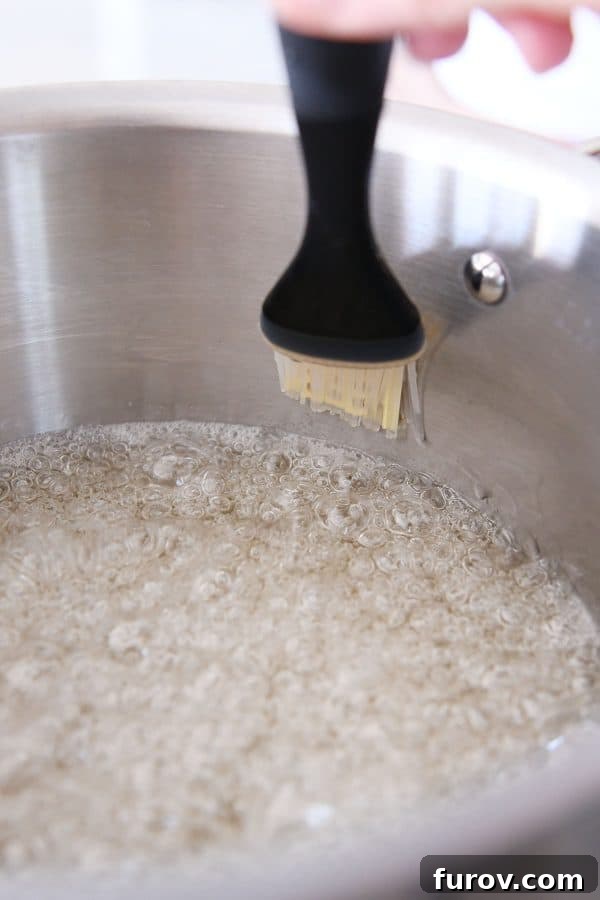
Once the mixture begins to boil, this is the perfect moment to address any stray sugar crystals. Dip your pastry brush into a cup of water and gently wipe down the inside edges of the pan, just above the boiling line. The water will dissolve any sugar granules, allowing them to flow back into the hot syrup, preventing crystallization. After this initial cleaning, you typically won’t need to repeat the process.
Now, clip your calibrated instant-read or candy thermometer to the side of the pan. Without stirring the mixture, continue to cook the syrup until it reaches a temperature between 325 and 345 degrees F. This temperature range offers flexibility without compromising the soft chewiness of the finished caramels. A higher temperature in this stage will result in a darker, more intensely flavored caramel. Over medium heat on my stove, this usually takes about 20 minutes.
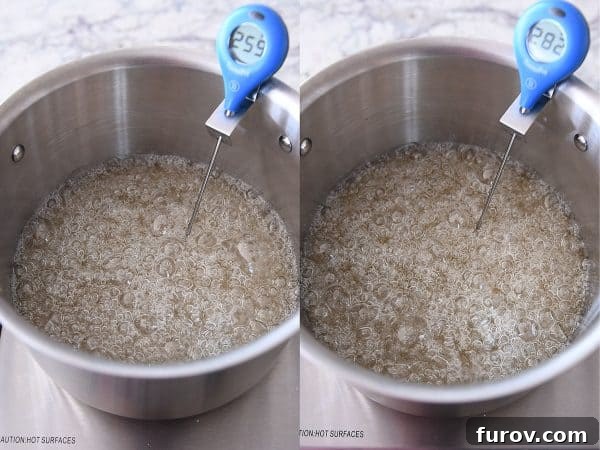
I typically aim for approximately 345 degrees F to achieve a deep, rich caramel flavor.
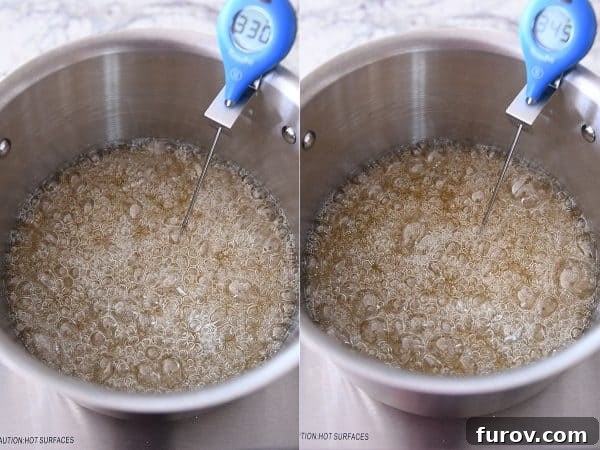
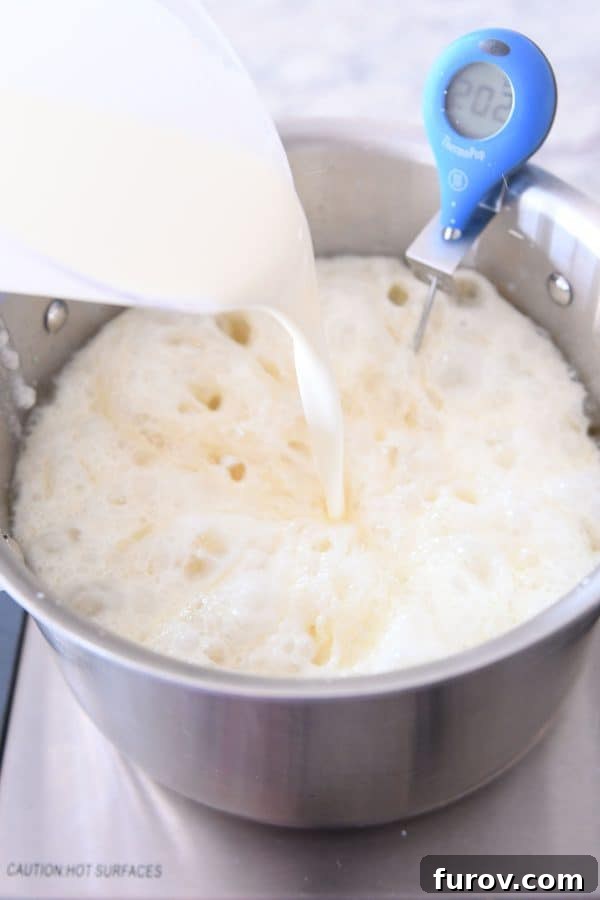
Once the desired temperature is reached, immediately, but slowly, pour in the warm cream. Be prepared for a vigorous reaction: the mixture will bubble and steam intensely. This is normal, but always prioritize safety. Ensure your hands and fingers are kept clear. This is also why a larger-than-you-think pot is essential, as the volume will increase significantly during this step.
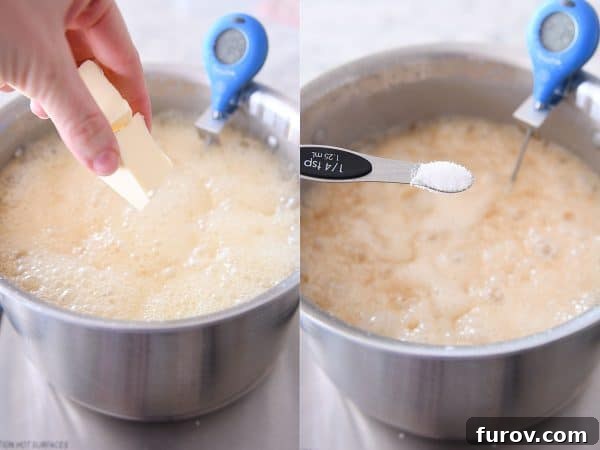
Next, add the butter and salt. The temperature of your caramel mixture will drop noticeably with these additions.
With the cream, butter, and salt now incorporated, it’s time to stir constantly. This continuous stirring is crucial from this point until the end of the caramel-making process to prevent scorching and ensure even cooking. Focus your efforts on scraping the bottom of the pot thoroughly, but avoid scraping down the sides. Doing so can introduce sugary crystals and hard bits back into the caramel, negatively impacting its smooth texture. Continue cooking and stirring until the caramel mixture reaches 245 degrees F, which determines its final softness or firmness.
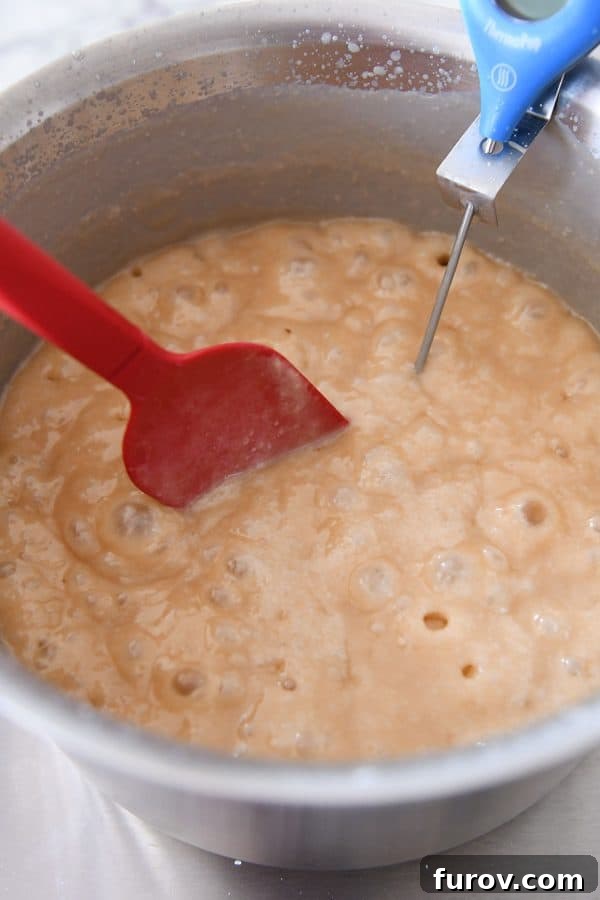
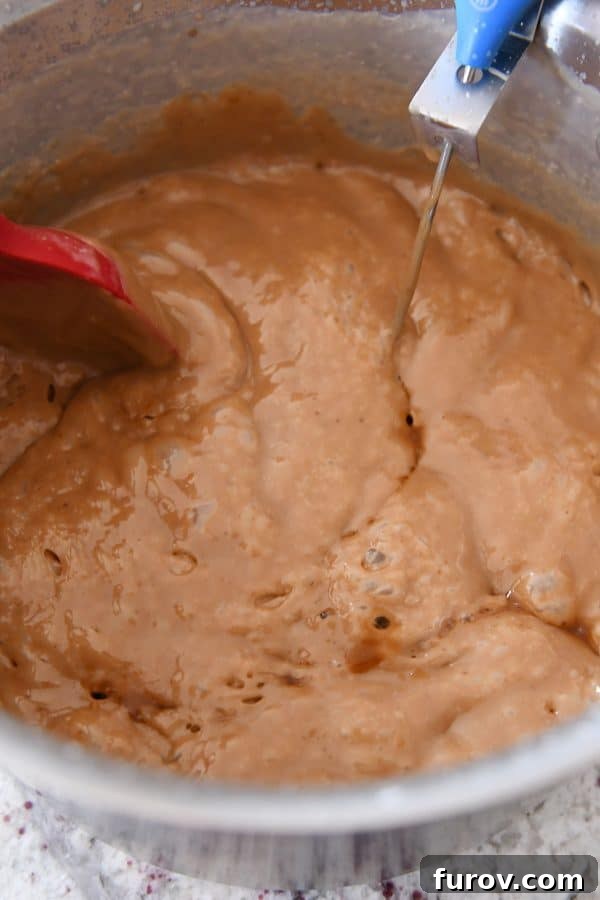
Observe the caramel’s transformation as it cooks. Initially, the mixture is lighter in color, with small, tightly packed bubbles.
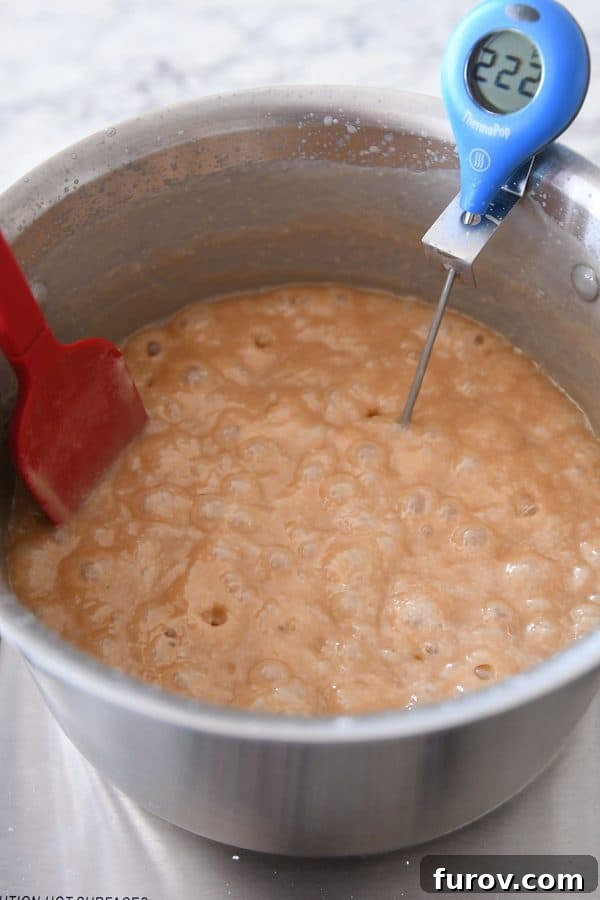
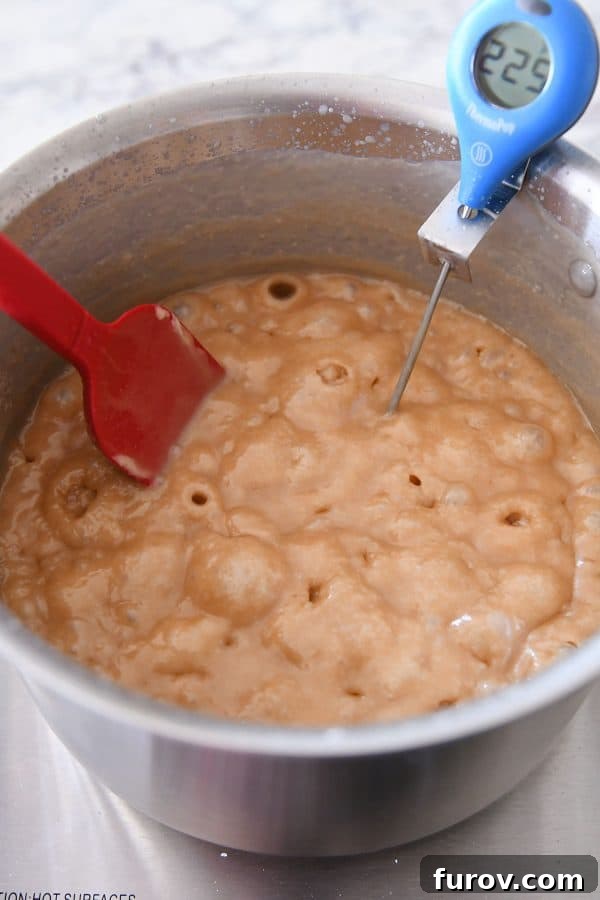
As the temperature rises, the color will deepen, and the bubbles will become larger and more spaced out, indicating it’s approaching the desired consistency.
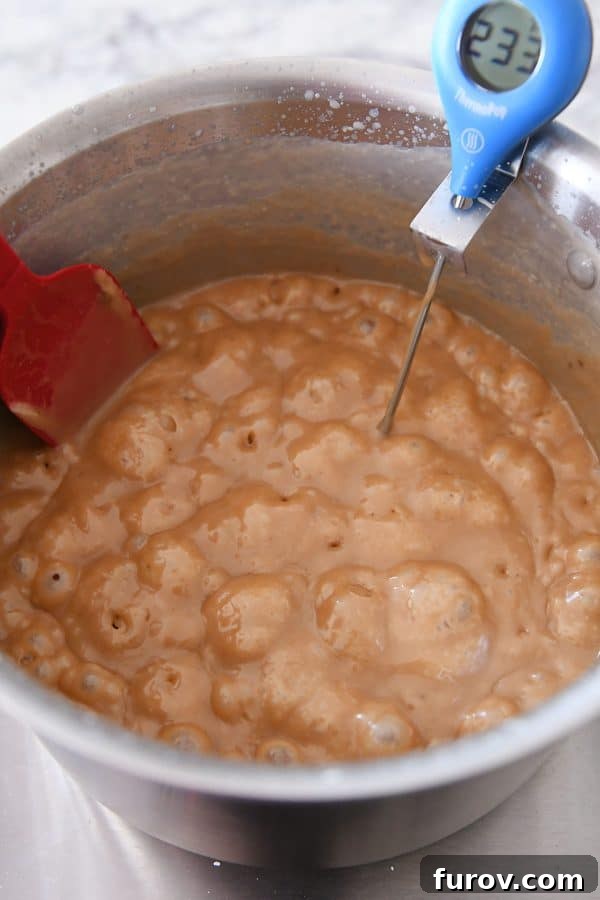
With my carefully calibrated thermometer, I consistently cook these vanilla caramels to exactly 245 degrees F. This stage typically takes 30-45 minutes, depending on your stovetop and how you manage the heat. At this temperature, the caramels achieve a delightful softness that is still wonderfully chewy, without being overly sticky to the paper. They are slightly softer than traditional store-bought Kraft or Brach’s caramels, yet firmer than the luscious caramel found inside a Twix bar. Does that make sense?
Speaking of Twix, why don’t they make dark chocolate versions? And why can’t I find them in my local grocery store? These are the real mysteries that keep me awake at night.
Feel free to adjust the final cooking temperature slightly lower or higher to match your personal preference for softer or firmer caramels.
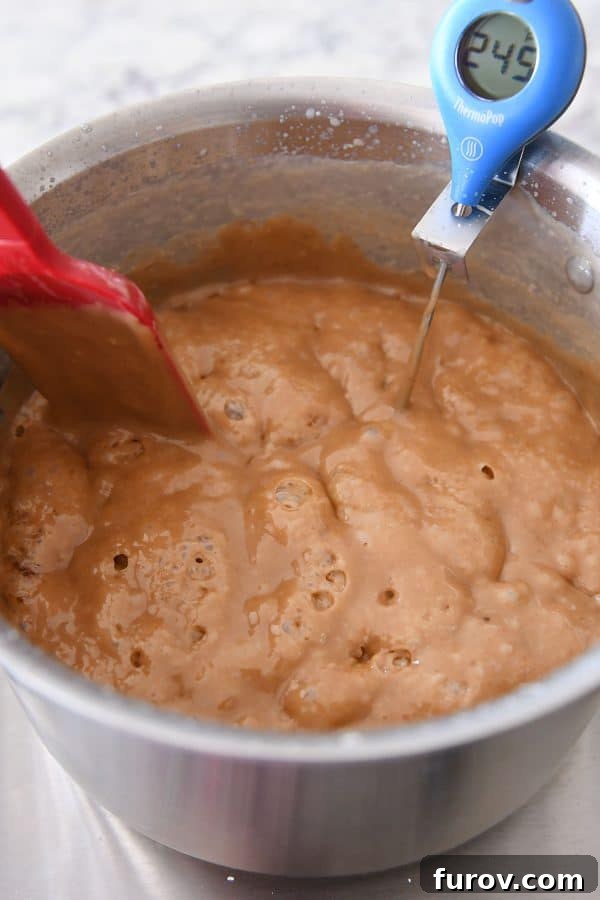
As soon as the caramel reaches your desired temperature, immediately remove the pan from the heat and stir in the vanilla extract. It will bubble a bit, which is perfectly normal. Remember, as you stir, avoid scraping down the sides of the pan.
Exploring Other Caramel Flavors
If you’re eager to experiment with different caramel flavors, this is the ideal moment! Simply omit the vanilla extract and stir in an alternative extract of your choice, such as cinnamon, anise, huckleberry, or razzleberry. The exact quantity will depend on the extract’s brand and intensity (remember, flavored *oils* are significantly more potent than extracts, so you’ll need less of an oil). Generally, I recommend using about 1/2 to 1 teaspoon of a flavored *oil* or 2-3 teaspoons of a flavored *extract*.
You can also incorporate food coloring at this stage if desired. Gel food coloring is my preference, as a small amount goes a long way in achieving vibrant hues.
1-Minute How-To Caramel Video
Want to see the entire cooking process condensed into approximately one minute? Here it is:
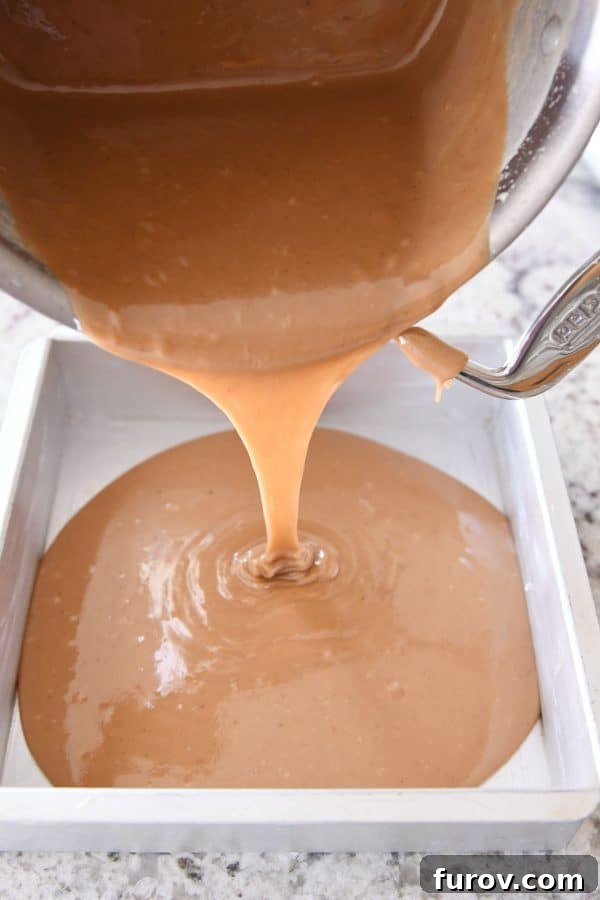
Once the vanilla (or other flavorings) are thoroughly stirred in, immediately pour the hot caramel into your meticulously prepared pan. You did prepare the pan, didn’t you? I truly hope you prepared the pan!
When pouring, avoid aggressively scraping the sides and bottom of the pot. A gentle scrape is fine, but trying to “clean out” the pot can introduce overly hot caramel from the bottom and sugary bits from the sides, potentially affecting the final texture of your caramels.
How to Cut and Wrap Your Homemade Caramels
After your caramels have completely cooled (this usually takes several hours), it’s time for the final, satisfying steps: cutting and wrapping.
First, use a flat spatula to gently loosen the entire slab of caramel from the pan. If your pan was well-buttered, it should lift out easily. Transfer the caramel slab onto a clean cutting board.
I find my bench scraper utterly indispensable for cutting caramels cleanly and efficiently. A single 8×8-inch pan of caramels typically yields between 50 and 60 delicious pieces.
Wax Paper vs. Cellophane Wrappers: A Comparative Look
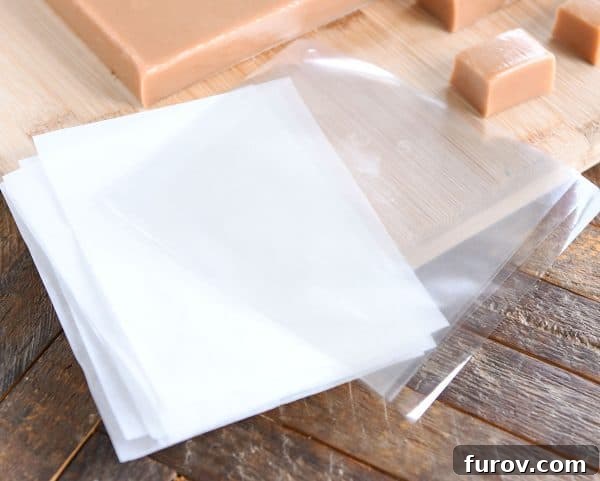
My childhood memories of homemade caramel production are filled with hours spent at the wax paper cutting station, armed with a pair of scissors. I meticulously cut hundreds of wax paper squares (or approximations thereof!) for the annual batches of caramels my mom lovingly made. Wax paper certainly works well, but it can be a tedious chore to cut into uniform pieces. While I initially thought pre-cut wax paper squares were nonexistent for caramel wrapping, many wonderful readers have since informed me otherwise! You can find pre-cut wax paper squares on Amazon, which is a fantastic convenience.
Now, as an adult with my own caramel-making household, I’ve fully embraced cellophane wrappers. They typically come in large packs of 500 or 1,000, meaning a single purchase will likely last a lifetime unless you’re making caramels professionally! These wrappers are incredibly practical, and I find the clear, slightly crinkly texture adds a lovely aesthetic to the finished caramels.
I personally use these cellophane wrappers. Many brands are available, often costing just a few cents per piece on Amazon. You might even find them at a lower price from online specialty retailers like Orson Gygi or Caramel Wrappers, though shipping costs should be considered.
When using cellophane, you might need to twist the ends a little more firmly than with wax paper, as they can sometimes unravel slightly. Despite this minor point, I adore them and can’t imagine wrapping caramels without them.
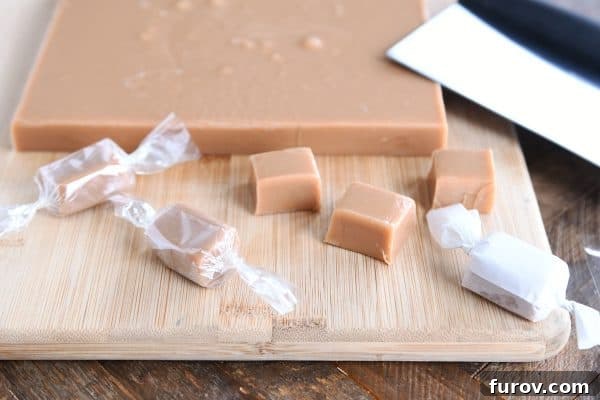
One final note: don’t worry if you notice small bubbles in your cooled caramel slab. This can happen, especially if (like me) you have enthusiastic younger helpers who might scrape a bit too vigorously from the pan. These bubbles are typically unnoticeable once the caramels are cut and individually wrapped, so they won’t detract from your beautiful treats.
May This Guide Inspire Your Best Homemade Caramels
I sincerely hope this definitive guide proves invaluable in your caramel-making adventures. I truly believe everyone deserves to feel like a kitchen rock star, and there’s no better way to achieve that than by mastering homemade caramels at least once.
There is genuinely nothing quite like the flavor and texture of homemade caramels. In fact, my self-control around a fresh batch of 50 little caramels is so nonexistent that I’ve had to delegate the cutting and wrapping to my children! It usually goes: one for the wrapper, one for me; one for the wrapper, one for me. By the end, I invariably end up with a mild-to-severe stomach ache. I know, I know, a personal problem!
Have More Questions?
Please don’t hesitate to ask any additional caramel-making questions in the comments below. I’ll be delighted to answer them or point you towards further resources (ahem, Google!) that can help.
Homemade caramels are truly my absolute favorite treat to make during the holidays. This versatile recipe also forms the base for my perfect homemade caramel apples and has become my staple for experimenting with other delightful flavors, such as cinnamon or licorice caramels.
Seriously, I must stop here because I could talk about homemade caramels forever, and I wouldn’t want to lose your loyalty by droning on and on. My husband, Brian, is probably giving all of you the side-eye, wondering, “Seriously, who got her started?”
Love you all. Now go forth and make a batch of incredible homemade caramels for yourself or your lucky neighbors!
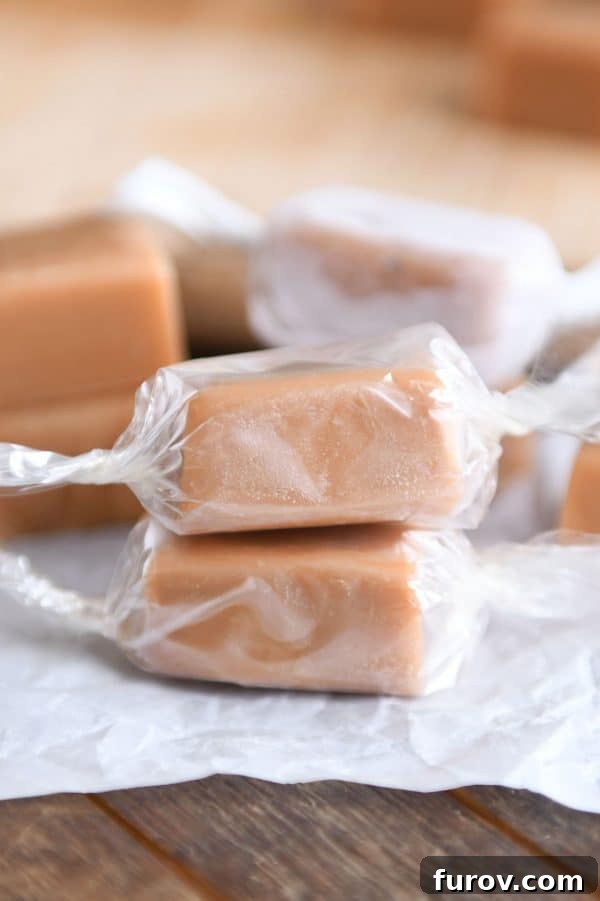
The Best Homemade Caramels
Yield: 60 Caramels
Prep Time: 15 mins
Cook Time: 45 mins
Total Time: 1 hr
Pin
Ingredients
- 2 cups heavy cream
- 2 ½ cups (530 g) granulated sugar
- ½ cup light corn syrup
- ½ cup water
- 6 tablespoons (85 g) butter, cut into tablespoon-size pieces
- ¼ teaspoon coarse, kosher salt
- 1 tablespoon vanilla extract (see note)
Instructions
- Butter the bottoms and sides (get into the corners, too!) of a 9×9-inch square baking pan. (Alternately, you can line with parchment and butter the parchment – this may make it easier to pull the slab of caramels out of the pan after they have cooled in order to cut and wrap them.) Set aside.
- Heat the cream in a saucepan or in the microwave until steaming. Keep warm.
- For the caramels, in a large, heavy-bottomed pot (at least 5- or 6-quarts), stir together the sugar, corn syrup, and water, taking care to not splash the mixture up the sides of the pot. Clip a candy thermometer onto the side of the pan.
- Bring the mixture to a boil over medium-high heat WITHOUT STIRRING or moving the pan. As it begins to boil, fill a cup with water and use a pastry brush to wash down the sides of the pan so there are no granules of sugar sticking to the sides of the pan (you probably won’t need to repeat this after the sides have been well-cleaned). This prevents the caramel mixture from crystallizing in later steps.
- Cook until the boiling sugar mixture registers 325 degrees F on the thermometer, about 15-20 minutes (for darker but still chewy caramels, continue cooking the sugar mixture – I’ve gone as high as 345 for super intense, dark caramels; beware the next step will cause much more steaming and bubbling the higher you cook this initial sugar mixture).
- Slowly and carefully pour the warm cream into the caramel. It will bubble and produce a lot of steam! Add the butter and salt. The mixture will bubble high during this step but will go down after a few minutes.
- Begin stirring the caramel with heatproof rubber spatula with a flat top (a flat edge does better at preventing the caramel from burning than a rounded edge). Avoiding scraping the edges of the pan, and continue to cook, stirring constantly and slowly, until the mixture reaches 245 degrees F, about 10-15 minutes (you can go as high as 248 degrees F for a firmer, but still chewy, caramel, or take the caramel off the heat earlier for a softer caramel; 245 is perfect in my book).
- Off the heat, stir in the vanilla without scraping down the sides of the pan – scraping the bottom of the pan is fine (this would be the time to add other flavorings/color).
- Immediately pour the caramel mixture into the prepared pan. Let the caramels cool completely. I use a large, metal spatula to peel the whole slab of caramel out of the pan and onto a cutting board.
- Cut into squares using a sharp knife or bench scraper, wrap, and store in an airtight container at cool room temperature for up to two weeks.
Notes
Vanilla: For a vanilla bean version, see this recipe.
Double Batch: This recipe can be doubled (for a 9X13-inch pan of caramels). Use a larger pan so it doesn’t boil over. A double batch will take longer to come to temperature at each step.
Time: The exact time for each step will depend on how low or high you moderate the heat – as well as if you have a gas or electric stove.
Elevation: I live at 2,400 feet elevation which is where this recipe has been tested. If you live at higher or lower elevation, you may need to adjust the final cooking temperature 2 degrees for every 1,000 feet elevation difference (subtracting for higher elevation and adding for lower elevation). For instance, if you live at sea level, you may need to add 4 degrees to the final cooking temperature. If you live at 5,000 feet elevation, you may need subtract 4 to 5 degrees from the final cooking temperature. A lot depends on the desired firmness/chewiness of the caramels, so there is some leeway in the exact number of degrees for cooking the caramel. In my experience, a difference of 2 to 4 degrees won’t make or break a caramel recipe, so don’t stress too much about this. Just keep track of the outcome and make adjustments in subsequent batches as needed.
Author: Mel
Serving: 1 Caramel, Calories: 69kcal, Carbohydrates: 11g, Protein: 1g, Fat: 3g, Saturated Fat: 2g, Cholesterol: 11mg, Sodium: 16mg, Sugar: 11g
Recommended Products
Recipe Source: adapted from this recipe which was originally adapted from Cuisine at Home 2016