
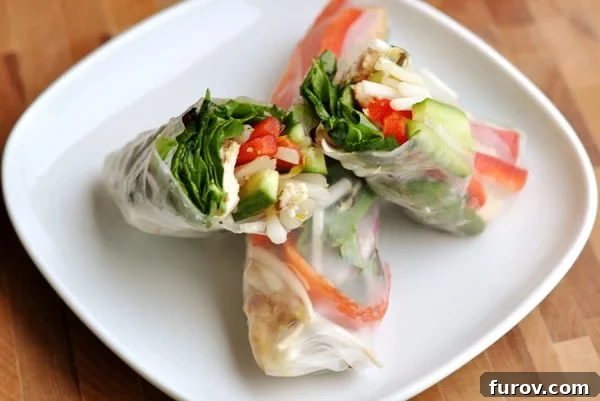
Experience the joy of fresh, vibrant flavors with these incredibly easy homemade Vietnamese spring rolls! Packed with healthful vegetables, tender marinated chicken, and served with a luscious hoisin peanut dipping sauce, these rolls are a culinary delight that proves healthy eating can be both simple and delicious.
For too long, the idea of making authentic Vietnamese spring rolls at home seemed like a daunting task, reserved only for seasoned chefs or those with an adventurous spirit in the kitchen. But after finally diving in, I can confidently say that these fresh rolls are surprisingly simple to prepare, debunking any myths of complexity. They are a testament to how accessible and rewarding homemade Asian cuisine can be.
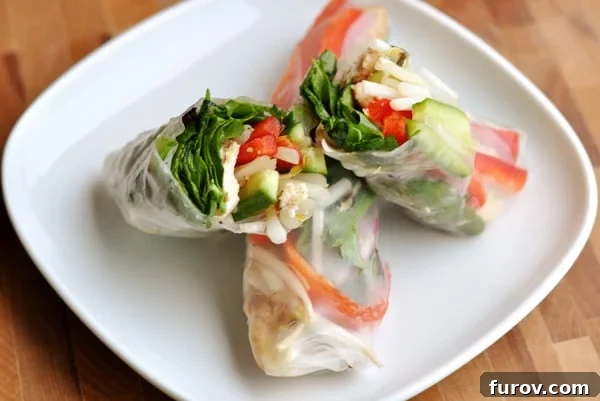
Discover the Delight of Homemade Vietnamese Spring Rolls
These fresh spring rolls are a symphony of textures and tastes – a delightful combination of crisp vegetables, savory marinated protein, and delicate rice paper wrappers. Each bite offers a burst of flavor that will have you savoring every moment. And the best part? You’ll be consuming a significant amount of nutritious vegetables without even realizing it, making them an ideal choice for a light and healthy meal or appetizer.
The magic truly happens when these fresh rolls meet their perfect partner: the dipping sauce. Like a rich frosting on a gourmet cake, our homemade Hoisin Peanut Dipping Sauce elevates the entire experience. It perfectly complements the tender, chewy rice paper wrapper, the fantastic crunch of fresh vegetables, and the succulent, Thai-inspired marinated chicken. This combination delivers an unforgettable culinary journey right to your dining table.
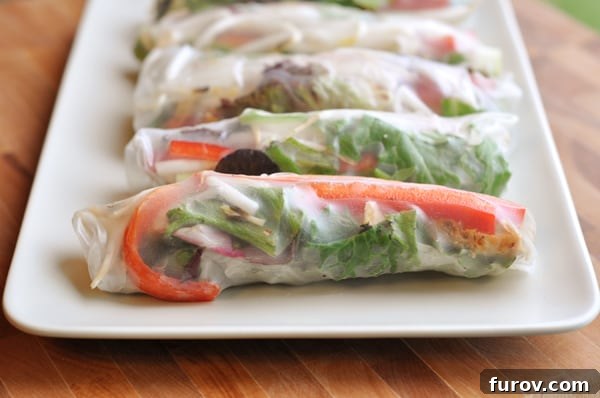
Sourcing Your Ingredients: Easier Than You Think!
While the exotic name might suggest hard-to-find ingredients, rest assured that most components for these Vietnamese spring rolls are readily available. Many local, larger grocery stores now carry a wide array of international foods, including crucial items like rice paper wrappers. Don’t let geographical location or perceived specialty scare you away – if I can find them, so can you! Look for rice paper in the Asian foods aisle, alongside other ingredients like fish sauce and hoisin sauce.
To ensure your success, I’ve included a comprehensive, step-by-step photo guide on the rolling process further down the page, after the detailed recipe. These visuals will walk you through each stage, making the assembly straightforward and fun.
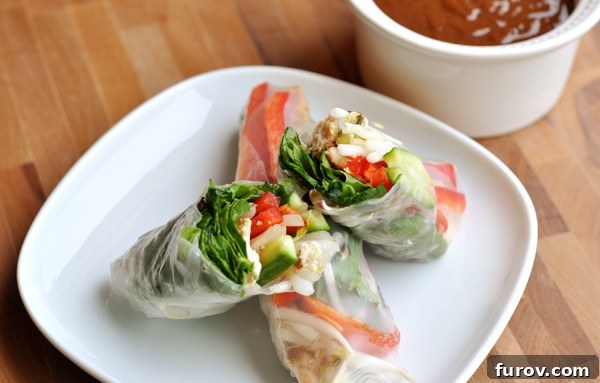
Elevate Your Meal: What to Serve With Vietnamese Spring Rolls
While these fresh Vietnamese spring rolls are a complete and satisfying meal on their own, pairing them with complementary dishes can create an even more memorable dining experience. Consider these delightful additions to your spread:
- Grilled Rosemary Buttermilk Chicken: A lean protein dish with a different flavor profile that still pairs wonderfully with the freshness of the rolls.
- A Light and Refreshing Fruit Salad: The sweetness and acidity of fruit perfectly cut through the savory notes of the spring rolls and peanut sauce. Try this Honey Lime Fruit Salad for a bright side.
- Savory Hummus with Chips or Crackers: For another easy appetizer or snack option, a creamy hummus provides a textural contrast and a satisfying dip.
- Vietnamese Iced Coffee (Cà phê sữa đá): For an authentic beverage pairing, the rich, strong coffee with sweetened condensed milk is an iconic choice.
- Simple Jasmine Rice: If you’re looking to make it a heartier meal, a side of fluffy jasmine rice can be a comforting addition.
Explore More Asian-Inspired Delights:
Chicken Gyros (A twist on wraps!)
Chicken with Mushrooms and Zucchini (Another fresh and light option)
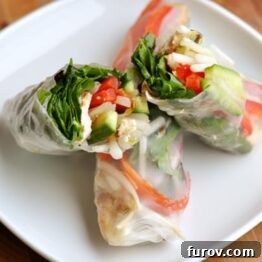
Authentic Vietnamese Spring Rolls with Hoisin Peanut Sauce
Pin
Rate
SaveSaved!
Ingredients for Fresh Vietnamese Spring Rolls
For the Rolls:
- 2 pounds chicken breasts or boneless pork chops, sliced thin for grilling/broiling
- About 30 (10-inch) rice paper spring roll wrappers, made from rice or tapioca flour for flexibility
- 1 pound fresh bean sprouts, rinsed and drained
- 1 red bell pepper, cored, seeds removed, and thinly sliced into matchsticks
- 1 large English cucumber, peeled (optional) and cut into thin, uniform strips
- 1 large bunch of fresh herbs, thoroughly washed and patted dry (a mix of fresh basil and cilantro works beautifully)
- 1 large bunch of fresh lettuce leaves, washed and separated (butter lettuce or green leaf work well)
- Warm water in a large shallow bowl or pie plate, wide enough to fully submerge a spring roll wrapper
For the Meat Marinade:
- Juice of 2 limes, freshly squeezed for maximum flavor
- 2 tablespoons brown sugar, lightly packed
- 2 tablespoons fish sauce, for an authentic umami depth
- 4 cloves garlic, finely minced or crushed
- 1 teaspoon chile-garlic paste, adjust to your preferred level of spice
For the Hoisin Peanut Dipping Sauce:
- 8 oz hoisin sauce, check labels for gluten-free options like the Y&Y brand
- ¼ cup smooth peanut butter, creamy and unsweetened is ideal
- 1 tablespoon rice vinegar, for a touch of tang
- 2 cloves garlic, crushed or pressed through a garlic press
- ½ teaspoon chile-garlic paste, for a subtle kick, adjust to taste
Step-by-Step Instructions for Perfect Spring Rolls
-
Prepare the Marinated Meat: Begin by whisking together all the marinade ingredients in a medium bowl until the brown sugar is fully dissolved. Transfer this flavorful marinade into a large ziploc bag. Add your sliced chicken breasts or pork chops to the bag, ensuring they are fully coated. Seal the bag and refrigerate for at least one hour, or up to two hours, allowing the meat to absorb all the delicious Thai-inspired flavors. Once marinated, cook the meat by grilling or broiling until it is thoroughly cooked through and lightly charred for extra flavor. Let the cooked meat cool completely before slicing it into 1/4 to 1/2-inch thin strips, ready for your spring rolls.
-
Craft the Hoisin Peanut Dipping Sauce: In a separate bowl, combine all the dipping sauce ingredients: hoisin sauce, smooth peanut butter, rice vinegar, crushed garlic, and chile-garlic paste. Whisk vigorously until all ingredients are well combined and the sauce is smooth and creamy. If the sauce appears too thick for dipping, gradually add small amounts of hot water, stirring continuously, until you achieve your desired pourable consistency. Set this exquisite sauce aside.
-
Assemble Your Fresh Spring Rolls: (Refer to the step-by-step photos below the recipe for visual guidance). Start by preparing your workstation. Have all your fresh ingredients – lettuce, herbs, sliced vegetables, and cooked meat – neatly arranged. Fill a large shallow bowl or pie plate with warm water, ensuring it’s wide enough to accommodate a spring roll wrapper. Dip one rice paper wrapper into the warm water for just a second or two; it should become pliable but not overly soft. Carefully lay the softened wrapper flat on a clean, damp surface or large cutting board. Layer a small strip of lettuce, fresh herbs, mixed vegetables (bean sprouts, bell pepper, cucumber), and the sliced marinated meat onto the lower third of the wrapper, leaving a small border on the sides and bottom, and a larger border on the top. Begin rolling from the edge nearest to you, gently bringing the wrapper up and over the filling. As you roll, tuck in the sides of the wrapper (like folding a burrito) to create a neat, enclosed cylinder. Roll tightly enough to secure the filling, but be careful not to pull too hard, as the wrappers can tear. Continue rolling until you reach the top edge. The rice paper will naturally be sticky and seal itself. Place the finished roll on a plate, ensuring it doesn’t touch other rolls to prevent sticking. Repeat with the remaining ingredients. Serve your freshly rolled spring rolls immediately with the prepared Hoisin Peanut Dipping Sauce on the side.
Helpful Notes & Tips
Gluten-Free Considerations: If you’re catering to gluten-free dietary needs, it’s essential to carefully check the labels on all bottled Asian ingredients. Hoisin sauce, fish sauce, and even some chile-garlic pastes can contain gluten. Opt for brands specifically labeled “gluten-free” to ensure your spring rolls are safe for everyone to enjoy.
Customizing Your Fillings: Don’t be afraid to experiment with your spring roll fillings! Cooked shrimp, tofu, or even shredded leftover roast chicken can be excellent protein substitutes. Add extra crunch with shredded carrots, red cabbage, or slivered jicama. Fresh mint, perilla leaves, or Thai basil can also enhance the aromatic profile.
Rolling Techniques: The key to a successful spring roll lies in the rolling. Don’t over-soak the rice paper, as it will become too flimsy and tear. A quick dip is all it needs, as it will continue to soften as you fill it. For a tighter roll, gently press down on the filling as you start to fold, ensuring no air pockets. Practice makes perfect, so don’t get discouraged if your first few aren’t picture-perfect!
Serving and Storage: Spring rolls are best enjoyed fresh, as the wrappers can stiffen or stick together over time. If you need to make them slightly ahead, arrange them on a platter with space between each roll, cover loosely with a damp paper towel or plastic wrap, and refrigerate for up to an hour. For longer storage, they aren’t ideal, as the wrappers can become brittle.
Recommended Kitchen Tools
Recipe Source: Adapted with inspiration from Use Real Butter
Mastering the Art of Rolling Vietnamese Spring Rolls: A Visual Guide
The key to beautiful and intact spring rolls lies in the rolling technique. Don’t be intimidated – with a little practice and these step-by-step photos, you’ll be rolling like a pro in no time! The trick is to work quickly and confidently once the rice paper is softened.
Step 1: Laying the Foundation
After briefly dipping your rice paper wrapper in warm water until it’s pliable (just a second or two is enough!), lay it flat on a large, clean cutting board or a damp work surface. Arrange your filling ingredients – lettuce, fresh herbs, crisp vegetables, and thinly sliced marinated meat – in a small, horizontal strip across the lower third of the wrapper. Make sure to leave a small border along the bottom and sides, and a more generous border at the top, which will be the last section to roll.
Step 2: The Initial Fold
Gently take the bottom edge of the wrapper and bring it up and over your meticulously arranged ingredients. As you do this, use your fingers to softly press down on the filling, helping to compact it and keep everything securely in place. The rice paper has a wonderful elasticity, allowing for a good stretch, but remember to be gentle to avoid tearing.
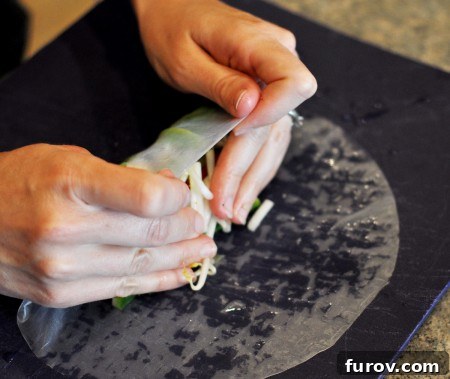
Step 3: Continuing the Roll
Continue to roll the wrapper upwards, away from you, further encasing the ingredients. Maintain a gentle pressure to ensure the roll remains tight and compact. This continuous upward motion is crucial for creating a firm, well-formed spring roll.
Step 4: Folding in the Sides (Burrito Style)
Once you’ve rolled about a third of the way up, hold the middle of the partially rolled spring roll gently with your fingertips. Now, take one of the side edges of the wrapper and fold it inward towards the center. Repeat this action with the other side. This step is much like folding a burrito, creating sealed ends that prevent your delicious filling from escaping.
Step 5: The Final Roll to the Top
With the sides securely folded in, resume rolling the wrapper all the way to the top edge. Keep the roll as snug as possible without over-stretching the delicate rice paper. This final roll completes the structural integrity of your spring roll.
Step 6: Sealing and Resting
As you reach the very end, the inherent stickiness of the softened rice paper will naturally seal the roll. Roll it completely to ensure it’s firmly closed. Once finished, place your perfectly rolled spring roll aside. It’s often best to place them individually or with slight spacing to prevent them from sticking to each other before serving. Prepare for a truly delightful fresh eating experience!