
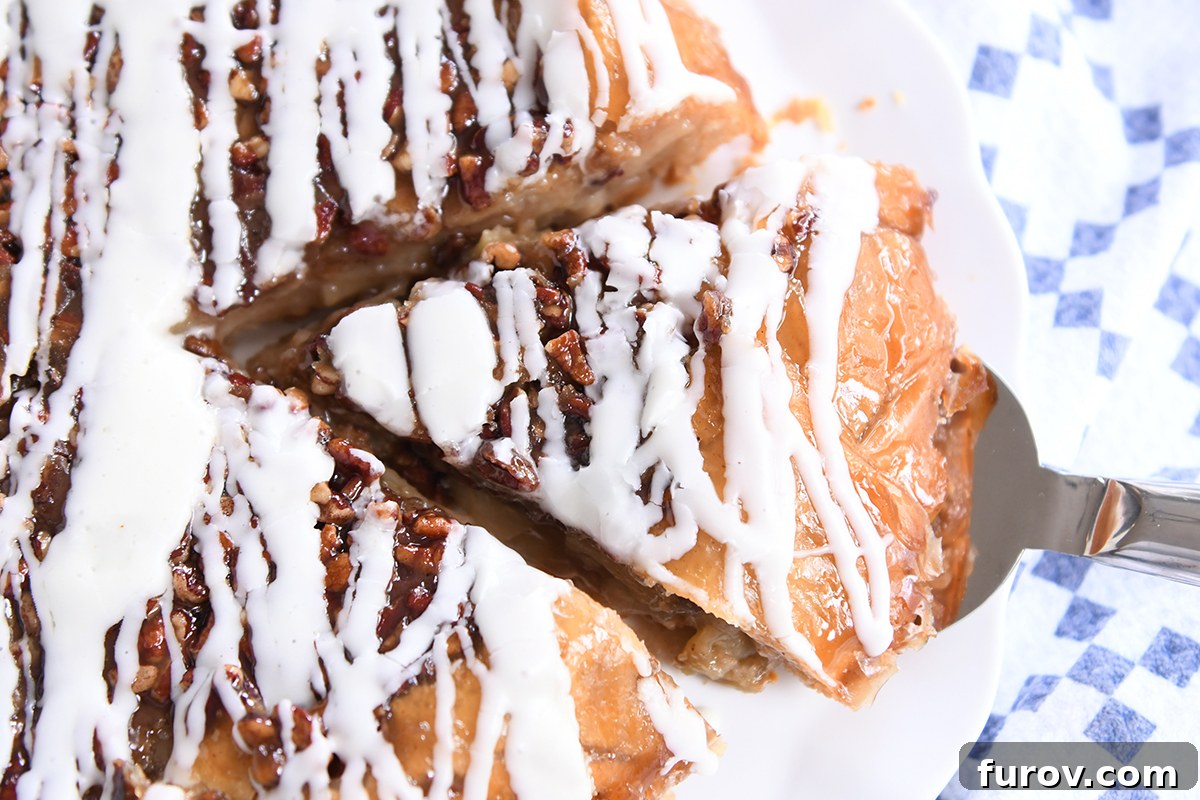
This upside down apple pie is nothing short of incredible! Imagine layers of perfectly tender, tart apples embraced by a rich caramel pecan base, all nestled within a buttery, crisp pie crust, and finished with a delicate, sweet glaze. It’s a dessert experience that will redefine your expectations of apple pie.
Prepare to rethink everything you thought you knew about classic apple pie. This unique upside-down rendition transforms a beloved dessert into something truly extraordinary. It’s not just a pie; it’s a revelation, boasting a symphony of textures and flavors that will tantalize your taste buds and leave everyone craving another slice. Far from a mere novelty, this pie elevates the familiar comfort of apple pie with an ingenious twist that makes it both spectacularly delicious and surprisingly approachable for home bakers.
What makes this upside-down apple pie truly exceptional is the harmonious blend of its core components. Beyond the generous filling of sweet-tart apples, the star of the show is undoubtedly the luscious caramel pecan layer. This isn’t just an added flourish; it’s the foundational element that imbues the pie with a depth of flavor and a delightful crunch, setting it miles apart from its traditional counterparts. Every bite delivers a perfect balance of warmth, sweetness, tang, and nutty goodness, making it an unforgettable treat for any occasion.
How to Master the Upside Down Apple Pie
The concept of an “upside down” pie might sound a little unconventional, even a bit strange. But trust us, this creative approach isn’t just a gimmick; it’s a stroke of culinary genius that unlocks new levels of flavor and texture. The magic largely lies in that irresistible caramel pecan layer, which caramelizes beautifully during baking, creating a magnificent topping once the pie is inverted. This method ensures a wonderfully crisp bottom crust (which becomes the top!) and infuses every bite with rich, buttery sweetness. Let’s walk through the simple, yet essential, steps to create this masterpiece in your own kitchen:
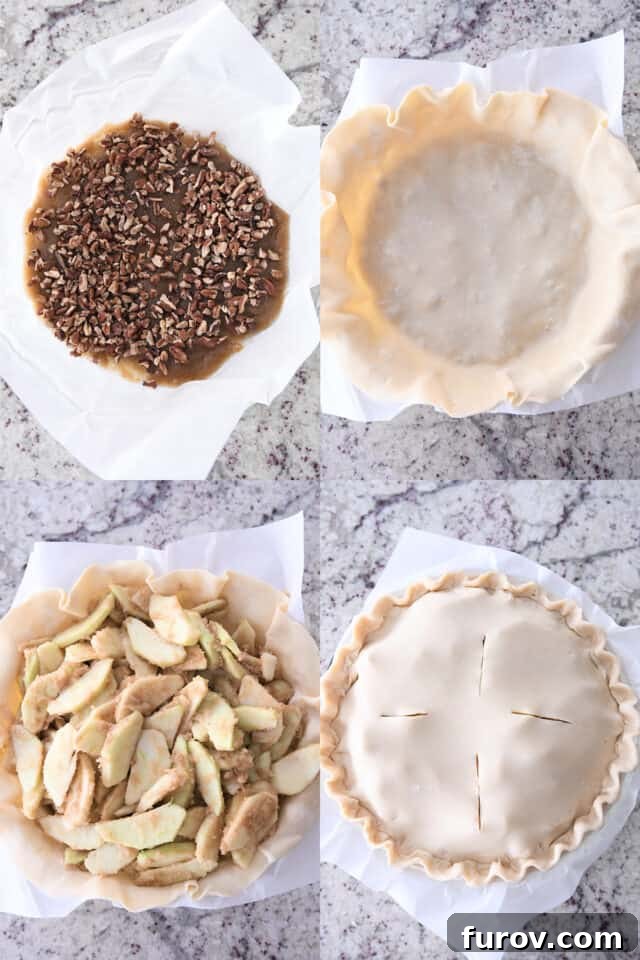
- Prepare Your Pie Plate: Begin by lining a deep 9- or 9.5-inch pie plate with parchment paper or heavy-duty foil. This crucial step is your safeguard against sticky situations during the inversion process. Make sure the paper or foil extends beyond the edges of the pie plate, creating “handles” that will aid in lifting. Then, generously grease the entire lined surface with cooking spray. I cannot stress this enough – forgetting the greasing step can lead to a less-than-ideal outcome, as I’ve learned from personal experience!
- Craft the Caramel Pecan Base: In a small bowl, combine melted butter and brown sugar until thoroughly mixed. Spread this rich caramel mixture evenly across the bottom of your prepared pie plate. Once smooth, sprinkle your chopped pecans over the caramel layer. This creates a delectable, nutty crust that will become the star topping when the pie is flipped.
- Lay the First Crust: Carefully roll out your first pie crust. Gently fit it snugly over the caramel pecan layer, ensuring it presses against the bottom and sides of the pie plate. This crust will become the sturdy base that holds all your delicious apple filling.
- Fill with Apple Goodness: In a large bowl, combine your peeled and thinly sliced tart apples (Granny Smith apples are highly recommended for their perfect balance of tartness and firm texture), granulated sugar, all-purpose flour, melted butter, ground cinnamon, ground nutmeg, and a pinch of salt. Toss everything together until the apples are evenly coated with the spice and sugar mixture. Then, pile this fragrant apple mixture high into the prepared pie crust. Don’t be shy; a full pie means more deliciousness!
- Top and Seal: Roll out your second pie crust and carefully place it over the apple filling. Trim both the top and bottom crusts to about 1/4- to 1/2-inch around the edges. This allows for a neat seal. Fold the bottom crust over the top crust, pressing firmly to seal the two crusts together. Once sealed, flute the edges to create a beautiful, decorative finish.
- Vent and Bake: Cut a few slits into the top crust – this allows steam to escape during baking, preventing the crust from becoming soggy and ensuring even cooking. Finally, place your assembled pie on a foil-lined baking sheet to catch any potential drips from the bubbling caramel and bake according to recipe instructions.
Following these steps will guide you to a perfectly baked, beautifully inverted, and absolutely delicious upside-down apple pie. Get ready to impress!
Crafting the Perfect Pie Edge: A Quick Guide
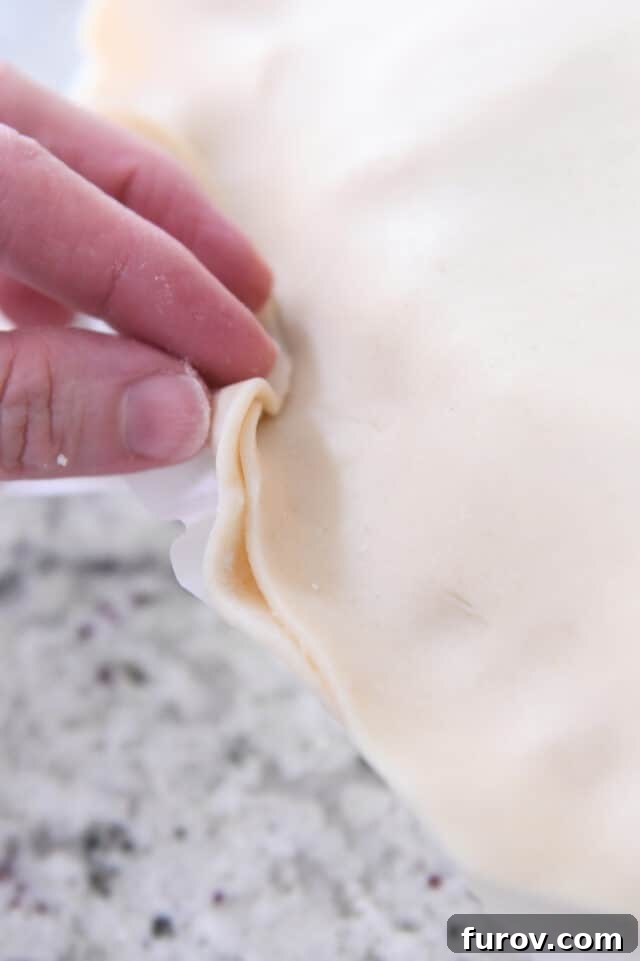
Achieving a beautifully sealed and fluted pie crust isn’t just about aesthetics; it’s also crucial for containing the luscious apple filling and the bubbly caramel pecan layer. For any double-crust pie, including this delightful upside-down version, I employ a simple yet effective technique to ensure a secure and visually appealing edge. After placing both the bottom and top crusts, I trim the excess dough, leaving about a 1/4- to 1/2-inch overhang around the entire circumference. This small margin is essential for a proper seal. The next step involves folding the bottom crust up and over the edge of the top crust. As you fold, gently but firmly press the two crusts together, ensuring they are tightly sealed. This creates a robust border that prevents any filling from seeping out during baking. Once sealed, you can then artfully flute the edges with your fingers or a fork, adding that classic, homemade touch that makes every pie feel special.
Essential Baking Wisdom for a Flawless Pie
Baking a pie, especially one with a bubbling caramel layer, comes with its own set of considerations. Heeding these crucial baking notes will help ensure your upside-down apple pie emerges from the oven perfectly cooked, beautifully golden, and wonderfully delicious, without any unwelcome oven messes or burnt edges.
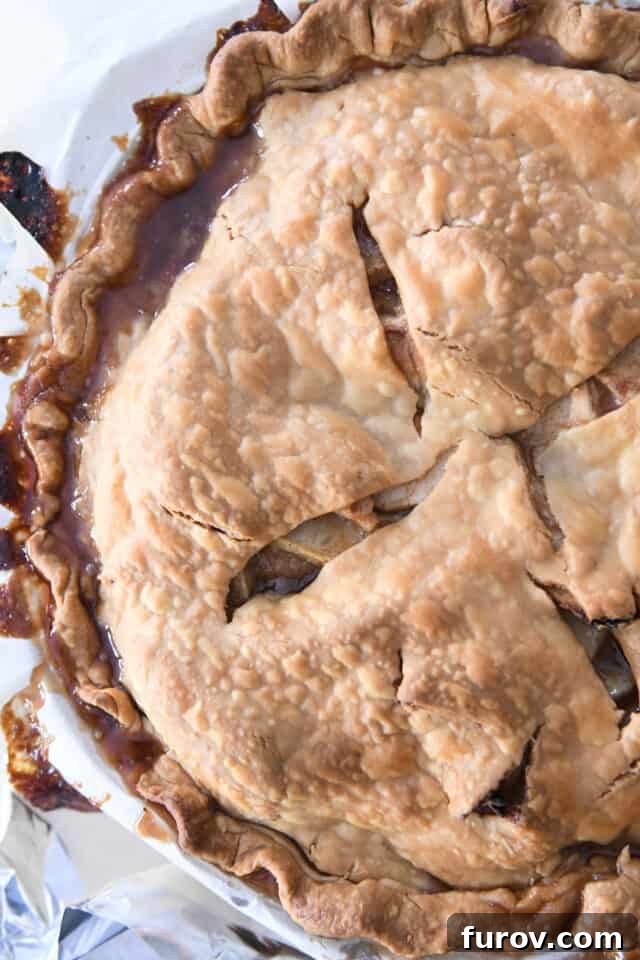
Baking Tip #1: Safeguard Your Oven Floor with a Foil-Lined Baking Sheet! This tip is non-negotiable for an upside-down pie. That incredible caramel pecan layer, which we absolutely adore, has a delightful tendency to bubble up enthusiastically while baking. While this bubbling is a sign of delicious caramelization, it can sometimes overflow the pie plate. Placing your pie on a foil-lined baking sheet acts as a protective barrier, catching any sweet drips and preventing them from cascading onto the floor of your oven, which can lead to smoke, odors, and a difficult cleanup. A little proactive measure goes a long way in ensuring a stress-free baking experience.
Baking Tip #2: Prevent Over-Browning with Foil or Pie Shields. As your pie bakes, you’ll want to keep a close eye on the crust, particularly the edges and the top. Due to varying oven temperatures and the sugar content in the crust, these areas can sometimes brown more quickly than desired. If you notice the edges or the top of your pie getting too dark before the apples inside are fully tender, don’t hesitate to cover them. A simple solution is to loosely tent the entire pie with aluminum foil, or use specialized pie shields around the edges. This deflects direct heat, allowing the rest of the pie to continue baking until the apples are perfectly soft without risking a burnt crust. The key is to ensure the apples are tender when pierced with a knife before removing the pie from the oven; a perfectly cooked filling is as important as a golden crust.
The Ingenious Charm of the Upside-Down Flip
One of the most liberating aspects of baking this upside-down apple pie is that you don’t need to fret over perfection when it comes out of the oven. In fact, this is an absolutely fantastic recipe for beginner bakers, or for anyone who enjoys a more relaxed approach to dessert making. It genuinely doesn’t matter if your pie edges aren’t impeccably fluted, if the top crust (which will soon become the bottom) has a tiny crack, or if the caramel layer looks a little “oozy doozy” around the sides while baking. All those little imperfections simply add to its rustic charm, and more importantly, they are about to be gloriously transformed.
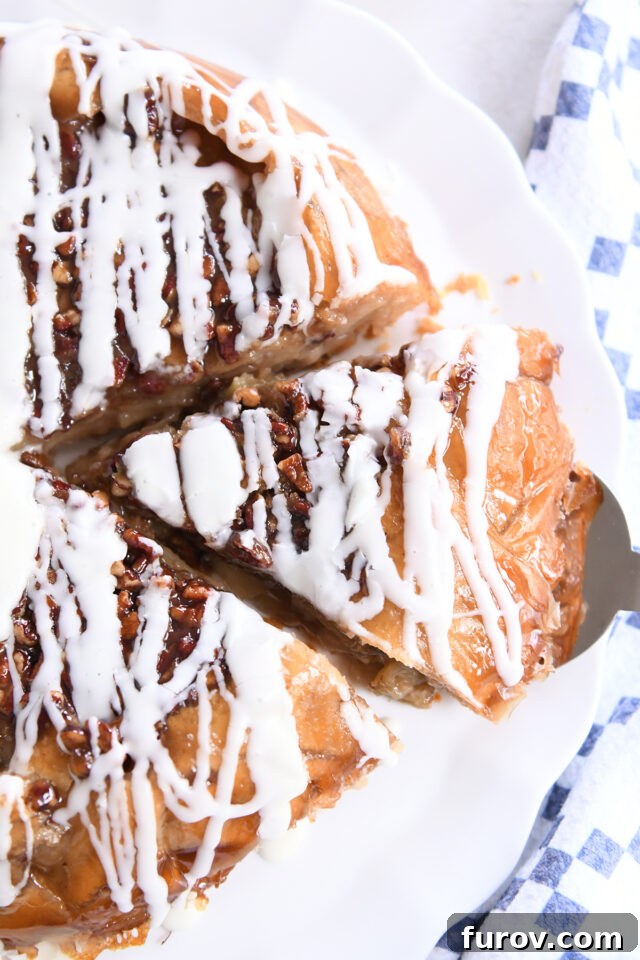
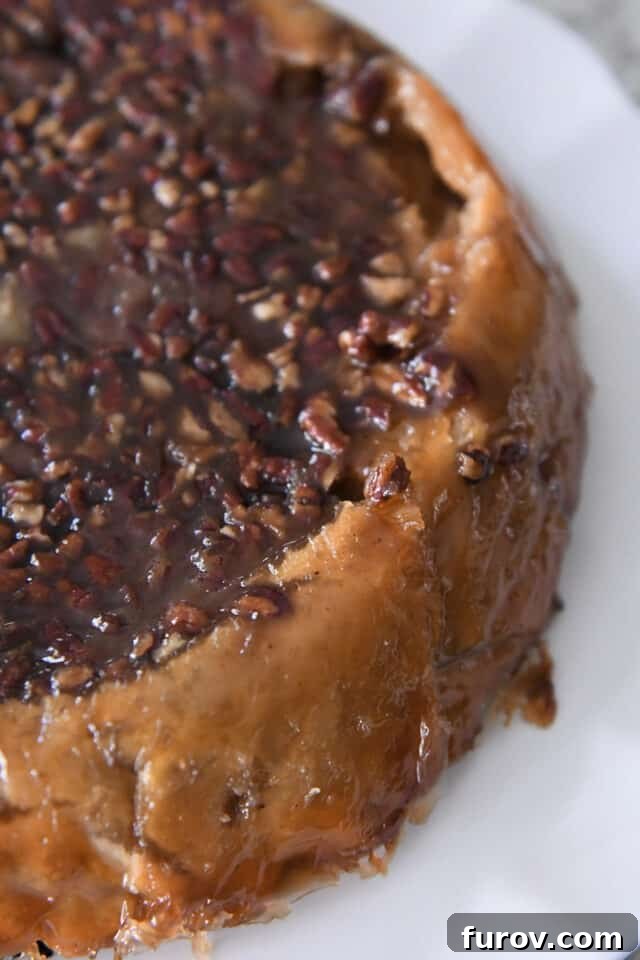
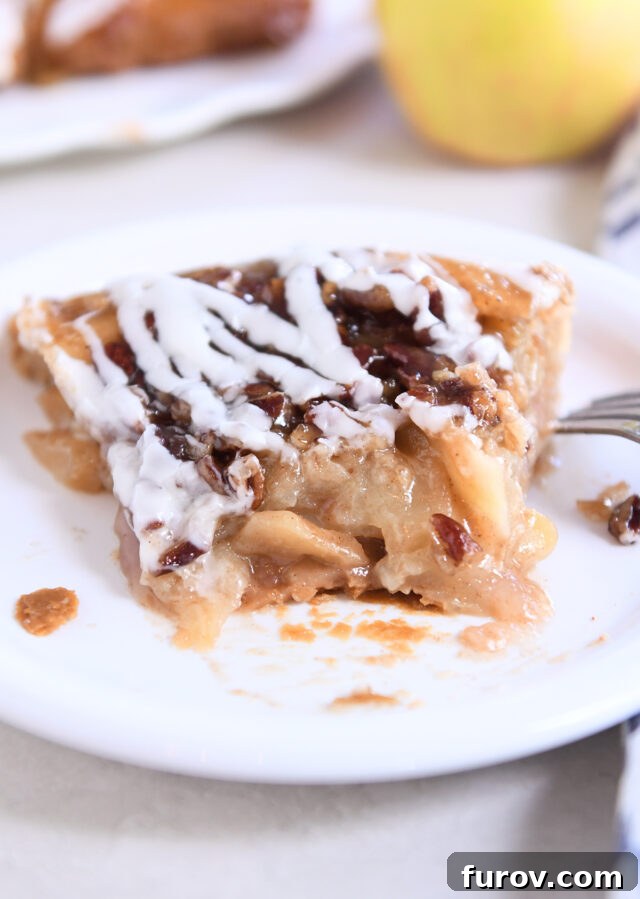
The true magic, the moment of revelation, happens a few minutes after the pie has rested out of the oven. This is when the grand “flip” occurs. With a deep breath and a confident motion, you’ll invert the pie onto your serving platter. The initial top crust, with all its baking imperfections, is never to be seen again! Instead, what is revealed is a stunning, glossy caramel pecan layer that has perfectly melded into the crust, creating a glistening, irresistible topping. This method ensures that the “top” crust (now the bottom) bakes up beautifully crispy, providing a delightful contrast to the tender apples and gooey caramel. You will immediately notice how delightfully non-soggy the bottom of the pie is once it’s flipped – a common pitfall of traditional apple pies completely bypassed by this clever technique. Look at that glorious caramel pecan layer – it’s truly a sight to behold, promising an explosion of flavor and texture. Oh my, it’s absolutely divine! 😍
To Glaze or Not to Glaze: Enhancing Your Pie’s Finish
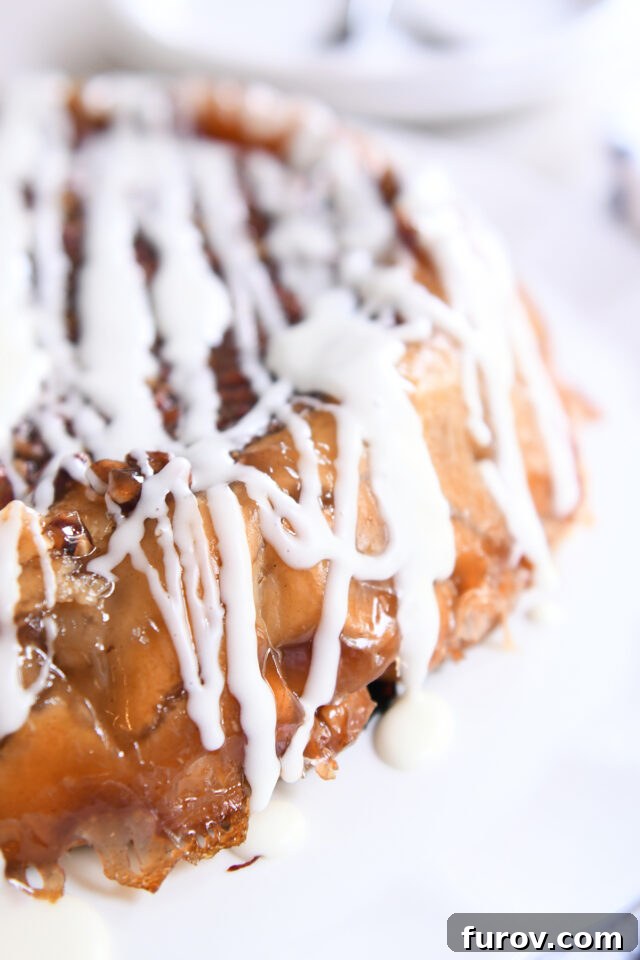
Once your magnificent upside-down apple pie has cooled slightly, a simple yet impactful decision awaits: to glaze or not to glaze? While the pie is undeniably delicious on its own, a quick drizzle of our easy, two-ingredient glaze adds an extra layer of sweetness and a beautiful sheen that truly completes the dessert. This glaze, made from just powdered sugar and a liquid, is designed to enhance rather than overpower the existing flavors.
You might wonder if it’s truly necessary to add this extra step. The answer is no, you don’t *have* to glaze the pie, but that little boost of sweetness from the glaze is genuinely glorious. It provides a perfect counterpoint to the tartness of the apples and complements the rich, buttery flavor of the pie crust and the deep caramel notes. It adds a touch of elegance and an additional layer of moisture and flavor that elevates the overall experience, making each bite even more satisfying.
As noted in the recipe, you have a choice for the liquid component of your glaze: milk or orange juice. Each offers a distinct flavor profile that can subtly alter the character of your finished pie. Milk lends a wonderfully creamy note to the glaze, resulting in a richer, slightly more subdued sweetness. It creates a classic, comforting finish that harmonizes beautifully with the traditional pie flavors. Alternatively, using orange juice introduces a bright, fresh, and slightly tangy pop to the glaze. This citrusy acidity can provide a fantastic contrast to the sweetness of the caramel and apples, adding a vibrant zing that truly awakens the palate. Consider your personal preference and the overall flavor you wish to achieve when making this delightful decision. Both options promise a delicious finish to an already spectacular pie.
Maximizing Your Upside Down Apple Pie Experience: Expert Tips
To ensure your upside-down apple pie is an absolute triumph every time, and to help you savor every last crumb, here are a few additional tips and insights. These recommendations cover everything from perfect slicing to clever adaptations, designed to make your baking and eating experience even more enjoyable and successful:
- Achieving Clean Slices: The Art of Cooling. Like most fruit pies, this upside-down apple pie truly benefits from a period of cooling. While it’s tempting to dive in immediately after it comes out of the oven, allowing the pie to cool for a bit – ideally at least 30-60 minutes, or even longer – allows the filling to set properly. This results in much cleaner, more defined slices and prevents the caramel from being too runny. Patience, in this case, is a virtue that promises a more elegant presentation and a better eating experience.
- Make Ahead and Reheat for Convenience. This pie is remarkably versatile and perfect for planning ahead. It can be made in advance and stored in the refrigerator. For the best possible tasting experience, I highly recommend gently reheating individual slices or even the whole pie before serving. A brief warm-up in a low oven (around 300°F or 150°C) will bring the crust back to its crisp glory, soften the apples, and re-liquefy that luscious caramel, making it taste freshly baked.
- Pecans: An Optional, Delightful Crunch. The pecans in the caramel layer add a wonderful, toasty crunch and a depth of nutty flavor that perfectly complements the apples and caramel. However, if you or your guests have a nut allergy, or simply prefer your pie without them, the pecans can easily be omitted. Simply spread the melted butter and brown sugar mixture in the bottom of the pie plate without adding the nuts. The pie will still be incredibly delicious, rich with caramel flavor, and just as enjoyable.
- The Importance of a Deep Pie Plate. When it comes to fruit pies, especially those generously filled like this one, the size of your pie plate matters. A standard 9-inch pie plate will likely be too shallow to accommodate the substantial amount of apples required for this recipe, potentially leading to overflow during baking. To avoid any messy spills and ensure all that delicious filling fits perfectly, make sure to use a deep 9-inch or a 9.5-inch pie plate. If a deep dish isn’t available, you can slightly reduce the amount of apples in the recipe to prevent overfilling, though a deep dish is always the preferred choice for maximum fruitiness!
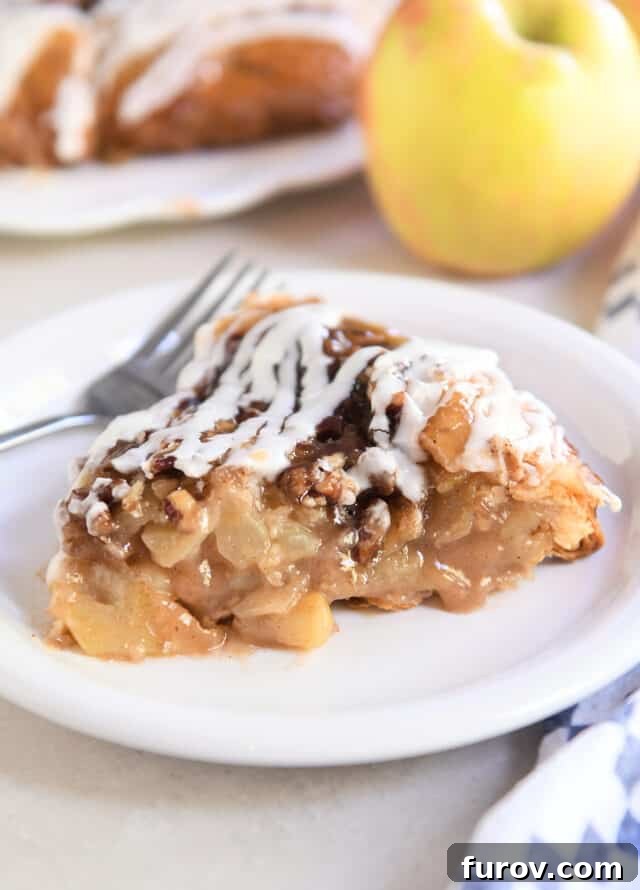
I genuinely love everything about this pie! It’s so incredibly unique, standing out from the crowd of traditional apple desserts. While sometimes recipes attempt to be different and end up merely being “weird,” this upside-down apple pie succeeds in all the best possible ways. It flawlessly captures all the comforting, familiar flavors of an amazing classic apple pie, but then elevates them with extra bonus points for that phenomenal caramel pecan layer.
Beyond the enhanced taste, there’s an extra delight in throwing caution to the wind and flipping a pie completely upside down. It’s a moment of anticipation, followed by the rewarding reveal of a beautifully caramelized, glistening masterpiece. It truly is a liberating and beautiful experience, both in the making and the tasting. I sincerely hope you love this one as much as I do!
Upside Down Apple Pie
8
-12 servings
45
mins
50
mins
1
hr
35
mins
Pin
Ingredients
-
2
unbaked pie crusts (see note)
Caramel Pecan Layer:
-
¼
cup
(57
g)
butter, melted (I use salted) -
½
cup
(106
g)
lightly packed light or dark brown sugar -
¼ to ½
cup
(20-60
g)
chopped pecans
Apple Filling:
-
8
cups
(790
g)
peeled and thinly sliced tart apples, like Granny Smith (see note) -
1
cup
(212
g)
granulated sugar -
⅓
cup
(47
g)
all-purpose flour -
2
tablespoons
melted butter -
1
teaspoon
ground cinnamon -
¼
teaspoon
ground nutmeg - Pinch salt
Glaze:
-
½
cup
(57
g)
powdered sugar -
1
tablespoon
milk or orange juice (see note)
Instructions
-
Preheat oven to 375 degrees F (190°C). Line a 9- or 9.5-inch deep pie plate with parchment paper or heavy-duty foil, ensuring it overhangs the edges. Generously grease with cooking spray (important!).
-
In a small bowl, stir together the 1/4 cup melted butter and 1/2 cup brown sugar until well combined. Spread this mixture evenly across the bottom of the lined and greased pie plate. Sprinkle the chopped pecans across the top of the caramel layer.
-
Roll out one pie crust and carefully place it on top of the caramel nut mixture, gently pressing it snug against the bottom and sides of the pie plate.
-
In a large bowl, combine the peeled and thinly sliced apples, granulated sugar, all-purpose flour, 2 tablespoons melted butter, ground cinnamon, ground nutmeg, and a pinch of salt. Toss everything until the apples are evenly and thoroughly coated.
-
Evenly fill the prepared pie crust with the apple mixture, mounding it slightly in the center.
-
Roll out the second pie crust and carefully place it over the apples. Trim both the top and bottom crusts to about 1/4- to 1/2-inch all the way around the edges. Fold the bottom crust up and over the top crust, pressing firmly to seal them together. Flute the edges for a decorative finish.
-
Cut four small slits on top of the pie crust to allow steam to escape during baking.
-
Place the pie on a foil-lined baking sheet (to catch any potential drips). Bake for 50-60 minutes, or until the apples are tender when pierced and the crust is lightly golden brown. If the edges or top of the pie begin to over-brown, loosely cover them with aluminum foil or use pie shields to continue baking.
-
Cool the pie on a wire rack for 10-15 minutes before carefully inverting it onto a serving platter or another pie plate. Use the overhanging parchment or foil as “handles” to assist with the flip. Gently remove the parchment paper or foil from the top (now the bottom) of the pie.
-
While the pie cools slightly, whisk together the powdered sugar and milk or orange juice for the glaze until smooth. Drizzle the glaze evenly over the inverted pie. Serve warm or at room temperature.
Notes
Apples: I’ve experimented with various apple varieties for this pie over time, and without a doubt, the best results are achieved when using tart apples like Granny Smith. Their firm texture holds up beautifully during baking, and their bright, acidic flavor provides a crucial balance to the sweetness of the caramel and glaze, preventing the pie from being overly rich.
Orange Juice for Glaze: If you’re looking to add a vibrant and fresh element to your pie, consider using orange juice instead of milk for the glaze. Milk will give the glaze a creamier, more classic flavor and texture. However, orange juice imparts a delightful tart freshness, adding a zesty “pop” that beautifully complements the sweet and warm spices of the apple filling. It’s a wonderful way to introduce a subtle citrusy brightness.
Mel Gunnell
Dessert
American
Bake
Serving:
1
serving
,
Calories:
557
kcal
,
Carbohydrates:
89
g
,
Protein:
4
g
,
Fat:
23
g
,
Saturated Fat:
9
g
,
Cholesterol:
23
mg
,
Sodium:
248
mg
,
Fiber:
5
g
,
Sugar:
59
g
Recommended Products
Recipe Source: Slightly adapted from this recipe.