
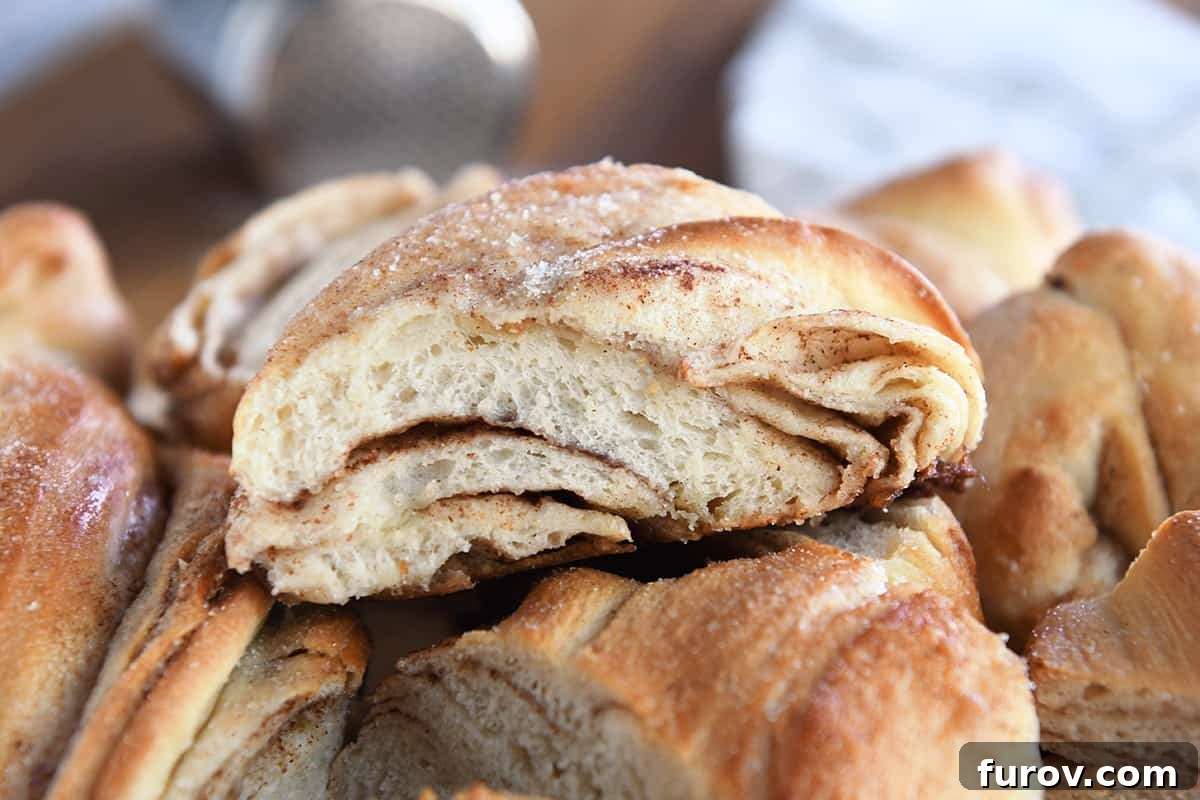
Welcome to the delightful world of Cinnamon Sugar Twisted Croissant Bread – a creation that promises all the flaky, buttery goodness of traditional croissants with significantly less effort. Imagine layers upon layers of sweet, cinnamon-infused dough, twisted and baked to golden perfection. This isn’t just a recipe; it’s an invitation to experience the joy of homemade pastry in a way that’s both approachable and incredibly rewarding. If you’ve ever been intimidated by the intricate process of classic croissants, this twisted croissant bread is your new best friend. It delivers those signature delicate layers and that irresistible buttery taste, all wrapped up in a much simpler method. Get ready to impress yourself and everyone lucky enough to share a bite!
The twisted croissant bread craze has taken the baking world by storm, and this cinnamon and sugar rendition is an absolute showstopper. It combines the comforting flavors of cinnamon and sugar with the sophisticated texture of a croissant-style bread, making it perfect for breakfast, brunch, or an indulgent snack. What sets this recipe apart is its ingenious approach to creating those coveted flaky layers without the extensive folding and chilling required for true croissants. We’re talking about a process that’s genuinely easy and fun, yielding results that taste like they came straight from a gourmet bakery. Below, you’ll find all the details and secrets to mastering this delectable pastry, transforming your kitchen into a haven of sweet, buttery aromas.
Crafting the Essential Cinnamon-Sugar Butter Packet
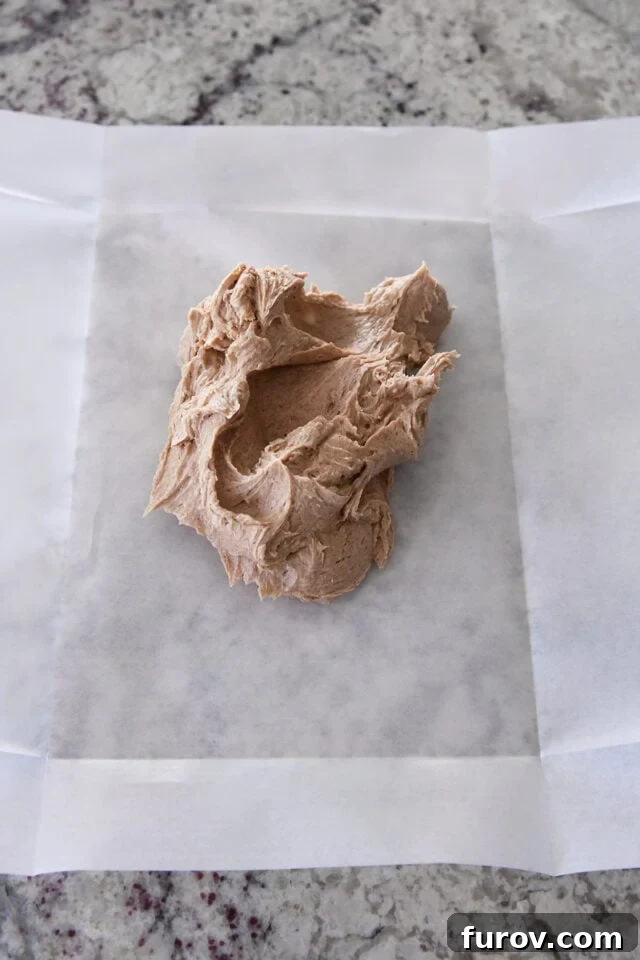
The heart of our Cinnamon Sugar Twisted Croissant Bread lies in its unique butter packet. While our other popular twisted croissant bread variations—like the classic and chocolate versions—rely on a simple, pure butter packet, this recipe calls for something extra special. To truly elevate the cinnamon flavor and ensure it permeates every single layer, we infuse the butter itself with aromatic spices and sweetness.
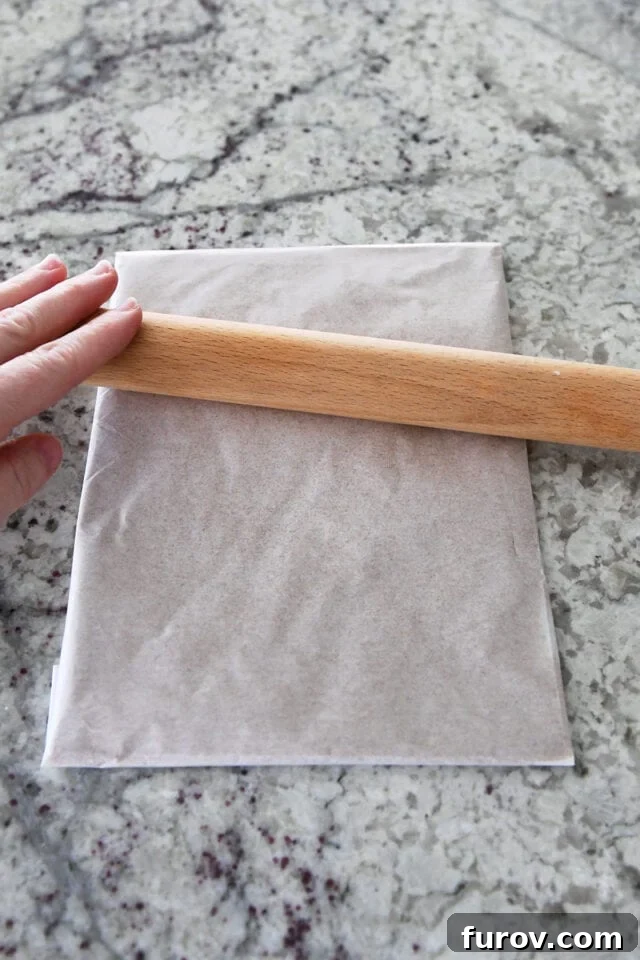
This enhanced butter packet begins with softened, high-quality salted butter, which is then vigorously whipped with a generous amount of granulated sugar and fragrant ground cinnamon. This crucial step not only blends the flavors beautifully but also aerates the butter, contributing to a lighter, more ethereal pastry. Only after this luscious mixture is perfectly combined is it carefully folded into parchment paper and rolled into a thin, even sheet. This method ensures that the cinnamon and sugar are evenly distributed throughout the butter, ready to create pockets of sweet spice within the dough.
Pro Tip for Easy Butter Packet Creation: Because the butter is softened and wonderfully pliable after mixing, you can easily forgo the rolling pin for this initial step. Simply use your hands to gently press the butter into a thin, uniform layer within the confines of the parchment paper. This can save time and make the process even more enjoyable!
Once your flavored butter sheet is formed, it’s imperative that it goes directly into the refrigerator to chill until it becomes thoroughly firm. This step is non-negotiable! If the butter isn’t sufficiently firm, it will become an unmanageable, sticky mess when you attempt to roll it out with the bread dough. A properly chilled butter packet is key to achieving those distinct, flaky layers we all crave in a croissant-style pastry. So, please, don’t rush or skip this vital chilling stage; patience here will yield truly incredible results.
The Art of Folding for Irresistibly Flaky Layers
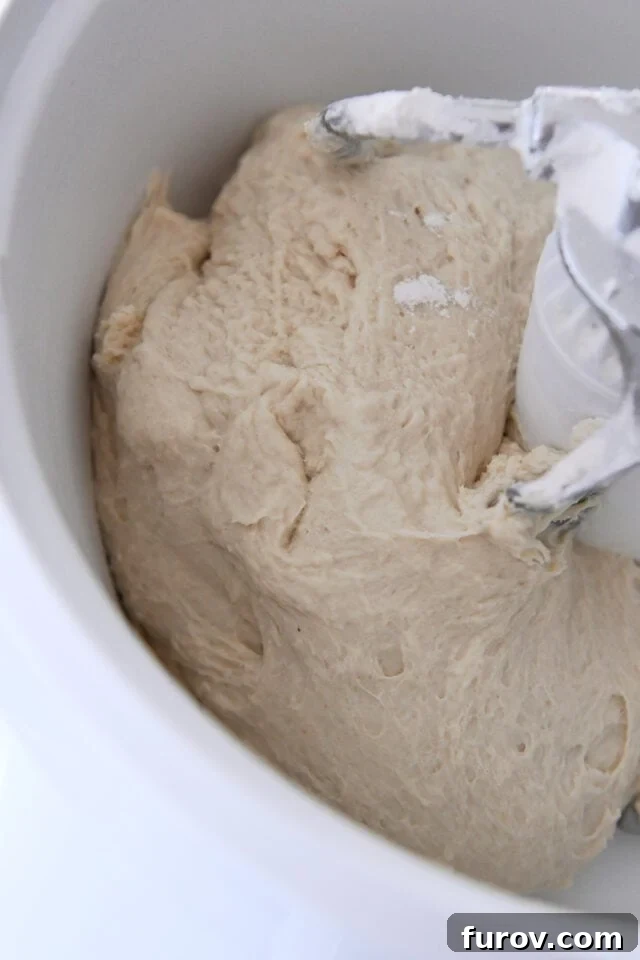
While your specially prepared cinnamon-sugar butter packet is firming up in the refrigerator, it’s the perfect time to prepare the simple yet essential French bread dough. This dough forms the perfect foundation for our twisted croissant bread, offering a tender counterpoint to the rich, spiced butter. Mix the dough and allow it ample time to rise until it becomes beautifully puffy and has noticeably doubled in size. A well-risen dough is crucial for the subsequent lamination process, ensuring elasticity and proper structure for those coveted layers.
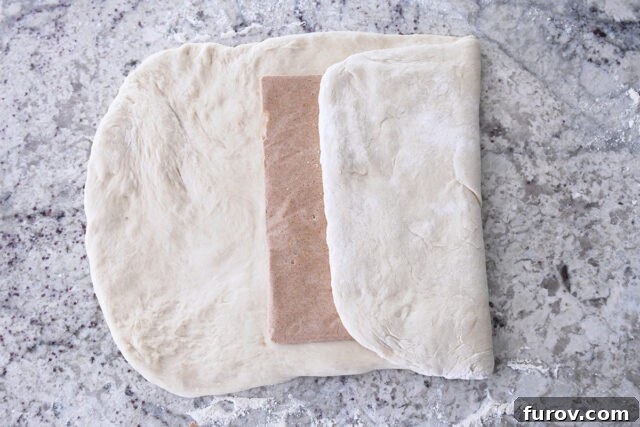
Once your dough has completed its first rise, gently deflate it and transfer it to a lightly floured counter. Using a rolling pin, press and roll the dough into a clean, even rectangle. This is where the magic of lamination truly begins, a simplified process designed to create the many flaky layers that make this bread so extraordinary. Carefully follow these steps to encase the butter packet within the dough, setting the stage for an incredible texture:
- Center the Butter: Place the fully chilled sheet of cinnamon-sugar butter directly in the center of your rolled-out dough rectangle. Ensure it’s positioned neatly to allow for even folding.
- First Fold – Right Side: Take the right side of the dough and fold it precisely halfway over the butter packet. This initiates the layering process, enclosing the butter within the dough.
- Second Fold – Left Side: Next, fold the left side of the dough over the butter. Crucially, this fold should slightly overlap the first fold by about an inch or so. This overlapping technique is vital for sealing the butter completely and creating the initial set of layers.
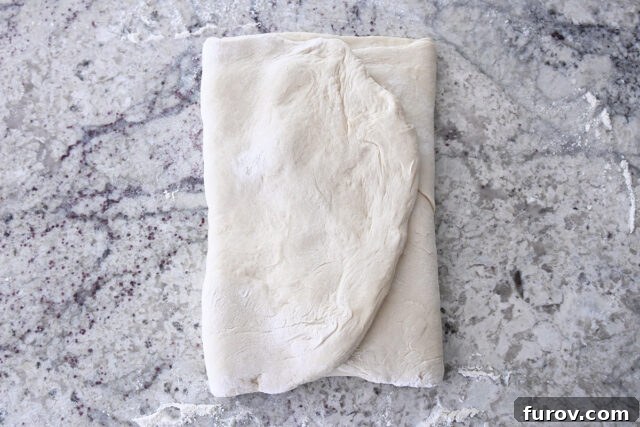
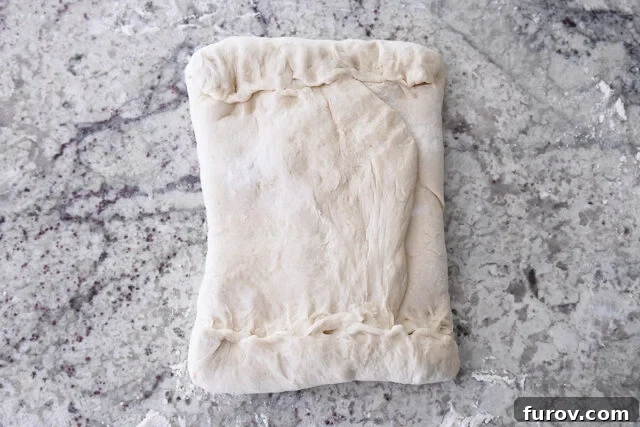
- Seal the Edges: Gently fold the top and bottom edges of the dough inward, just enough to meet and pinch them firmly to seal. This prevents any butter from escaping during subsequent rolling and ensures a neat packet.
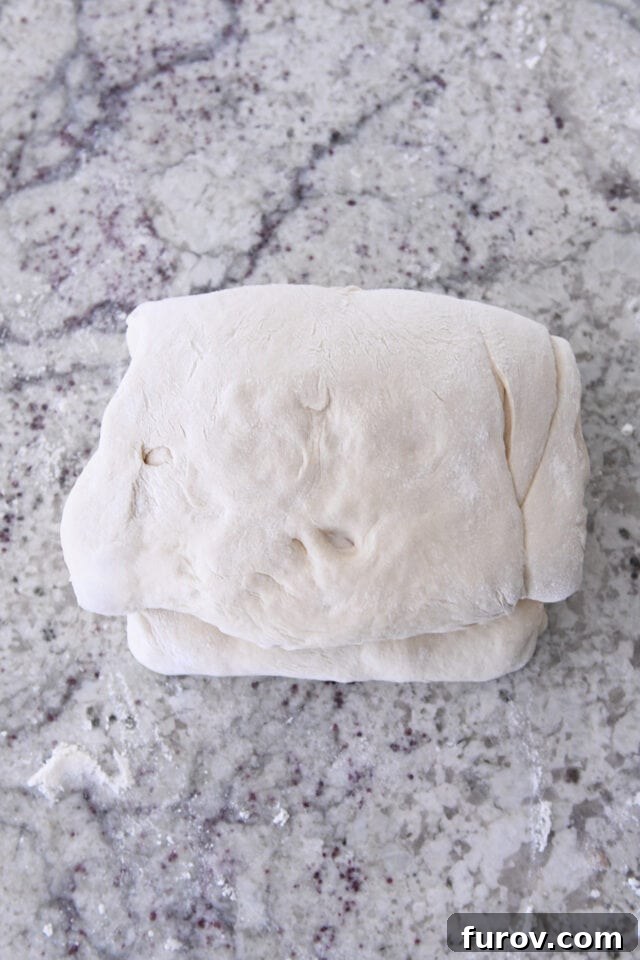
- Final Fold (Book Fold): To complete this stage of lamination, fold the entire dough packet in half. You can bring the left side to meet the right side, or vice versa. This action creates the initial “book fold” that is fundamental to developing multiple, distinct layers.
These precise folds are the secret to achieving a beautifully flaky texture without the complexities of traditional croissant making. Each fold contributes to developing numerous thin layers of butter and dough, which will separate and become airy during baking, resulting in that incredible, tender crumb.
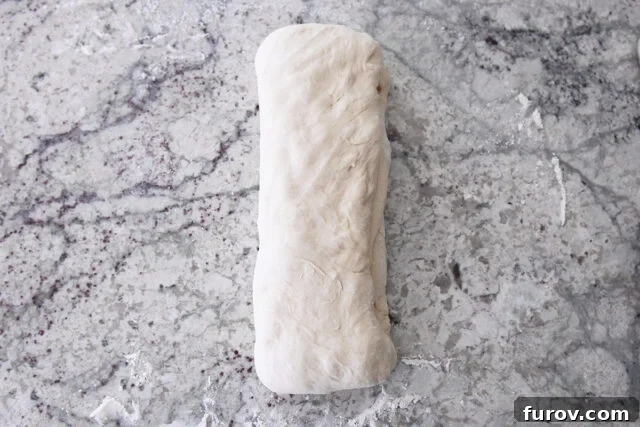
The Second Roll and Fold: Building More Layers
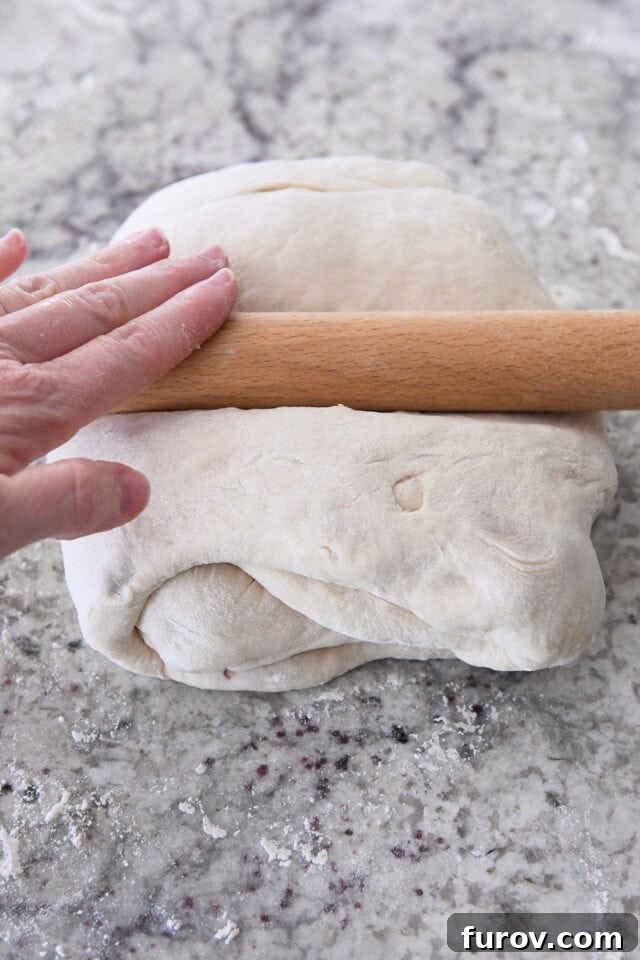
With the initial folds complete and the butter beautifully enrobed in dough, it’s time for the next crucial step in developing those incredible flaky layers: the second roll and fold. Carefully take the folded log of dough and, with gentle but firm pressure, roll it out into a long, thin rectangle. Aim for dimensions of approximately 22 inches long and 8 inches wide. Don’t worry about being absolutely precise; the key is to achieve a relatively even thickness across the entire rectangle.
After achieving the desired dimensions, perform a second series of folds to further multiply the layers:
- Top Edge to Center: Fold the top (shorter) edge of the dough down towards the center of the rectangle. This creates the first part of a “letter fold.”
- Bottom Edge to Center: Then, take the bottom (other shorter) edge of the dough and fold it up towards the center, ensuring it meets the first fold perfectly.
- Fold in Half: Finally, fold the entire dough in half, bringing one of the short sides over to meet the other. This last fold completes the lamination process, locking in numerous layers of butter and dough, which are essential for the croissant-like texture.
Tip #1 for Smooth Rolling: If, at any point during this rolling and folding process, you find the dough resisting or springing back excessively, don’t force it. This is a sign that the gluten needs to relax. Simply cover the dough and let it rest for 5-10 minutes on the counter. This brief resting period will allow the gluten strands to unwind, making the dough much more cooperative and easier to roll out without tearing.
Tip #2 for Butter Management: It’s vital to keep the butter within the dough chilled. If the butter becomes too soft and starts to melt, making the dough hard to handle or excessively sticky, immediately transfer the dough onto a parchment-lined baking sheet. Place it in the refrigerator for 10-20 minutes. This will firm up the butter, making the dough much easier to work with and preventing the butter from incorporating directly into the dough, which would compromise the distinct layers.
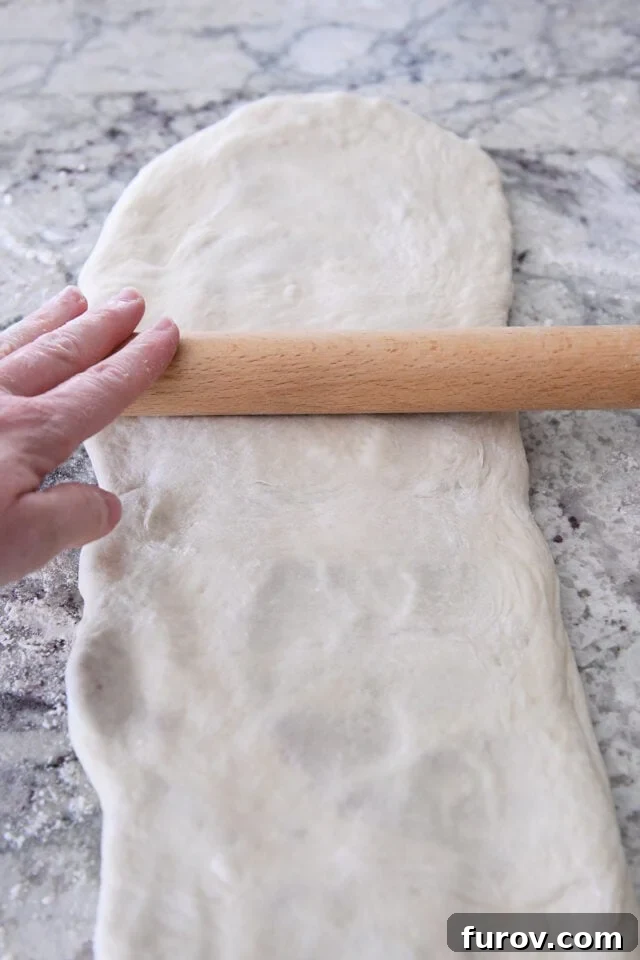
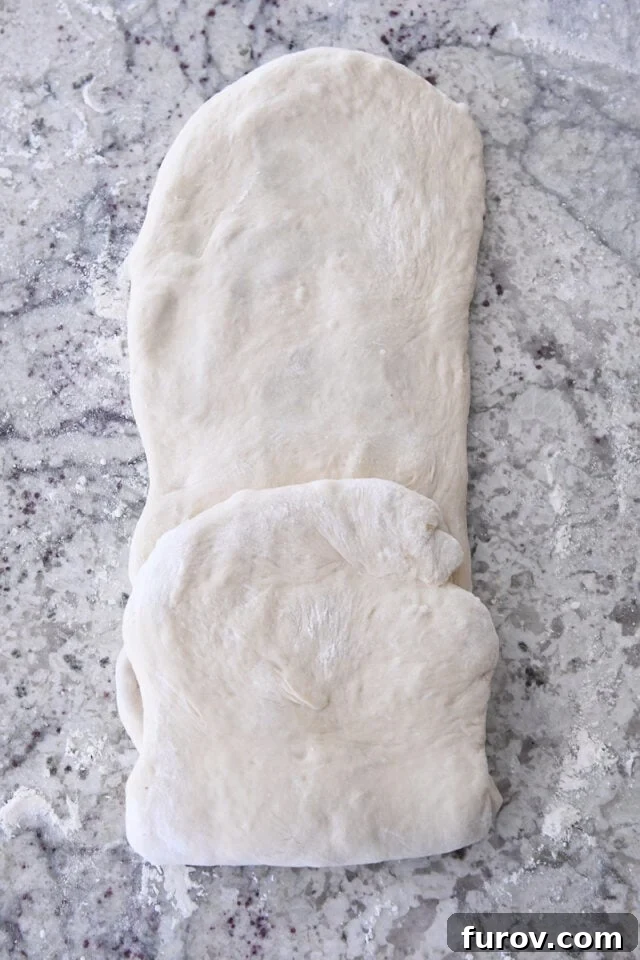
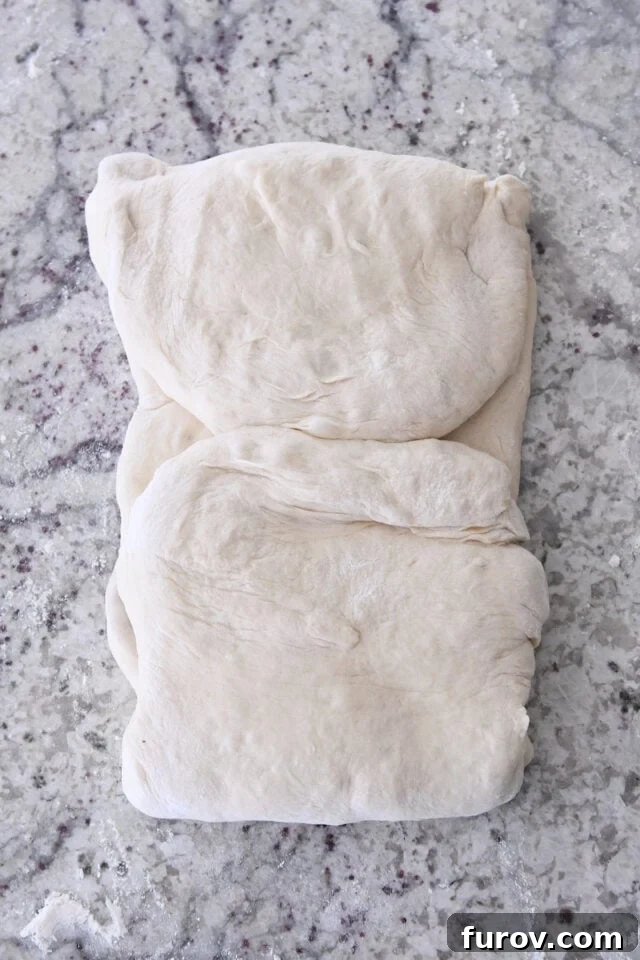
Final Shaping: Rolling, Cutting, and Twisting
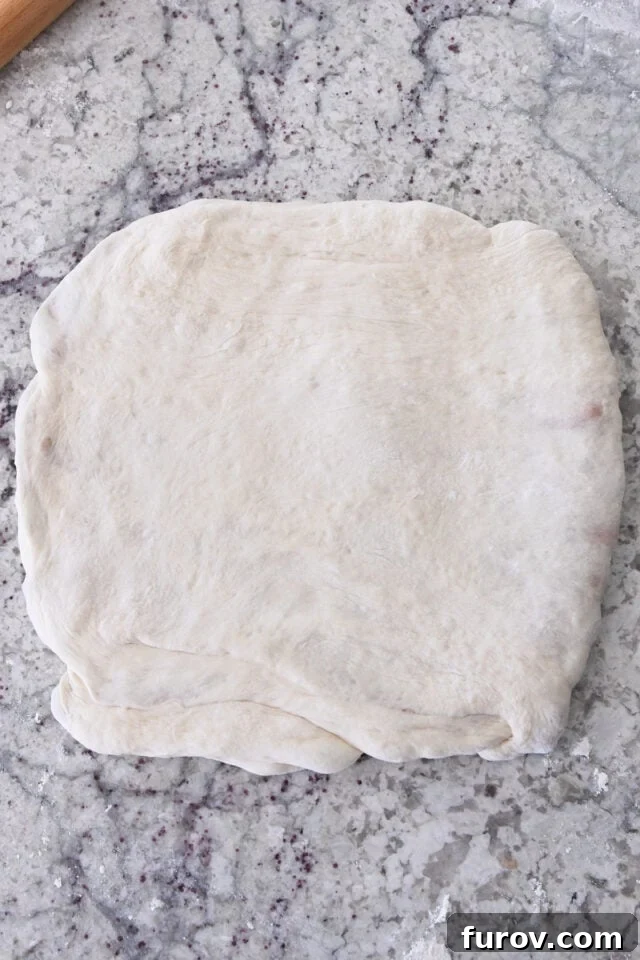
Once your dough has completed its final fold and rested briefly, it’s ready for the exciting stage of shaping. Roll the dough out into a roughly 12- or 13-inch square. Again, don’t fret over perfect measurements; a general square shape will suffice. This square of dough is now replete with all the buttery, cinnamon-sugar layers you’ve worked to create, just waiting to be revealed.
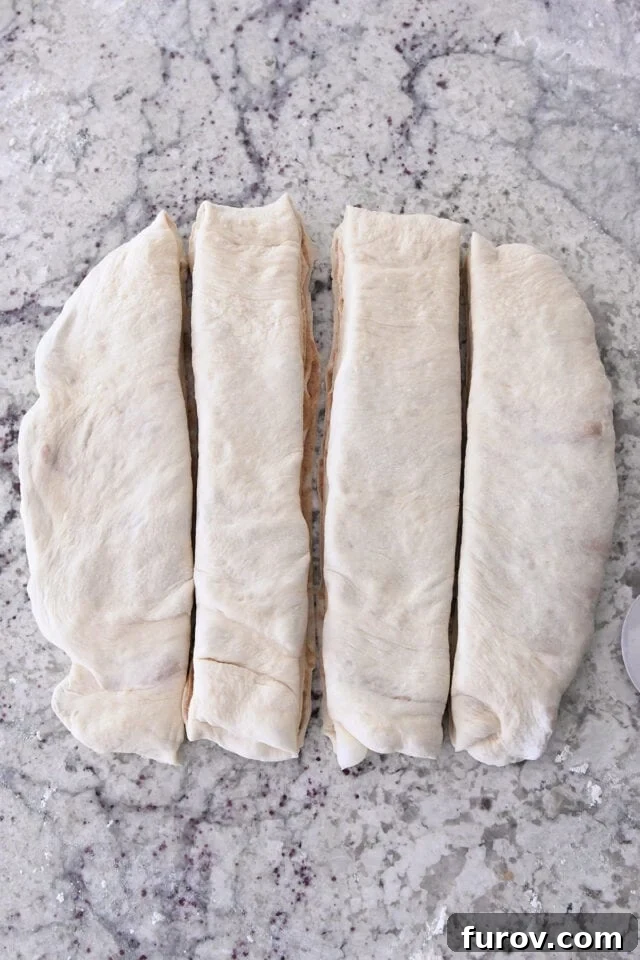
Using a sharp knife or a pizza cutter, carefully cut the large dough square into four distinct strips. The precise width of these strips isn’t critical, but aim for consistency so your finished loaves bake evenly. Each of these strips will transform into a delightful twisted croissant bread. To achieve the signature “twisted” look, take each individual strip and gently twist it several times along its length. The twists create visual appeal and help separate the layers, allowing for that classic, airy texture. Once twisted, carefully place each strip onto parchment-lined baking sheets. I find that half-sheet pans are ideal for this, allowing enough space to bake two loaves per pan without crowding, ensuring even heat distribution and a beautiful golden crust.
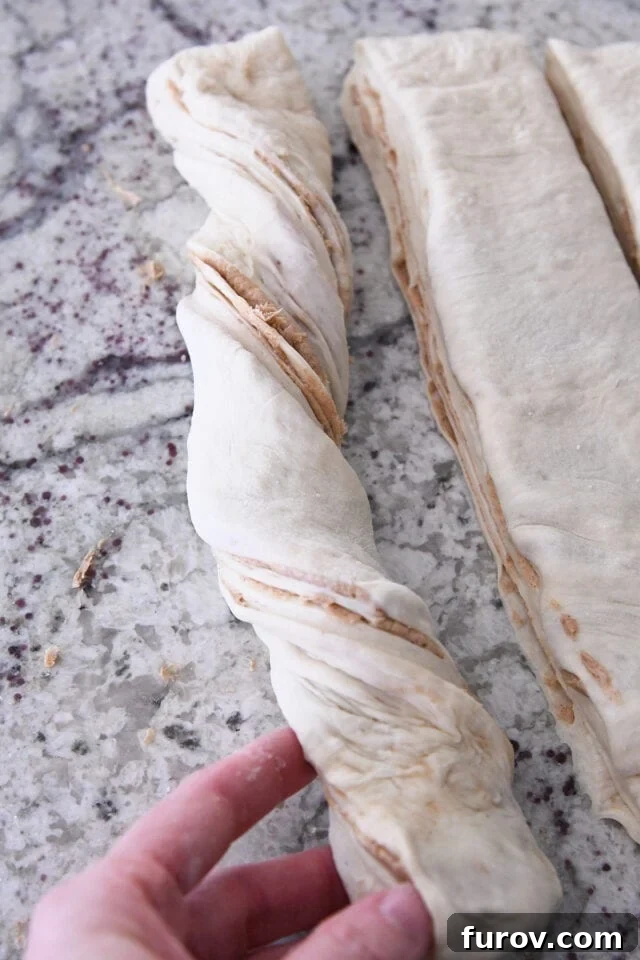
Once twisted and arranged, cover the dough and allow it to rise until it becomes noticeably puffy. This final proofing stage is essential for the bread’s light and airy texture. However, there’s a crucial caveat for this particular dough:
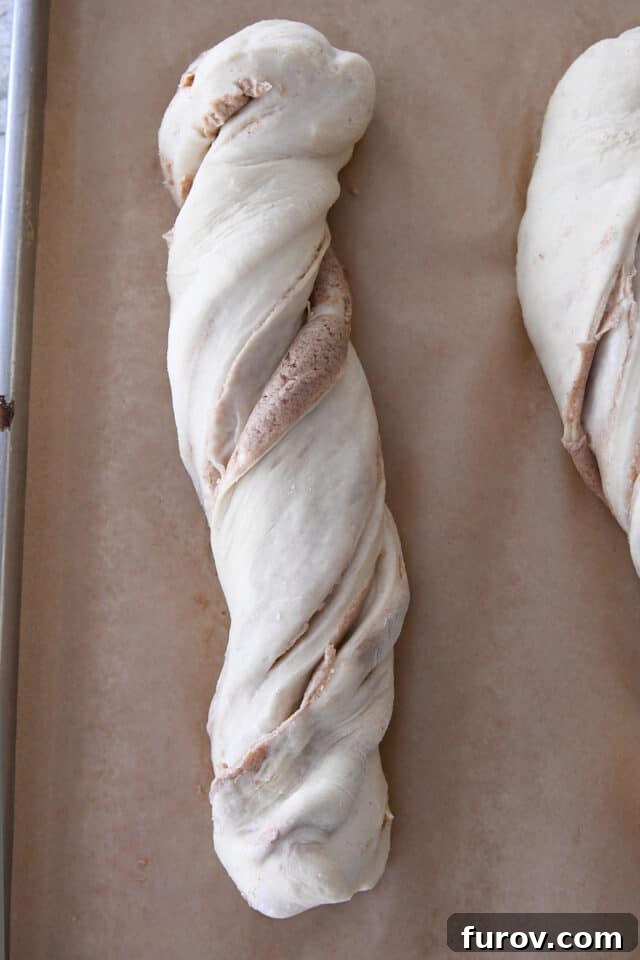
This dough truly thrives when rising at cooler temperatures. Unlike many traditional bread recipes that benefit from a warm environment, this croissant-style dough requires a more temperate setting. If it’s left to rise in a spot that’s too warm, the delicate butter layers embedded within the dough will soften and melt prematurely, before the loaves even reach the oven. When this happens, you lose the distinct separation that creates those signature flaky, buttery layers, resulting in a bread that is denser and less spectacular. So, choose a cool spot in your kitchen, or even consider a slow overnight rise in the refrigerator, to ensure your twisted croissant bread develops its full, incredible potential.
The Irresistible Finishing Touch: More Cinnamon and Sugar!
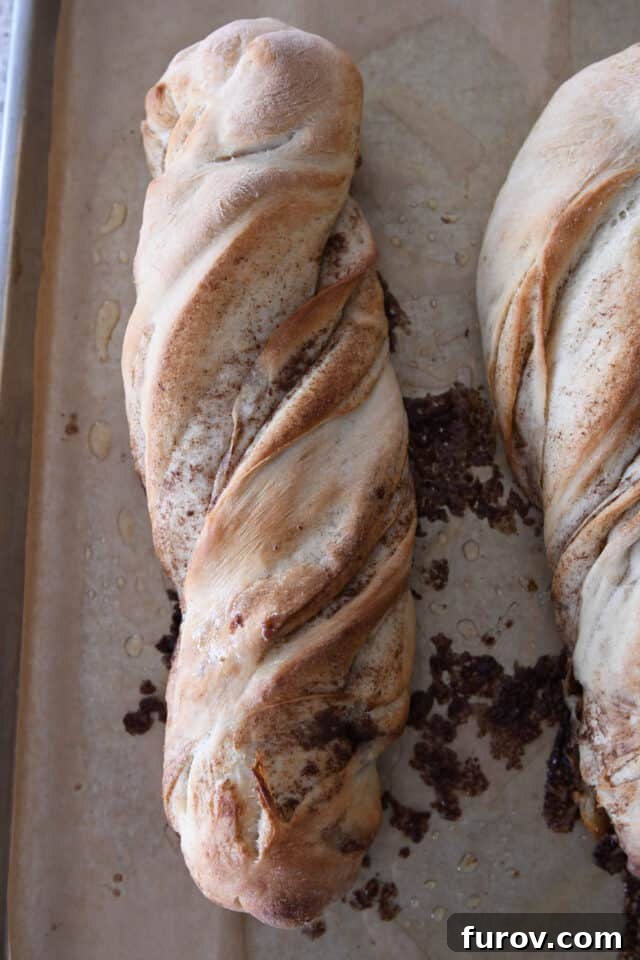
As your beautiful twisted croissant loaves emerge from the oven, golden brown and fragrant, you might notice a small amount of butter that has inevitably leaked onto the sheet pan during baking. Far from being a problem, this is a completely normal occurrence and, indeed, something we can use to our advantage! That rich, melted butter is packed with flavor and is the perfect vehicle for our final cinnamon-sugar coating.
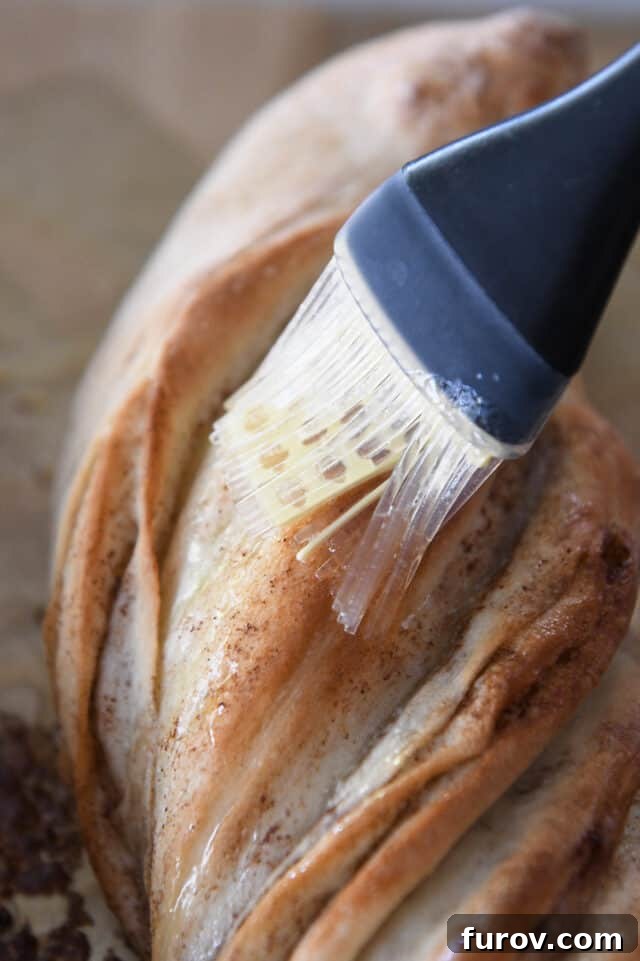
Immediately upon removing the bread from the oven, while it’s still piping hot, take a pastry brush and generously brush any of that lovely leaked butter directly over the top of the warm loaves. This not only adds an extra layer of moisture and richness but also creates a sticky surface for the next step. (If, for some reason, there isn’t enough butter collected on the pan, simply melt 1 to 2 tablespoons of fresh butter for brushing.)
Once buttered, it’s time for the grand finale: a lavish sprinkling of cinnamon sugar. Don’t be shy here! Follow your heart and personal preference when it comes to how much cinnamon sugar to apply. Some prefer a light dusting, while others love a thick, sweet crust. This final touch transforms the warm, flaky bread into an utterly irresistible treat, ensuring every bite is bursting with sweet, spiced goodness.
Perfect Cinnamon Sugar Ratio: For a balanced and flavorful topping, mix 1/2 cup of granulated sugar with 4 teaspoons of ground cinnamon. Feel free to increase the cinnamon for an even bolder spice profile if desired. Any extra cinnamon sugar topping can be stored in a covered container at room temperature, where it will keep fresh for several weeks, ready for your next baking adventure!

The Unforgettable Experience of Cinnamon Sugar Twisted Croissant Bread
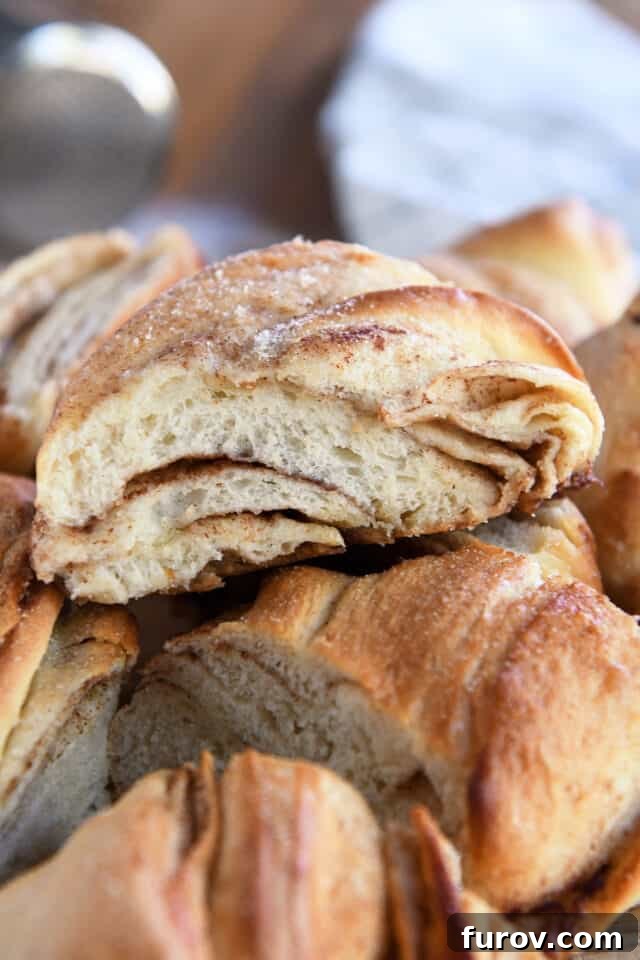
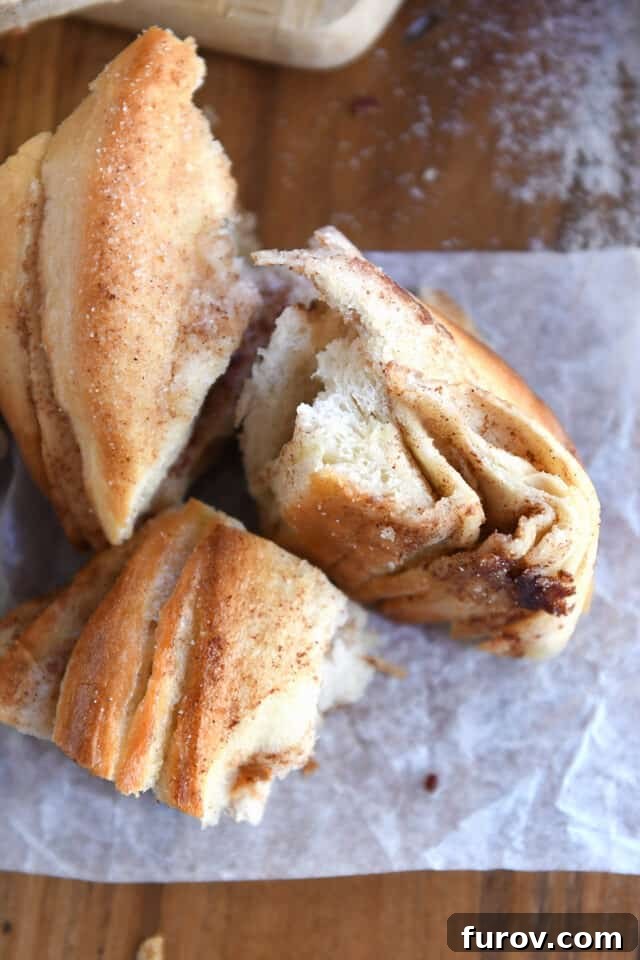
Prepare yourself for a truly memorable culinary experience with this Cinnamon Sugar Twisted Croissant Bread. It is every bit as delightful as it sounds and looks, delivering a symphony of textures and flavors. Each bite offers a blissful combination of soft, tender bread, intricately wrapped around a tapestry of buttery, sweet cinnamon filling. The aroma alone is enough to transport you to your favorite patisserie, while the taste confirms that you’ve created something truly special in your own kitchen.
What makes this bread uniquely appealing is its thoughtful balance of sweetness. It’s important to note that this is not an overly sweet confection, nor does it resemble a traditional cinnamon roll, which often has a dense, cake-like texture and heavy frosting. Instead, imagine it as the perfect marriage between the comforting simplicity of cinnamon toast and the sophisticated, airy flakiness of a classic croissant—but achieved through a remarkably easier, “lazy-girl” method. The subtle sweetness of the dough is perfectly complemented by the robust cinnamon-sugar layers, creating a harmonious flavor profile that is neither too rich nor too light.
This bread is absolutely divine when served warm, straight from the oven, allowing the butter to melt and the cinnamon sugar to sparkle. However, its deliciousness doesn’t diminish as it cools; it’s equally delightful at room temperature, making it a fantastic option for a grab-and-go breakfast, a sophisticated brunch offering, or a comforting afternoon treat with a cup of coffee or tea. Honestly, it’s just really, truly incredible.
If you’ve already fallen in love with other variations of our twisted croissant bread, such as the classic French bread or the decadent chocolate version, then this cinnamon sugar rendition is guaranteed to become a new favorite. The familiar process, combined with this beloved flavor profile, makes for an instant hit. And if you haven’t yet embarked on the twisted croissant bread adventure, what are you waiting for? This cinnamon sugar version is the perfect entry point into a world of easy, impressive, and utterly delicious homemade pastry. It’s a versatile bread that promises to elevate any meal or snack, offering a gourmet experience with minimal fuss. Dive in and discover your new favorite baking project!
One Year Ago: One Pot Creamy Tuscan Pasta
Two Years Ago: Sourdough Pumpkin Muffins {a.k.a. The Best Muffins On The Planet}
Three Years Ago: Easy Homemade Broccoli Cheese Soup
Four Years Ago: The Best Taco Soup {Stovetop or Slow Cooker}
Five Years Ago: Soft and Chewy Caramel Popcorn
Six Years Ago: Philly Cheesesteak Sloppy Joes {30-Minute Meal}
Seven Years Ago: Amazing Pumpkin Chocolate Chip Cookies
Eight Years Ago: Perfect Pumpkin Chocolate Chip Cookies
Nine Years Ago: Slow Cooker Applesauce {No Sugar Added}
Ten Years Ago: Chocolate Chip Cookie Dough Ice Cream Sandwiches
Cinnamon Sugar Twisted Croissant Bread
Pin
Rate
SaveSaved!
Ingredients
Butter Packet:
- 1 cup salted butter, cool room temperature
- ¼ cup granulated sugar
- 1 tablespoon ground cinnamon
Dough:
- 2 cups warm water, 105-110 degrees F
- 1 tablespoon instant or active dry yeast
- 2 tablespoons granulated sugar
- 1 ½ teaspoons salt
- 4 ¾ cups all-purpose flour, plus more for dusting
- Cinnamon sugar for sprinkling (see note)
Instructions
-
For the butter packet: Grab a piece of parchment paper, approximately 16 1/4-inches by 12-inches (exact dimensions are not critical, but aim for close). Fold the two shorter edges of the parchment inward about 4 1/2 inches each, allowing them to slightly overlap. Crease these folded edges very well to create defined lines.
-
Keeping these initial folds in place, fold the top and bottom edges inward by approximately 1 3/4-inches. When fully folded, this should create a small parchment packet with a center rectangle measuring about 8 1/2-inches by 7-inches. Set this prepared packet aside.
-
In the bowl of an electric mixer (either handheld or a stand mixer with the paddle attachment), combine the cool room temperature butter with the granulated sugar and ground cinnamon. Whip these ingredients together until they are thoroughly blended and the mixture is light and creamy.
-
Unfold the parchment paper. Carefully scrape the whipped cinnamon-sugar butter mixture into the defined center square of the parchment. Refold the packet along the pre-creased lines and then flip it over so the folded edges are on the bottom, securely encasing the butter.
-
Using a rolling pin (or even just pressing firmly with your hands), gently roll or press the softened butter within the packet into a thin, even sheet, ensuring it reaches all the edges of the parchment packet. It should have a relatively uniform thickness. Chill this butter packet in the refrigerator until it is completely firm. This is crucial for successful lamination.
-
For the dough: In the bowl of a stand mixer fitted with the dough hook, combine the warm water (between 105-110 degrees F), instant or active dry yeast, and granulated sugar. Let this mixture sit for 2-3 minutes until it becomes foamy, indicating the yeast is active. Add the salt and the all-purpose flour. Mix on low speed until a soft dough forms and pulls away cleanly from the sides of the bowl. If the dough appears too sticky or clings to the hook, add a small amount of additional flour, one tablespoon at a time, until it reaches a soft but not overly sticky consistency.
-
Increase the mixer speed to medium-low and knead the dough for 3-4 minutes. The dough should become soft, smooth, and elastic. Transfer the dough to a lightly greased bowl, or simply cover the mixing bowl. Allow the dough to rise in a warm, draft-free place until it has visibly doubled in size, which typically takes about an hour, depending on your kitchen’s temperature.
-
Once risen, gently deflate the dough and turn it out onto a lightly floured counter. Using a rolling pin, roll the dough into a rectangle approximately 18-inches long by 11- or 12-inches wide. Strive for an even thickness across the entire rectangle.
-
Retrieve the firm butter packet from the refrigerator and carefully unfold the parchment, leaving the butter sheet on one side of the parchment. Place the butter sheet, still on its parchment, face down onto the center of your rolled-out bread dough rectangle. Gently peel the parchment paper off the butter, leaving the firm butter sheet neatly centered on the dough.
-
Critical Step: Work quickly and efficiently during the subsequent folding and rolling steps to prevent the butter from softening too much. Maintaining the butter’s coolness is essential for achieving flaky layers!
-
Fold one short side of the dough over the butter packet, covering it by about halfway to two-thirds. Then, fold the other short side of the dough over the butter, ensuring it overlaps the first folded side by approximately one inch.
-
Fold the top and bottom edges of the dough over by about 1/2- to 1-inch and firmly pinch the seams to seal the butter completely within the dough.
-
Complete this folding sequence by folding the dough in half once more (either from right to left or left to right). Starting from the center and working outwards, roll this folded dough out into a long, thin rectangle, aiming for dimensions of roughly 8-inches by 22-inches. If the dough resists or springs back, cover it and let it rest for 5-10 minutes to allow the gluten to relax, then resume rolling.
-
Fold one short edge of the long rectangle into the center. Repeat this with the other short edge, so both edges meet precisely in the middle. Then, fold the dough in half again (from one of the short sides). Allow the dough to rest for 2-3 minutes to relax before the final shaping.
-
While the dough rests, prepare two half-sheet pans by lining them with parchment paper. Preheat your oven to 375 degrees F (or 400 degrees F for a slightly darker, crispier crust).
-
Roll the rested dough into a 12-inch or 13-inch square. If the dough springs back, let it rest again for 5-10 minutes. Once you have a square, use a sharp knife or pastry cutter to divide it into four even strips.
-
Take each dough strip and twist it 3-4 times along its length to create the classic twisted shape. Place two twisted strips on each prepared sheet pan, ensuring they are spaced several inches apart to allow for proper expansion during rising and baking.
-
Cover the twisted loaves and allow them to rise until they are noticeably puffy. It’s crucial that this rising occurs in a cooler environment. If the loaves rise in an overly warm spot, the butter within the layers will melt before baking, preventing the formation of those desirable flaky layers. For best results, these loaves can be left to rise slowly in the refrigerator overnight or for several hours. If refrigerated, once removed, let them come to room temperature and continue rising until they are nearly doubled in size if they haven’t achieved enough puffiness in the fridge.
-
Bake the loaves in your preheated oven for 20-22 minutes, or until they are beautifully golden brown and the layers are clearly defined.
-
Immediately after removing the baked loaves from the oven, use a pastry brush to gather any melted butter that has collected on the sheet pan and brush it generously over the tops of the hot bread. This adds a beautiful sheen and extra flavor. Then, generously sprinkle the tops of the buttered loaves with your prepared cinnamon sugar mixture.
-
Serve the Cinnamon Sugar Twisted Croissant Bread warm for an ultimate indulgence, or at room temperature for a delightful treat. The bread can be easily sliced or torn into individual pieces to enjoy.
Notes
Folding Parchment for Butter Packet: For a clear visual guide on how to effectively fold the parchment paper to create the butter packet, please refer to the helpful pictures included in this post.