
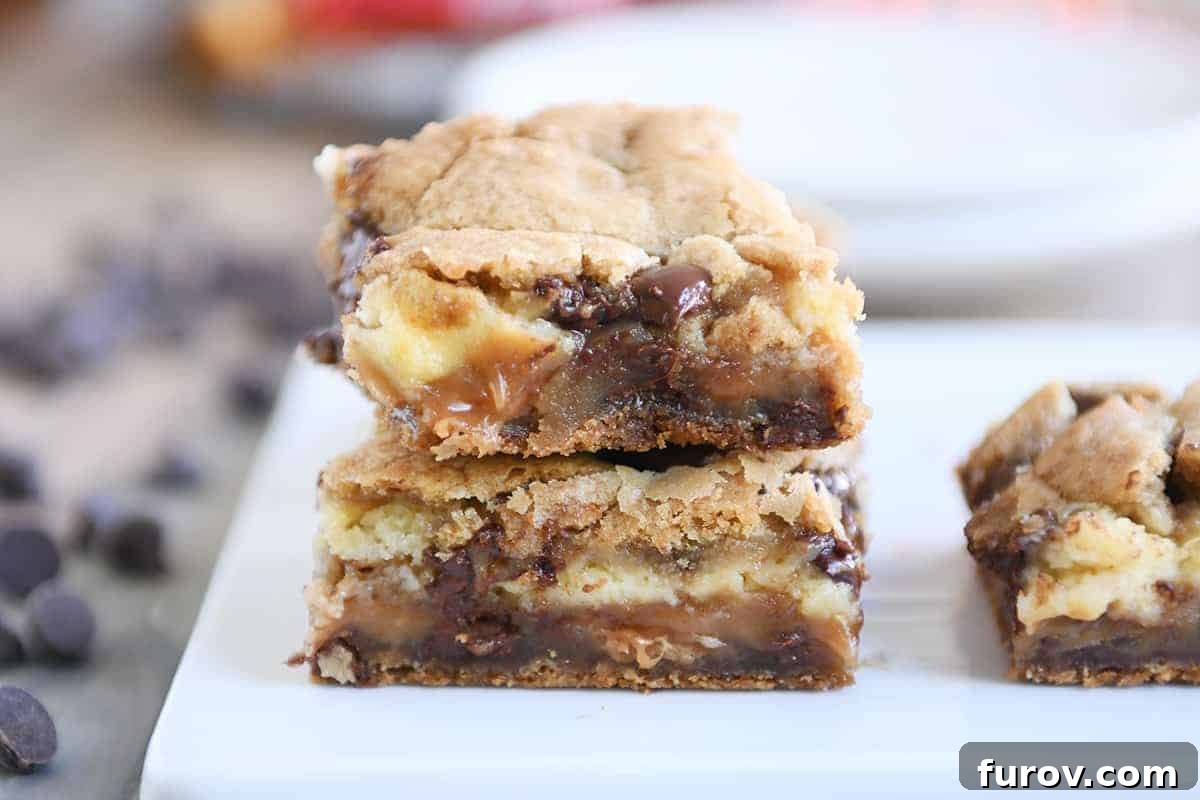
Imagine the pure euphoria of creating dishes with your own hands that rival (or even surpass) the most exquisite meals you’d pay a fortune for at a high-end restaurant. Now imagine your family and friends raving about your culinary masterpieces, truly believing you possess some secret, innate talent. This isn’t a fantasy reserved for professional chefs with culinary degrees or those who spend countless hours and dollars on gourmet ingredients. The truth is, transforming your cooking and feeling like an absolute rock star in your own kitchen often boils down to embracing a few simple, yet incredibly powerful, techniques and ingredients.
You don’t need a gourmet pantry or a lifetime of experience. Often, it’s just one clever trick, a refined technique, or a shift in a common ingredient that can dramatically elevate your culinary game. These are the “aha!” moments that make you wonder how you ever cooked without them.
Today, I’m thrilled to share five accessible ways you can instantly level up your kitchen skills without extensive effort or specialized equipment. These straightforward suggestions are designed to empower you, boosting your confidence and making you feel ready to conquer any recipe, perhaps even challenging a celebrity chef! If you haven’t yet integrated any of these game-changers into your cooking routine, I offer you this friendly challenge: pick just one tip from the list below, commit to trying it, and then come back and tell me all about your experience. I genuinely can’t wait to hear how these simple changes transform your kitchen journey!
Tip #1: The Golden Secret: Mastering Brown Butter
Brown butter, sometimes referred to as ‘beurre noisette’ by the French, is one of the fastest and most effective ways to infuse an incredibly deep, nutty, and complex flavor into both sweet and savory creations. For many years, the idea of browning butter intimidated me. I’d heard countless warnings about how easy it was to burn, leading to a bitter, ruined mess. The fear of failure almost kept me from trying. But once I finally took the leap and discovered just how straightforward it is, I was genuinely frustrated by all the unnecessary apprehension I’d carried. It turns out, browning butter is ridiculously easy, and I promise, I’m not exaggerating.
The magic happens when butter is gently melted and cooked over medium-low heat. The milk solids within the butter begin to toast, undergoing the Maillard reaction, which is the same chemical process responsible for the delicious browning of meat, toasted bread, and roasted coffee beans. As the butter cooks, it transitions from a pale yellow to a rich amber, emitting a wonderfully fragrant, nutty aroma reminiscent of hazelnuts. This transformation intensifies the butter’s natural richness, adding layers of savory depth that can elevate almost any dish.
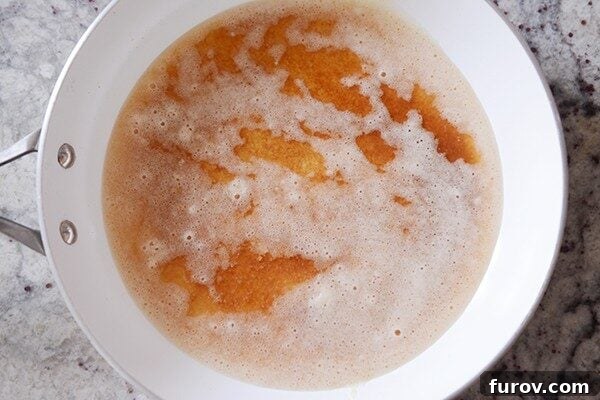
For a comprehensive, step-by-step guide, check out this super easy tutorial on How to Brown Butter.
Once you master this simple technique, you’ll find endless applications. Beyond the incredible depth it adds to baked goods, brown butter is exceptional in savory dishes. Drizzle it over roasted vegetables like asparagus or Brussels sprouts, toss it with pasta and a sprinkle of Parmesan, or use it to create an unforgettable pan sauce for fish or chicken. It’s also fantastic in glazes for ham or turkey, and can even elevate simple popcorn! Its versatility makes it an indispensable tool in any chef’s arsenal.
Here are some of my favorite recipes where brown butter truly shines:
- Salted Caramel Brown Butter Chocolate Chip Cookie Bars
- Browned Butter Vanilla Rice Krispie Treats
- Banana Bars with Browned Butter Frosting
- Butternut Squash Shells with Sage Brown Butter Sauce
- Penne with Roasted Asparagus and Balsamic Browned Butter
Tip #2: Unleash Your Inner Baker: The Magic of No-Knead Rustic Crusty Bread
Perhaps you’ve long dismissed the idea of baking your own bread, convinced it’s too time-consuming, too complicated, or simply not “your thing.” Maybe a past disaster involving yeast has permanently sworn you off homemade loaves. I understand! But it’s time to shake off those past experiences, because this incredible easy no-knead rustic crusty bread recipe is about to revolutionize your baking perspective and perhaps, your life!
The beauty of this bread lies in its simplicity. It requires no special stand mixer, no vigorous kneading, and absolutely no complex techniques. The foolproof dough comes together effortlessly in a bowl with just a wooden spoon. After a quick mix of flour, water, yeast, and salt, it’s left to rest for several hours, allowing time to work its magic. During this extended fermentation, the gluten develops naturally, creating a complex flavor and an incredible texture without any physical effort on your part. You’ll know it’s ready when the surface is bubbly and alive.
Once risen, with hands lightly greased with oil or cooking spray, the dough is simply formed into a rustic, freeform loaf. It’s then allowed a final, shorter rise before being baked in a scorching hot Dutch oven or on a baking stone, which creates that enviable, crackling, golden-brown crust. The result is a truly magnificent loaf – crisp on the outside, soft and airy within, with a wonderfully chewy texture and a deep, yeasty flavor. It’s a guaranteed showstopper, and I can assure you, no one will ever suspect how incredibly easy it was to make. The aroma alone will transport you to a European bakery.
If your goal is to truly feel like a culinary rock star, nothing quite compares to the satisfaction of pulling a warm, fresh-baked loaf of bread from your oven. This easy rustic crusty bread is the perfect entry point into the world of homemade baking, proving that gourmet results are achievable with minimal fuss. The dedicated recipe post includes detailed instructions and vivid pictures, providing a complete tutorial to guide you through every step.
Tip #3: The Flavor Catalyst: Embracing Coarse Kosher Salt
Beyond simply adding “saltiness,” the type of salt you use can profoundly impact the flavor and texture of your dishes. It’s time to upgrade your pantry staple and start incorporating coarse, kosher salt into your everyday cooking. And for an extra touch of culinary cool (and ultimate functionality), store it in a super cute bamboo salt box. This simple act of pinching a bit of flaky kosher salt between your fingers and flicking it over a sizzling skillet of eggs, vibrant roasted vegetables, or a perfectly seared steak instantly elevates your cooking experience and the final taste.
Coarse kosher salt isn’t just a trend; it’s a superior seasoning agent. Its larger, irregular crystal structure provides a more nuanced flavor delivery than fine table salt. It adheres beautifully to food surfaces, offering a delightful textural crunch and a burst of clean, pure saltiness without the metallic tang often associated with iodized table salt. I use it constantly, and while some recipes might caution against direct interchangeability with table salt, I often make the swap (yes, I live on the culinary edge!).
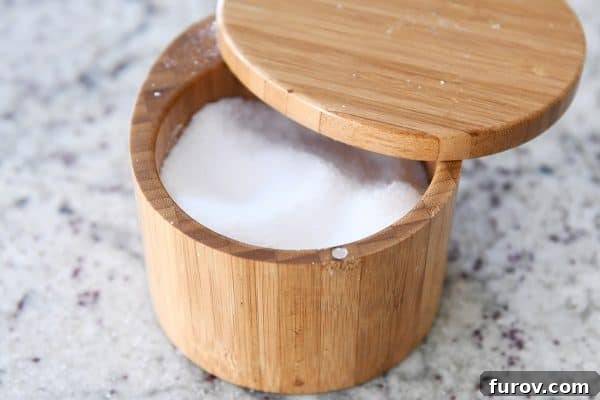
A helpful rule of thumb for conversion: Generally, if a recipe specifies 1 teaspoon of fine table salt, you’ll want to use approximately 1 1/4 to 1 1/2 teaspoons of coarse kosher salt. This adjustment accounts for the larger crystals of kosher salt, which don’t compact as densely into a measuring spoon as the finer granules of table salt do. This means a teaspoon of kosher salt weighs less than a teaspoon of table salt, so you need slightly more by volume to achieve the same salinity.
While I still rely on fine table salt for the precise measurements often required in baking recipes like cookies, cakes, and brownies, for almost everything else, I reach for the coarse kosher salt from my bamboo box. My preferred brand is usually Diamond Crystal kosher salt due to its light, flaky texture, which provides excellent control when seasoning. However, Morton’s kosher salt is also a great option, though it’s denser and less coarse than Diamond Crystal, so you might need to adjust quantities slightly if switching between the two brands.
Over the past year, I’ve made a conscious effort to specify when I use coarse kosher salt in my recipes to help you achieve the exact flavor profile intended. If you haven’t yet made the conversion, now is the perfect time! It’s a surprisingly inexpensive switch that delivers a significant impact on flavor and makes you feel incredibly cool and competent in the kitchen, ensuring your food is amazingly and perfectly seasoned every time.
Tip #4: The Freshness Factor: Falling in Love with Fresh Basil, Garlic, and Ginger
I am an undeniable devotee of dried herbs; my pantry shelves are filled with them, and they are a daily staple in my cooking. So, rest assured, I’m not here to judge anyone who reaches for dried basil or granulated garlic. However, if you’re seeking an unparalleled flavor boost—a kind of culinary magic that can genuinely transform a good dish into something utterly revolutionary and fresh—then I wholeheartedly advocate for embracing these three fresh powerhouses: basil, garlic, and ginger.
Fresh Basil: The Aromatic Heart
There is simply nothing quite like fresh basil. Its vibrant, sweet, and slightly peppery notes are intoxicating. I’d go as far as to say I love fresh basil more than almost any other herb (perhaps with the exception of rosemary, but that’s primarily because of this specific bread recipe). I have a multitude of recipes that specifically call for fresh basil, but you can also use it to dramatically upgrade recipes that traditionally use dried. As a general guideline, use double or even triple the amount of fresh basil compared to dried. So, if a recipe calls for 1 teaspoon of dried basil, aim for about a tablespoon (or more, to taste) of fresh, chopped basil. Remember to add fresh herbs like basil towards the very end of the cooking process, as prolonged simmering or high heat can diminish their delicate flavors and vibrant color.
Fresh Garlic: The Pungent Perfection
Incorporating fresh garlic will literally transform the way your food tastes, adding a depth and pungency that dried garlic powder simply cannot replicate. To make the process ridiculously rewarding and minimize the fuss, consider investing in a quality garlic press, particularly one that doesn’t require peeling the garlic first. This ingenious tool makes mincing garlic effortless. You don’t have to commit to using fresh garlic in every single recipe for the rest of your life! Just start by using it in dishes where you really want to make a lasting impression, and you’ll quickly notice the profound difference. And when convenience calls, there’s absolutely no shame in occasionally reaching for that garlic powder. Moderation, after all, is key in all things.
Fresh Ginger: The Zesty Zing
I could wax poetic about fresh ginger all day – its unique, zesty, spicy, and warming notes are simply unparalleled. However, this seemingly humble ingredient can appear a little intimidating to prepare. Fear not! I have a brilliant, stress-free method for working with fresh ginger. Simply cut the gnarly, nobby rhizome into 1-inch chunks (no need to peel them at this stage!), toss them into a freezer-safe ziploc bag, and freeze. Whenever a recipe calls for fresh ginger, pull out a frozen chunk and grate it directly from frozen (again, no peeling required!) using a microplane or the small holes of a box grater. It’s incredibly easy and mess-free. I’m also a huge fan of ginger paste for added convenience; while culinary aficionados might detect a subtle difference, I honestly can’t, and it’s a fantastic substitute when fresh isn’t available or time is short. Here are some of my favorite recipes that highlight the incredible flavor of fresh ginger.
Tip #5: The Zesty Zing: Ditch the Bottled Lemon Juice for Fresh Citrus
Seriously, it’s time to break up with bottled lemon juice. This isn’t a suggestion; it’s a culinary intervention! I grew up enjoying delicious lemon bars made with bottled lemon juice, and I frankly don’t think I ever purchased a fresh lemon or lime from the grocery store until my mid-20s. It took me until my late 20s to even figure out the proper way to zest one of these vibrant citrus creatures. So, believe me, I truly understand being a little late to this particular party.
However, after decades of exclusively using the real deal, the difference is not just noticeable – it’s profound. Bottled lemon or lime juice simply cannot compete with the bright, zesty zing and incredible fragrance of freshly squeezed citrus. While I might occasionally use bottled lemon juice for specific home canning recipes where acidity levels are critical, for almost all other culinary applications, fresh lemons and limes are non-negotiable. The aroma alone is invigorating, and the depth of flavor they impart is unparalleled. Using fresh citrus is such an effortlessly elegant way to elevate your entire cooking repertoire, from savory dishes to sweet treats and refreshing beverages.
Beyond just the juice, don’t underestimate the power of citrus zest. The zest, which is the colored outer layer of the peel, is packed with aromatic oils that contain the most intense flavor. Try rubbing fresh lemon zest into granulated sugar for an incredibly punchy lemon kick, perfect for baking or rimming cocktail glasses. Just inhaling the scent of this simple concoction is an experience in itself! Always remember to zest your citrus before you juice it, as it’s much easier when the fruit is firm. A good microplane grater makes zesting a breeze, yielding fine, fluffy zest that disperses beautifully into your dishes.
For everyday cooking and baking, I rely on this inexpensive citrus juicer, which efficiently extracts every last drop of juice. And for achieving that perfect, aromatic zest, this microplane grater is an absolute must-have in any kitchen. These two simple tools will quickly become indispensable allies in your quest for brighter, more flavorful food.
Bonus: Unleash Your Inner Pyromaniac with a Kitchen Torch
Alright, this one is less about profound flavor transformation and more about pure, unadulterated fun and flair. Even if you only ever use it to perfectly toast marshmallows for s’mores indoors or to achieve that perfectly browned meringue on a pie, you will undeniably feel like the coolest, most capable chef in the kitchen every single time you ignite that flame. Of course, it’s also absolutely fabulous and essentially indispensable for achieving that signature glassy, caramelized sugar crust on a classic crème brûlée. But don’t limit its potential! A kitchen torch can also be used for melting cheese on gratins, searing small cuts of meat for a beautiful crust, charring peppers for a smoky flavor, or even glazing a baked ham. My personal favorite, user-friendly model is this easy-to-use kitchen torch.
What about you? What other quick, simple tips or unexpected kitchen tools have made you feel like an instant rock star in your own culinary domain? Share your secrets! (Yes, effortlessly ordering pizza like a true champion absolutely counts!)
Disclaimer: I am a participant in the Amazon Services LLC Associates Program, an affiliate advertising program designed to provide a means for me to earn fees by linking to Amazon.com and affiliated sites. As an Amazon Associate I earn from qualifying purchases.