
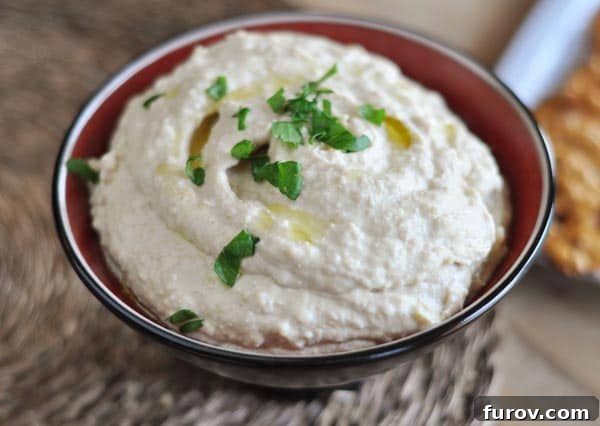
Experience the unparalleled delight of homemade hummus – a quick, healthy, and versatile dip that’s perfect for everyday snacking and elegant enough for any special gathering.
Mastering Homemade Hummus: Classic, Roasted Garlic & Red Pepper Variations
While the humble chickpea in its whole form might not win everyone over, transform it into a creamy, savory dip, and you’ve got a universally adored classic: hummus. This incredible dip isn’t just delicious; it’s a staple in our home, constantly stocked in the fridge for healthy, convenient snacking. It’s a true win-win, offering wholesome goodness that both kids and adults (including myself!) eagerly enjoy.
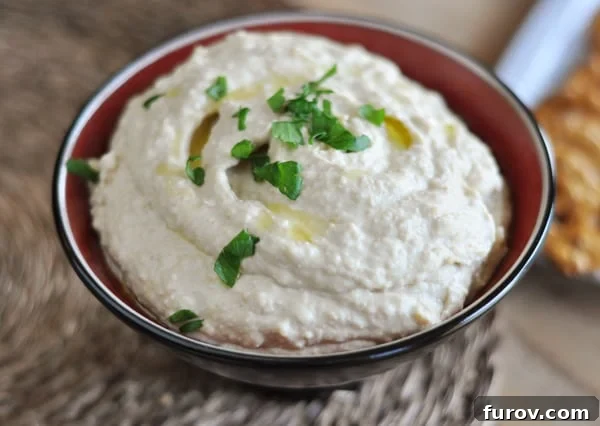
Today, we’re diving deep into the world of hummus, starting with a foundational classic recipe and then elevating it with two exquisite variations: rich roasted garlic hummus and vibrant roasted red pepper hummus. Each variation offers a unique flavor profile that’s sure to impress, whether you’re a seasoned hummus connoisseur or new to making it at home. The beauty of homemade hummus lies not only in its superior taste but also in its incredible versatility. It effortlessly transitions from a casual, healthy afternoon snack to a sophisticated appetizer that can grace any dinner party spread.
Why Choose Homemade Hummus? The Benefits of Crafting Your Own
There’s a significant difference between store-bought hummus and a freshly made batch. While convenient, pre-packaged options often contain preservatives, excess sodium, or unwanted additives. Crafting your own hummus gives you complete control over the ingredients, allowing you to adjust seasonings to your exact preference and ensure the freshest, most wholesome dip possible. It’s also surprisingly cost-effective and a fantastic way to incorporate more plant-based protein and fiber into your diet. Plus, the satisfaction of blending a few simple ingredients into something so incredibly delicious is a reward in itself.
Achieving the Perfect Silky Smooth Hummus Texture
The hallmark of an exceptional hummus is its smooth, creamy, almost ethereal texture. Achieving this can sometimes be a challenge, as I’ve experienced myself with a less-than-stellar food processor resulting in a slightly chunkier consistency. But fear not! Even if your appliance isn’t top-of-the-line, a wonderfully creamy result is absolutely within reach. The key lies in a few simple tricks:
- **Peel the Chickpeas:** This step is often overlooked but can make a dramatic difference. While tedious, gently pinching each cooked chickpea to remove its skin will result in an incredibly smooth puree. If you’re short on time, don’t worry – it’s still delicious without this step, just a touch less refined.
- **Blend Tahini First:** For the creamiest result, blend the tahini with lemon juice and water *before* adding the chickpeas. This emulsifies the tahini, preventing it from seizing and creating a smooth base.
- **Use Ice-Cold Water:** Adding a tablespoon or two of ice-cold water during processing can help achieve that light, airy, and ultra-smooth consistency. It aids in emulsification and brightens the flavor.
- **Process, Process, Process:** Don’t be afraid to let your food processor or high-speed blender run for a few minutes, scraping down the sides occasionally. The longer you blend, the smoother your hummus will become. If you have a powerful blender, it will often yield a superior texture compared to many food processors.
Ultimately, a slightly chunkier hummus, like the one sometimes produced by my own trusty (but aging) food processor, is still incredibly flavorful and enjoyable. So, whether your hummus turns out flawlessly silky or charmingly rustic, rest assured, it will be a delightful treat.
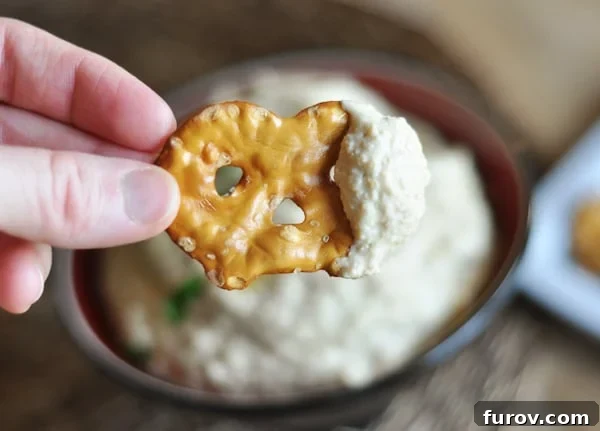
Perfect Pairings: What to Serve with Your Hummus
Hummus is incredibly versatile and pairs beautifully with a wide array of dippers and accompaniments. For a classic experience, serve it with warm pita bread wedges, crispy pita chips, or crunchy pretzel thins. For a healthy and refreshing option, a colorful assortment of fresh vegetables like carrot sticks, celery stalks, cucumber slices, bell pepper strips, cherry tomatoes, and radishes are excellent choices. Beyond dipping, hummus can also be used as a spread in sandwiches and wraps, a dollop on salads, or even as a creamy base for grain bowls. Don’t be afraid to get creative!
Classic Hummus
8
Servings (Makes about 2 cups)
15
mins
15
mins
Pin Recipe
Rate This Recipe
Ingredients
- 3 tablespoons juice from 1 to 2 lemons
- ¼ cup water
- 6 tablespoons tahini, stirred well
- 2 tablespoons extra-virgin olive oil, plus extra for drizzling
- 1 (14-ounce) can chickpeas, drained and rinsed
- 1 small garlic clove, minced or pressed through garlic press (about 1/2 teaspoon)
- ½ teaspoon table salt
- ¼ teaspoon ground cumin
- Pinch cayenne
- 1 tablespoon minced fresh cilantro or parsley leaves
Instructions
-
Combine lemon juice and water in a small bowl or measuring cup. Whisk together tahini and 2 tablespoons olive oil in a second small bowl or measuring cup. Set aside 2 tablespoons of chickpeas for garnish, if desired (alternatively, process all chickpeas with the hummus).
-
Process the remaining chickpeas (or all of them), garlic, salt, cumin, and cayenne in a food processor until almost fully ground, about 15 seconds. Scrape down the bowl with a rubber spatula. With the machine running, gradually add the lemon juice-water mixture in a steady stream through the feed tube. Scrape down the bowl and continue to process for 1 minute. With the machine running, add the oil-tahini mixture in a steady stream through the feed tube; continue to process until the hummus is smooth and creamy, about 15 seconds, scraping down the bowl as needed.
-
Transfer the hummus to a serving bowl, sprinkle with reserved chickpeas (if using) and minced cilantro or parsley over the surface. Cover with plastic wrap and let stand for at least 30 minutes to allow the flavors to meld. Drizzle with extra olive oil just before serving.
Notes
Make Ahead: The prepared hummus can be made and refrigerated up to 5 days in advance. Hold off on adding the fresh parsley or cilantro until you are ready to serve. If the hummus has thickened in the fridge, stir in 1 tablespoon of hot water to achieve the desired texture. Tahini, a sesame paste, is typically found in the natural foods or international aisle of most grocery stores.
Roasted Garlic Hummus: To create this flavorful variation, start by preparing the roasted garlic. Remove the papery outer skins from 2 heads of garlic, then cut off and discard the top quarters of the heads. Wrap the garlic in aluminum foil and roast in a 350°F (175°C) oven until the cloves are golden brown and very tender, which usually takes about 1 hour. Meanwhile, in a small 8-inch skillet, heat 2 tablespoons of olive oil with 2 thinly sliced garlic cloves over medium-low heat. Cook, stirring occasionally, until the garlic slices are golden brown (be careful not to burn them), approximately 15 minutes. Use a slotted spoon to transfer the toasted garlic slices to a paper towel-lined plate and set aside; reserve the infused oil. Once the roasted garlic is cool enough to handle, squeeze the soft cloves from their skins. You should yield about 1/4 cup of roasted garlic puree. In the classic hummus recipe above, substitute the garlic cooking oil for the standard olive oil in step 1, and omit the ground cumin. Process the entire can of chickpeas along with the roasted garlic puree, salt, and cayenne. Garnish the finished hummus with the reserved toasted garlic slices, 2 teaspoons of chopped fresh parsley, and a drizzle of olive oil.
Roasted Red Pepper Hummus: For this vibrant alternative, adjust the classic recipe by omitting the water and ground cumin. Thoroughly rinse and pat dry 1/4 cup of jarred roasted red peppers with paper towels. Process the entire can of chickpeas along with the prepared roasted red peppers and the other classic hummus ingredients (except the cumin). Garnish the roasted red pepper hummus with 2 tablespoons of toasted sliced almonds, 2 teaspoons of chopped fresh parsley, and a final drizzle of olive oil.
Mel
Appetizer
American
No-Bake
Nutrition Facts (Approximate per serving)
Serving: 1 Serving,
Calories: 181kcal,
Carbohydrates: 17g,
Protein: 6g,
Fat: 11g,
Saturated Fat: 1g,
Sodium: 153mg,
Fiber: 4g,
Sugar: 3g
Recommended Products
Recipe Source: Adapted slightly from Cook’s Illustrated
Explore More Delicious Dips and Spreads
If you loved creating these homemade hummus recipes, you’ll surely enjoy exploring other flavorful dips and spreads. These recipes are perfect for entertaining, healthy snacking, or adding a burst of flavor to any meal.
Other Recipes You Might Enjoy: