
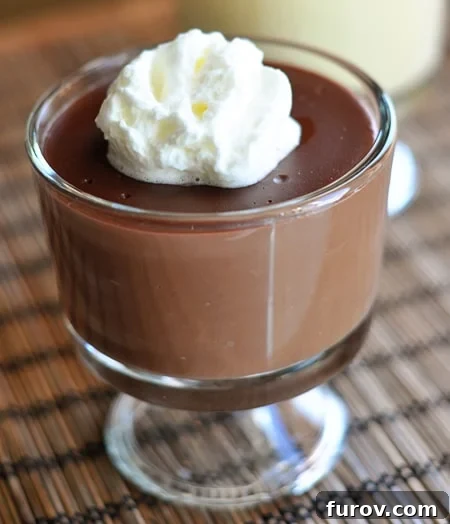
The Ultimate Homemade Chocolate Pudding: A Silky Smooth Indulgence from Scratch
Experience the unparalleled taste, luxurious richness, and velvety texture of this homemade chocolate pudding. It’s truly worlds better than any boxed variety, promising a delightful sensation with every single spoonful. You’ll savor each from-scratch bite!
If you’ve been relying on instant pudding mixes, prepare for a revelation. Shifting to homemade pudding is a game-changer, and I promise you, it’s an experience worth embracing. The difference is so profound, you’ll wonder why you ever settled for anything less.
The depth of flavor, the opulent richness, and the perfectly smooth texture of a homemade chocolate pudding far surpass anything a boxed mix can offer. And here’s the best part: it’s not significantly more difficult to make. In fact, with a few simple ingredients and a little patience, you can create a dessert that tastes like it came straight from a gourmet kitchen. You are going to absolutely love it.
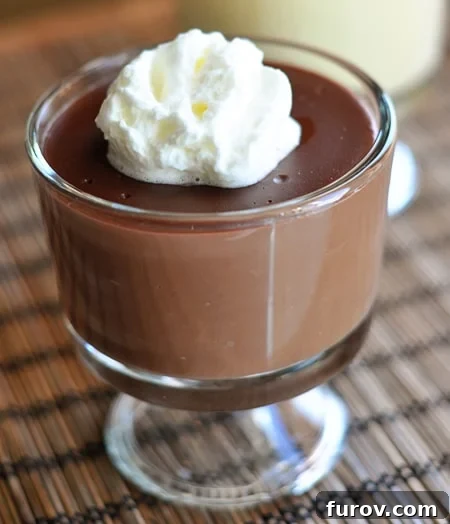
Why Homemade Chocolate Pudding is a Must-Try
There’s a certain magic to homemade desserts, and pudding is no exception. While convenience has its place, the satisfaction and superior quality of a dessert made from scratch are simply unmatched. Homemade chocolate pudding offers:
- Unrivaled Flavor Depth: You control the quality of your chocolate and cocoa, leading to a much richer, more complex flavor profile than artificial ingredients can provide.
- Perfectly Creamy Texture: No weird gummy or overly gelatinous consistency here. Just pure, silky smoothness that melts in your mouth.
- Wholesome Ingredients: You know exactly what goes into your pudding – fresh milk, real chocolate, and natural thickeners, free from preservatives and artificial flavors.
- Nostalgic Comfort: There’s something inherently comforting about a bowl of homemade chocolate pudding, reminiscent of childhood and simpler times.
Once you taste the difference, you’ll be converted. And the beauty of this recipe is its reliability and straightforwardness, making it accessible even for novice cooks.
(Note: We’ve previously shared both chocolate and vanilla pudding recipes together, but for clarity and ease of access, the vanilla pudding recipe is now available in a separate post.)
From Our Archives: Here are some other cherished recipes you might enjoy:
Balsamic and Black Bean Salsa
Lemon and Garlic Grilled Chicken
Gourmet Buttermilk Cookies
The Best Chocolate Pudding
8 servings (4 cups of pudding)
5 hrs
10 mins
5 hrs 10 mins
Pin Recipe
Ingredients
- ¼ cup (53 g) packed light brown sugar
- 3 tablespoons unsweetened cocoa powder, Dutch-process or regular
- 3 tablespoons cornstarch
- ¼ teaspoon salt
- 2 ¾ cups whole milk
- ¼ cup heavy cream
- 1 cup (170 g) milk chocolate chips, or 6 ounces bar milk chocolate chopped
- ½ teaspoon vanilla extract
Instructions
-
In a large saucepan, combine the brown sugar, cocoa powder, cornstarch, and salt, whisking lightly to ensure there are no lumps. Gradually whisk in the whole milk and heavy cream to the sugar mixture until it is completely smooth and well combined. Stir in the milk chocolate chips. Place the saucepan over medium heat, whisking or stirring occasionally, until the mixture begins to simmer.
-
Once the mixture reaches a gentle simmer (you’ll see small bubbles forming around the edges), reduce the heat to medium-low. Continue to cook, whisking constantly to prevent sticking and scorching, until the pudding mixture is noticeably thickened and large bubbles pop at the surface, which typically takes about 2 to 3 minutes. The pudding should coat the back of a spoon. Remove the pot from the heat and stir in the vanilla extract until fully incorporated.
-
Immediately transfer the hot pudding to a large clean bowl. Cover the surface of the pudding directly with plastic wrap, pressing it down so that it touches the entire surface. This crucial step prevents a “skin” from forming as the pudding cools. Refrigerate the pudding until it is completely chilled and set, at least 4 hours. For best results and optimal firmness, chill for at least 6-8 hours or overnight. The pudding can be stored in an airtight container in the refrigerator for up to 3 days. Serve cold, ideally with a dollop of freshly whipped cream, a sprinkle of chocolate shavings, or simply enjoy it plain.
Mel
Dessert
American
Stovetop
Calories: 193kcal,
Carbohydrates: 24g,
Protein: 3g,
Fat: 10g,
Saturated Fat: 6g,
Cholesterol: 23mg,
Sodium: 119mg,
Fiber: 1g,
Sugar: 19g
Expert Tips for Making the Best Chocolate Pudding
Achieving that perfectly smooth, rich, and creamy chocolate pudding is easier than you think, especially with these simple tips:
- Whisk Dry Ingredients Thoroughly: Before adding any liquids, make sure your brown sugar, cocoa powder, cornstarch, and salt are completely combined. This prevents lumps from forming later and ensures even distribution of flavor and thickeners.
- Gradual Liquid Addition: When adding the milk and cream, do so gradually while continuously whisking. This creates a smooth slurry, further preventing lumps.
- Constant Stirring is Key: While the pudding cooks, especially after it starts to warm up, whisk constantly. This prevents the milk from scorching at the bottom of the pan and ensures the cornstarch thickens evenly. Pay special attention to the corners of the saucepan.
- Medium Heat is Your Friend: Avoid the temptation to crank up the heat to speed up the process. High heat can cause the milk to curdle or scorch, leading to a grainy texture and burnt flavor. Medium to medium-low heat allows the pudding to thicken gently and properly.
- Watch for Bubbles: The instruction to cook until “large bubbles pop at the surface” is important. This indicates that the cornstarch has activated and is fully thickening the pudding. Don’t stop too early, but also don’t overcook.
- Direct Contact Plastic Wrap: This is a non-negotiable step to prevent a thick, rubbery skin from forming on top of your pudding as it cools. Press the plastic wrap directly onto the surface, making sure there are no air pockets.
- Patience with Chilling: While 4 hours is the minimum, allowing your pudding to chill for at least 6-8 hours, or even overnight, will result in the firmest, most luxurious texture and allow the flavors to meld beautifully.
Elevate Your Dessert: Serving Suggestions and Flavor Variations
While this homemade chocolate pudding is phenomenal on its own, here are some ideas to make it even more special:
Serving Suggestions:
- Classic Whipped Cream: A generous dollop of freshly whipped cream is the ultimate companion, offering a light, airy contrast to the rich pudding.
- Chocolate Shavings or Sprinkles: For an extra chocolatey flourish and appealing texture.
- Fresh Berries: Raspberries, strawberries, or blueberries add a touch of tartness and freshness that beautifully complements the chocolate.
- Crushed Cookies or Graham Crackers: Add a crunchy texture with crushed Oreos, shortbread, or graham crackers.
- Caramel or Hot Fudge Drizzle: For an even more decadent treat, drizzle with homemade caramel sauce or warm fudge.
- A Pinch of Sea Salt: A tiny sprinkle of flaky sea salt can enhance the chocolate flavor and add a sophisticated touch.
- In a Pie Crust: This pudding makes an incredible filling for a chocolate cream pie with a graham cracker or traditional pastry crust.
Flavor Variations:
- Dark Chocolate Dream: For a more intense chocolate experience, use good quality dark chocolate chips (60-70% cacao) instead of milk chocolate chips. You might want to slightly increase the brown sugar if you prefer it less bitter.
- Mint Chocolate Pudding: Add ¼ to ½ teaspoon of mint extract along with the vanilla for a refreshing twist.
- Orange Chocolate Pudding: Stir in a teaspoon of fresh orange zest or a few drops of orange extract for a citrusy note that pairs wonderfully with chocolate.
- Espresso Boost: A teaspoon of instant espresso powder (dissolved in a tiny bit of hot milk) can deepen and intensify the chocolate flavor without making the pudding taste like coffee. Add it with the dry ingredients.
- Spicy Chocolate: For an adventurous palate, a tiny pinch of cayenne pepper or chili powder can add a subtle warmth and kick.
Storage and Make-Ahead Goodness
This homemade chocolate pudding is perfect for making ahead, making it an ideal dessert for dinner parties or weekly meal prep.
- Refrigeration: Store the pudding in an airtight container in the refrigerator for up to 3 days. Remember to keep it covered with plastic wrap directly on the surface to prevent a skin from forming.
- Freezing: While technically possible, freezing pudding can alter its texture, making it slightly watery or grainy upon thawing. It’s best enjoyed fresh and chilled from the refrigerator.
- Serving Temperature: For the best texture and flavor, always serve the pudding cold.
Frequently Asked Questions About Homemade Chocolate Pudding
Q: Can I use different types of milk?
A: Whole milk provides the richest and creamiest texture, which is highly recommended for the best results. You can use 2% milk, but the pudding might be slightly less rich. Skim milk is generally not recommended as it significantly impacts the texture and flavor. For a dairy-free option, full-fat canned coconut milk or a rich almond milk can work, but the final texture and flavor will be different.
Q: How can I prevent my pudding from being lumpy?
A: The key to lump-free pudding is to thoroughly whisk your dry ingredients (sugar, cocoa, cornstarch, salt) together before adding any liquids. Then, gradually whisk in the milk and cream until the mixture is completely smooth. Constant whisking during cooking is also crucial.
Q: What if my pudding doesn’t thicken?
A: The most common reason for thin pudding is not cooking it long enough or not bringing it to a full simmer. Ensure you cook it over medium-low heat, whisking constantly, until it visibly thickens and large bubbles consistently break the surface for 2-3 minutes. If it’s still thin, you can try whisking a tablespoon of cornstarch with an equal amount of cold milk, then slowly whisking this slurry into the simmering pudding and cooking for another minute or two.
Q: Is Dutch-process cocoa powder necessary?
A: No, you can use either Dutch-process or natural unsweetened cocoa powder. Dutch-process cocoa is alkalized, giving it a darker color and milder, less acidic chocolate flavor. Natural cocoa is more acidic and fruitier. Both will yield delicious results, but Dutch-process often lends itself to a richer, darker chocolate pudding color.
Q: Can I make this with dark chocolate instead of milk chocolate chips?
A: Absolutely! Using dark chocolate (like bittersweet or semi-sweet) will result in a more intense and less sweet chocolate pudding. You might consider adding an extra tablespoon or two of brown sugar if you prefer a slightly sweeter dark chocolate pudding.
Recipe Source: adapted from Feb/March 2011 Cook’s Country