
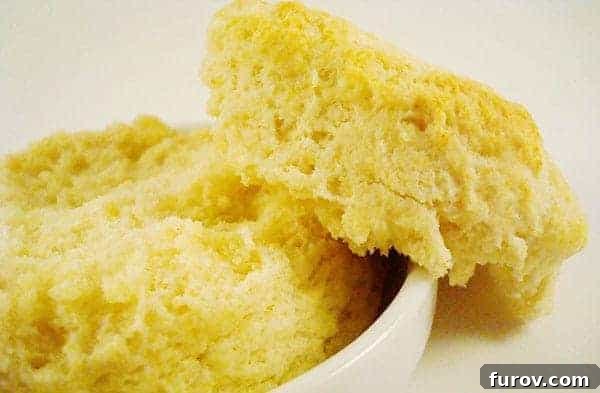
Discover the ultimate easy cream biscuit recipe – where rich cream replaces butter for unbelievably fluffy, flaky, and tender results. Simply stir, pat, and bake your way to homemade biscuit perfection!
The Ultimate Easy Cream Biscuits: Fluffy, Flaky, and Foolproof Homemade Perfection
For many home bakers, the quest for the perfect biscuit can feel like an unending odyssey. I’ve long confessed my struggles with certain baking endeavors, from finicky pie crusts to delicate cream puffs. Yet, perhaps the most relentless challenge, the one that truly tested my baking spirit, has always been the humble biscuit.
The journey to master biscuits has been a long and, frankly, often painful one. Countless batches have emerged from my oven: flat, tough, overly salty, lacking any hint of flakiness, or simply soggy. Over seven years, I estimate I attempted biscuits at least 256 times. And for 255.5 of those attempts, they were an unmitigated disaster. The remaining half-point goes to the one time my children, bless their hearts, actually managed to eat them, though I suspect it was only out of sheer hunger on a bean-for-dinner night.
Each failure chipped away at my confidence. I grew weary of the cycle: hopeful anticipation followed by the crushing disappointment of another flat, uninspired biscuit. The well-meaning, if not entirely helpful, comments from my children – “Mom, sorry the biscuits were yucky again tonight” – eventually led me to hang up my apron entirely when it came to biscuit making. I simply gave up.
A Biscuit Breakthrough: Embracing the Cream Difference
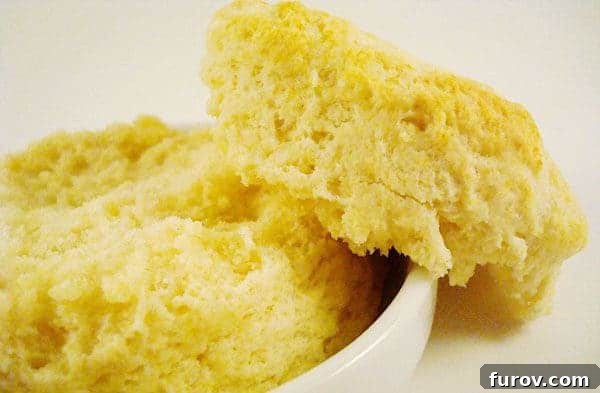
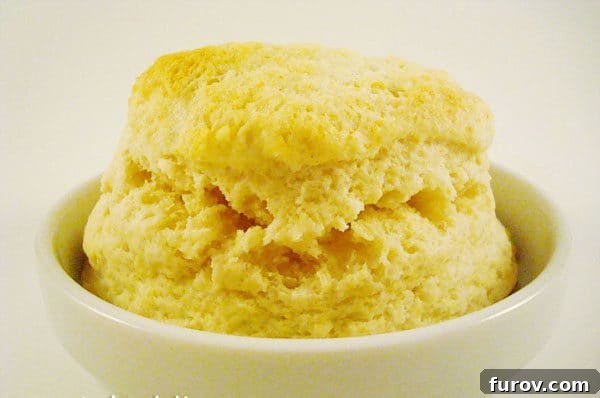
But then, this recipe appeared. And let me tell you, it was a revelation. Just one glance at the picture tells the story: these biscuits stand at least 84 times taller than any of my previous, regrettable attempts. And the texture? Oh, the tender flakiness! It was nothing short of dreamy. Absolutely, unequivocally dreamy.
Never before had such a perfect biscuit graced the shelves of my oven. From this moment forward, I am forever loyal to this cream biscuit recipe. It has pulled me from the depths of my biscuit-making despair and transformed me into a true believer – a testament that homemade biscuits truly can be not just edible, but exceptional.
The secret to these delicious, stress-free biscuits lies in their cream-based foundation. This simple ingredient substitution completely alleviates the common anxieties associated with traditional biscuit recipes. Gone are the worries about whether the butter pieces are cold enough, small enough, or properly cut into the flour. There’s no more agonizing over potentially overworking the dough or mastering intricate folding techniques to achieve those elusive layers. With this recipe, you simply stir the cream into the dry ingredients, gently pat out the dough, and cut out your biscuits. It’s that simple, that effortless, and ultimately, that satisfying.
Why Cream Biscuits Are a Game-Changer for Home Bakers
Traditional biscuit recipes often rely on cold butter, which is cut into the flour to create pockets of steam during baking, resulting in a flaky texture. While effective, this method can be intimidating, requiring a delicate touch and precise temperature control. Overworking the dough or using butter that’s too warm can quickly lead to tough, dense biscuits. This is where cream truly shines as a hero ingredient.
Heavy cream, with its high fat content, disperses more evenly throughout the dry ingredients than solid butter. This leads to a tender crumb without the need for meticulous cutting-in or fear of overworking. The fat in the cream contributes to an incredibly rich flavor and a soft, melt-in-your-mouth texture. It simplifies the entire process, making biscuit baking accessible to everyone, regardless of their past experiences.
The Science of Softness: How Cream Creates Culinary Magic
When you use heavy cream in a biscuit recipe, you’re essentially adding both fat and liquid in one ingredient. The fat coats the flour proteins, preventing excessive gluten development, which is the main culprit behind tough biscuits. This coating action ensures a tender bite every time. Furthermore, the moisture in the cream combines with the baking powder to create ample steam during baking, contributing to a magnificent rise and a wonderfully airy, flaky interior. The result is a biscuit that is consistently light, fluffy, and impossibly tender, without any of the usual fuss.
Foolproof Baking Tips for Perfect Cream Biscuits
Even with a simplified recipe, a few key tips can ensure your cream biscuits turn out perfectly every time. First, **don’t overmix the dough**. Once the cream is added to the dry ingredients, mix just until combined. A slightly shaggy or sticky dough is preferable to a dry, overmixed one. Overmixing develops gluten, leading to a tough texture.
Second, when patting out the dough, **handle it gently and avoid excessive flour**. A lightly floured surface is all you need. The goal is to work the dough as little as possible. Press it out evenly to about 3/4 inch thickness. For cutting, use a sharp biscuit cutter and press straight down without twisting. Twisting can seal the edges of the biscuit, hindering its rise.
Finally, ensure your oven is **preheated properly** to 425°F (220°C). A hot oven helps the biscuits rise quickly and creates that beautiful golden-brown crust. Baking on parchment paper also prevents sticking and promotes even browning.
An Added Perk: Flash Freezing for Future Feasts
One of the best practical advantages of this recipe is the ability to flash freeze the unbaked biscuits. This means you can prepare a larger batch and enjoy fresh, hot biscuits whenever the craving strikes, with minimal effort. Imagine having homemade biscuits ready for breakfast, dinner, or a sudden guest! This convenience elevates the cream biscuit from a simple treat to a staple in your culinary repertoire.
So, I hope you too will become a believer in the transformative power of the cream biscuit (unless, of course, you’re already a professional biscuit maker. If so, I’m not sure we can be friends, as I tend to surround myself with people who share my baking mishaps – it’s much easier on the ego!).
Oh, and a final note: if you find yourself gasping at the generous amount of cream used in recipes this week, please rest assured that I promise some wonderfully healthful meals are on their way next week. But until then, please, please, please do not check back tomorrow. The culinary delights I have planned will put even our beloved glazed meatloaf, decadent creamy potatoes, and these celestial biscuits to shame with their sheer indulgence!
You Might Also Enjoy: Pasta Chicken Salad with Sun-Dried Tomatoes, Spinach and Bacon
Cream Biscuits
Pin
Rate
Save
Ingredients
- 3 tablespoons (43 g) melted butter
- 2 cups (284 g) all-purpose flour, plus more for dusting the surface
- 1 tablespoon baking powder
- ½ teaspoon salt
- 1 tablespoon sugar, optional
- 1 ½ cups heavy cream
Instructions
-
Preheat the oven to 425°F (220°C). Line a baking sheet with parchment paper. Sift two cups flour, the baking powder, salt and (if using) sugar into a large bowl. Fold in 1 1/4 cups cream. If the dough is not soft or easily handled, fold in the remaining 1/4 cup cream, little by little, until a soft dough forms.
-
Turn the dough onto a lightly floured surface, gently mound it into a ball and, using your hands, carefully press it to a thickness of about 3/4 inch. It does not need to be completely smooth across the top. Using a 2 1/2 inch round biscuit cutter, cut out the biscuits. Gather dough scraps and gently press together to cut additional rounds, working the dough as little as possible.
-
Place the biscuits on the prepared baking sheet lined with parchment paper or a silicone baking mat. Brush the tops with the melted butter. Bake for 12 to 15 minutes, or until golden brown and risen. Serve immediately, or flash freeze (see note below) for future use.
Notes
Once Frozen: Carefully transfer the frozen biscuits to a freezer-safe ziploc bag or airtight container. They can be stored in the freezer for up to 3 months, ready to be baked as needed.
Baking From Frozen: Biscuits can be baked directly from the freezer; there’s no need to thaw. Simply add an additional 3 to 5 minutes to the baking time, or until they are golden brown and cooked through.
Recommended Products
Recipe Source: Adapted from Smitten Kitchen (originally from James Beard’s American Cookery)