
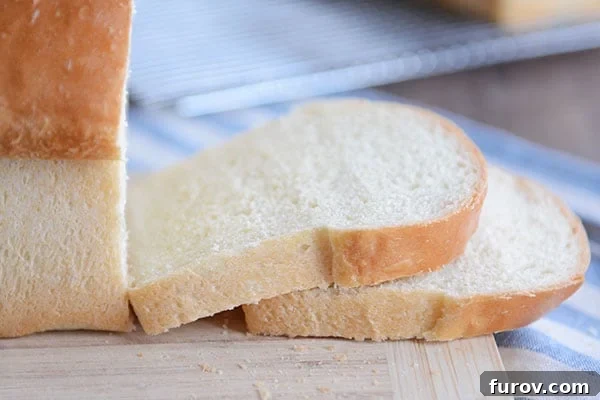
Welcome to the ultimate guide for baking the best white sandwich bread you’ll ever taste! Forget store-bought loaves; this homemade version is incredibly easy to make, delivering unparalleled softness and fluffiness. Perfect for crafting delicious sandwiches, creating golden toast, or whipping up a batch of decadent French toast, this recipe will quickly become a cherished staple in your kitchen.
There’s truly nothing quite like the comforting aroma and tender texture of freshly baked bread. This recipe promises a loaf that is not just soft and fluffy, but consistently perfect every single time. What makes it even better? It’s surprisingly simple, requiring no complicated ingredients or time-consuming techniques. Just straightforward, satisfying baking that yields impressive results.
My Mom’s Timeless White Bread Recipe: A Family Favorite
This remarkable recipe isn’t just a recipe; it’s a legacy. It’s my mom’s famous white bread, a tried-and-true classic that filled our home with warmth and deliciousness throughout my childhood. I have vivid, cherished memories of her in the kitchen, meticulously mixing the dough in a large blue bowl with nothing but a sturdy wooden spoon. No fancy electric stand mixer for her – just skill, patience, and love.
The beauty of this dough lies in its incredible forgiveness. It’s remarkably easy to work with, making it an ideal choice for both aspiring bakers taking their first steps into the world of bread making and seasoned experts seeking a reliable, high-quality loaf. Its pliable nature ensures a successful bake, boosting confidence and delivering exceptional results regardless of your experience level. This recipe proves that you don’t need elaborate techniques to create something truly spectacular.
Streamlining the Process: My Approach to Homemade Bread
While I admire my mom’s dedication to hand-mixing, I confess I lean a bit more towards efficiency in the kitchen. That’s why I always opt for my trusty stand mixer to prepare this bread dough. I personally use a Bosch stand mixer, which handles bread dough with incredible ease. However, this versatile recipe performs beautifully in any stand mixer equipped with a dough hook, whether it’s a KitchenAid or another brand.
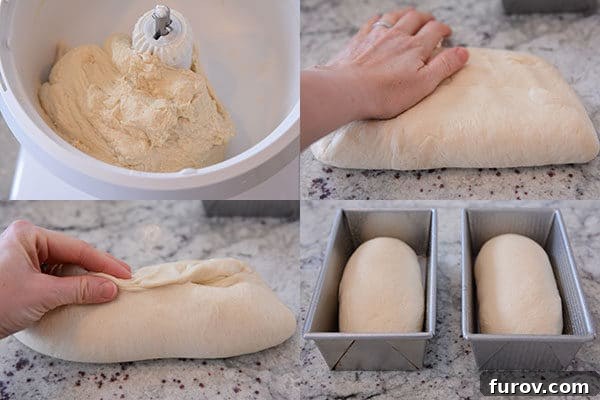
The dough itself is a dream to work with: soft, smooth, and wonderfully pliable. Once adequately kneaded, its texture is elastic and resilient, indicating proper gluten development. After the initial rise, I gently punch down the dough to release the air, then divide it into two equal portions. Each portion is then carefully pressed into a thick rectangle, about 8 inches in length. I then roll each rectangle tightly into a log, ensuring to pinch the seam firmly to create a smooth, aesthetically pleasing loaf that holds its shape beautifully in the bread pan.
The Culinary Versatility of Homemade Perfection
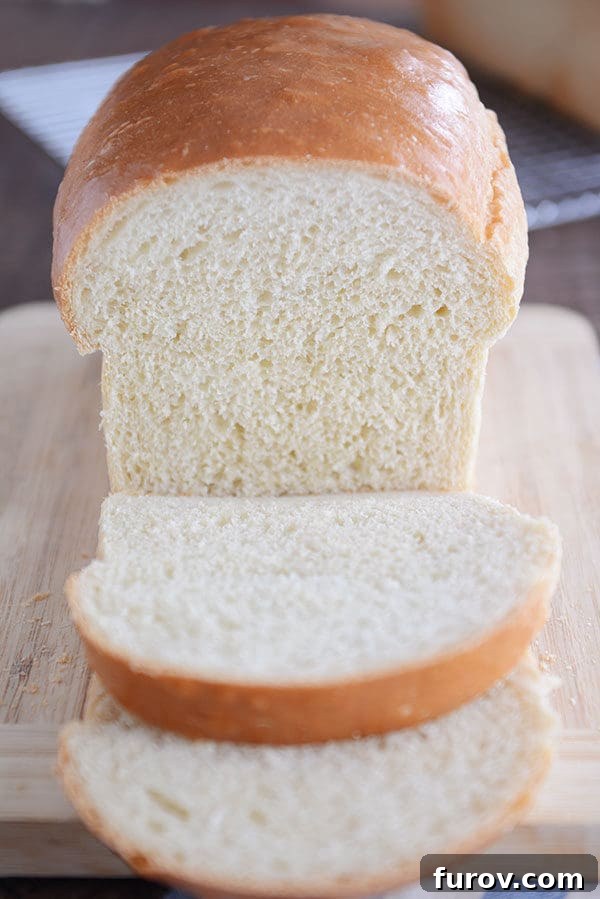
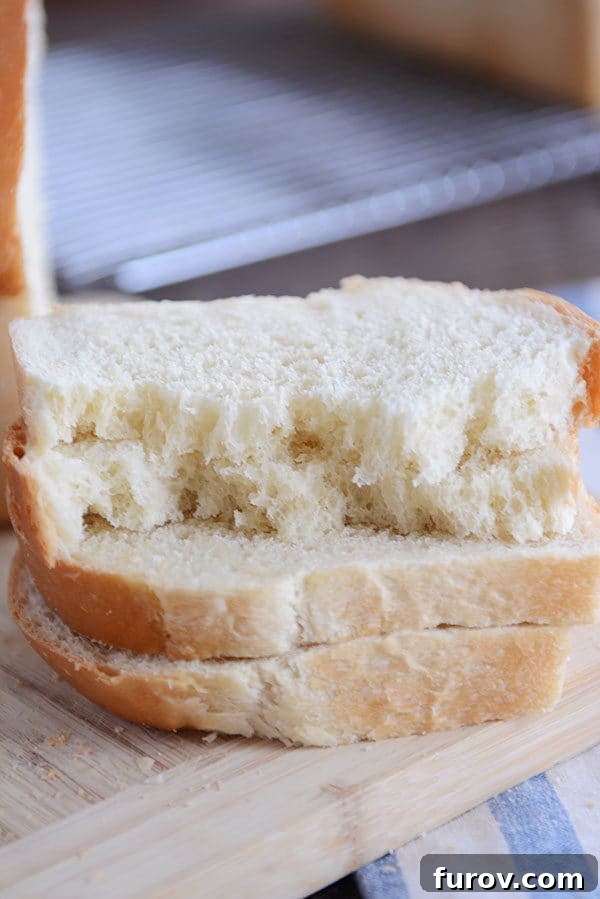
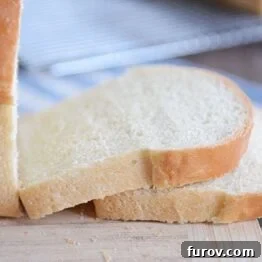
The resulting baked loaves are nothing short of magnificent – tall, sturdy, and golden brown. Slice into one, and you’ll discover a soft, yet tight, crumb that makes it the quintessential bread for any sandwich. From classic deli meats to gourmet fillings, this bread provides the perfect foundation, holding up without becoming soggy and adding a delightful texture to every bite.
But the versatility doesn’t end there! If you’re looking to elevate your comfort food game, this bread transforms into the most fantastic grilled cheese sandwiches imaginable, boasting a crispy exterior and a melty, cheesy interior. And for a truly indulgent breakfast or brunch, it makes an unbelievably good French toast – soaking up the custard beautifully while maintaining its structure. Good thing this recipe doubles so well! In our household, a single batch never lasts long. I often prepare a double batch, baking four loaves and freezing two for later, a strategy I affectionately call “freezer self-control.” It ensures we always have homemade goodness on hand for busy days or unexpected cravings.
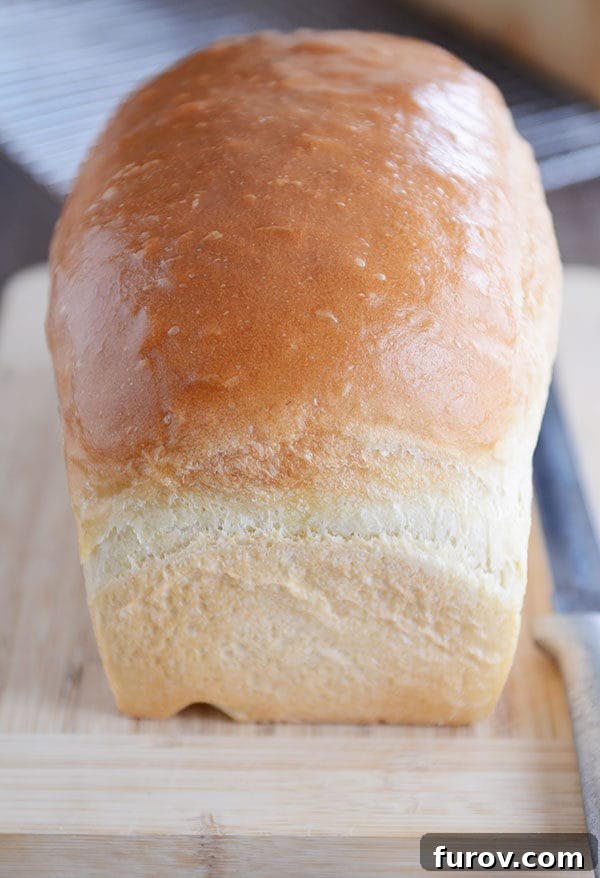
Essential Equipment for Superior Homemade Bread
Having the right tools can significantly enhance your bread-making experience. Here’s a detailed look at the equipment I rely on for consistently excellent results:
- Stand Mixer
For all my bread-making endeavors, my Bosch stand mixer is my go-to. While I also own a KitchenAid mixer, I’ve found the Bosch to be unparalleled for handling heavy bread doughs with ease. This recipe, which yields two loaves, is manageable in a KitchenAid, but the Bosch excels, especially when I double the recipe to make four loaves at once. Of course, if you prefer a more traditional approach, this bread can absolutely be made by hand, offering a truly rewarding tactile experience. - Bread Pans
The choice of bread pan significantly impacts the loaf’s shape and crust. I exclusively use 8 1/2-inch by 4 1/2-inch bread pans for our everyday sandwich bread, as opposed to the larger 9×5-inch pans. This specific size helps create taller, more uniform loaves. My collection includes a mix of excellent Chicago Metallic pans and USA Bread pans, both of which I highly recommend. If pressed to choose, the USA bread pans might slightly edge out the competition due to their consistently non-stick performance. A useful tip I’ve learned over a decade of bread making: I rarely wash my bread pans with soap and water when baking sandwich bread (quick breads like banana bread are an exception). Instead, I use a clean dishrag soaked in very hot water to wipe them thoroughly, especially in the corners and crevices. Air drying prevents rust and keeps the pans in excellent condition for years. - Kitchen Scale
Precision in baking is key, especially when dividing dough. My trusty kitchen scale is invaluable for weighing out dough portions. While not strictly necessary, it ensures that each loaf has a uniform weight, promoting even baking and consistent results. This attention to detail guarantees beautiful, symmetrical loaves every time. - Bench Scraper
An optional but incredibly handy tool, this bench scraper/cutter is perfect for cleanly dividing dough into loaves and scraping up any sticky bits from your work surface. Beyond bread making, it’s one of the most versatile tools in my kitchen, serving countless purposes from chopping vegetables to portioning pastries. - Flour Sack Towels
For covering dough during its rise, lightweight flour sack towels are an excellent, breathable alternative to greased plastic wrap. They create a perfect environment for the dough to rise without sticking, allowing for optimal air circulation. - Unbleached All-purpose Flour
When baking white bread, I consistently choose unbleached all-purpose flour over its bleached counterpart. While bleached flour would likely work in this recipe, I haven’t personally tested it. My mom, however, used bleached flour for decades, achieving delicious results. Unbleached flour often has a slightly higher protein content, contributing to a better crumb structure and flavor. - Bread Bags
Proper storage is crucial for keeping your homemade bread fresh. A few years ago, I invested in a case of 1,000 bread bags – a decision that has significantly elevated my bread storage game! While a thousand might be excessive for most, dedicated bread bags are far superior to awkwardly stuffing loaves into ill-fitting Ziploc bags. This is the case of bread bags I have, but for a smaller quantity, these bread bags are a fantastic option. To seal them securely, I always use plastic clips like these, often snagging a fresh supply during my annual IKEA visit. - Bread Knife
A good bread knife is essential for clean, even slices that preserve the integrity of your homemade loaf. This affordable bread knife is my absolute favorite. Its long, serrated blade glides through both crust and crumb, ensuring neat, uniform slices every time, whether you’re making thin sandwich slices or thick pieces for toast.
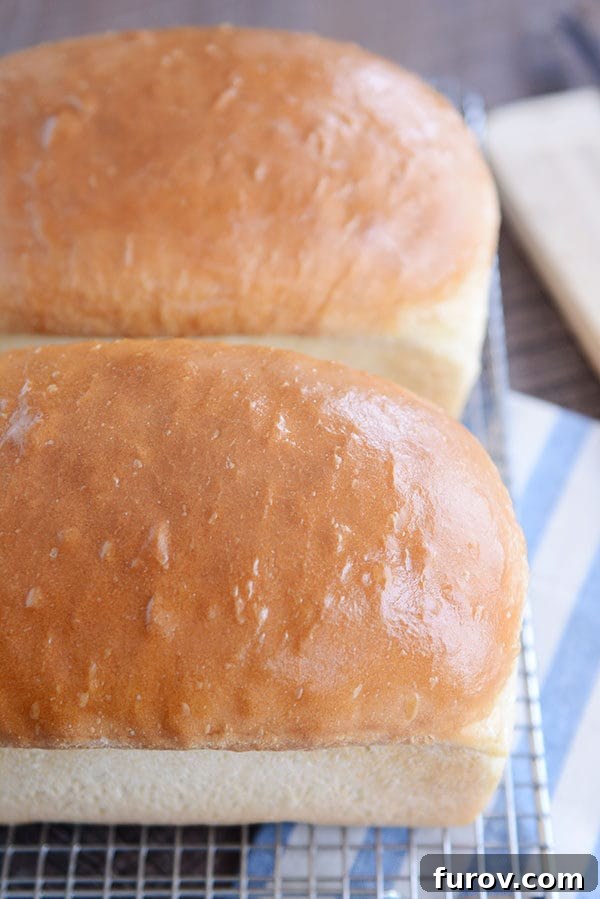
If your quest for the ultimate, soft, white sandwich bread has been ongoing, consider your search officially over! This tried-and-true recipe offers a simple, delicious, and incredibly fluffy loaf that will satisfy every time. Embrace the joy of homemade bread and transform your everyday meals into something extraordinary.
One Year Ago: Soft Baked Skillet Chocolate Chip Cookie {Egg-Free}
Two Years Ago: Fudgy Coconut Oil Brownie Bites
Three Years Ago: Incredible Chocolate Pudding {Dairy, Egg and Gluten Free}
The Best White Sandwich Bread
20
slices (2 loaves)
2 hours
30 minutes
30 minutes
3 hours
Pin
Ingredients
-
6 ½ to 7 ½ cups
(923-1065 g)
unbleached all-purpose flour -
2 ½ teaspoons
salt -
1 ½ tablespoons
instant yeast -
¼ cup
sugar or honey -
2 ¾ cups
very warm water -
¼ cup
neutral-flavored oil, like grapeseed, canola, vegetable, avocado -
Butter for top of loaves, optional
Instructions
-
In the bowl of an electric stand mixer fitted with the dough hook (or in a large bowl, if making the dough by hand), combine THREE cups of the flour, salt, yeast and sugar.
-
Add the water and oil and mix until combined. The mixture will be thinner than traditional bread dough.
-
Cover the bowl and let the batter rest for 10 minutes; it will become slightly bubbly, indicating yeast activation.
-
With the mixer running (or stirring vigorously by hand), gradually incorporate another 3 to 4 cups of flour. Continue adding flour until the dough forms a cohesive ball that pulls away cleanly from the bottom and sides of the bowl. The dough should still be slightly tacky to the touch, not dry or dense, ensuring a soft final loaf.
-
Knead the dough for approximately 2 minutes until it transforms into a smooth, supple, and elastic mass.
-
Lightly grease a large clean bowl. Transfer the dough into this prepared bowl, cover it with greased plastic wrap or a clean, light kitchen towel, and allow it to rise in a warm spot until it has visibly doubled in size, typically about an hour, depending on your kitchen’s temperature.
-
Gently punch down the risen dough to deflate it, then divide it into two equal pieces. For best results and even loaves, use a kitchen scale to ensure precise division.
-
Grease two 8 1/2-inch by 4 1/2-inch bread pans thoroughly.
-
Take each piece of dough and press it into a thick rectangle, roughly 8-inches long. Roll the dough up tightly from one of the shorter ends, pressing firmly along the seams as you roll, and meticulously pinching the final seam together to seal it securely. This technique creates a beautiful, uniform loaf.
-
Carefully place each shaped dough log into the prepared bread pans, seam-side down.
-
Cover the pans with lightly greased plastic wrap or thin kitchen towels and let the dough rise again until it has doubled in volume and risen approximately 1-inch above the top rim of the pan. This second rise usually takes about an hour, varying with room temperature.
-
While the dough is undergoing its second rise, preheat your oven to 350 degrees F (175 degrees C).
-
Bake the bread for 30-32 minutes, or until the tops are beautifully golden brown and the loaves are thoroughly baked through. An internal temperature of 200-210°F (93-99°C) indicates doneness.
-
Remove the baked bread from the oven and immediately turn the loaves out onto a wire rack. For an extra soft crust and a touch of richness, brush the tops of the hot loaves generously with melted butter, or simply rub a stick of butter directly over the surface.
-
Allow the bread to cool completely on the wire rack before slicing. Slicing warm bread can lead to a gummy texture.
-
Once cooled, store the bread at room temperature, securely covered in a bread bag, for a couple of days to maintain freshness. For longer storage, the loaves can be frozen for up to a month or so.
Notes on Perfecting Your Loaf
Yeast: This recipe calls for instant yeast, which can be directly mixed with dry ingredients. If you only have active dry yeast, you can easily adapt. Simply dissolve the same amount of active dry yeast in 1/4 cup of the very warm water (from the total amount required) along with a pinch of sugar. Let this mixture sit for 5-10 minutes until it becomes foamy and bubbly, indicating that the yeast is active and ready to work. Then, add this activated yeast mixture along with the oil and the remaining water to the dry ingredients as per the instructions.
Flour Amount: As is common with all yeast doughs, especially bread dough, the exact amount of flour needed can vary. Treat the specified flour amount in the recipe as a guideline rather than a strict measure. Several factors can influence how much flour you’ll need, including how you measure flour (I recommend the “spoon and level” method for accuracy), the climate and humidity levels in your kitchen, and even the protein content of your specific flour brand. The key is to add flour gradually until the dough achieves the desired texture: soft, smooth, elastic, and only just slightly tacky to the touch. It should cleanly pull away from the sides of the bowl without being overly dry or dense, which can lead to a tough loaf. Trust your instincts and the feel of the dough.
Mel
Bread
American
Bake
Serving:
1
slice
,
Calories:
195
kcal
,
Carbohydrates:
36
g
,
Protein:
5
g
,
Fat:
3
g
,
Saturated Fat:
1
g
,
Sodium:
292
mg
,
Fiber:
1
g
,
Sugar:
3
g
Recommended Products
Other Recipes Like This:
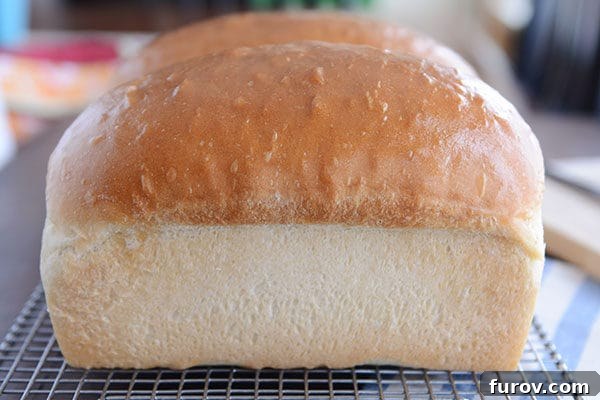
There is immense satisfaction in pulling warm, fragrant loaves of bread from your own oven. This recipe for the best white sandwich bread is not just about making a meal; it’s about creating memories, sharing comfort, and enjoying the simple pleasure of wholesome, homemade goodness. Give it a try, and discover why so many home bakers swear by its perfect results!