
Mastering the Art of Homemade California Sushi Rolls: A Step-by-Step Guide
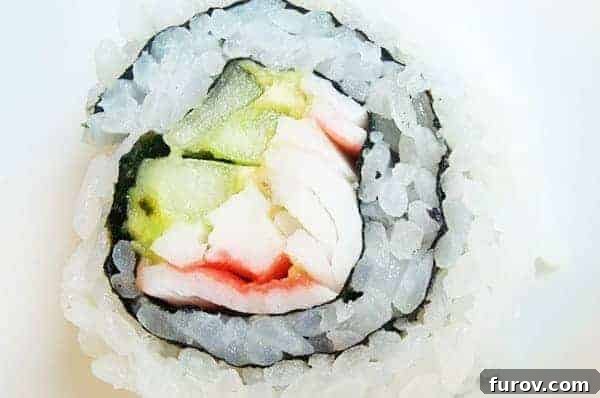
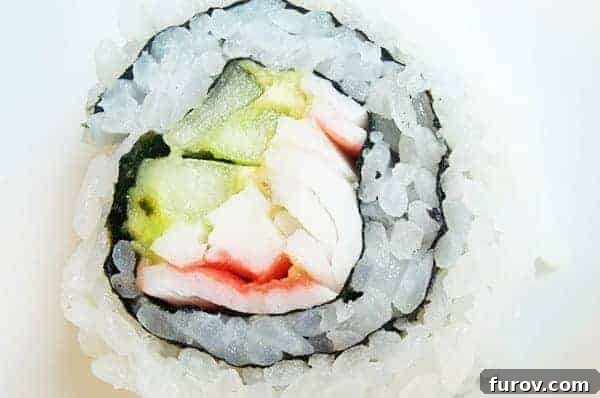
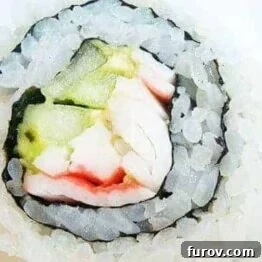
Welcome to the delightful world of homemade sushi! While the ingredients for these California sushi rolls might seem wonderfully simple, their combined magic creates an absolutely awesome culinary experience. Imagine creamy avocado, crisp cucumber, and savory crab (or imitation crab) perfectly rolled within tender sushi rice and a sheet of delicate nori seaweed. This guide will walk you through everything you need to know to create these popular rolls right in your own kitchen.
Disclaimer: I am certainly no sushi sensei or a certified California Roll connoisseur. In fact, I probably fit comfortably into the “enthusiastic amateur” category. However, I consider myself an absolute expert at devouring them, and I firmly believe they are among the most delicious little morsels to grace our planet.
The Journey to Homemade Sushi: From Skeptic to Enthusiast
My culinary adventure with California Rolls began when my friend, Melanie, introduced me to the idea of making them at home. Melanie lives in Japan, which is essentially the sushi capital of the world – though I often wonder if this Americanized California Roll is a common sight on menus there! Since that introduction, I’ve prepared these rolls countless times, refining my technique with each batch. Now, I’m thrilled to share my easy, step-by-step process with you, so you can experience the joy of making and eating your own fresh sushi.
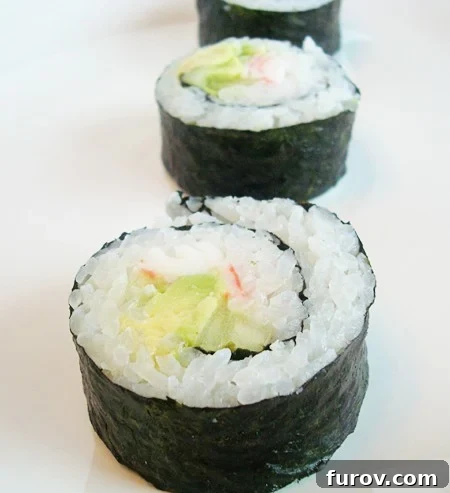
I like to keep my California Rolls wonderfully simple and focused on classic flavors: creamy avocado, refreshing cucumber, and savory imitation crab, all nestled within perfectly seasoned sushi rice and wrapped in sheets of roasted nori (seaweed). Of course, you can certainly get creative and add other ingredients like pickled ginger, toasted sesame seeds, or a drizzle of sriracha mayo. But for me, the beauty lies in mastering the delicious basics.
It took me a while to convince myself to even try making these. I was skeptical, having never even tasted a California Roll before. Seaweed? Really? But one bite was all it took – I was completely hooked! And to my absolute shock, so were my kids. They gobble these up as if there’s no tomorrow. It must be a delicious genetic predisposition!
Even if you’re a bit hesitant about the idea of making, or even eating, these little beauties, I feel it’s my duty to gently nudge you into giving them a try. Trust me, everyone who tries them seems to fall in love, and I just know you will too. Plus, they’re a fantastic combination of healthy and delicious, which makes me an even better friend for sharing this comprehensive how-to guide with you.
Sushi vs. Sashimi: A Quick Clarification
Speaking of sushi, here’s a fun fact you might already know, but it’s always good to reiterate: sushi does not actually mean raw fish. Many people mistakenly believe it does, but the term “sushi” primarily refers to the method or process of preparing a Japanese dish with seasoned rice. This seasoned rice is often paired with various toppings, which can include seafood (raw or cooked) and vegetables. If you’re looking for raw fish specifically, the correct term is “sashimi.” So, whether you prefer cooked ingredients like in a California Roll, or the pristine freshness of raw fish, the foundation of delicious sushi always starts with that perfectly prepared rice!
California Sushi Rolls: A How-To Guide
4-5 California rolls
30 mins
20 mins
50 mins
Pin Recipe
Ingredients
For the Filling:
- 4 cups cooked and prepared sushi rice (recipe follows)
- 2 large avocados, cut into long, thin slices
- 1 large cucumber, peeled and cut into long, thin slices
- Imitation crab meat, cut into long, slender slices
Essential Supplies:
- Bamboo mat, for rolling
- Plastic wrap, for covering the mat
- 4-5 sheets nori (roasted seaweed), large squares that are dark, nearly black, in color
For the Sushi Rice:
- 2 cups sushi, short or medium grain rice (do not use long grain rice)
- 2 cups water, plus extra for rinsing rice
- 2 tablespoons rice vinegar
- 2 tablespoons sugar
- 1 tablespoon kosher salt
Instructions for Sushi Rice Preparation
- Place the sushi rice into a mixing bowl and cover it with cool water. Swirl the rice gently in the water, then carefully pour off the cloudy water. Repeat this rinsing process 2 to 3 times, or until the water runs clear. This step is crucial for achieving perfectly sticky (but not mushy) sushi rice.
- Transfer the rinsed rice and 2 cups of fresh water into a medium saucepan. Place the saucepan over high heat and bring it to a vigorous boil, uncovered. Once it begins to boil rapidly, immediately reduce the heat to the lowest setting, cover the saucepan tightly with a lid, and let it simmer for precisely 15 minutes. After 15 minutes, remove the saucepan from the heat but keep it covered. Allow the rice to steam, undisturbed, for another 10 minutes. Do not peek!
- While the rice is steaming, combine the rice vinegar, sugar, and kosher salt in a small bowl. Heat this mixture in the microwave on high for about 30 to 45 seconds, or until the sugar and salt have fully dissolved. Stir well to ensure everything is incorporated.
- Carefully transfer the cooked rice into a large wooden or glass mixing bowl. Pour the prepared vinegar mixture evenly over the rice. Using a spatula or rice paddle, gently fold the mixture into the rice, taking care not to mash the grains. The goal is to combine and coat each grain of rice with the seasoning. Allow the rice to cool completely to room temperature before you begin assembling your sushi rolls.
- To expedite the cooling process, you can spread the rice out evenly on a large, rimmed baking sheet. Periodically, gently fold the rice and fan it (a file folder works wonderfully for fanning!) until it reaches room temperature. As my friend Melanie often says during this process, “fan and fold, fan and fold” – it’s quite therapeutic! Once the rice is completely cooled, cover it with a damp towel to prevent it from drying out while you prepare your other ingredients.
Notes for Success
Avocado + Lemon: If you’re concerned about your avocado slices turning brown, especially if the rolls won’t be served immediately, simply toss the cut avocado with a tiny bit of lemon juice before assembling. This helps prevent oxidation and keeps them looking fresh.
Nori & Bamboo Mats: Roasted seaweed (nori) and bamboo rolling mats are readily available. You can typically find them at most major grocery stores, large retailers like Walmart, or, of course, any Asian market. Look for nori that is dark green, almost black, for the best quality.
Assembling the Rolls: The detailed, step-by-step assembly instructions, complete with helpful pictures, are provided below. Don’t skip these visual aids for a smoother rolling experience!
Mel
Appetizer
Japanese
Stovetop
Recommended Products for Sushi Making
Step-by-Step Guide to Assembling Your California Rolls
Now that your sushi rice is perfectly prepared and cooled, and your ingredients are sliced and ready, it’s time for the most exciting part: assembling your California Rolls! This guide will primarily focus on making “inside-out” rolls, where the rice is on the outside. At the very end, I’ll provide a quick tip for making traditional “nori-on-the-outside” rolls. It’s “easy peasy, lemon squeezy,” as my five-year-old would delightfully say!
Preparing Your Rolling Station
1. Take your bamboo rolling mat and lay it flat on a clean surface. Place a piece of plastic wrap securely over the top of the mat. Make sure to leave about 2 inches of overhang on each side of the plastic wrap, which you’ll then tuck under the mat and tape on the back. This clever trick prevents sticky rice from getting lodged in the tiny crevices of your bamboo mat. Trust me, you’ll be thankful for this step – cleaning rice out of a bamboo mat is a sure way to deter future sushi-making attempts!
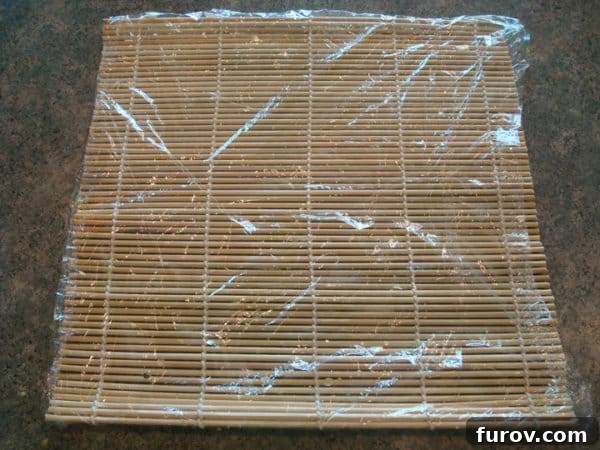
2. Here’s what the mat should look like with the plastic wrap securely taped on the back. This creates a non-stick, easy-to-clean surface for your sushi-making adventure.
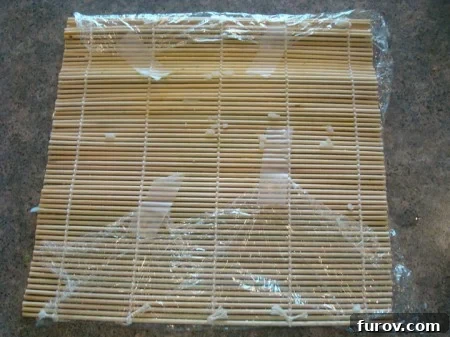
Layering the Nori and Rice (Rice on the Outside)
3. Flip your bamboo mat back over so the plastic-wrapped side is facing up. Take one sheet of that deliciously dark nori and place it squarely on top of the plastic-covered bamboo mat. This will be the base for your roll.
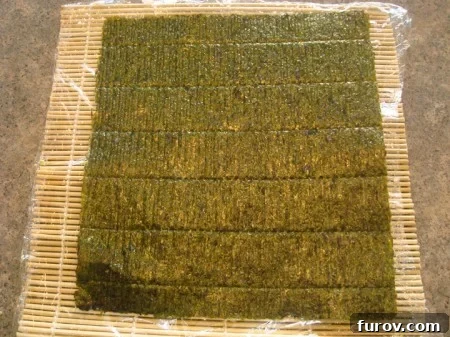
4. Grab a handful of the cooled sushi rice – roughly about 1/2 to 3/4 cup, depending on how substantial you want your rolls to be – and gently plop it onto the center of the nori sheet.
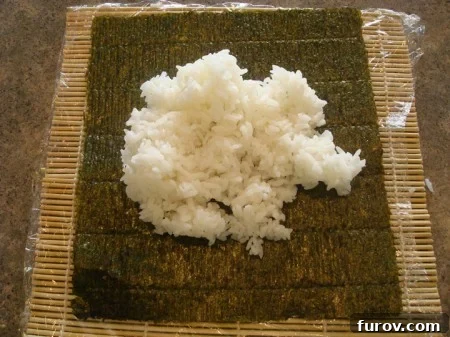
5. Now, wet your hands slightly. Using damp hands, spread the sticky rice evenly across the entire surface of the nori, making sure it reaches the edges. Leave a very slight margin (about 1/4 inch) on the side closest to you; this small gap will help significantly with sealing the roll later.
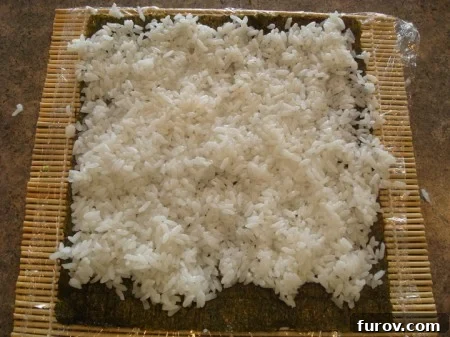
6. Gently grasp the nori sheet and carefully flip it over, so that the rice layer is now on the bottom, directly touching the plastic wrap of the bamboo mat. The nori will be facing up.
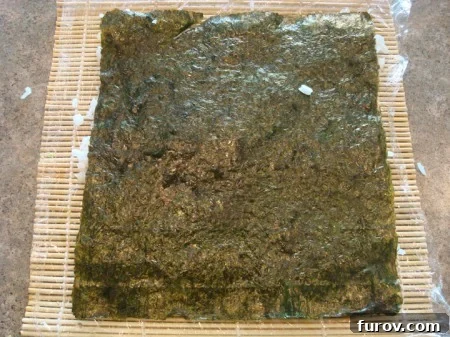
7. Just a quick peek to ensure the rice is indeed on the bottom, creating that classic “inside-out” California Roll style. The nori will now be your canvas for the delicious filling.
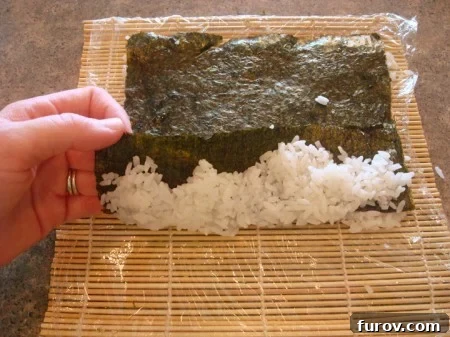
Adding the Delicious Filling
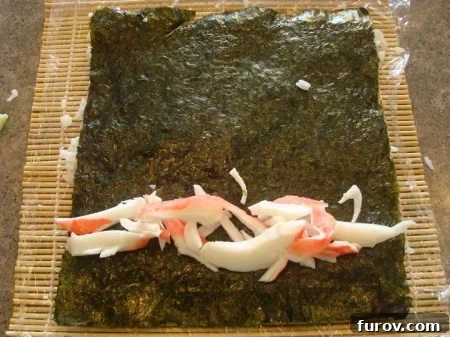
8. Now for the fun part: layering all the yummy goodness that will be rolled up inside. Start with the imitation crab meat. Arrange it in a neat line, positioning it closer to the edge of the nori that is nearest to you. Leave about a 1-inch margin from that edge; this space is important for the initial roll and ensuring a tight, well-formed cylinder.
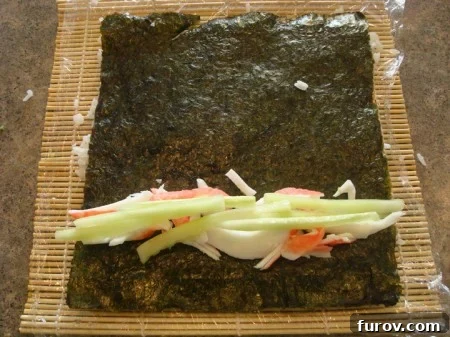
9. Next, layer the crisp cucumber slices right on top of the crab meat. Aim for an even distribution to ensure every bite of your roll is perfectly balanced.
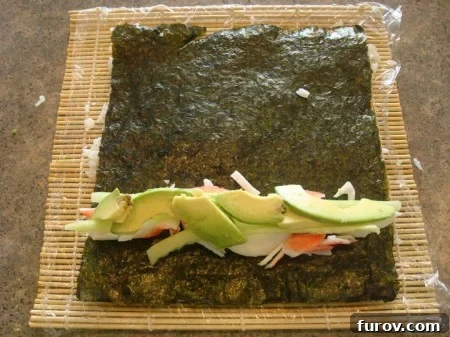
10. Finally, add the creamy avocado slices. This is often my personal favorite part! A quick note: I might have been a little enthusiastic with the ingredients in these photos. Remember to exercise caution and avoid overloading your roll. The more filled it is, the harder it will be to achieve a tight, uniform roll. Less is often more when it comes to sushi filling.
The Art of Rolling Your Sushi
11. Now comes the moment of truth – the rolling! This step might require a few deep breaths and some patience, but I promise, with a little practice, it will become second nature. Begin by gently lifting the edge of the bamboo mat closest to you. Fold it over the filling, encasing the ingredients and forming the initial curve of your roll. As you do this, gently use your fingers to press the crab, avocado, and cucumbers back towards the mat, ensuring they stay compressed and don’t become loose.
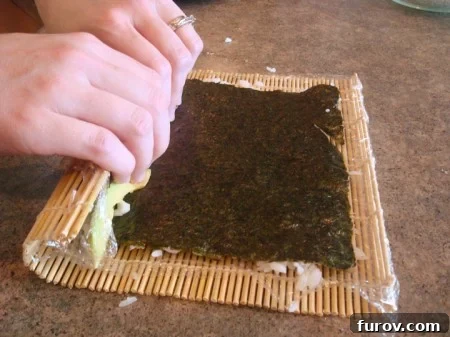
12. Continue folding the mat over, applying firm and even pressure throughout the entire rolling process. Keep rolling until you’ve reached a point where the bamboo mat can no longer roll further without folding over on itself. You definitely don’t want to accidentally roll up the bamboo mat into your delicious sushi!
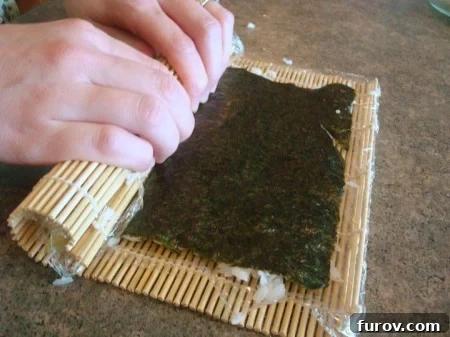
13. Gently unfold the mat, releasing the rolled section while keeping the sushi cylinder tightly tucked. Now, lift the bamboo mat straight up and reposition it, placing it just beyond the rolled section, ready to continue rolling.
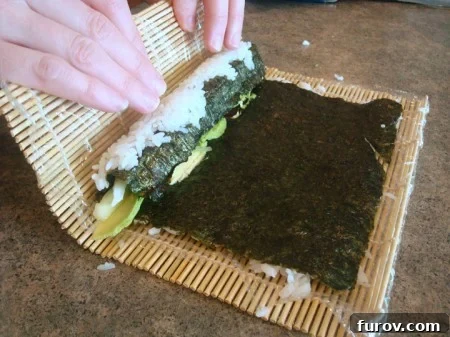
14. For this next phase, you’ll again bring the bamboo mat over the roll, rolling it further. As you roll, use your fingers to press the bamboo mat tightly into the roll. This action helps to compact the ingredients and rice even more, ensuring a perfectly cylindrical and firm sushi roll.
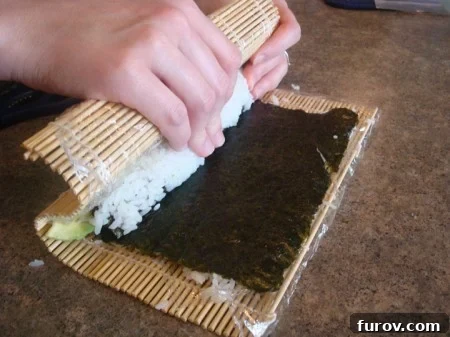
15. As you perform this final tightening, you’ll notice a slight overhang of the bamboo mat in front of your fingers. This is a good sign! It indicates that your California Roll is rolling up beautifully, becoming nice and tight, ready for slicing.
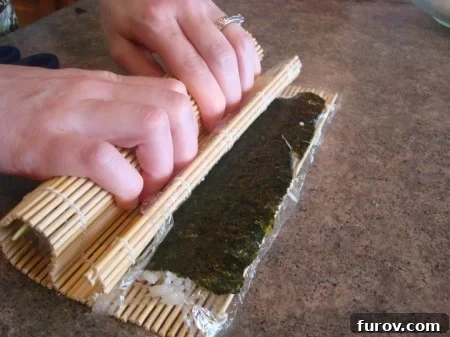
16. Continue this rolling, lifting, repositioning, and pressing process until you reach the very end of the mat and your sushi is completely rolled and firm. At this point, wrap the bamboo mat completely around the finished roll and give it a final, gentle hug with your fingers. This ensures it’s perfectly firm and evenly shaped – but be careful not to press too hard, or you’ll crush your masterpiece! Now, let out a big shout of “Hallelujah!” You’ve done it! Your beautiful roll can be wrapped in plastic wrap and refrigerated until you’re ready to serve, or you can proceed to slicing.
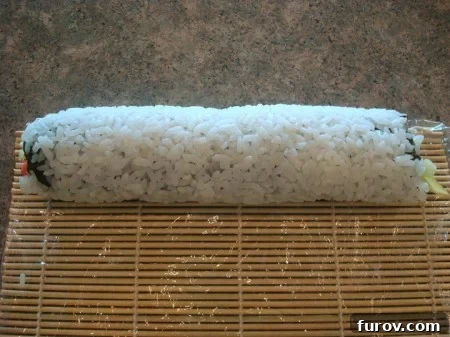
Slicing and Serving Your Rolls
17. If you’re eager to serve your homemade sushi right away, transfer the tightly rolled cylinder to a clean cutting board. Using a very sharp, slightly dampened knife, slice the roll precisely in half. A damp knife helps prevent the rice from sticking and tearing.
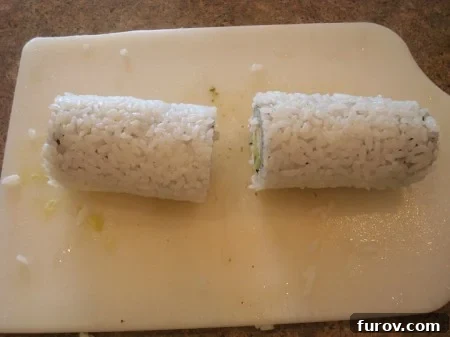
18. Next, take each half and slice it in half again, creating four equally sized pieces.
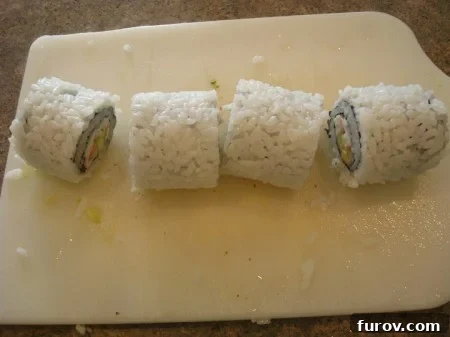
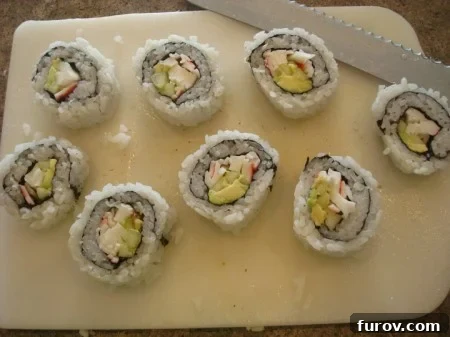
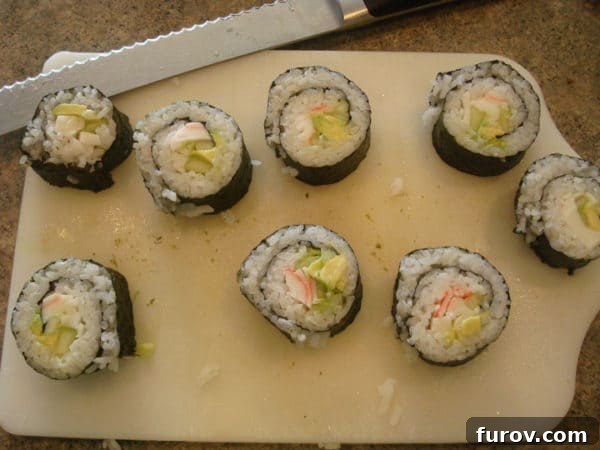
19. Finally, slice each of those four pieces in half one last time, yielding eight perfectly bite-sized California Roll pieces. You get the picture! And seriously, try not to gobble up all these delicious pieces just yet – I still need to show you how to roll with the nori on the outside!
Bonus: Rolling with Nori on the Outside (Traditional Style)
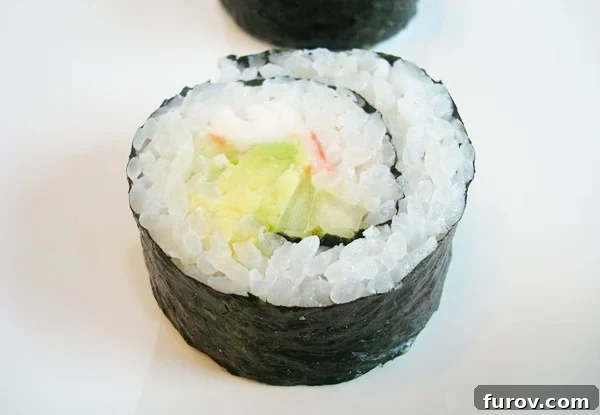
20. For those who prefer the traditional look with the seaweed on the outside, the process is incredibly similar, with one key difference. After you’ve spread the sushi rice to the edges of the nori (step 5), DO NOT flip it over. Instead, you’ll layer all your delicious filling ingredients – the crab, cucumber, and avocado – directly on top of the rice.
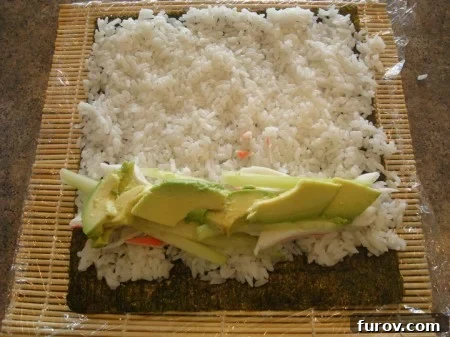
21. Once your ingredients are layered, proceed to roll the sushi just as explained in steps 11 through 16. Apply firm, even pressure to ensure a tight, well-formed roll with the nori visible on the exterior.
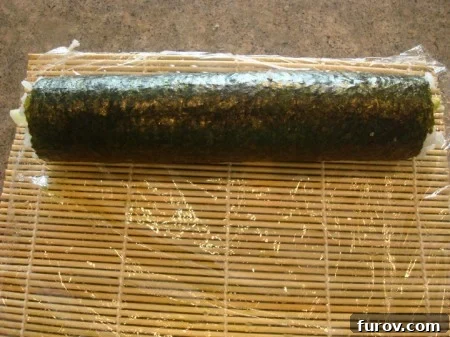
22. Once rolled, slice and serve your beautiful, nori-on-the-outside California Rolls! Oh yeah, and truly, try to resist the urge to shove every single last piece into your mouth at once. It’s hard, I know!
Enjoying Your Homemade California Rolls
Congratulations, you’ve successfully crafted your very own California Sushi Rolls! These delightful bites are perfect as a light lunch, a healthy snack, or an impressive appetizer for gatherings. Serve them alongside classic accompaniments like soy sauce, a dab of spicy wasabi, and a few slices of vibrant pickled ginger to cleanse the palate. Don’t forget to practice your chopstick skills, or simply enjoy them by hand.
Making sushi at home is not just about the food; it’s an enjoyable process that builds confidence in the kitchen and provides a rewarding culinary experience. With fresh ingredients and these detailed instructions, you’re well on your way to becoming a sushi-making pro. So gather your ingredients, follow these steps, and prepare to impress yourself and your loved ones with these incredibly delicious and satisfying homemade California Sushi Rolls!