
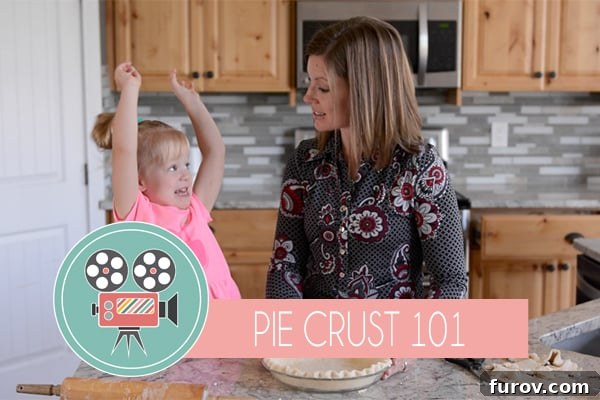
Embark on a culinary journey to master the art of homemade pie crust! This comprehensive guide, complete with a video tutorial, will transform your baking, making you a pie-making pro in no time.
As the aroma of freshly baked pies fills the air, signalling the arrival of pie season – or perhaps you’re one of the fortunate souls for whom pie season is a year-round celebration – there’s no better time to perfect your pie-making skills. For years, my beloved go-to pie crust recipe has been a cornerstone for countless bakers, and now, it’s complemented by an easy-to-follow video tutorial designed to make your baking experience even smoother.
The thought of making pie crust from scratch can often evoke a sense of dread or seem like an unnecessary chore. In our fast-paced, modern world, the convenience of a store-bought, pre-made pie crust from the freezer aisle is undeniably tempting. And while there’s absolutely no judgment in opting for such a shortcut when time is of the essence, I firmly believe that the unparalleled satisfaction and sheer culinary prowess you feel after crafting a homemade pie crust are truly unmatched. It’s an instant confidence booster in the kitchen, making you feel like a true baking maestro.
Beyond the immense satisfaction, the truth is, making this particular pie crust is surprisingly simple. I’m not merely exaggerating; this recipe consistently yields a crust that is effortlessly flaky, tender, and utterly perfect every single time. A multitude of you have eagerly requested a visual guide to accompany the detailed step-by-step pictures in the original pie crust post, and it’s a pleasure to finally deliver! My little helper, Cam, and I had a delightful time demonstrating the process (though I admit, the excitement of rolling out dough might not be quite as captivating for a three-year-old, bless her sleepy heart).
Demystifying the Perfect Pie Crust: Your Journey to Flakiness
Many aspiring bakers are intimidated by pie crust, often fearing a tough, crumbly, or overly sticky dough. This recipe is specifically designed to alleviate those concerns. The secret to an exquisitely flaky pie crust lies in a few fundamental principles: cold ingredients, minimal handling, and the right moisture balance. When cold butter is incorporated into flour, it creates tiny pockets of butter. As the crust bakes, these butter pockets release steam, creating distinct layers and that signature flaky texture we all adore. Overworking the dough develops gluten excessively, leading to a tough crust, so gentle handling is paramount.
Mastering Your Method: By Hand vs. Food Processor
Yes, this versatile pie crust can be prepared using a food processor for speed and convenience, but I’m demonstrating the hand-mixing method in the video for several reasons. Firstly, it’s so straightforward that cleaning a food processor afterward might feel like more effort than the mixing itself. Secondly, most home kitchens are equipped with a bowl and fork, making the by-hand method universally accessible. If you choose to use a food processor, a crucial tip is to cube your butter and freeze it before adding it to the flour. Avoid grating the butter as demonstrated for the hand method; a food processor will obliterate those delicate butter strands, compromising the beautiful flakiness of your finished crust. The goal is pea-sized butter pieces, not a homogenous mixture.
The Art of Hand-Mixing for Ultimate Flakiness
Making pie crust by hand is a therapeutic experience that allows you to truly feel the dough and understand its consistency. Start with very cold butter, ideally cut into small cubes or even grated, and quickly work it into the flour mixture using your fingertips, a pastry blender, or even two knives. The key is to avoid letting the butter melt from the warmth of your hands. You’re looking for a coarse meal consistency with visible pea-sized chunks of butter interspersed. Then, add ice-cold water, a tablespoon at a time, mixing just until the dough barely comes together. This minimal hydration prevents toughness and encourages flakiness.
Food Processor Efficiency: A Time-Saving Approach
For those who prefer a quicker method, the food processor is your ally. Combine flour, salt, and sugar in the food processor bowl. Add very cold, cubed butter and pulse only a few times until the mixture resembles coarse crumbs with some larger butter pieces remaining. Then, gradually add ice water through the feed tube while pulsing until the dough just comes together. Be careful not to overmix; it’s easy to develop too much gluten with the machine’s power. Stop as soon as the dough starts to clump together. The speed of the food processor keeps the butter cold, which is a major advantage.
Essential Tools for Pie-Making Success
While filming, my focus was on showcasing the process, and I might have overlooked mentioning a few indispensable kitchen items that significantly streamline pie crust creation. These are tools I genuinely love and rely on:
- My personal favorite is the classic no-frills rolling pin. (The link leads to a newer version of the one I’ve cherished for years. While I also own and appreciate a French-style rolling pin, I consistently find myself reaching for the classic style for its reliability and ease of use.)
- For consistent baking results, my go-to 9-inch pie plate is simply perfect. Its even heat distribution ensures a beautifully golden and evenly baked crust.
- The pastry cloth and board combination is a game-changer. It not only makes rolling out pie crust an absolute breeze but also works wonders for tortillas, flatbreads, and sugar cookies, making these tasks genuinely enjoyable.
- A trusty pair of kitchen shears is incredibly handy for precise trimming of the pie crust, ensuring clean edges and a professional finish.
Beyond the Basics: Tips for a Flawless Finish
Chilling is Crucial
After mixing, always chill your dough for at least 30 minutes, or even an hour. This allows the gluten to relax, making the dough easier to roll out without shrinking, and it ensures the butter remains cold, contributing to superior flakiness. You can even make the dough a day or two in advance and store it in the refrigerator, tightly wrapped.
Rolling Out Like a Pro
When it’s time to roll, work on a lightly floured surface. Begin from the center and roll outwards, rotating the dough frequently to prevent sticking and ensure an even thickness. Aim for a circle about 2 inches larger than your pie plate. Don’t press too hard; gentle, even pressure is key. If the dough starts to crack, simply pinch it back together or allow it to warm slightly, then continue.
Transferring and Crimping
Carefully transfer the rolled-out dough to your pie plate. The easiest way is to gently roll it onto your rolling pin, then unroll it over the plate. Gently ease the dough into the contours of the plate without stretching it, which can cause shrinkage during baking. Trim the edges, leaving about an inch of overhang, then fold this excess under and crimp for a decorative finish. Whether you use your fingers, a fork, or a specialty crimper, make it your own!
Troubleshooting Common Pie Crust Problems
- Tough Crust: Almost always due to overworking the dough or adding too much water. Remember: mix just until combined, and add water sparingly.
- Crumbly Dough: Not enough water. Add a tiny bit more, a teaspoon at a time, until the dough just holds together.
- Sticky Dough: Too much water or butter that’s too warm. Chill the dough longer or add a tablespoon of flour if necessary, but sparingly.
- Shrinking Crust: Dough wasn’t chilled long enough, or it was stretched when placed in the pie plate. Let the dough rest and relax!
The Versatility of Your Homemade Crust
This perfect pie crust isn’t just for classic apple or pumpkin pies. Its neutral, rich flavour makes it incredibly versatile. Use it for savory quiches, chicken pot pies, fruit tarts, or even as a base for sweet hand pies. Once you master this basic recipe, a world of culinary possibilities opens up, transforming everyday meals and special occasions alike.
For those who love visual learning, remember that all my video tutorials are conveniently available on my Video Tips page. Additionally, you can find them on the Mel’s Kitchen Cafe YouTube channel, where subscribing will ensure you receive immediate updates on new video releases.
Embrace Your Inner Baker!
Creating a homemade pie crust is more than just a step in a recipe; it’s an act of culinary artistry and a rewarding experience that elevates any pie. With this guide and the accompanying video, you have all the tools and knowledge to overcome any intimidation and achieve truly spectacular results. So, roll up your sleeves, embrace the process, and get ready to impress yourself and your loved ones with the most delicious, flaky, and tender pie crust you’ve ever made. Happy baking!
{As always, this post remains unsponsored. The few affiliate links provided above are to products I have personally purchased and genuinely love from Amazon, shared purely for your benefit.}