Welcome to the definitive guide for crafting the most delightful and vibrant homemade Jalapeño Jelly, also affectionately known as Hot Pepper Jelly! This comprehensive tutorial not only provides a foolproof recipe for a sweet and spicy preserve but also walks you through the essential steps of canning, ensuring your jelly is safe, delicious, and shelf-stable. Prepare to transform humble peppers into a culinary masterpiece that will impress family and friends alike.
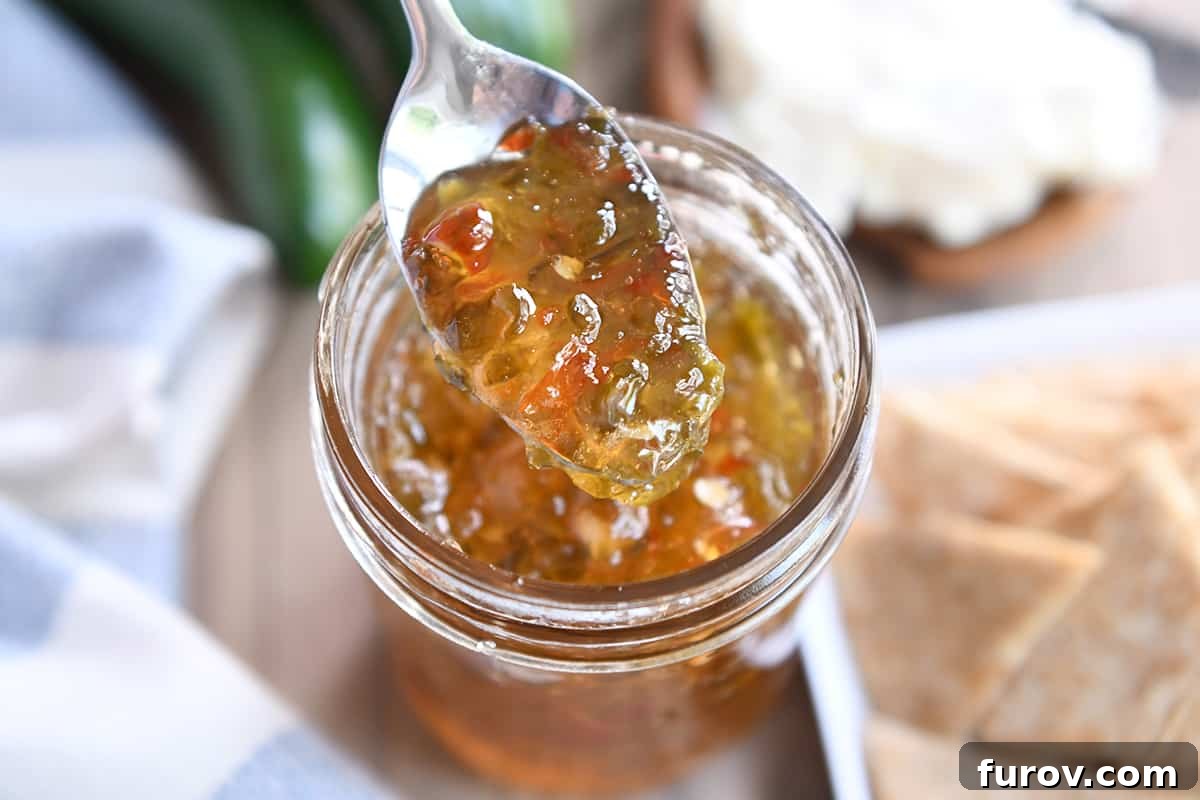
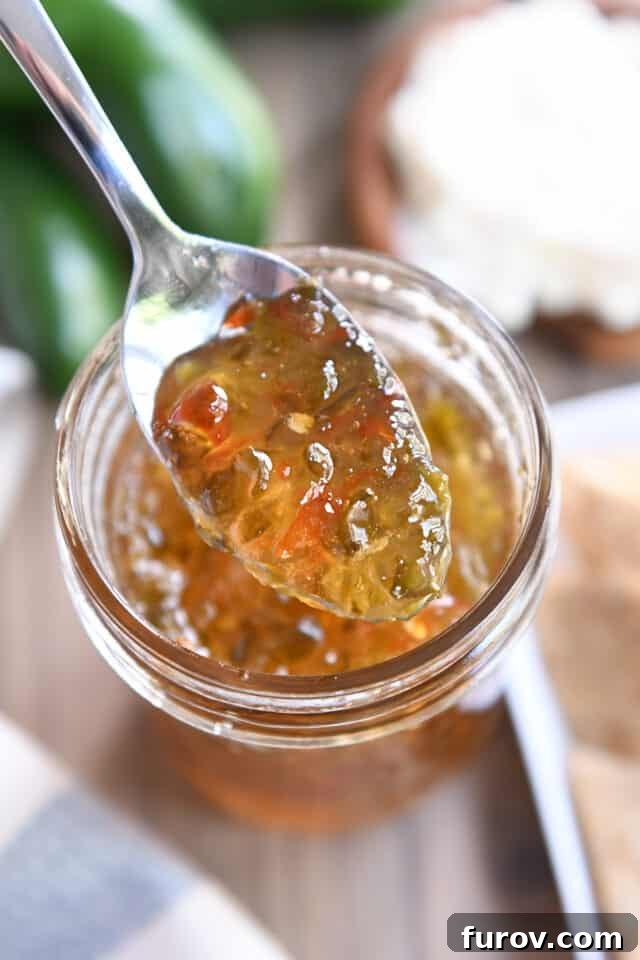
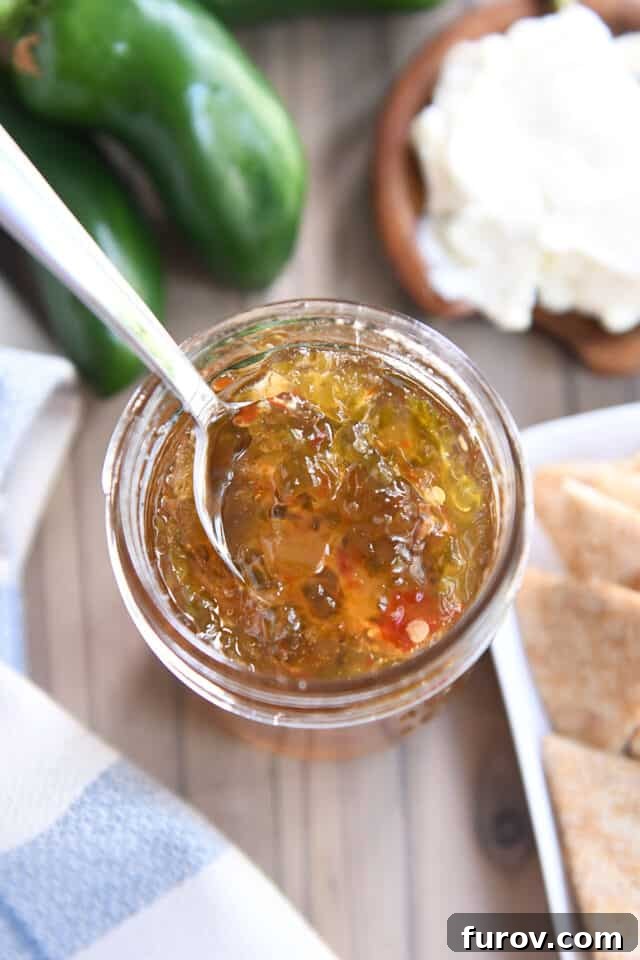
Jalapeño jelly is a true marvel – a perfect symphony of sweet and spicy flavors that tantalizes the taste buds. Its versatility is astounding, making it an indispensable addition to your pantry. Imagine this shimmering, jewel-toned jelly spooned generously over a block of velvety cream cheese, served alongside crisp crackers for an effortless yet elegant appetizer. The interplay of cool, creamy cheese with the warm, piquant jelly is simply heavenly. But its magic doesn’t stop there; this jelly elevates sandwiches, glazes meats, and becomes a shining star on any charcuterie board. The best part? The heat level is entirely customizable, giving you complete control over your culinary creation.
Crafting Your Homemade Jalapeño Jelly: A Step-by-Step Guide
Making hot pepper or jalapeño jelly at home is a surprisingly straightforward and rewarding process. With a little preparation and attention to detail, you’ll soon be enjoying your own batch of this exquisite condiment. The journey begins with selecting and preparing the stars of our recipe: the peppers.
For this recipe, achieving the perfect balance of flavor and heat starts with a specific quantity of finely chopped peppers, totaling 3 cups (approximately 18-20 ounces). This precise measurement is crucial for the jelly’s consistency and ensures a reliable set. You have the freedom to use any combination of bell peppers and jalapeños to reach this volume, allowing for creative experimentation with color and taste. The bell peppers contribute sweetness and body, while the jalapeños bring the signature heat.
While any combination works, many find that a balanced mix provides the best flavor profile. My tried-and-true preferred combination for a beautifully balanced jelly includes:
- 1 to 2 medium or 1 very large red bell pepper: Aim for about 9 to 10 ounces before coring and seeding. Red bell peppers offer a lovely sweetness and vibrant color.
- 1 to 2 medium or 1 very large green bell pepper: Also weighing approximately 9 to 10 ounces before prep. Green bell peppers provide a slightly more herbaceous note and classic “pepper jelly” color.
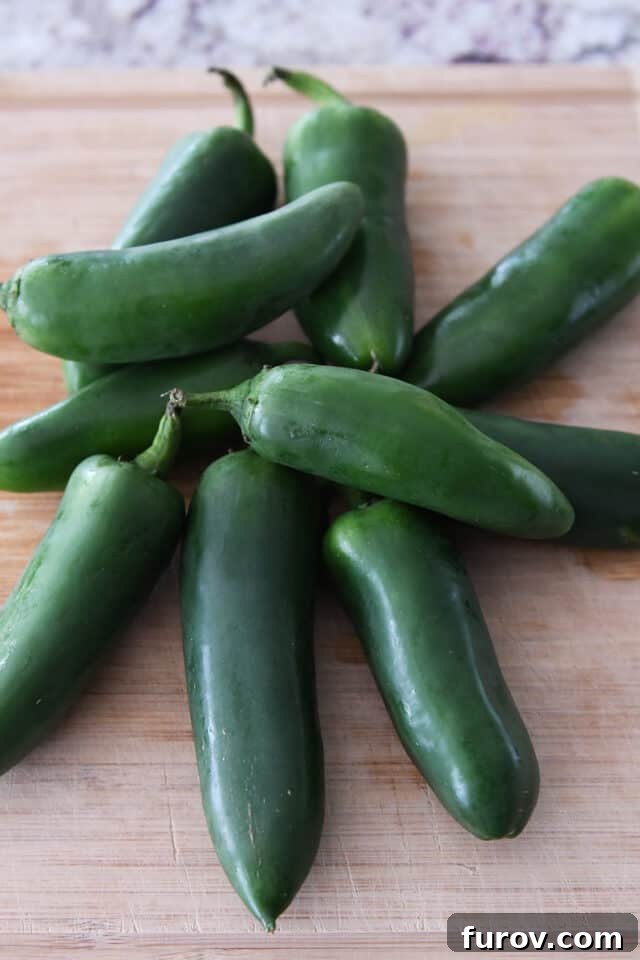
- 10 medium jalapeños: These should weigh around 12 to 13 ounces before coring and seeding. This quantity forms the core of the jelly’s heat.
Tailoring the Heat: Adjusting the Spiciness of Your Jalapeño Jelly
One of the most appealing aspects of making homemade jalapeño jelly is the complete control you have over its heat level. The spiciness of your jelly is primarily influenced by two factors: the number of jalapeños you use and, critically, whether you choose to remove the seeds and internal membranes (the pith).
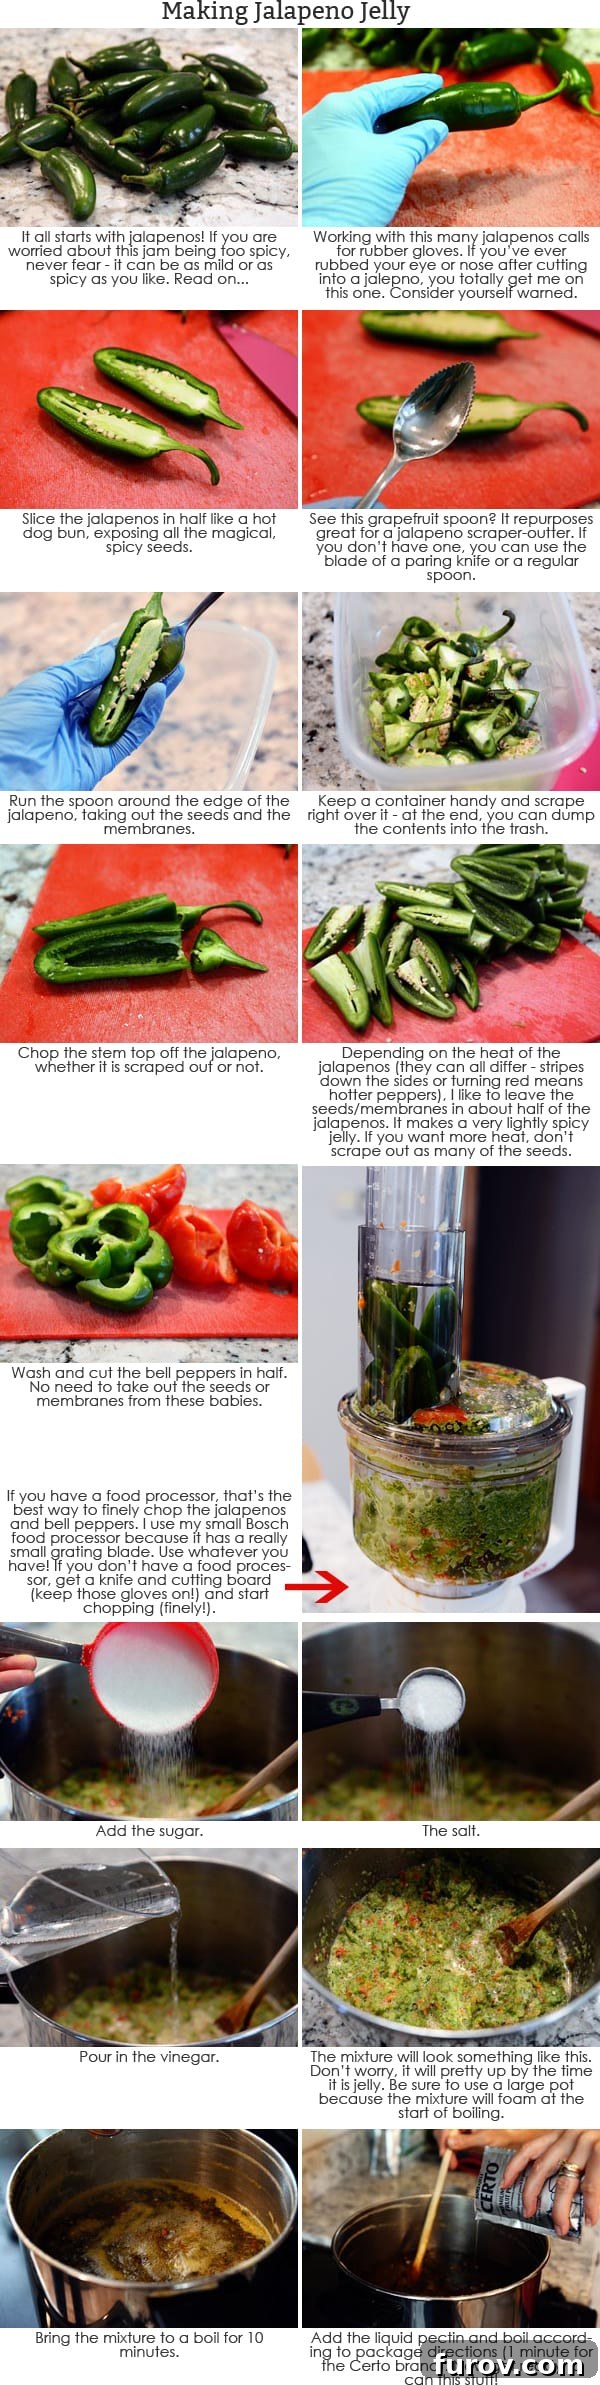
For a beautifully balanced medium-heat jelly that offers a pleasant warmth without overwhelming your palate, I typically recommend leaving the seeds and membranes in about 3 to 4 of the jalapeño peppers. These internal components contain the highest concentration of capsaicin, the compound responsible for chili peppers’ heat. If you prefer a milder jelly, remove the seeds and membranes from all the jalapeños. For a bolder, spicier kick, feel free to leave them in all the peppers, or even increase the jalapeño count slightly (while maintaining the overall 3-cup volume by adjusting bell peppers).
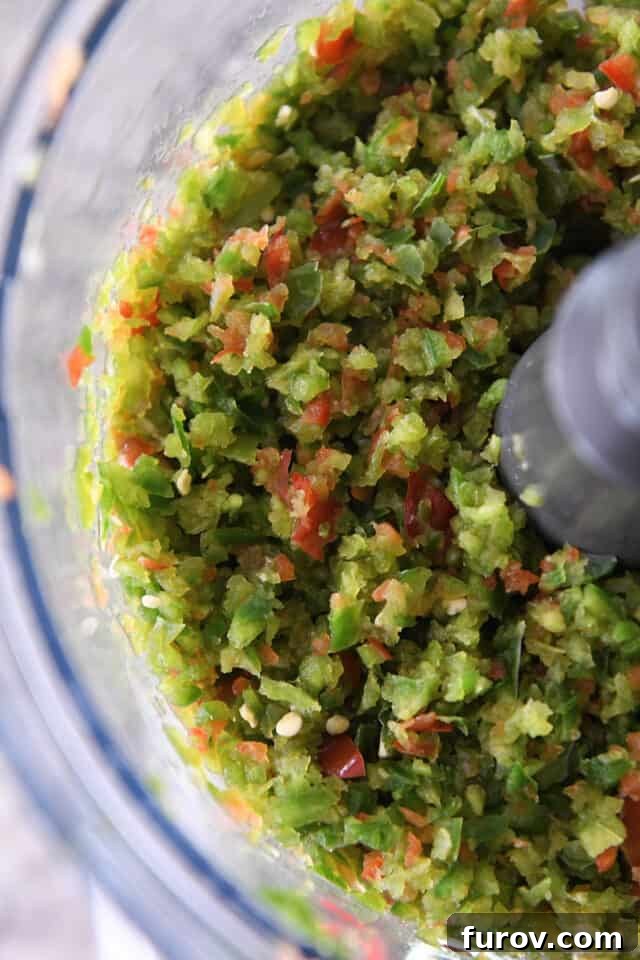
Once you’ve decided on your desired heat level, the next step is to finely chop all your chosen peppers. A food processor, equipped with either a standard blade or a fine shredder attachment, is an absolute game-changer here. It transforms this potentially tedious task into a quick and effortless process, ensuring an even consistency that’s ideal for jelly making. If you don’t have a food processor, a sharp knife and a bit of patience will also do the trick, just aim for very small, uniform pieces. After chopping, it’s essential to measure your peppers accurately to ensure you have the required 3 cups, lightly packed. And remember, draining any excess liquid from your chopped peppers is a critical step that helps guarantee a proper set for your finished jelly.
Pectin Power: Liquid vs. Powdered Pectin in Jelly Making
Pectin is the unsung hero of jelly making, a natural gelling agent found in fruits that helps your jelly achieve its desired set and texture. Historically, the original recipe for this beloved jalapeño jelly utilized liquid pectin, and those instructions remain a valid option for traditionalists. However, after years of making this jelly and carefully considering feedback from countless home cooks, I’ve found that incorporating powdered pectin offers a more consistent and reliable result.
My own extensive experience, echoed by numerous reports from fellow jelly enthusiasts, overwhelmingly indicates that jelly made with powdered pectin tends to set up more effectively and consistently compared to liquid pectin. This reliability is a major advantage, especially for those who are new to jelly making or want to minimize the risk of a runny batch.
When working with powdered pectin, the quantity is key to achieving your desired firmness. Using two full boxes (each typically 1.75 ounces) of powdered pectin generally results in a wonderfully firm-set jelly, perfect for spreading. If you prefer a slightly softer, more spoonable jelly, I encourage you to experiment with a slightly lesser amount, such as 1 1/2 boxes. However, a crucial note: always avoid using low-sugar or sugar-free pectin for this particular recipe. The high sugar content in this recipe is integral not only to the flavor but also to the proper gelling action of regular pectin. Low-sugar pectins are formulated differently and require specific sugar ratios to set properly, which would alter the recipe’s intended outcome.
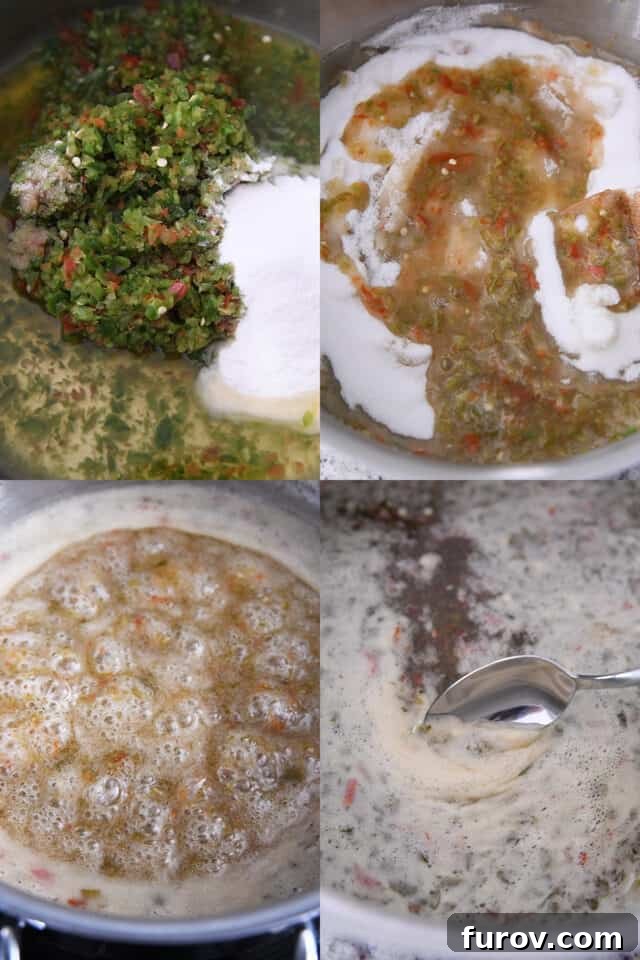
It’s important to be aware that the cooking methodology differs slightly depending on whether you’re using liquid or powdered pectin. Powdered pectin is typically added earlier in the cooking process with the fruit and acid, brought to a boil, and then the sugar is introduced. Liquid pectin, conversely, is usually added after the fruit and sugar mixture has already come to a boil. Therefore, it’s imperative to read through the recipe instructions carefully to ensure you follow the correct steps for your chosen pectin type, guaranteeing a perfectly set jelly every time.
Mastering Preservation: How to Process and Can Your Jalapeño Jelly
Once your exquisite jalapeño jelly has reached its perfect set and cooked to perfection, the next exciting phase is processing and canning. This crucial step ensures your homemade jelly is shelf-stable, allowing you to enjoy its vibrant flavors for months to come and share it as thoughtful gifts. Proper canning techniques are paramount for safety and longevity.
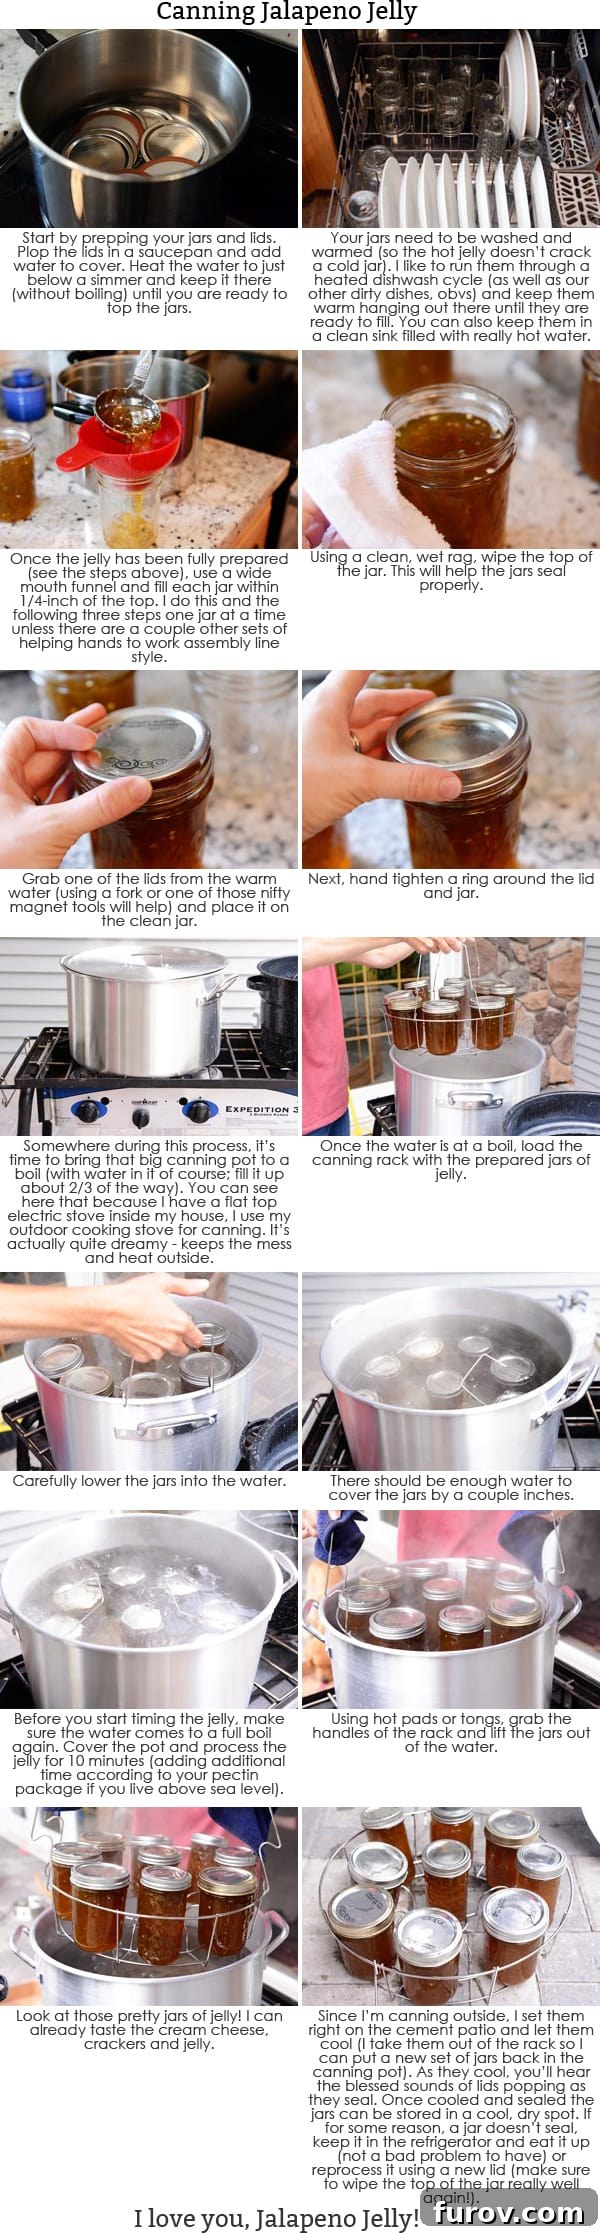
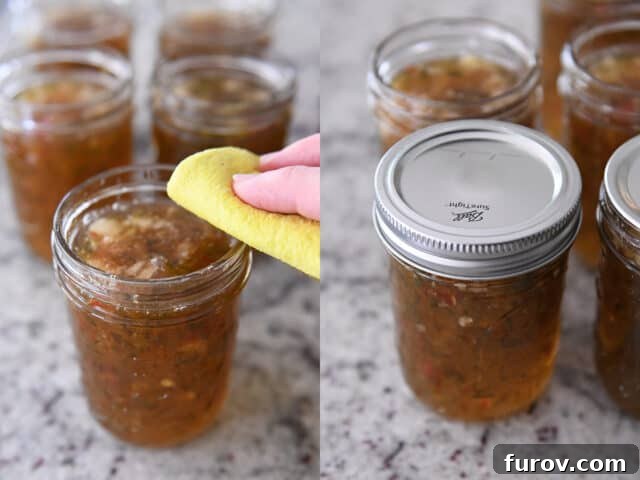
Begin by carefully ladling the hot jelly into your meticulously cleaned and sterilized canning jars. It’s vital to leave precisely 1/4-inch of headspace from the top of the jar. This space allows for expansion during processing and helps create a strong vacuum seal. After filling, use a clean, damp rag to meticulously wipe around the rim of each jar, ensuring no jelly residue interferes with the seal. Finally, securely center a new canning lid on top of the jar, followed by a screw band, tightened only to “fingertip tight” – snug but not overly forceful.
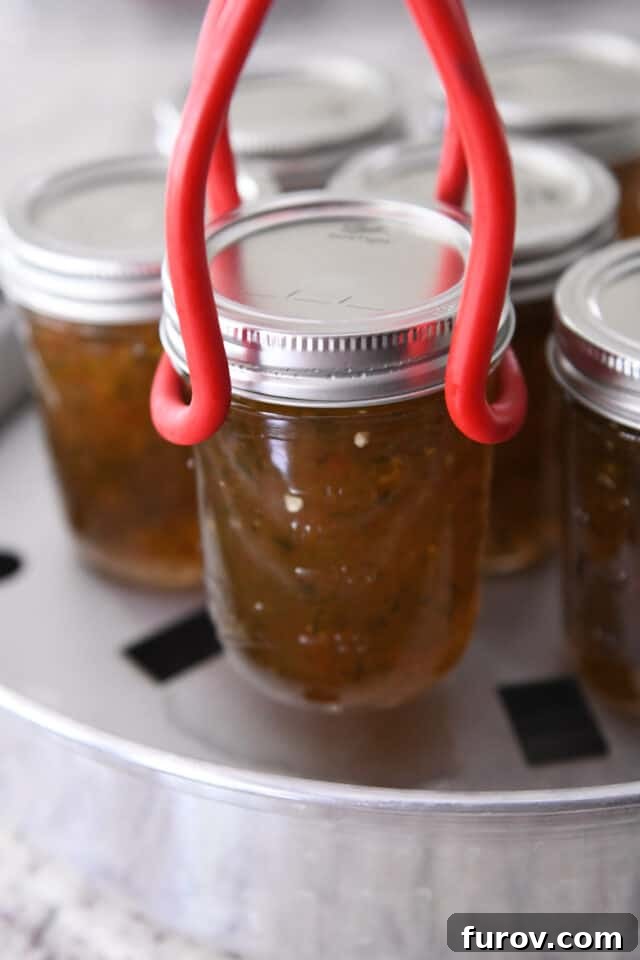
Jalapeño jelly can be safely processed and canned using either a traditional water bath canner or a convenient steam bath canner. Both methods are effective for high-acid foods like jelly, creating a vacuum seal that preserves your creation.
While a full tutorial for water bath canning will be detailed further below the recipe, it’s worth noting the increasing popularity and efficiency of steam canners. These days, I personally gravitate towards using a steam bath canner. This method is not only quicker to heat up and uses less water, but it’s also fully approved by reputable organizations like the National Center for Home Food Preservation (NCHFP), ensuring safety and reliability.
Regardless of whether you choose a water bath or steam canner, the processing time for jalapeño jelly is crucial. Process the jelly for a minimum of 10 minutes at a full, rolling boil (for water bath) or steady steam (for steam canner). It’s important to remember to adjust this processing time if you live at a higher elevation. As a general rule, it is recommended to add an additional 5 minutes of processing time for every 3,000 feet of elevation above sea level to account for the lower boiling point of water. Always consult up-to-date canning guidelines for your specific altitude.
Once the processing time is complete, carefully remove the hot jars from the canner using appropriate canning tongs. Place them upright on a clean towel or cooling rack on your counter, ensuring there’s a little space between each jar. Allow them to cool completely and undisturbed for 12 to 24 hours. During this cooling period, you’ll often hear the satisfying “pop” sound as the lids seal, indicating a successful vacuum. After cooling, check all seals by pressing on the center of the lid; if it doesn’t flex, the jar is sealed. Properly sealed jars can be stored in a cool, dark place for up to a year, ready to brighten any meal or gathering.
Elevate Your Meals: Creative Ways to Serve Jalapeño Jelly
This exquisite jalapeño jelly, whether you call it hot pepper jelly or simply “liquid gold,” boasts a captivating blend of sweet, spicy, and tangy flavors that make it incredibly versatile in the kitchen. Its vibrant taste profile allows it to transcend the boundaries of a simple condiment, transforming ordinary dishes into extraordinary culinary experiences.
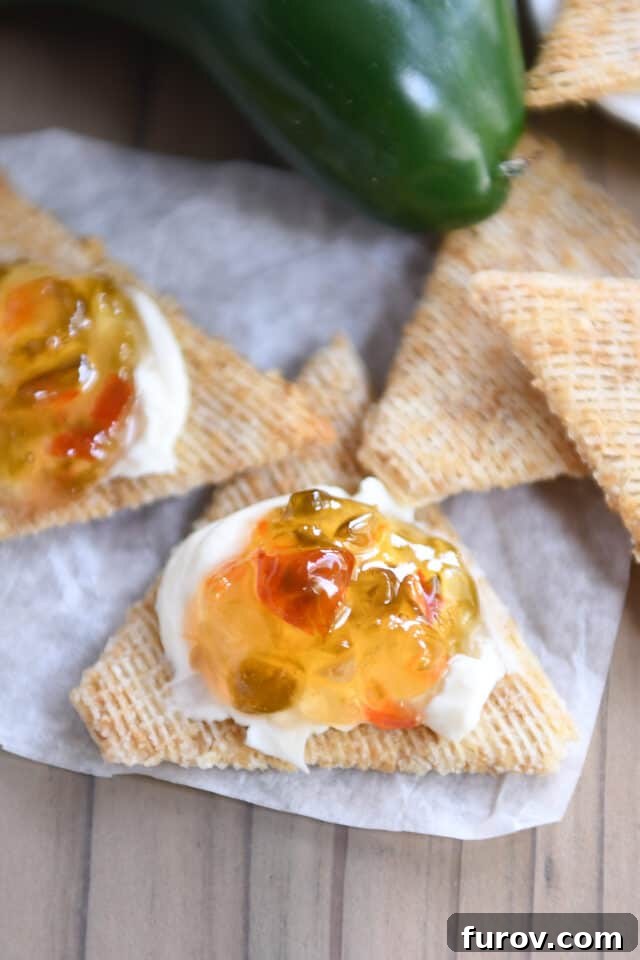
The classic serving suggestion, and undoubtedly a crowd-pleaser, involves spooning this beautiful jelly generously over a block of softened cream cheese. Paired with an assortment of crisp crackers, this creates an instant appetizer that disappears quickly at any gathering. The cool, creamy texture of the cheese perfectly complements the jelly’s zesty kick, creating an addictive contrast.
Beyond the traditional, jalapeño jelly shines in numerous other applications. Consider it as a gourmet topping for panini or grilled cheese sandwiches, where its sweet heat melts beautifully into the bread and cheese. It also makes a fantastic glaze for roasted chicken, pork tenderloin, or even meatballs, adding a sticky, spicy-sweet coating that caramelizes delightfully. For charcuterie aficionados, a small bowl of this jelly is an essential component, offering a bright counterpoint to savory meats and cheeses. Don’t shy away from incorporating it into salad dressings for an unexpected twist, or whisking it into marinades for grilled vegetables or shrimp. We’ve made it a beloved tradition to feature this jelly on our New Year’s Eve appetizer spread every year, and it consistently proves to be the first dish to be utterly devoured, a testament to its irresistible appeal.
Commonly Asked Questions About Jalapeño Jelly
If your intention is to refrigerate or freeze the jelly for short-term storage, you have more flexibility to alter ingredients and add other fruits or vegetables. However, if you plan to can the jelly to make it shelf-stable, it is strongly recommended not to alter the core ingredients of tested recipes. Changing ingredients can significantly affect the acidity levels, potentially making the canned product unsafe for long-term storage at room temperature. Always stick to tested recipes for canning safety.
Absolutely! While bell peppers and jalapeños are the standard, you can certainly substitute other types of peppers to customize the flavor and heat. Popular alternatives include Anaheim peppers for a milder touch, serrano peppers for a noticeable increase in heat, or even habanero peppers for those who crave intense spiciness. Just ensure your total volume of chopped peppers remains consistent with the recipe’s requirement for a proper set.
No, it is generally not recommended to pressure can jalapeño jelly or other high-acid jellies. Pressure canning subjects food to much higher temperatures and longer processing times than necessary for high-acid products. This extended heating can negatively affect the delicate texture and vibrant flavor of the jelly, often resulting in an overcooked taste and a less desirable consistency. Water bath or steam canning methods are perfectly sufficient and preferred for jellies.
Jelly not setting is a common issue! The most frequent culprits are incorrect pectin measurement (too little or the wrong type for your recipe), not boiling the mixture hard enough or long enough (a rolling boil that can’t be stirred down is essential), or too much liquid from the peppers. Ensure you drain excess liquid from chopped peppers and use fresh, properly stored pectin. Humidity and exact ingredient ratios also play a role.
Properly canned and sealed jalapeño jelly, stored in a cool, dark place, can maintain its quality for up to one year. Once opened, it should be refrigerated and typically consumed within 2-3 weeks for the best flavor and freshness. Uncanned jelly stored in the refrigerator will last about 2-3 weeks.
Essential Home Canning Resources and Tips for Success
Embarking on the journey of home canning can seem daunting, but with the right resources and a few key tips, you’ll be preserving delicious foods like this jalapeño jelly with confidence. Safe canning practices are fundamental for enjoying your homemade creations year-round.
- My Best Canning Resources: A curated list of trusted guides and tools for home canning.
- Small Batch Canning 101: Perfect for those starting out or looking to preserve smaller quantities.
- Water Bath Canning Basics: A foundational guide to the essential water bath canning method.
For convenience and efficiency, I frequently prepare this jalapeño jelly in small batches, predominantly using a steam canner. This method, as previously mentioned, is officially approved by the NCHFP and offers significant advantages. It heats up quickly, consumes less water and energy, and cleanup is remarkably simple, making the canning process less of a chore and more of a joy. Whether you choose water bath or steam canning, always ensure your equipment is in good working order and follow tested recipes precisely for safe and delicious results.
Real Feedback: What Our Readers Are Saying
Nothing speaks to the quality and deliciousness of a recipe quite like the enthusiastic feedback from those who have made it. Here are some invaluable comments from fellow home cooks who have successfully created and enjoyed this jalapeño jelly, offering their own tips and heartfelt endorsements:
Diana: “I make this every year and gift it for Christmas. My entire family loves it. ❤️ Thank you for taking the guesswork out of holiday shopping! Every year I have to add more jalapeño plants to keep up with demand. If you like it a little hotter, try adding a couple of Serrano peppers, but be warned, they truly bring the heat!”
Dave: “I have made this recipe about 5 times, and on a scale of one to ten, I would give it a 15! I opted to chop the peppers quite small with a knife rather than using a blender, which gave it a great texture. The only ‘problem’ I have is that the jars of this incredible jam (more like a chunky jelly for me) disappear far too quickly. Everyone who has tried it absolutely craves more. With about 35 pepper plants in my garden, I use a variety of peppers alongside the jalapeños, and I’m consistently thrilled with the results. I definitely plan on making more in the future. Thanks, Mel, for this fantastic recipe!”
Deb: “I found that using half-pint jars worked perfectly, yielding about 5-6 jars per batch, which is ideal for gifting. I also used red and yellow/orange bell peppers instead of green ones (either the store was out, or I had a brain malfunction that day!), and the color was beautiful. I made this last year and gave away many jars as gifts. People absolutely loved it, and so do I! Thanks so much for sharing such a wonderful recipe!”
Leslie: “This recipe is utterly delicious and incredibly easy to make! I’ve been making it for the last four years, and my friends and family consistently rave about it. It’s truly delicious and so addicting! I’ve happily shared this recipe over and over again. For more texture, I prefer to chop up 4.5 red and orange bell peppers, which gives it a lovely consistency compared to just two. Since we grow both habanero and jalapeño peppers, I’ve used this recipe to make both individual versions and even combined them to create a fantastic jalapeño-habanero pepper jelly. This recipe truly is the best; thank you so much for your hard work and for sharing it with us!”
Jalapeño Jelly {a.k.a. Hot Pepper Jelly}
Yield: 3 to 4 pint jars or 7 to 8 half-pint jars
Prep Time: 1 hour 20 minutes
Cook Time: 25 minutes
Total Time: 1 hour 45 minutes
Ingredients
- 1 large red bell pepper (or 1-2 medium, about 9-10 oz before coring/seeding)
- 1 large green bell pepper (or 1-2 medium, about 9-10 oz before coring/seeding)
- 10 medium jalapeños (about 12-13 oz before coring/seeding)
- 1 ½ cups white vinegar
- ½ teaspoon salt
- 5-6 cups granulated sugar
- 3-ounce pouch liquid fruit pectin OR two boxes (1.75 ounces each) powdered pectin – Do NOT use low sugar or sugar free pectin
Instructions
- Clean and sterilize canning jars according to manufacturer’s directions.
- Finely chop the bell peppers and jalapeños. A food processor with a blade or fine shredder attachment makes this super quick. Alternatively, chop finely by hand. Crucially, drain any excess liquid from the chopped peppers before proceeding; this step is essential for the jelly to set properly.
- For liquid pectin: To a large (5- or 6-quart) pot, combine the chopped peppers, vinegar, salt, and sugar. Bring the mixture to a full, rolling boil, stirring frequently, and continue to boil for 5 to 10 minutes.
- Then, quickly stir in the liquid pectin. Return the mixture to a vigorous, rolling boil that cannot be stirred down, and boil for exactly 1 more minute. Remove the pot from the heat.
- For powdered pectin: To a large (5- or 6-quart) pot, combine the chopped peppers, vinegar, salt, and powdered pectin. Bring this mixture to a full, rolling boil, stirring constantly, and boil for 1 minute.
- Next, add all the sugar to the pot. Stir constantly and bring the mixture back to a full, rolling boil (one that cannot be stirred down). Boil for exactly 1 full minute. Remove the pot from the heat.
- Carefully pour the hot jelly into the prepared canning jars, leaving precisely 1/4-inch of headspace from the rim. Use a clean, damp rag to wipe the jar rims thoroughly. Place a clean canning lid and a screw band on each jar, tightening only to fingertip-tight.
- Process the filled jars in a water bath canner or a steam bath canner for 10 minutes. Remember to add additional processing time if you are at a higher elevation (e.g., an extra 5 minutes for every 3,000 feet of elevation).
- Once processed, carefully remove the jars from the canner and place them on a clean counter or cooling rack. Allow them to cool completely and undisturbed for 12 to 24 hours until the lids have popped and sealed.
Notes
- Peppers: You’ll need a total of 3 cups (18-20 ounces) of finely chopped peppers. Any combination of bell peppers and jalapeños will work. For a classic balance, my preference is 1-2 medium/1 large red bell pepper (9-10 oz), 1-2 medium/1 large green bell pepper (9-10 oz), and 10 medium jalapeños (12-13 oz) before coring and seeding.
- To adjust heat, leave seeds/membranes in 3-4 jalapeños for medium heat. Remove all for milder, or leave in all for spicier.
- Setting Up: If your jelly doesn’t set, potential issues include pectin type/quantity and high water content in peppers.
- Before cooking, always drain any excess liquid from the finely chopped peppers to help ensure a proper set.
- Pectin Choice: While liquid pectin works, powdered pectin often yields a more consistent and firm set. Use two full boxes for a firm jelly; reduce to 1 1/2 boxes for a softer set. Always use regular pectin, not low-sugar or sugar-free varieties for this recipe.
Recommended Equipment
- Breville Food Processor
- Wooden Spoon
- Steam Canner
Recipe Source: Adapted from my Aunt Marilyn.
Recipe originally posted July 2014; updated August 2023 with new recipe notes, photos, and an expanded canning tutorial.
Step-by-Step Visual Guide: Preparing Peppers for Jalapeño Jelly
Visual aids can be incredibly helpful when mastering a new recipe. This section provides a detailed step-by-step photo guide on how to properly prepare your peppers for optimal jelly consistency. Remember to always check the notes in the recipe above regarding draining excess liquid from the chopped peppers. This critical step prevents a runny jelly and ensures a perfect set every time.
Comprehensive Canning Guide for Jalapeño Jelly
Preserving your homemade jalapeño jelly through canning is a rewarding process that extends its shelf life and allows you to enjoy its flavors throughout the year. Below is a detailed, step-by-step tutorial specifically for water bath canning this delicious jelly. While I’ve more recently come to prefer the efficiency of a steam bath canner, the fundamental principles for jar preparation, filling, and processing times remain largely consistent between both methods. This guide will ensure your jelly is safely sealed and ready for long-term storage, providing you with confidence in your home canning endeavors.