
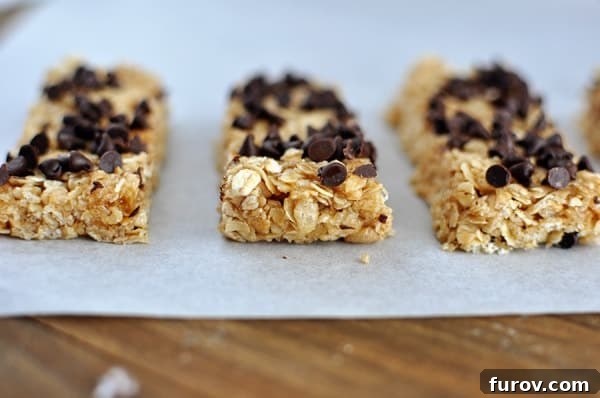
Irresistible Homemade Chewy Granola Bars: Your Go-To Easy & Healthy Snack!
Are you tired of expensive, plastic-wrapped granola bars that often fall short on flavor and nutritional value? It’s time to discover the sheer joy and simplicity of crafting your own **homemade chewy granola bars**! This recipe isn’t just easy; it’s a culinary revelation that will transform your snack routine. Imagine biting into a perfectly soft, deliciously chewy bar, knowing exactly what wholesome ingredients went into it. These delightful treats are not only incredibly tasty but also remarkably quick to prepare, making them an ideal choice for busy mornings, lunchbox additions, or an energy-boosting afternoon snack.
What’s more, these homemade wonders come with a significant bonus: they typically cost about three times less than their store-bought counterparts. That’s right – superior flavor, better ingredients, and substantial savings, all from your own kitchen! Say goodbye to preservatives, artificial flavors, and excessive packaging, and embrace the fresh, wholesome goodness of a snack made with love. This recipe promises a granola bar experience that is genuinely unparalleled, delivering a perfect balance of texture and taste that will have everyone asking for more.
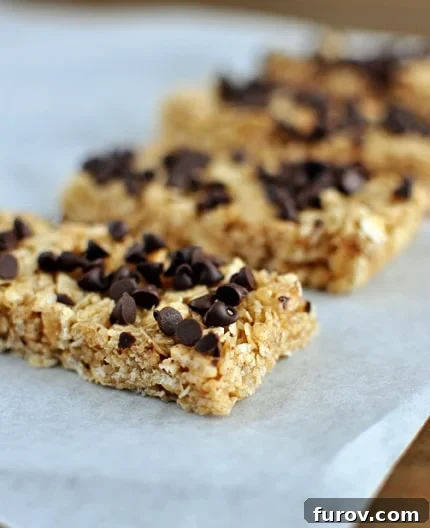
Why Homemade Granola Bars Reign Supreme: Beyond Just Taste
In a world overflowing with convenience foods, the allure of store-bought granola bars is understandable. However, once you experience the ease and benefits of crafting your own **homemade granola bars**, there’s simply no going back. The advantages extend far beyond just taste, impacting your wallet, your health, and even the environment.
Unbeatable Cost Savings
Let’s talk economics. Granola bars from the grocery store often come with a hefty price tag, especially for those “healthier” or organic options. This homemade recipe slashes that cost significantly – we’re talking about saving up to three times what you’d typically spend. The core ingredients like oats, honey, and brown sugar are pantry staples that are incredibly affordable, making this a truly **budget-friendly snack** solution for individuals and families alike. Over time, these savings add up, allowing you to enjoy delicious snacks without breaking the bank.
Complete Control Over Ingredients
One of the most compelling reasons to make your own granola bars is the absolute control you gain over what goes into them. Commercial bars often contain a list of ingredients that are hard to pronounce, including high-fructose corn syrup, artificial flavors, and chemical preservatives. With this **easy granola bar recipe**, you choose every component. Opt for organic oats, natural sweeteners, and high-quality add-ins. This transparency means you can confidently create **healthy snacks** tailored to dietary needs, allergies, or simply your preference for clean eating. It’s real food, made with real ingredients, for real people.
Superior Freshness and Flavor
There’s an undeniable difference between a fresh-baked good and one that has been sitting on a shelf for weeks. Homemade granola bars boast an unparalleled freshness that translates directly into superior flavor. The oats maintain their integrity, the honey’s rich notes are more pronounced, and any chocolate chips or dried fruits you add burst with vibrant taste. This freshness ensures that every bite is a delightful experience, far surpassing the often-stale or overly processed taste of commercial varieties.
A Greener Choice: Reduce Waste
Beyond the personal benefits, choosing homemade also offers an environmental perk. Store-bought granola bars often come individually wrapped in plastic, then packed into larger cardboard boxes. This creates a significant amount of waste. By making your own, you drastically reduce your plastic consumption, contributing to a more sustainable lifestyle. It’s a small change in your kitchen that can have a positive ripple effect on the planet.
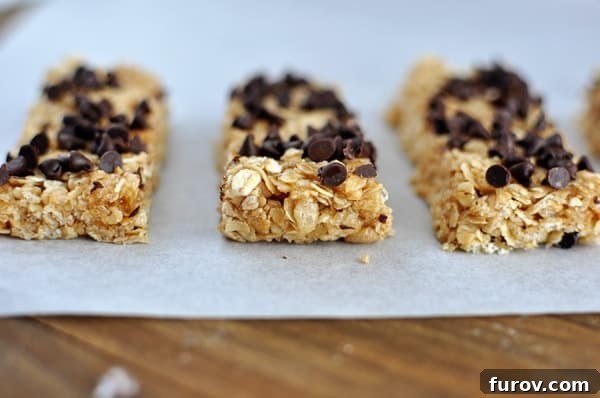
The Quest for the Perfect Chewy Texture: This Recipe Delivers!
My journey to find the ultimate **chewy granola bar recipe** has been a long one, filled with many trials and errors. Over the past few months, I’ve experimented with numerous homemade versions. While many were “good” in their own right, none quite captured that elusive, perfect balance of chewiness, flavor, and structural integrity that I was seeking. Until now. This particular recipe stands head and shoulders above the rest.
What makes these bars truly the best of the bunch? It’s a combination of factors, but primarily the exceptional texture. They are wonderfully soft yet firmly packed, providing that satisfying chewiness without being overly sticky or falling apart at the slightest touch. And, let’s be honest, the generous sprinkle of mini chocolate chips on top certainly doesn’t hurt! But even without them, the granola bars themselves are simply delicious – a testament to the carefully balanced ingredients and straightforward method.
A Touch of Magic: Toasted Oats (Optional, but Highly Recommended!)
While this recipe is fantastic as written, there’s one optional step that can elevate your **granola bar flavor** to an entirely new level: toasting the oats. This simple technique takes just a few minutes in the oven but transforms the humble oat into a nutty, aromatic powerhouse. The gentle heat brings out a deeper, richer flavor profile that adds an incredible complexity to the finished bars. If you have an extra 4-7 minutes, I urge you not to skip this step – it’s a game-changer!
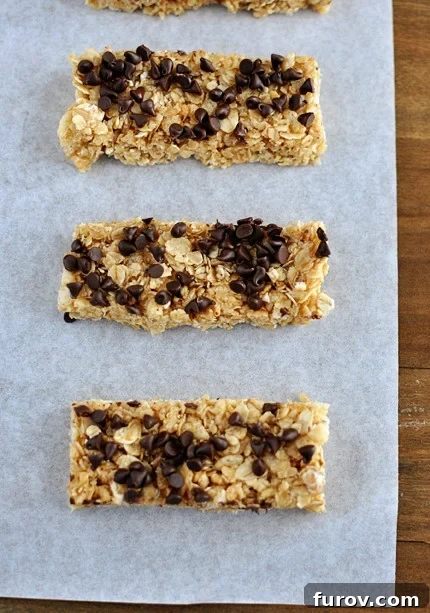
Mastering the Art of Non-Crumbly Granola Bars: The Secret to Success
The distinction between a delightful **chewy granola bar** and a disappointing crumbly mess often comes down to one crucial step: how firmly you press the mixture into the pan. This isn’t merely a suggestion; it’s the golden rule for achieving that coveted, cohesive texture. Many aspiring home bakers find their bars crumbling upon cooling, wondering where they went wrong. The answer almost always lies in the packing technique.
Once you’ve combined the wet and dry ingredients, and before sprinkling those tempting chocolate chips, you must press the mixture down with considerable force. Use the back of a spoon, a spatula, or even your hands (lightly greased if sticking is an issue) to compact the granola mixture as tightly as possible into your prepared pan. This firm **pressing technique** ensures that all the ingredients bond together effectively. As the bars cool, this compression helps them solidify into a sturdy, yet wonderfully chewy, form.
Think of it as creating a strong foundation. Without adequate pressure, the individual oat and rice krispie pieces will lack sufficient contact with the binding agents (honey, butter, brown sugar), leading to a loose structure that will disintegrate when you try to cut or pick up a bar. So, remember: for perfect, non-crumbly **homemade chewy granola bars**, press, press, and press again! Your patience and effort at this stage will be richly rewarded with bars that hold their shape beautifully and deliver that satisfying chew every time. Crumbly = bad. Chewy = good. It’s that simple!
Endless Possibilities: Customizing Your Granola Bars
One of the most exciting aspects of making your own granola bars is the freedom to get creative with add-ins. While mini chocolate chips are a timeless favorite, the base recipe is incredibly versatile, inviting a world of customization to suit your taste, dietary preferences, or whatever ingredients you have on hand. Transform your **customizable granola bars** into a unique snack every time!
- Nuts & Seeds: For an extra layer of crunch and a boost of healthy fats and protein, incorporate chopped almonds, walnuts, pecans, cashews, sunflower seeds, or pumpkin seeds. Lightly toasting them beforehand can enhance their flavor even further.
- Dried Fruits: Introduce natural sweetness and a chewy counterpoint to the oats with dried fruits. Raisins and cranberries are classics, but consider chopped apricots, dates, cherries, or even a blend of tropical dried fruits for an exotic twist. Just ensure they are finely chopped if they are large.
- Coconut Flakes: A sprinkle of shredded or flaked coconut (toasted for extra flavor) can add a delightful texture and tropical aroma.
- Spices: Warm spices like cinnamon, nutmeg, a hint of cardamom, or even a touch of pumpkin pie spice can infuse your granola bars with comforting, inviting flavors.
- Nut Butters: For added richness and a different flavor dimension, you can swirl in a tablespoon or two of peanut butter, almond butter, or cashew butter into the melted wet mixture. This might slightly alter the consistency, so you might need a tiny adjustment in other liquid ingredients.
- Mini Candies or Sprinkles: If you’re making these for a special occasion or just want a fun treat, mini M&M’s or sprinkles can add a festive touch.
Don’t be afraid to mix and match! A combination of dried cranberries and chopped pecans, or perhaps sunflower seeds and white chocolate chips, can create truly exceptional **granola bar variations**. The key is to keep the total volume of add-ins reasonable so the bars still bind together effectively.
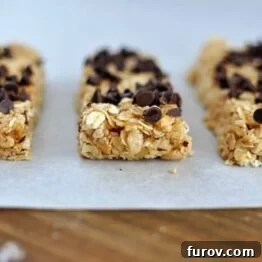
Chewy Granola Bars
10
-12 bars
15 minutes
2 minutes
17 minutes
Pin
Rate
Ingredients
-
4
tablespoons
(57 g)
butter -
¼
cup
(85 g)
honey -
¼
cup
(53 g)
packed light brown sugar -
2
cups
(200 g)
quick cooking oats -
1
cup
rice krispies cereal -
½
teaspoon
vanilla extract -
¼
cup
(43 g)
mini chocolate chips
Instructions
-
Lightly coat a 9×11-inch pan with cooking spray and set aside. If you don’t have a pan that size, use a similar sized pan, like an 8×12-inch. This recipe is a bit small for a 9×13-inch pan but if that’s all you have, just pack the granola bar mixture into a smaller portion of the pan – the mixture doesn’t spread so that should work fine.
-
In a large bowl, stir together the oats and rice krispies. Set aside. In a small saucepan, combine the butter, honey, and brown sugar. Cook over medium heat until the butter melts and the mixture comes together, stirring frequently. Cook at a simmer (so the mixture is lightly bubbling) for 2 minutes. Remove from the heat and stir in the vanilla.
-
Pour the wet mixture over the oats/rice krispies and mix with a wooden spoon until evenly moistened. Press the mixture into the prepared pan, pressing down very firmly. If the mixture isn’t pressed down well enough, the bars will be crumbly once they cool. Sprinkle the mini chocolate chips on top. Press lightly if you want them to stick to the bars. Mine tended to fall off, which was just fine since there were a lot of little fingers ready to eagerly pick them up and eat them anyway.
-
Let the bars cool for at least 2 hours at room temperature. Cut into rectangles. Store well covered at room temperature for 2-3 days.
Notes
Toasting the Oats: If you want to take these to a new level, toast the oats in the oven (350 degrees F for 4-7 minutes) and let cool before using them in the recipe. Amazing.
Mel
Snack
American
Stovetop
Serving:
1
Bar
,
Calories:
180
kcal
,
Carbohydrates:
29
g
,
Protein:
3
g
,
Fat:
7
g
,
Saturated Fat:
4
g
,
Cholesterol:
13
mg
,
Sodium:
60
mg
,
Fiber:
2
g
,
Sugar:
16
g
Recommended Products
Recipe Source: Adapted slightly from Lauren’s Latest via Rachael Ray
Simple Storage for Lasting Freshness
Once you’ve invested your time (minimal as it is!) in making these incredible homemade chewy granola bars, you’ll want to ensure they stay fresh and delicious for as long as possible. Proper storage is key to maintaining their perfect chewy texture and flavor.
After the bars have cooled completely and been cut into individual rectangles, transfer them to an airtight container. They will remain wonderfully fresh and chewy for about 2-3 days when stored at room temperature. If you live in a particularly warm or humid climate, or if your kitchen tends to be on the warmer side, you might consider storing them in the refrigerator, which can extend their freshness for up to a week. However, keep in mind that refrigeration might make them slightly firmer, so letting them come to room temperature for a few minutes before eating is a good idea.
For longer-term storage, these granola bars freeze exceptionally well. Individually wrap each bar in plastic wrap, then place the wrapped bars in a freezer-safe bag or container. They can be frozen for up to one month. When you’re ready for a snack, simply take a bar out of the freezer and let it thaw at room temperature for about 15-30 minutes. This makes them a fantastic make-ahead option for busy weeks, ensuring you always have a wholesome and delicious snack at your fingertips.
Other Delicious Recipes to Explore:
Embrace the joy of baking and the satisfaction of creating something truly delicious and wholesome from scratch. These **homemade chewy granola bars** are more than just a recipe; they’re an invitation to a healthier, tastier, and more budget-friendly snacking lifestyle. Enjoy every chewy, chocolatey bite!