
Irresistibly Soft Lion House Dinner Rolls: Your Ultimate Guide to Fluffy Perfection
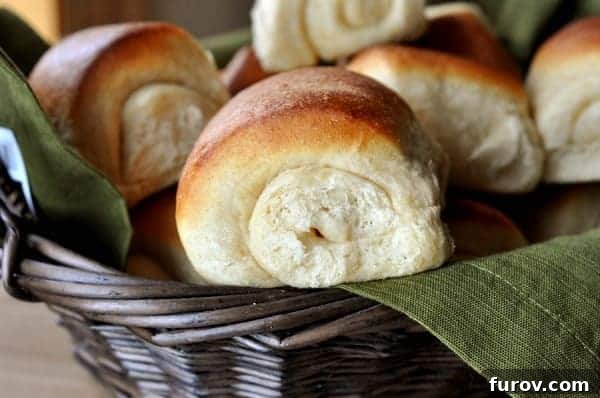
These legendary Lion House dinner rolls are renowned for their exceptional tenderness, rich buttery flavor, and absolutely perfect texture, making them a sublime addition to any meal or even a delightful standalone treat!
For generations, the Lion House Dinner Rolls have captivated palates with their unparalleled softness and rich, buttery taste. Originating from the historic Lion House in Salt Lake City, this recipe has become a treasured staple in countless kitchens, earning its reputation as the gold standard for homemade bread rolls. It’s a recipe that transcends ordinary baking, transforming simple ingredients into a culinary masterpiece that feels both comforting and luxurious.
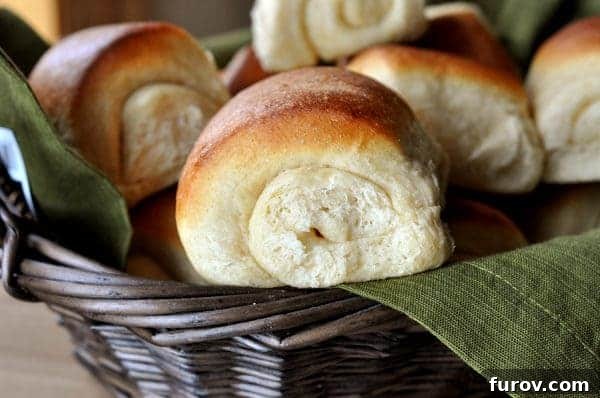
There’s a reason these rolls appear on my dinner table several times a month – they are truly in a league of their own. While I often incorporate a blend of white and white whole wheat flour for added nutrition, preparing them with 100% white flour elevates them to an almost dessert-like indulgence. Each bite is a testament to their tender crumb, exquisite butteriness, and flawless consistency.
Truly, these rolls are tender, buttery, and utterly perfect. They consistently outperform any other roll recipe I’ve tried, holding a permanent spot in my baking repertoire. It would take an extraordinarily remarkable recipe to ever replace these beautiful, pillowy delights.
The Enduring Legacy of Lion House Dinner Rolls
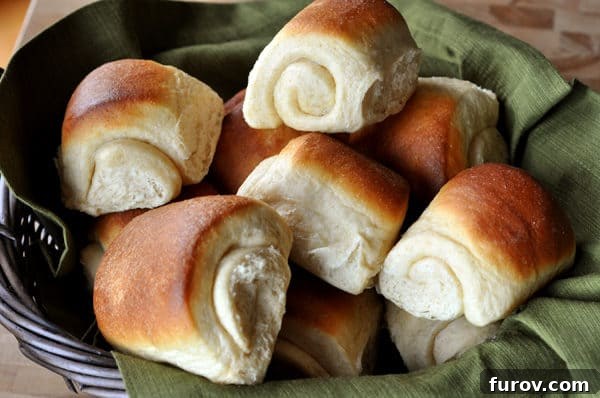
The Lion House in Salt Lake City, Utah, is more than just a historic building; it’s a culinary landmark, particularly famous for its incredible dinner rolls. For decades, guests at the Lion House Pantry restaurant have savored these soft, rich, and slightly sweet rolls, leading to their widespread fame. The recipe became a cherished secret, eagerly sought after by home bakers. What makes these rolls so special is a combination of traditional techniques and high-quality ingredients, resulting in a texture that’s exceptionally light and a flavor that’s deeply satisfying. This recipe allows you to recreate that legendary experience right in your own kitchen, bringing a piece of culinary history to your family’s table.
Key Ingredients for Unforgettable Rolls
The magic of Lion House Dinner Rolls lies in a few carefully selected ingredients that contribute to their signature taste and texture. High-quality active dry yeast or instant yeast is paramount for a good rise, ensuring a light and airy roll. Warm water activates the yeast, while sugar not only feeds the yeast but also adds a subtle sweetness and helps with browning. Softened butter is a non-negotiable for that rich, tender, and melt-in-your-mouth quality, while a large egg enriches the dough and contributes to its soft structure. Salt is essential for flavor balance, preventing the rolls from tasting bland. Finally, nonfat dry milk adds an incredible tenderness and a delicate milky flavor that truly sets these rolls apart. When it comes to flour, a good quality all-purpose white flour yields the classic fluffy texture, though variations with white whole wheat flour are also delicious, offering a slightly heartier roll without sacrificing too much tenderness. The careful balance and quality of these components are what make these rolls an enduring favorite.

Lion House Dinner Rolls
⭐
⭐
⭐
⭐
Pin
Ingredients
- 2 tablespoons active dry yeast
- 2 cups warm water
- ⅓ cup (71 g) sugar
- ⅓ cup (75 g) butter, softened
- 1 large egg
- 2 ½ teaspoons salt
- ⅔ cup nonfat dry milk
- 5-6 cups (710 to 852 g) flour (see note)
Instructions
-
In a large bowl, combine the yeast and water. If using active dry yeast, let it stand for 5 minutes to proof. If using instant yeast, you can proceed directly by adding the yeast and water along with the other ingredients. Add sugar, softened butter, salt, dry milk, 2 cups of flour, and the egg. Beat these ingredients together until the mixture is very smooth. Gradually add the remaining flour, approximately 1/2 cup at a time, until a soft but not sticky dough is formed. Knead the dough thoroughly for at least five minutes using an electric mixer or a minimum of 10 minutes if kneading by hand. The dough should become smooth, supple, and elastic. Once kneaded, place the dough in a lightly greased large bowl, cover it with greased plastic wrap, and let it rise in a warm place until it has doubled in size.
-
Once risen, gently punch down the dough and divide it into two equal portions. On a lightly floured surface, roll out each portion into an approximate 11×14-inch rectangle. Brush the entire surface of each rolled-out rectangle generously with melted butter. Using a pizza cutter or a sharp knife, slice the dough lengthwise down the middle (refer to photos below for visual guidance). Then, slice the dough horizontally into five or six strips across, creating 10 to 12 small rectangles from each original portion. Take each small rectangle and roll it up tightly, resembling a snail shape. Arrange these rolls on a baking sheet lined with a Silpat mat or lightly greased, ensuring each roll rests on its open edge. Repeat this process with the second portion of dough.
-
Cover the shaped rolls with lightly greased plastic wrap and allow them to rise again until they have doubled in size. Preheat your oven to 375 degrees Fahrenheit (190°C). Bake the rolls for 12-14 minutes, or until they achieve a beautiful golden-brown color and are cooked through. Serve warm with butter, jam, or as a side to your favorite meal.
Expert Tips & Notes
Shaping Techniques: While the traditional method involves rolling the dough into three circles and cutting them into crescent-like triangles, this recipe introduces an alternative, highly efficient method for shaping the rolls. By rolling the dough into an 11×14-inch rectangle, brushing with melted butter, and then cutting into strips and rolling them like snails, you achieve beautifully uniform and perfectly portioned rolls. Be sure to check out the step-by-step photos provided below the recipe for a clear visual guide, which makes this technique surprisingly simple.
Flour Measurement and Dough Consistency: When working with any yeast dough, it’s crucial to understand that the precise amount of flour can vary significantly. Factors like humidity, ambient temperature, and even altitude can affect how much flour your dough will absorb. Therefore, view the given flour amount (5-6 cups or 710-852g) as a guideline rather than a strict rule. The key is to judge the dough by its texture and feel. Aim for a dough that is soft and pliable but no longer sticky. If you have a kitchen scale, using gram measurements for flour can offer more consistent results. For further guidance on identifying a perfectly floured dough, refer to a comprehensive yeast tutorial.
Flour Variations for Healthier Rolls: These rolls are incredibly versatile when it comes to flour choices. For a heartier option, you can substitute half to three-quarters of the white flour with finely ground white whole wheat flour. The results are consistently good, offering added fiber and nutrients without compromising much on the tender texture. If you’re feeling adventurous, you can even use 100% finely ground white whole wheat flour, though be aware that the resulting rolls will be slightly denser. When incorporating any amount of whole wheat flour, extend the kneading time by a few minutes. This extra kneading helps to develop the gluten in the whole wheat flour, which tends to be less elastic than white flour, ensuring a better rise and texture.
Freezing and Reheating for Convenience: These rolls are excellent for make-ahead meal prep. Once baked and completely cooled, store them in freezer-safe ziploc bags to maintain freshness. They can be frozen for up to 3 months. To serve, simply retrieve the desired number of frozen rolls and microwave them (about 6 at a time) for approximately 2 minutes, or until warmed through and soft. This makes them perfect for busy weeknights or unexpected guests, allowing you to enjoy fresh-tasting rolls with minimal effort.
Recommended Products
Recipe Source: Adapted from The Lion House original recipe, cherished for its classic taste and perfect texture.
Mastering the Art of Shaping Your Dinner Rolls
One of the most satisfying parts of making these Lion House Dinner Rolls is the shaping process. It’s simpler than you might think, and the unique “snail” shape not only looks charming but also contributes to the rolls’ tender layers once baked. Follow these steps for perfectly shaped rolls:
First, once your dough has completed its initial rise and has been punched down, divide it into two equal portions. On a lightly floured surface, take one portion and roll it out carefully. Aim for a rectangular shape, approximately 11×14 inches in size. This dimension ensures consistent roll sizes.
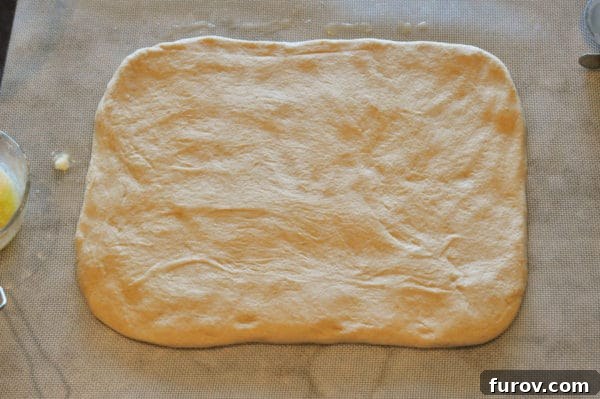
Next, take some melted butter and generously brush the entire surface of your rolled-out dough. This butter layer is key to the rolls’ rich flavor and soft texture. After buttering, use a pizza cutter or a sharp knife to slice the dough in half, lengthwise. This creates two narrower, long rectangles from your original larger one.
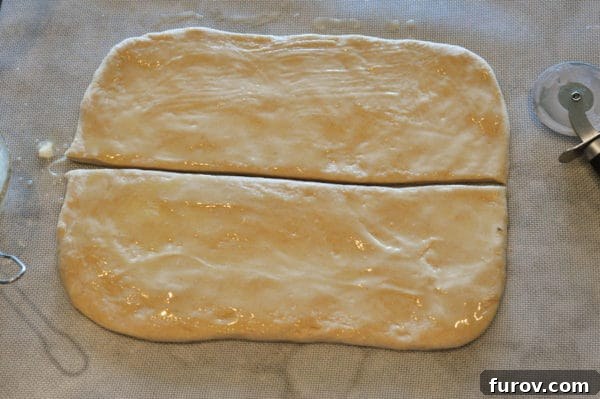
Now, to create the individual rolls, you’ll need to slice these two long rectangles into smaller strips. A helpful trick is to use your hand in an “L” shape to approximate the distance for each slice across the dough. This provides a quick and consistent measurement without needing a ruler.
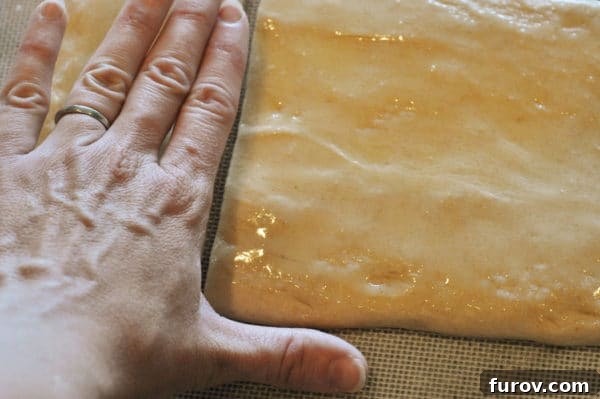
Continue using this method until each of the two long rectangles is sliced into five or six sections across. This will result in 10 to 12 small, individual rectangles from each half of the dough, giving you a total of 20 to 24 rolls.
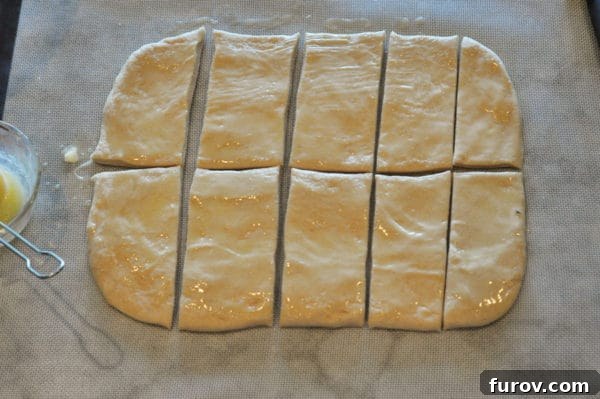
With your small rectangles ready, the final shaping step is to roll each one up tightly, from one end to the other, creating a shape that resembles a snail shell. This simple roll-up technique ensures a beautiful spiral pattern and tender layers in the finished roll.
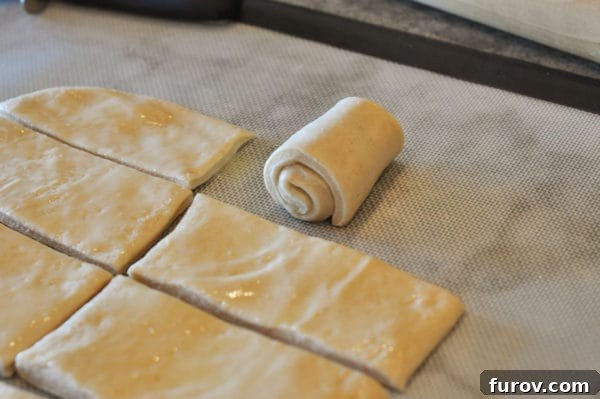
Once shaped, place each roll onto your prepared baking sheet (lined with a Silpat or lightly greased). Make sure the rolls are resting on their open edge to maintain their shape during the second rise and baking. Allow sufficient space between each roll for them to expand as they rise.
Serving Suggestions & Variations
These versatile Lion House Dinner Rolls are perfect with nearly any meal. Serve them warm with a pat of butter and a drizzle of honey, or alongside hearty stews, soups, and roasted meats. They also make fantastic small sandwiches for lunchboxes or light suppers. For a sweet twist, spread them with homemade jam or fruit compote. You can also sprinkle a little garlic powder and parmesan cheese before baking for savory garlic-parmesan rolls, or add fresh rosemary to the dough for an herby aroma. The possibilities are endless!
Frequently Asked Questions About Lion House Dinner Rolls
1. Can I use a bread machine for the dough?
Yes, you can absolutely use a bread machine for the dough cycle. Simply add the ingredients in the order recommended by your bread machine manufacturer (usually liquids first, then dry ingredients, with yeast last). Once the dough cycle is complete, proceed with the shaping, second rise, and baking instructions as written.
2. How do I know if my yeast is active?
If using active dry yeast, combine it with the warm water (and a pinch of sugar, if desired) and let it sit for 5-10 minutes. If the mixture becomes foamy and bubbly, your yeast is active and ready to use. If there’s no activity, your yeast might be old or the water temperature was incorrect, and you should start with fresh yeast.
3. What’s the ideal temperature for rising dough?
Dough rises best in a warm, draft-free environment, ideally between 75-85°F (24-29°C). You can achieve this by placing the covered bowl in a slightly warmed (but turned off) oven, near a sunny window, or in a warm spot in your kitchen.
4. My rolls didn’t rise enough. What could be the problem?
Several factors can inhibit rising: expired yeast, water that’s too hot (which kills the yeast) or too cold (which slows it down significantly), too much salt, or not enough kneading to develop the gluten. Ensure your yeast is fresh, your water is at the correct temperature (around 105-115°F or 40-46°C for active dry yeast), and that you knead the dough sufficiently until it’s smooth and elastic.
5. Can I prepare these rolls ahead of time?
Absolutely! You can prepare the dough through the first rise, then punch it down, cover tightly, and refrigerate for up to 24 hours. Let it come to room temperature for about 30-60 minutes before shaping. Alternatively, you can shape the rolls, place them on the baking sheet, cover tightly, and refrigerate for an overnight slow rise. Take them out of the fridge about an hour before baking to finish rising.