
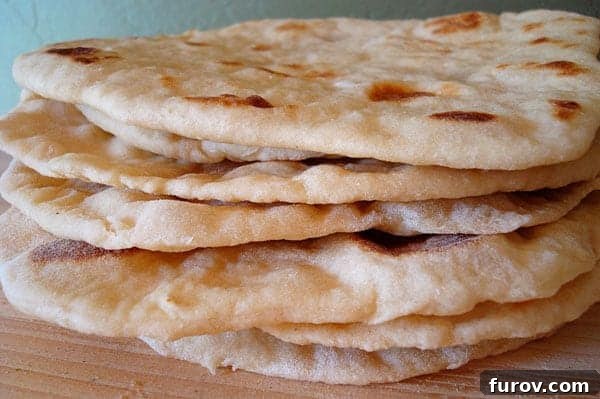
Welcome to the world of effortlessly delicious, no-oven required Soft Wrap Bread! These incredible flatbreads are truly a game-changer in any kitchen. Imagine soft, tender, and perfectly chewy discs of flavorful bread, ready to elevate countless main dishes or simply enjoyed on their own. They are so simple to make, yet their profound deliciousness will leave you wondering why you haven’t been making them your whole life.
I distinctly remember the first time I made this bread. I was preparing for a special dinner, and my initial motivation was purely pragmatic. With no quality bakery conveniently close, and the thought of serving dry, cardboard-like store-bought pitas unappealing, I decided to venture into making my own “wrap-style” bread. My expectations were low, to say the least. It felt more like a chore, a means to an end, rather than an exciting culinary experiment.
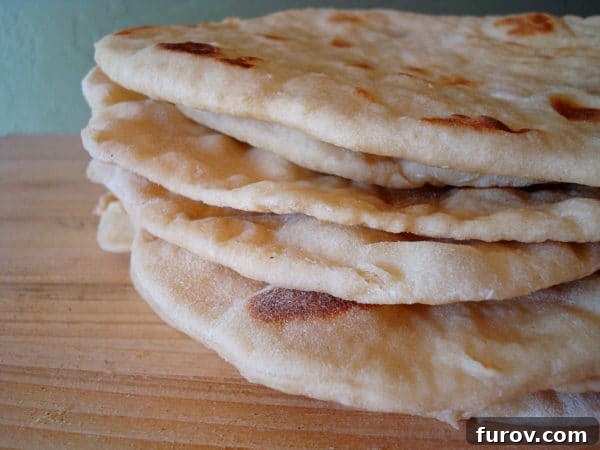
But then, everything changed. The moment I tasted that first warm, fluffy piece, it was nothing short of a revelation. My low expectations were shattered, replaced by an overwhelming sense of culinary delight. “Amazing” doesn’t even begin to cover it. This homemade soft wrap bread is incredibly soft, boasts a delightful tenderness, and offers a satisfying chewiness that sets it apart. The flavor is rich and comforting, a perfect canvas for both sweet and savory accompaniments.
The Undeniable Versatility of This No-Oven Bread
What truly makes this recipe shine is its incredible versatility. These pliable flatbreads are not just a side dish; they are a culinary chameleon. They pair exquisitely with savory meals, soaking up sauces and complementing rich flavors. Think homemade falafel wraps, tender chicken shawarma, or hearty beef kebabs tucked inside. They are phenomenal for scooping up creamy hummus, rich curries, or vibrant Mediterranean dips. Cut them into wedges and serve them alongside a mezze platter, or use them as a base for quick and easy mini pizzas – perfect for a family dinner or a fun appetizer.
But the magic doesn’t stop at savory. This soft skillet bread transforms into an utterly delightful sweet treat. Drizzle it generously with honey, sprinkle with cinnamon sugar, or spread a dollop of your favorite fruit jam, and enjoy it warm. My husband, for instance, has been known to devour at least four of these lovely discs simply adorned with a golden stream of honey. The possibilities are truly limitless, from classic sandwich roll-ups for school lunches to sophisticated appetizer bites for entertaining. It’s the kind of bread that makes you constantly dream of the next occasion to make it.
Effortless Cooking: No Oven, No Fuss
Perhaps one of the most appealing aspects of this soft wrap bread is that it requires absolutely no oven. That’s right, you won’t need to heat up your entire house, especially during warmer months, or wait for your oven to preheat. These flatbreads are “dry-fried” directly on a griddle or a simple frying pan over medium heat. This stovetop method is not only convenient but also imparts a unique texture and beautiful golden-brown flecks to the bread, creating that perfect puffiness you crave. It’s a simple, efficient, and incredibly rewarding way to bake fresh bread whenever the craving strikes.
A Healthier Spin: Embracing Whole Grains
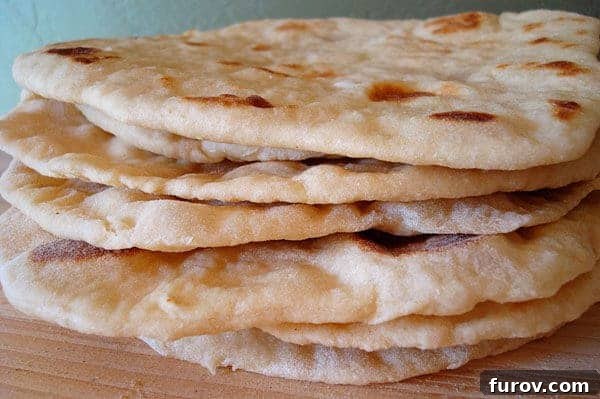
After countless batches of perfecting this recipe, I’ve discovered that it adapts beautifully to whole wheat flour. Specifically, I often use white wheat flour because it offers a milder flavor and softer texture compared to traditional red whole wheat, making it an ideal choice for this tender bread. Whether I use half white whole wheat and half all-purpose flour, or even go all-in with 100% finely ground whole wheat, the results are consistently delicious and undoubtedly healthier. This makes the soft wrap bread an excellent choice for those looking to incorporate more whole grains into their diet without sacrificing taste or texture. The slight nuttiness of the whole wheat flour only adds another layer of complexity to the bread’s delightful flavor profile.
Frequently Asked Questions About Soft Wrap Bread
Absolutely! A stand mixer, like a KitchenAid, can certainly make the kneading process easier. However, be mindful of your mixer’s power and capacity. This dough is relatively stiff, so if you have a smaller or less powerful mixer, you might want to divide the batch in half to avoid overworking the motor. Start on a low speed and gradually increase as the dough comes together. If the dough seems too stiff for your mixer, you can always finish kneading by hand for a few minutes.
Yes, potato starch is a perfectly suitable substitute for potato flour in this recipe. Both contribute to the incredibly soft and tender texture of the bread by inhibiting gluten development and helping to retain moisture. If using potato flakes or buds, these also work wonderfully, providing a similar effect. The key is to add that potato element for optimal texture.
Indeed, this dough is fantastic for making ahead! You can prepare the dough and refrigerate it for up to 24 hours. If storing unbaked individual wraps, make sure to lightly grease parchment paper or whatever you use to separate them, preventing them from sticking together. Alternatively, you can cook all the breads, allow them to cool completely, and then freeze them in an airtight freezer bag for longer storage. They reheat exceptionally well in the microwave for a quick refresh, or you can gently warm them on low heat in the oven or even back on the griddle, and they’ll taste wonderfully fresh.
The possibilities are truly endless! These soft wrap breads are incredibly versatile. Think of them as elevated tortillas for your tacos, burritos, or quesadillas. They make excellent sandwich roll-ups, perfect for a quick lunch. Use them as a base for delightful mini pizzas, or cut them into triangles for dipping into hummus, baba ghanoush, or any spread you love. They’re also fantastic with savory stews, curries, or simply drizzled with honey for a sweet treat. Anything you’d use a traditional flatbread or tortilla for, these soft wraps will likely do even better!
Using boiling water (sometimes referred to as a “scald” or “tangzhong” method in other bread recipes) gelatinizes some of the starch in the flour. This process allows the dough to absorb more liquid, resulting in a softer, more tender bread with an improved crumb structure. It also helps the bread stay fresh and moist for longer, which is a wonderful benefit for these soft wraps.
Soft Wrap Bread
8 -9 breads
2 hrs
4 mins
2 hrs
4 mins
Pin
Ingredients
- 3 to 3 ¼ cups unbleached all-purpose flour (see note for alternatives)
- 1 ½ cups boiling water
- ¼ cup potato flour OR 1/2 cup potato buds or flakes (potato flakes are a common choice for tenderness)
- 1 ¼ teaspoons salt
- 2 tablespoons vegetable oil
- 1 teaspoon instant yeast (refer to notes for active dry yeast substitution)
Instructions
-
Begin by placing 2 cups of the unbleached all-purpose flour into a large mixing bowl or the bucket of a bread machine. Carefully pour the boiling water over the flour. Stir immediately and vigorously until the mixture is smooth and lump-free. This initial scald helps to gelatinize the starch, contributing to the bread’s soft texture. Lightly cover the bowl or bucket and let this mixture rest for 30 minutes to cool slightly.
-
In a separate bowl, whisk together the potato flour (or potato flakes/buds), the remaining 1 cup of flour, salt, vegetable oil, and instant yeast. Add this combined mixture to the slightly cooled flour and water mixture. Stir initially, then knead for several minutes until a soft, cohesive dough forms. This can be done by hand, with a stand mixer, or in a bread machine. It might seem like the drier ingredients won’t incorporate at first, especially if using an electric mixer, but trust the process – they will. If using an electric mixer, you might need to scrape down the sides or even finish kneading by hand to ensure everything is thoroughly combined. Avoid adding too much extra flour at this stage.
-
Note on Kneading: If using a bread machine, you can let it complete its full kneading cycle, but it’s not strictly necessary for this recipe. About 5 minutes of kneading at full speed in the machine is usually sufficient. The goal is to achieve a ball of dough that is fairly stiff but still somewhat sticky. Resist the urge to add excessive flour, as this can make the wraps tough. If kneading by hand, keep your hands and work surface lightly oiled rather than floured to prevent sticking.
-
Once kneaded, place the dough in a lightly oiled bowl, cover it with plastic wrap or a clean kitchen towel, and let it rise in a warm place for at least 1 hour. Depending on the warmth of your environment, it can even rise for up to 2 hours, resulting in a slightly lighter texture. The dough should roughly double in size.
-
After the first rise, gently punch down the dough to release the air. Divide the dough into 8 equal pieces. Each piece should be approximately the size of a handball, weighing around 3 ounces (about 85 grams). Roll each piece into a neat ball, cover them again, and let them rest for another 15 to 30 minutes. This second rest is crucial as it relaxes the gluten, making the dough much easier to roll out.
-
Now, it’s time to cook! On a lightly floured surface, roll each dough ball into a thin 7- to 8-inch circle. Heat a griddle or a large frying pan over medium heat. Do not add oil to the pan; these are dry-fried. Place one rolled flatbread onto the hot surface. Cook for about 1 to 2 minutes per side, or until it puffs up and develops beautiful golden-brown flecks. I often find cooking mine for 2-3 minutes per side yields a perfect cook without drying them out. You might need to adjust your cooking time based on the thickness of your wraps and the heat of your pan.
-
Throughout the cooking process, carefully monitor the heat of your griddle or pan. If the breads are cooking too quickly, they might brown on the outside but remain raw or doughy in the center. If they cook too slowly, they can dry out and become stiff. Adjust the heat as needed to maintain a steady, medium cooking temperature, ensuring even cooking and a tender result.
-
As each soft wrap bread cooks, transfer it to a wire rack. It’s best to stack the cooked breads on top of each other and cover them with a clean kitchen towel. This helps trap the steam, keeping them incredibly soft and pliable. Serve immediately for the best experience, or allow them to cool slightly before storing them in an airtight plastic bag to maintain their freshness.
Notes
Yeast: This recipe is designed to work best with instant yeast. Its fine granules dissolve quickly during the kneading process, meaning you don’t need to proof it separately. If you prefer to use active dry yeast, simply use 1 cup of boiling water for the initial flour mixture, then dissolve your 1 teaspoon of active dry yeast in 1/4 cup of warm water (around 105-115°F or 40-46°C) for 5-10 minutes until foamy. Add this yeast mixture to the dough along with the potato flour mixture. The dough might feel a bit “slippery” at first, but with proper kneading, it will become smooth and elastic.
Flour: While unbleached all-purpose flour works perfectly, don’t hesitate to experiment with whole grains. I frequently use a blend of half to three-quarters finely ground white whole wheat flour with excellent results. For an even heartier and healthier option, I sometimes use 100% finely ground white whole wheat flour. Just be aware that whole wheat flour might absorb a bit more liquid, so you may need to adjust by adding a tiny bit more water if the dough feels too stiff, or slightly less flour if it’s too sticky. The key is finely ground whole wheat to maintain a tender texture.
Mel
Bread
American
Stovetop
Nutrition Facts (per serving):
Serving: 1 Bread, Calories: 238kcal, Carbohydrates: 44g, Protein: 6g, Fat: 4g, Saturated Fat: 1g, Sodium: 368mg, Fiber: 2g, Sugar: 1g
Recipe Source: adapted from King Arthur Flour
Recommended Products for Perfect Soft Wrap Bread
To make your soft wrap bread experience even smoother and more enjoyable, here are some recommended tools:
A sturdy silicone spoon is excellent for mixing the initial hot flour and water mixture, as well as for general dough handling.
A good wire whisk ensures your dry ingredients are perfectly combined before adding them to the wet mixture, preventing lumps and ensuring even distribution of yeast and salt.
For effortless kneading, especially if you plan to make large batches or other bread recipes, a powerful stand mixer like the Bosch Universal is an invaluable investment.
Explore More Delicious Flatbread Recipes:
I hope you’re inspired to try making this incredible no-oven soft wrap bread. It’s truly a rewarding experience, yielding perfectly tender, chewy, and flavorful flatbreads that will become a staple in your kitchen. Whether you serve them with a savory main course, use them for creative culinary experiments, or simply enjoy them with a drizzle of honey, their deliciousness and ease of preparation are unmatched. Happy baking!