
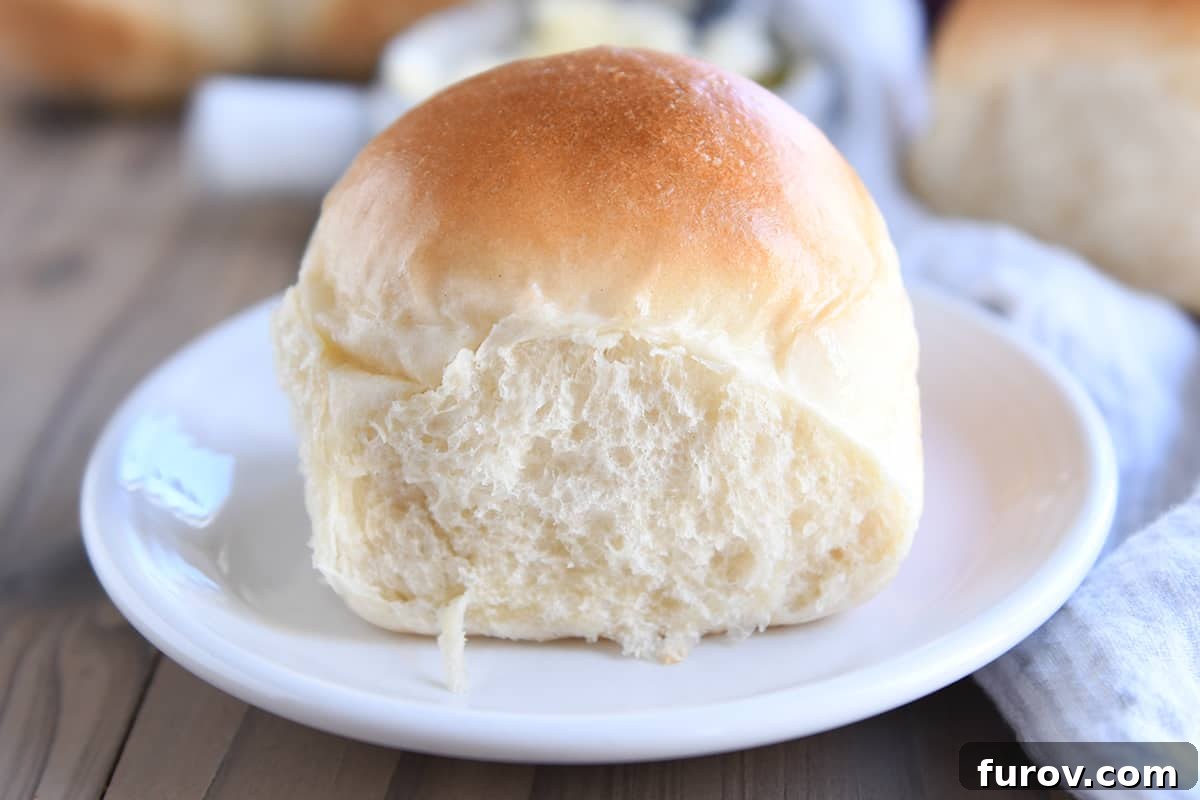
Get ready to discover the most incredibly soft, pillowy, and utterly delicious dinner rolls you’ll ever bake! This foolproof recipe is not only fast and easy to follow but also guarantees a sensational result every single time, perfect for any meal or special occasion.
If you thought there wasn’t room for another dinner roll recipe in your life, prepare to have your mind (and taste buds!) completely changed. I’ve spent years perfecting the art of the dinner roll, tirelessly testing and refining until I reached what I genuinely believe to be the pinnacle of homemade bread. These aren’t just any rolls; they are the culmination of every beloved roll recipe I’ve ever shared, embodying the ideal balance of tenderness, flavor, and delightful texture.
Whether you’re planning an elaborate holiday feast, a comforting Sunday dinner, or simply craving a warm, buttery accompaniment to your everyday meal, these perfect soft and fluffy dinner rolls are destined to become your new kitchen staple. They bring a touch of bakery-quality luxury right to your table with minimal fuss.
Crafting the Perfect Dinner Roll Dough
Among the many cherished roll recipes that grace my culinary collection, today’s soft and fluffy creations bear a kinship to my epic French bread rolls. However, this new recipe elevates the experience, producing rolls that are noticeably richer in flavor and even more exquisitely fluffy. This enhanced quality isn’t by accident; it’s the result of carefully chosen ingredients and a thoughtful process.
The secret lies, in large part, to a specific combination of ingredients:
- A harmonious blend of milk and water
- The inclusion of an egg for added richness and structure
- Using butter instead of oil for superior flavor and tenderness
The Science Behind Scalded Milk
One of the key techniques that sets this recipe apart is the use of scalded milk. This means heating the milk until it’s just shy of boiling – you’ll see tiny bubbles forming around the edges and steam rising. Once heated, it’s crucial to allow the milk to cool down to a warm, “bath-like” temperature before proceeding. This step, though simple, is scientifically significant: scalding helps to break down the whey protein structure in the milk. If not denatured, these proteins can weaken gluten development, leading to a denser, less airy bread. By scalding, we ensure the protein won’t interfere, allowing the yeast to work its magic more effectively and resulting in a lighter, more ethereal texture in your finished rolls.
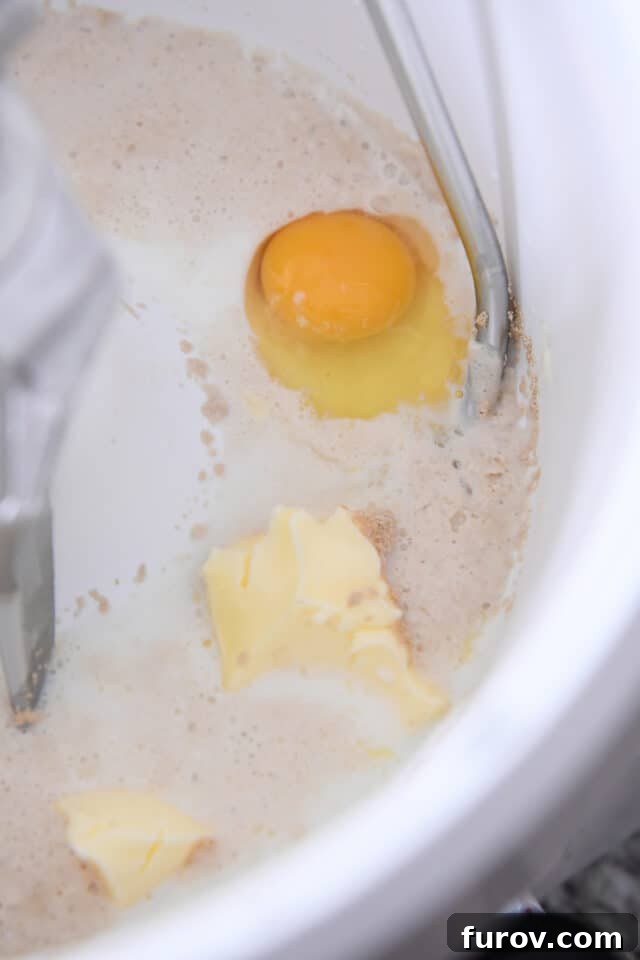
After the scalded milk cools sufficiently, the sugar, softened butter, and yeast are introduced to the mixture. This warm, sugary environment provides the perfect fuel for the yeast, allowing it to “bloom” – you’ll notice it becoming wonderfully bubbly and foamy. This visual cue confirms your yeast is active and ready to create that incredible rise we all crave in a perfect dinner roll.
The Secret to Unbeatable Softness: Mastering Flour and Kneading
If I could impart just one monumental secret to guarantee perfect, consistently soft dinner rolls every single time, it would be this: exercise extreme caution with the flour amount to avoid over-flouring the dough. This single factor is the most common pitfall in homemade bread making, and mastering it will elevate your rolls from good to extraordinary.
While I strive to provide an exact flour measurement, baking is an art influenced by numerous variables that can slightly alter the ideal flour quantity for each individual. Factors such as the humidity in your kitchen, your geographical elevation, the precise temperature of your liquids, and even the method you use to measure flour (scooping vs. spooning) all play a role in how much flour your dough will ultimately absorb.
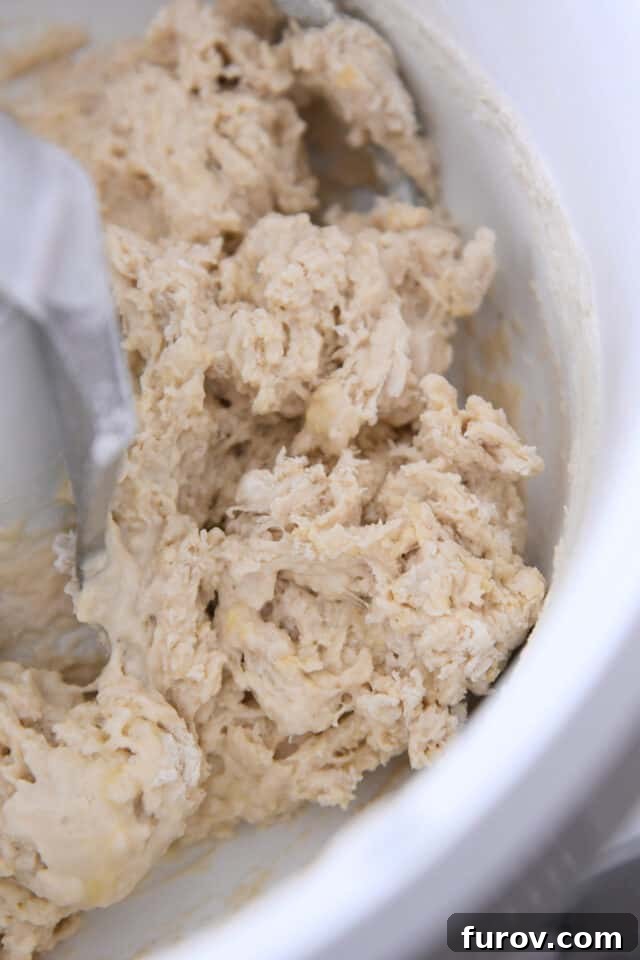
For this specific recipe, begin by adding approximately 3 ¾ to 4 cups of all-purpose flour into your mixer bowl right at the start. Initiate the mixer, and don’t be alarmed if the dough appears quite shaggy and unkempt at first. This is perfectly normal. Continue to incorporate additional flour very gradually, only adding more if and when it’s truly needed. The goal is to reach a point where the dough just begins to pull away from the sides of the bowl, forming a coherent, albeit still slightly sticky, ball.
Achieving Silky Smooth Dough Through Proper Kneading
As the kneading process continues – typically for 5-6 minutes – you’ll witness a remarkable transformation. The shaggy mixture will evolve into a beautifully soft, supple, and smooth ball of dough. This smooth, elastic texture is what you’re aiming for, indicating optimal gluten development. Proper kneading creates the internal structure that traps air, resulting in those coveted fluffy rolls.
During the kneading phase, it’s normal for the dough to occasionally cling to the bottom or sides of the mixing bowl. If this occurs, resist the urge to add a large amount of flour all at once. Instead, add flour sparingly, a tablespoon at a time, allowing it to fully incorporate before adding more. Continue this until the dough once again begins to clear the sides of the bowl. There’s no need to reset your kneading timer if you’re only adding small, incremental amounts of flour.
The Art of the First Rise: Proofing for Power
Once your dough is perfectly kneaded, it’s time for its first rise, also known as bulk fermentation. Find a warm, draft-free spot in your kitchen. I often embrace simplicity and let my dough rise directly in the stand mixer bowl, loosely covered with plastic wrap or a clean kitchen towel. Alternatively, you can transfer it to a lightly greased bowl, turning it once to coat, then cover it. Allow the dough to rise until it has visibly doubled in size – this usually takes about an hour, depending on your kitchen’s temperature and the vitality of your yeast. This initial rise is crucial for developing flavor and creating a light, airy internal structure.
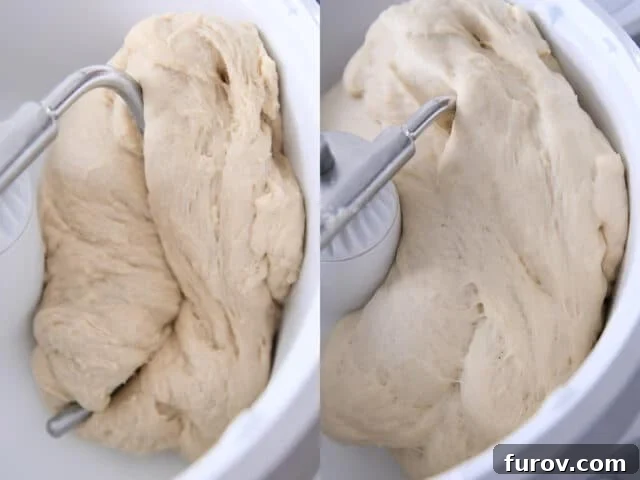
Shaping and Proofing for Ultimate Fluffiness
After its glorious first rise, gently punch down the dough to release the air. Turn it out onto a lightly greased countertop – avoid dusting with too much flour, which can dry out your dough. A single batch of these remarkably soft and fluffy dinner rolls is perfectly sized to fit into a standard 9×13-inch baking pan. If you’re feeding a larger crowd, a doubled batch will comfortably bake on a half sheet pan.
Consistent Shaping for Uniform Rolls
For consistent baking and presentation, aim for each individual dough ball to weigh approximately 3 to 3.5 ounces. Divide your dough accordingly, then roll each piece into a smooth, round ball. Arrange these perfectly shaped balls in your prepared baking pan, leaving just a little space – about half an inch – between each one. This allows them room to grow and create that delightful “pull-apart” texture.
Now comes the second, equally important rise, also known as proofing. Cover the pan loosely with greased plastic wrap or a clean towel and let your rolls rise again. This step is non-negotiable for achieving their maximum fluff-fluffy potential. They should become exceptionally puffy, expanding until their sides gently touch, creating a cohesive, soft mass. Do not skimp on this rising time! Under-proofed rolls will be dense and lack the airy, tender crumb you’re striving for. Patience here truly pays off.
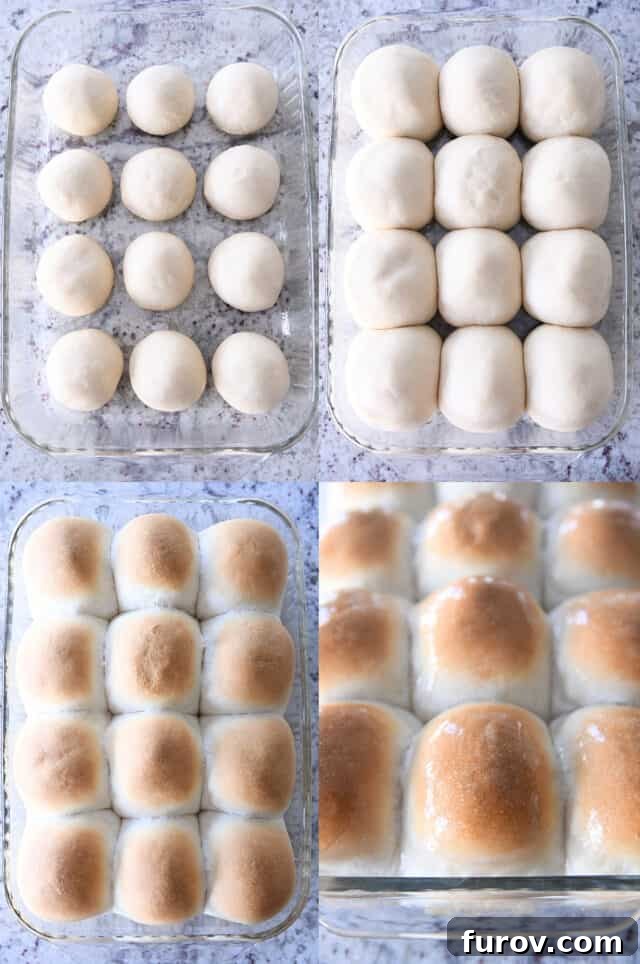
How to Get Perfectly Golden-Brown Dinner Rolls Every Time
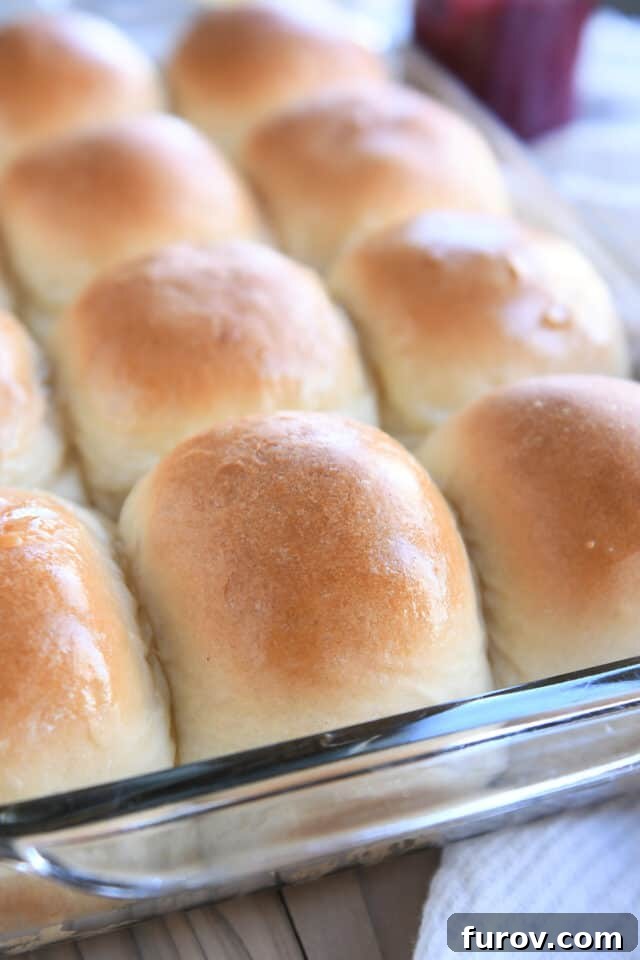
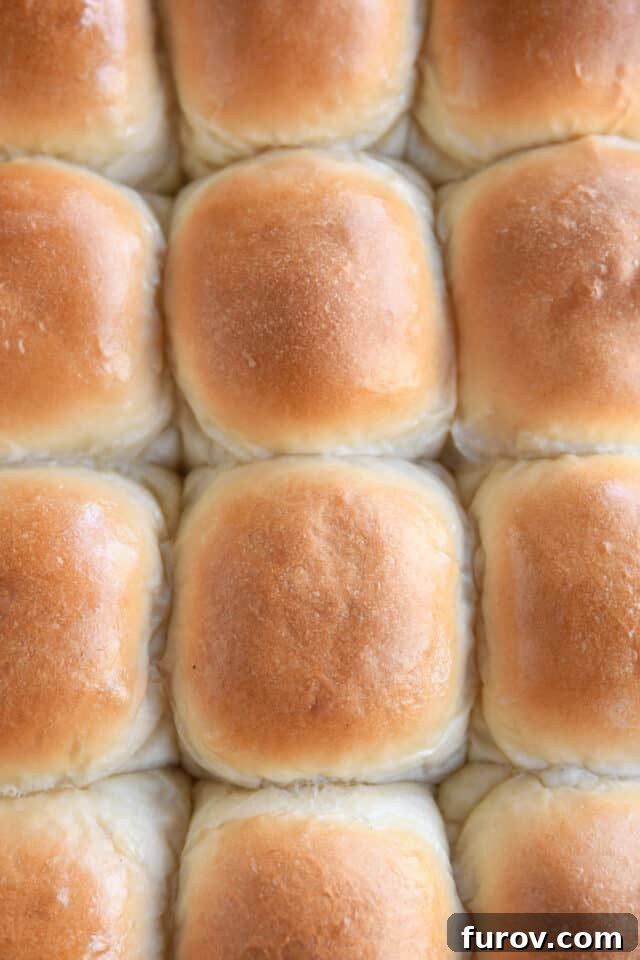
Once your rolls have beautifully proofed, it’s time for the oven. Bake them at 375 degrees F for 18-20 minutes, or until they achieve a gorgeous golden hue on both their tops and bottoms. The exact timing can vary slightly based on your oven, so keep a watchful eye.
If you find your dinner rolls aren’t browning sufficiently on top, even after the full recommended baking time, there are a couple of common culprits and simple solutions:
- Oven Rack Position: The placement of your oven rack can significantly impact browning. In many ovens, a middle or upper-middle rack position provides more direct heat to the top of the rolls, encouraging better golden-brown color compared to a lower rack. Experiment with your oven to find its sweet spot.
- Oven Temperature Calibration: Not all ovens heat precisely the same, even when set to identical temperatures. It’s quite possible that your oven bakes on the cooler side. To compensate, try increasing your oven temperature by 15-25 degrees F. This slight adjustment can often make all the difference in achieving that desirable golden crust without over-baking the interior. Consider investing in an oven thermometer to verify your oven’s true temperature.
Immediately upon removing the hot rolls from the oven, brush their tops generously with melted butter. This not only imparts a beautiful sheen and rich flavor but also keeps the crust wonderfully soft as they cool. The steam trapped by the butter creates an irresistible tender exterior that perfectly complements their fluffy interior.
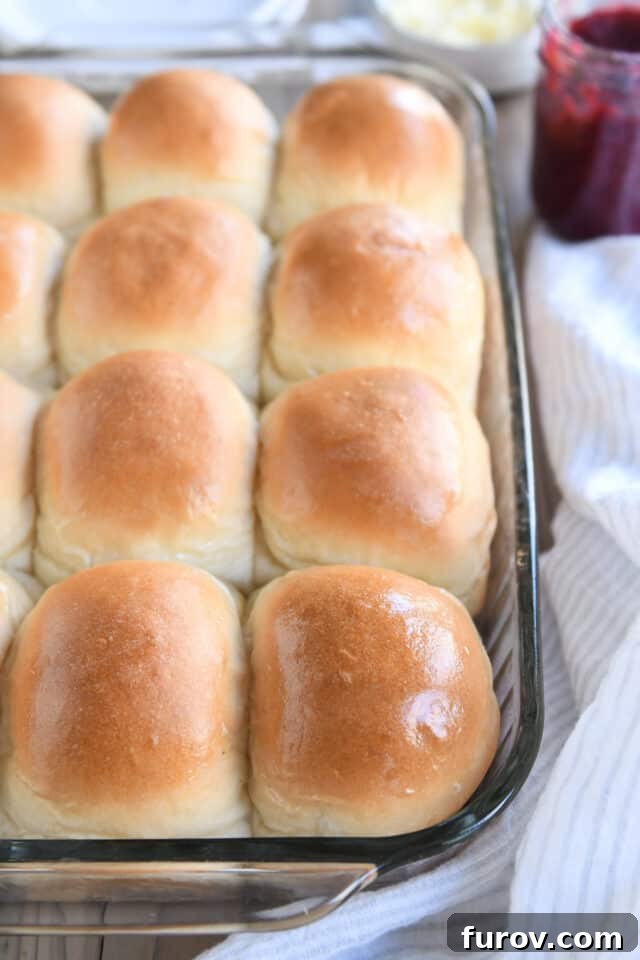
Why These Are the Best Homemade Dinner Rolls You’ll Ever Make
I can confidently say that this truly is one of the best dinner roll recipes you will ever encounter. The resulting rolls are beyond insanely fluffy – they are cloud-like, almost weightless, yet retain an incredible substance that sets them apart from ordinary bread. The texture is a dream, a perfect testament to the careful balance of ingredients and technique.
But even with their extreme fluffiness, these rolls possess the satisfying heft and robust structure you expect from a truly exceptional homemade roll. They strike the ideal balance:
Meaning: they won’t disappointingly disintegrate into a pile of crumbs or smoosh into oblivion with just a single swipe of butter or a gentle squeeze.
Instead, they offer a delightful resilience – sturdy enough to hold up to your favorite spreads and fillings, yet exquisitely soft to the bite. Plush, substantial, and utterly perfect, these rolls elevate any dining experience. Each one is a little masterpiece of comfort food, promising to melt in your mouth and leave you craving just one more.
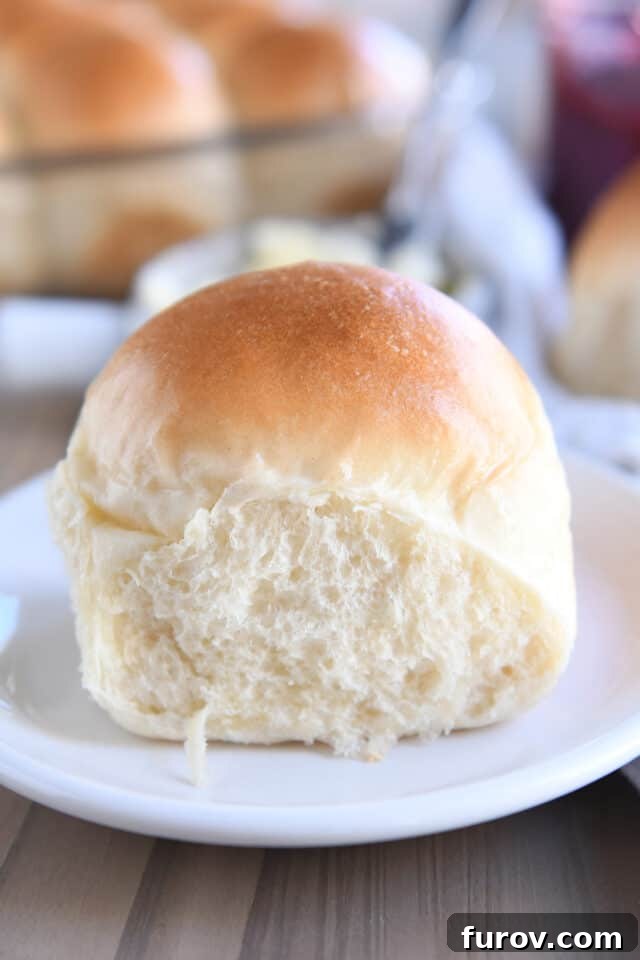
Make-Ahead & Freezing Options: Convenience for Any Occasion
One of the many benefits of this stellar recipe is its flexibility. I’ve included comprehensive make-ahead instructions within the recipe notes, allowing you to prepare these incredible rolls to fit your schedule. They can be prepared in advance, placed in the baking pan, covered, and then refrigerated to rise slowly overnight. This method is a game-changer for holiday meal prep or busy weeknights, allowing you to simply pull them out and bake them fresh when you’re ready.
Additionally, these rolls are remarkably freezer-friendly. Once baked and completely cooled, you can store them in resealable freezer bags for up to a month. To enjoy, simply thaw them at room temperature and warm them gently in the oven for that fresh-baked taste. This versatility makes them an ideal choice for large gatherings or for always having delicious homemade bread on hand.
In fact, I’m personally preparing a staggering 252 of these rolls later this week for a school banquet – that’s 21 batches (10 double batches and one single batch, for those counting!). While it will undoubtedly be an extremely long day in the kitchen, and not an undertaking I plan to repeat for at least a decade, I have absolute confidence in this recipe. I’m not worried about the rolls turning out perfectly, because this recipe is truly golden: simple, dependable, and absolutely foolproof.
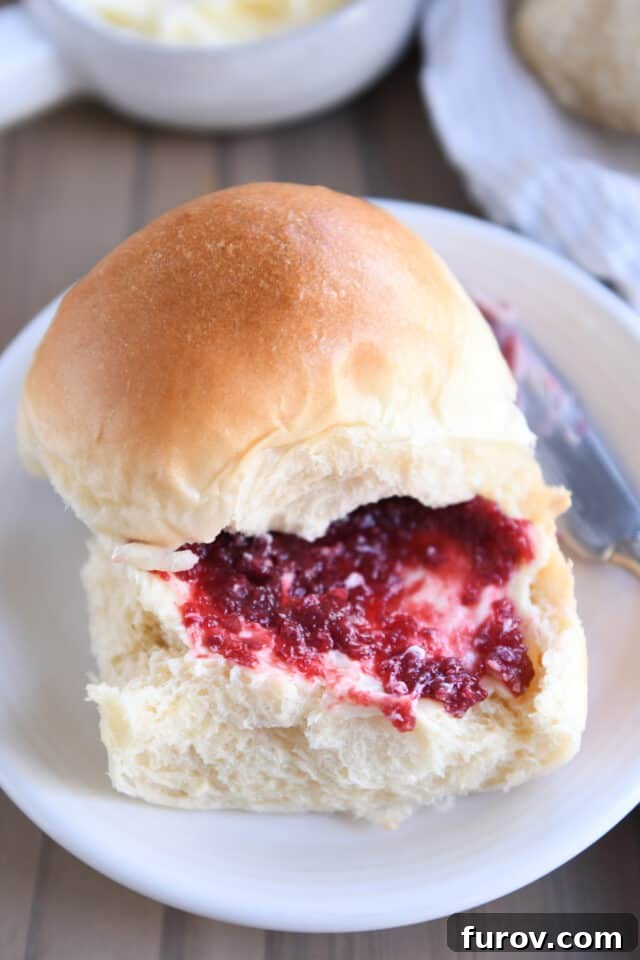
Your New Go-To Dinner Roll Recipe Awaits!
If you’ve been on a quest for an easy, reliable, and utterly delicious go-to dinner roll recipe, your search ends here. And if you already have a cherished favorite, I confidently believe this recipe might just tempt you to reconsider. Its exceptional texture and flavor profile are truly unmatched.
I am eagerly looking forward to hearing your thoughts once you’ve had the chance to bake and savor these incredible rolls! They’re a joy to make and an even greater joy to eat.
Just remember these two simple, yet essential, rules for experiencing the pinnacle of homemade roll enjoyment:
- Liberally brush the tops of the warm rolls with melted butter the moment they emerge from the oven.
- Do not, under any circumstances, skimp on the butter (and your favorite jam or honey) when it’s time to enjoy the finished product.
And there, my friends, you have the simple secrets to a very happy life – at least in the realm of irresistible baked goods! Enjoy every fluffy, buttery bite. 😉❤️
Explore More Delicious Recipes from Our Archives:
- One Year Ago: Pumpkin Rosemary Dinner Rolls
- Two Years Ago: Creamy Baked Mashed Potatoes with Buttery Parmesan Crumbs {Make-Ahead!}
- Three Years Ago: Pressure Cooker Lasagna Soup {+ Stovetop Directions}
- Four Years Ago: Delicious Cranberry Pear Crumble
- Five Years Ago: Buttery, Flaky Make-Ahead Overnight Crescent Dinner Rolls {No Kneading/No Stand Mixer}
- Six Years Ago: Skillet Honey Garlic Chicken {20-Minute Meal}
- Seven Years Ago: Stuffed Apple and Bacon Sweet Potato Casserole
- Eight Years Ago: Warm Russian Tea
- Nine Years Ago: Smoky Corn Chowder
- Ten Years Ago: Whole Wheat Blender Pancakes

Perfect Soft and Fluffy Dinner Rolls
12
rolls
25
mins
20
mins
2
hrs
2
hrs
45
mins
Pin Recipe
Ingredients
- 1 ¼ cups milk
- ¼ cup water
- ¼ cup (57 g) butter, softened or melted
- 2 tablespoons (27 g) granulated sugar (see note)
- 1 tablespoon instant or active dry yeast
- 1 large egg
- 1 ¼ teaspoons salt
- 4 ¼ to 4 ½ cups (604-639 g) all-purpose flour
- Additional butter, for brushing hot, baked rolls
Instructions
-
Heat the milk until tiny bubbles form around the edges and the milk is steaming. Pour into the bowl of a stand mixer fitted with the dough hook.
-
Add the water, butter, and sugar. Let the mixture cool until warm (if you dip a finger in, it should feel like a warm bath – not too hot, not too cold, just right).
-
Stir in the yeast and let rest for 5-7 minutes until the yeast is foamy (technically, you don’t need to let the yeast activate before adding the flour, but it is recommended for yeast breads with milk for a quicker/better rise).
-
Add the egg, salt, and flour (start with 3 ¾ to 4 cups flour) and mix. Add additional flour gradually, if needed, until the dough clears the sides of the bowl and forms a soft, sticky ball. Crucially, do not over-flour the dough.
-
Knead for 5-6 minutes until the dough is soft and smooth.
-
Let the dough rise in a warm spot until doubled in size, about an hour or so. (You can let the dough rise right in the mixing bowl, or transfer to a lightly greased bowl and cover.)
-
Grease a 9×13-inch pan. Lightly punch down the dough and turn out onto a lightly greased countertop.
-
Divide the dough into 12 equal pieces (each weighing approximately 3 to 3.5 ounces). Roll each piece into a round ball and place them in the prepared pan, spacing them about ½-inch apart (four rows of three rolls).
-
Preheat the oven to 375 degrees F (190 degrees C). Place an oven rack in the middle position.
-
Cover the rolls and let them rise until doubled in size. The rolls should be very puffy with their sides touching.
-
Bake the rolls for 15-20 minutes until they are golden on the tops and bottoms. Butter the tops of the rolls immediately after removing them from the oven.
Notes
Flour Substitutions: While I haven’t tested this recipe with entirely whole wheat flour, it performs beautifully when substituting 1-2 cups of the all-purpose flour with whole wheat flour. For a lighter texture, white whole wheat, kamut, or einkhorn flours are preferable.
Make-Ahead Instructions: For convenience, the shaped rolls can be placed in the baking pan, covered tightly with greased plastic wrap (ensure it doesn’t stick to the dough), and immediately refrigerated for up to 24 hours (do not let them rise in the pan first). They will slowly rise in the fridge. Before baking, remove them from the refrigerator in time to come to room temperature and complete their full second rise if they haven’t already. Bake as directed.
Freezing Baked Rolls: Fully baked and cooled rolls can be frozen in airtight, resealable bags for up to 1 month. Thaw at room temperature and warm gently in the oven before serving.
Mel Gunnell
Bread
American
Bake
Nutrition Information (per roll)
Calories: 239kcal,
Carbohydrates: 41g,
Protein: 7g,
Fat: 5g,
Saturated Fat: 3g,
Cholesterol: 27mg,
Sodium: 241mg,
Fiber: 1g,
Sugar: 3g
Recommended Products
Recipe Source: Adapted from Mel’s Kitchen Cafe