
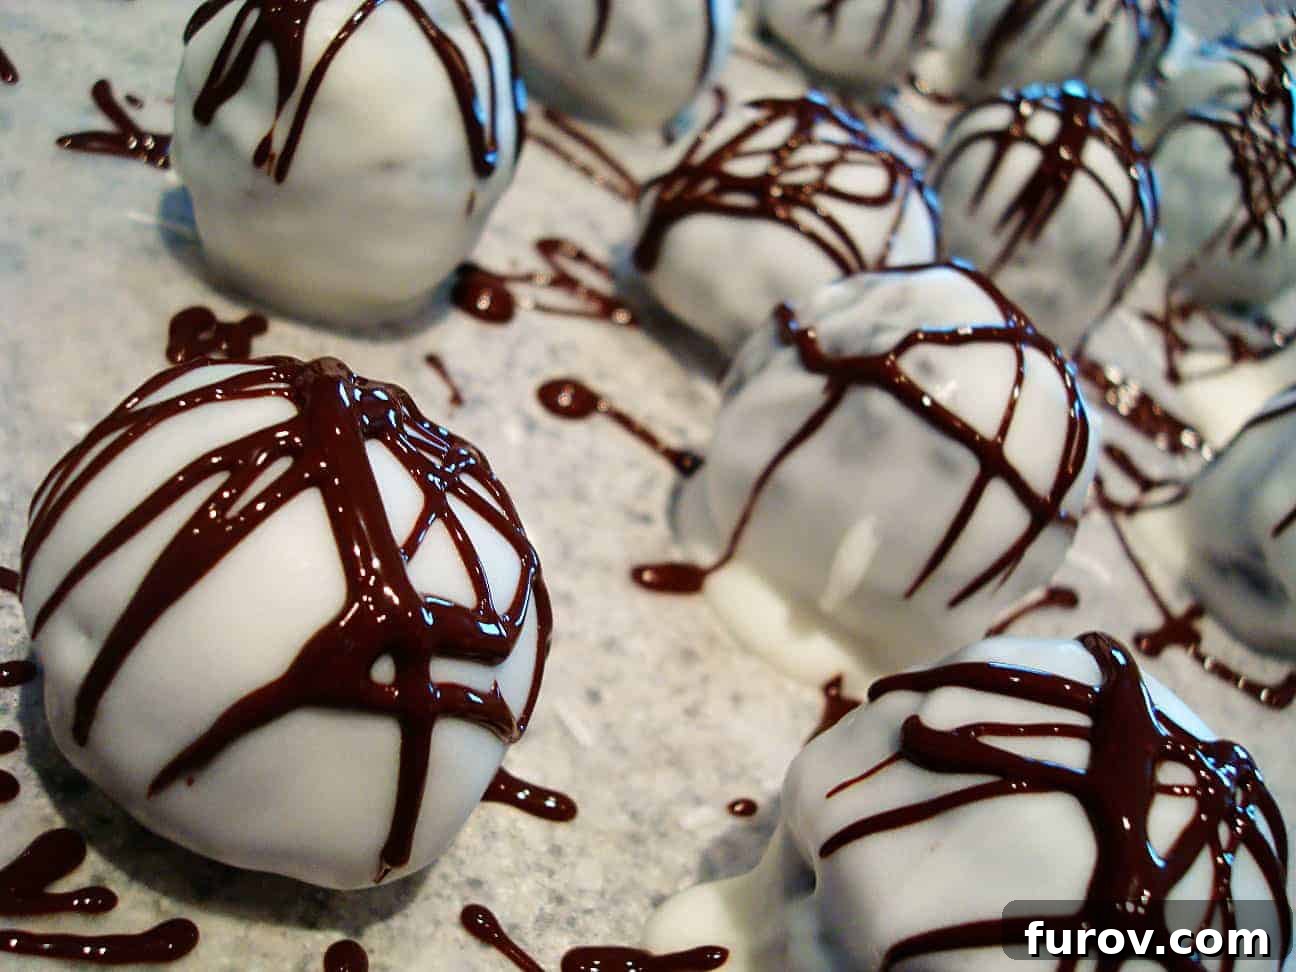

Decadent Oreo Truffles: The Ultimate No-Bake Dessert Sensation
Prepare to tantalize your taste buds with these incredibly easy and utterly decadent Oreo Truffles! Imagine the rich, unmistakable flavor of crushed Oreo cookies, blended seamlessly with smooth, tangy cream cheese, all rolled into perfect, bite-sized balls. Each exquisite truffle is then generously enrobed in a luscious, melted white chocolate coating, creating a delightful snap with every bite. To top it all off, a delicate drizzle of contrasting chocolate adds an elegant touch, making these not just a treat for the palate but also a stunning visual centerpiece. These no-bake wonders are more than just a dessert; they are a celebration of simplicity and extraordinary flavor, guaranteed to impress family and friends at any gathering, holiday party, or as a luxurious personal indulgence. Forget complicated baking; this recipe is designed for maximum deliciousness with minimal effort, allowing you to create impressive confections that everyone will adore!
Why These Oreo Truffles Are Your Next Go-To Dessert
There are countless reasons to fall in love with this Oreo truffle recipe. It’s a dessert that consistently delivers on taste, presentation, and ease, making it a favorite for both novice and experienced home cooks alike. Here’s why these delightful treats should be next on your list:
- Effortlessly Delicious: Requiring no baking, these truffles are incredibly simple to prepare. With just a few staple ingredients and straightforward steps, you can create a professional-looking dessert in your own kitchen.
- Universally Loved Flavor: The classic combination of sweet Oreo cookies and creamy, slightly tart cream cheese is a flavor pairing that appeals to almost everyone. The added white chocolate coating elevates it to pure dessert heaven.
- Versatile for Any Occasion: Whether you’re hosting a holiday party, contributing to a potluck, celebrating a birthday, or simply looking for a sweet pick-me-up, these truffles fit every scenario perfectly. They also make thoughtful, homemade gifts!
- Customization at Your Fingertips: This recipe serves as a fantastic base for endless variations. Easily adapt it with different Oreo flavors, chocolate coatings, or an array of festive toppings to suit any preference or theme.
- Perfect for Making Ahead: These truffles are ideal for meal prep! You can prepare them in advance and store them in the refrigerator, ensuring you have a delicious dessert ready to go whenever a sweet craving or sudden guest arrives.
The Simple Magic Behind Every Bite
The allure of Oreo truffles lies in their ingenious simplicity and the harmonious blend of textures and flavors they offer. At its core, this dessert leverages the iconic appeal of Oreo cookies – not just the cookie part, but the creamy filling too. When these cookies are finely crushed, they transform into a moist, dense crumb that forms the perfect foundation. Blending this with softened cream cheese results in a rich, pliable “dough” that is incredibly easy to work with and bursts with flavor. The cream cheese not only binds the cookie crumbs but also adds a subtle tang that balances the sweetness of the Oreos and the subsequent chocolate coating.
The crucial chilling step is what elevates these simple balls into true truffles. Refrigeration firms up the cookie and cream cheese mixture, ensuring each ball holds its shape impeccably when dipped into the warm, melted chocolate. This creates a sturdy internal structure that contrasts beautifully with the crisp, smooth shell. The white chocolate coating isn’t just for aesthetics; it provides a luxurious outer layer that adds another dimension of sweetness and a satisfying “crack” when bitten into. Finally, the contrasting dark chocolate drizzle is the chef’s kiss, adding both visual appeal and an additional layer of chocolatey goodness. It’s a symphony of textures—creamy, crunchy, and smooth—making each truffle a truly indulgent experience.
Oreo Truffles Recipe
A classic no-bake dessert featuring crushed Oreos and cream cheese, coated in white chocolate.
Yield: 30-36 truffles
Prep Time: Approximately 1 hour (active preparation time)
Chill Time: 4-5 hours (inactive refrigeration time)
Total Time: 5-6 hours (including chilling)
Recipe Rating: 4.75 stars (based on 12 reviews)
Pin Recipe
Ingredients
- 1 (18-ounce) package Oreo cookies (standard size, approximately 36 cookies). Ensure they are crushed into very fine crumbs. Using a food processor is highly recommended for consistency.
- 1 (8-ounce) package cream cheese, softened completely to room temperature. This is crucial for a smooth mixture, free of lumps.
- 1 package Almond Bark (about 24 ounces / 680g) or 12-16 ounces (340-450g) of good quality white melting chocolate wafers or chips.
- 2-4 ounces chocolate chips or chocolate bark (dark or milk chocolate recommended) for the decorative drizzle.
Instructions
- Prepare the Oreo Crumbs: Place the entire package of Oreo cookies, including their creamy filling, into a food processor. Pulse until the cookies are finely crushed into uniform crumbs. If you do not have a food processor, place the cookies in a large, heavy-duty Ziploc bag, seal it, and crush them thoroughly with a rolling pin until no large pieces remain. Transfer the fine Oreo crumbs to a large mixing bowl.
- Combine with Cream Cheese: Add the fully softened cream cheese to the bowl with the Oreo crumbs. The best way to combine these ingredients is by using your clean hands. Mix and knead the mixture together until it is thoroughly combined, forming a thick, uniform, and slightly sticky dough. Ensure there are no visible streaks of cream cheese left. While a stand mixer can be used, your hands offer the best control for achieving the perfect consistency.
- Roll the Truffles: Take small portions of the Oreo mixture, approximately 1 tablespoon each, and roll them gently between your palms to form smooth, uniform 1-inch (2.5 cm) balls. Place the rolled truffles onto a baking sheet or tray lined with parchment paper, leaving a small space between each one.
- Chill Until Firm: This step is absolutely essential. Refrigerate the truffle balls for at least 3-4 hours, or ideally until they are very firm. For a quicker set, you can place them in the freezer for about 1 hour. Proper chilling prevents the truffles from disintegrating or becoming too soft when dipped into the warm chocolate coating.
- Melt the White Chocolate Coating: Once your truffles are sufficiently firm, it’s time to prepare the coating. Melt the white almond bark or white melting chocolate according to the package directions. This can typically be done in a microwave (heating in 30-second intervals, stirring thoroughly after each to prevent burning) or using a double boiler for a more controlled melt. Ensure the chocolate is completely smooth and fluid, without any lumps.
- Dip the Truffles: Using two forks or a specialized chocolate dipping tool, carefully dip each chilled Oreo truffle into the melted white chocolate. Ensure the truffle is fully coated, then lift it out, allowing any excess chocolate to drip back into the bowl. Gently tap the fork against the edge of the bowl to remove extra coating for a cleaner finish.
- Harden the Coating: Place the dipped truffles back onto the parchment-lined baking sheet. Allow the white chocolate coating to set and harden completely. This can happen at room temperature, or you can expedite the process by refrigerating them for about 15-20 minutes.
- Prepare the Chocolate Drizzle: Once the white chocolate coating is dry and firm, melt the chocolate chips or chocolate bark intended for drizzling. If using chocolate chips, you might need to add about ½ to 1 teaspoon of shortening or coconut oil to achieve a smooth, drizzly consistency. Scoop the melted chocolate into a small Ziploc bag. Snip a very tiny corner off the bag to create a small opening.
- Decorate and Final Chill: Drizzle the melted chocolate back and forth over the hardened white chocolate truffles in a decorative pattern. Let the drizzled chocolate set completely. You can let them dry at room temperature or place them back in the refrigerator for another 10-15 minutes until everything is firm.
- Serve Cold: For the best taste and texture, chill the finished truffles for at least 30 minutes before serving. They are most enjoyable when cold and firm.
Notes for Success
Expert Tip for Chocolate: Achieving a smooth, unblemished chocolate coating is key for beautiful truffles. For optimal results, consider learning about how to temper chocolate, which helps prevent blooming and cracking. Additionally, understanding the nuances of dipping items in chocolate like a pro can significantly enhance your final product. For quality and consistent melting, Ghirardelli is a highly recommended brand for both melting wafers and chocolate chips due to its excellent melting properties and rich, consistent flavor.
Nutrition Information (Per Truffle)
Serving Size: 1 Truffle (estimated)
- Calories: 214 kcal
- Carbohydrates: 26 g
- Protein: 1 g
- Fat: 11 g
- Saturated Fat: 8 g
- Cholesterol: 8 mg
- Sodium: 108 mg
- Fiber: 1 g
- Sugar: 21 g
Author: Mel
Course: Dessert | Cuisine: American | Method: No-Bake
Recipe Source: adapted from Bakerella
Essential Tips for Crafting Perfect Oreo Truffles
While the recipe itself is straightforward, a few key tips can elevate your Oreo truffles from good to absolutely perfect:
- Achieve Ultra-Fine Crumbs: The texture of your truffles largely depends on the fineness of your Oreo crumbs. A food processor is invaluable here, ensuring uniform, powdery crumbs. If crushing manually, take your time to break down every piece thoroughly; large chunks will make your truffles lumpy and harder to roll.
- Room Temperature Cream Cheese is Non-Negotiable: This is a critical step! Cold cream cheese will not blend smoothly with the Oreo crumbs, leading to a lumpy, difficult-to-work-with mixture. Allow your cream cheese to soften at room temperature for at least an hour before you begin mixing.
- Embrace the Mess (and Your Hands!): While stand mixers can assist, mixing the Oreo crumbs and cream cheese by hand is often the most effective method. Your hands allow you to feel the consistency and ensure everything is perfectly combined, creating a smooth, pliable dough. Don’t shy away from getting a little messy – it’s worth it for the results!
- Chilling is Your Best Friend: Do not underestimate or shorten the chilling time for the rolled truffle balls. This step is paramount. Well-chilled truffles hold their shape better and won’t melt or fall apart when dipped into the warm chocolate coating. Patience here pays off!
- Mastering Chocolate Melting: Whether using a microwave or a double boiler, melt your chocolate slowly and carefully. Overheating chocolate is the quickest way to ruin it, causing it to seize and become unusable. Stir frequently, especially in the microwave, using short bursts of heat.
- Dipping for a Flawless Finish: For the smoothest coating, use a narrow, deep bowl for your melted chocolate. This allows for full submersion with less chocolate. Utilize two forks or a specialized dipping tool to lift the truffle, gently tapping off excess chocolate before placing it onto parchment paper.
- Proper Storage for Lasting Freshness: Always store your finished Oreo truffles in an airtight container in the refrigerator. This not only maintains their firm texture and prevents them from getting sticky but also keeps them fresh for longer.
Delicious Variations and Customizations for Every Craving
The beauty of Oreo truffles lies in their versatility. While the classic version is undeniably a star, this recipe provides a fantastic canvas for endless creativity. Here are some exciting ways to customize your truffles:
- Explore Different Oreo Flavors: Don’t limit yourself to the original! Experiment with mint Oreos for a refreshing twist, peanut butter Oreos for a nutty depth, golden Oreos for a vanilla-based truffle, or even seasonal flavors like pumpkin spice Oreos during the holidays for unique flavor profiles.
- Alternative Chocolate Coatings: Swap the white chocolate for rich dark chocolate for a more intense flavor, or creamy milk chocolate for a milder sweetness. You can also use colorful candy melts to match specific party themes or holiday palettes.
- Get Creative with Toppings: Before the chocolate coating fully sets, sprinkle your truffles with an array of tempting toppings. Options include finely chopped nuts (pecans, walnuts, pistachios), shredded coconut, festive sprinkles, crushed peppermint candies (perfect for winter holidays), a dusting of cocoa powder, or even edible glitter for extra sparkle.
- Infuse with Extracts or Zests: Add a tiny amount of complementary extract (like peppermint, almond, or a hint of orange zest) to the cream cheese mixture before rolling. Start with a quarter teaspoon and adjust to taste to avoid overpowering the Oreo flavor.
- Adult-Friendly Boozy Bites: For a sophisticated, adult-only treat, mix a tablespoon of your favorite liqueur, such as Kahlua, Bailey’s Irish Cream, or rum, into the cream cheese mixture before rolling the truffles.
Frequently Asked Questions About Oreo Truffles
- Can I use a stand mixer to mix the Oreo and cream cheese?
- Yes, you can absolutely use a stand mixer fitted with the paddle attachment. It will combine the ingredients efficiently. However, many home bakers find that mixing by hand allows for better control over the consistency, ensuring all crumbs are thoroughly incorporated and the mixture doesn’t get overmixed, which can sometimes happen with a machine.
- My truffles are too sticky or soft to roll/dip. What did I do wrong?
- This is a common issue and usually points to one of two things: your cream cheese wasn’t soft enough initially, or the truffles haven’t been chilled for long enough. Ensure your cream cheese is at true room temperature before mixing. If the mixture is still too soft after rolling, simply chill the truffle balls for an extra hour or two in the refrigerator, or even pop them into the freezer for 30-45 minutes to firm them up quickly before dipping.
- How do I prevent the chocolate coating from cracking after it sets?
- Cracking typically occurs due to a significant temperature difference between the cold truffle and the warm melted chocolate, or if the chocolate was overheated and “seized” during melting. To minimize cracking, ensure your truffles are very cold, and your melted chocolate is warm enough to be fluid but not excessively hot. Dipping quickly and allowing excess chocolate to drip off also helps create a thinner, more stable coating. For advanced users, properly tempering your chocolate can greatly improve its stability and reduce cracking.
- How long do Oreo truffles last, and how should I store them?
- Stored in an airtight container in the refrigerator, these delicious truffles will stay fresh and firm for up to 1 to 2 weeks. They are also excellent for freezing! You can freeze them in a single layer in an airtight container for up to 1 month. When ready to enjoy, simply thaw them in the refrigerator for a few hours before serving.
- Can I make these Oreo truffles gluten-free?
- Absolutely! Many brands now offer excellent gluten-free sandwich cookies that closely mimic the taste and texture of traditional Oreos. Simply substitute a package of your favorite gluten-free chocolate sandwich cookies for the regular Oreos in this recipe to create a delicious gluten-free version.
Conclusion: Your New Favorite No-Bake Treat Awaits!
Oreo Truffles are more than just a dessert; they are a delightful experience waiting to happen, offering a perfect blend of convenience and indulgence. With their irresistible combination of crunchy cookies, creamy filling, and a smooth, elegant chocolate coating, they promise a moment of pure bliss with every bite. Easy to make, endlessly customizable, and guaranteed to impress, these no-bake truffles are destined to become a beloved staple in your recipe collection. Whether for special occasions or a simple craving, they deliver extraordinary flavor with minimal fuss. So, gather your ingredients, follow these simple steps, and prepare to create a batch of these heavenly, show-stopping delights!
Explore More Oreo Delights
If you love the magical taste of Oreo cookies as much as we do, you’re in for a treat! Discover other fantastic recipes that feature this iconic cookie, perfect for expanding your dessert repertoire and satisfying your sweet tooth with more no-bake and easy-to-make options.