
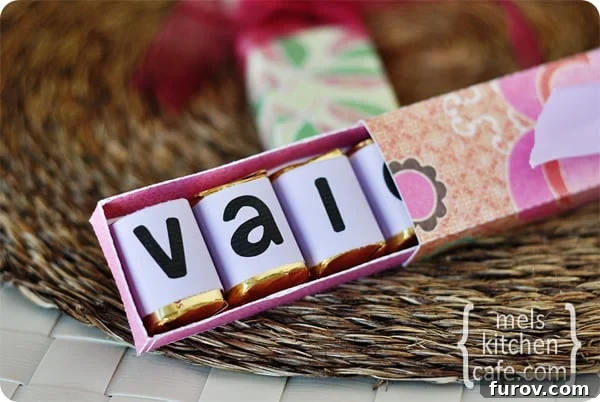
Crafting Joy: The Ultimate Guide to DIY Valentine’s Day Chocolate Boxes
Valentine’s Day is a time for heartfelt gestures, and what could be more personal and charming than a handmade gift? Forget the generic store-bought chocolates; this year, you can create unique, personalized chocolate boxes that are not only easy to assemble but also incredibly thoughtful. These DIY Valentine chocolate boxes offer a delightful way to express appreciation, love, or friendship, making them a truly special present for anyone on your list.
Why Choose a DIY Chocolate Box for Valentine’s Day?
In a world saturated with mass-produced items, a handmade gift stands out. It shows effort, creativity, and a personal touch that store-bought presents often lack. These DIY chocolate boxes are more than just a container; they’re a canvas for your affection. Here’s why they make the perfect Valentine’s Day offering:
- Uniquely Personal: Customize every aspect, from the paper patterns to the message inside, making each box truly one-of-a-kind.
- Budget-Friendly: Crafting these boxes is significantly more economical than purchasing pre-made gourmet chocolate assortments, allowing you to create multiple gifts without breaking the bank.
- Versatile Gifting: While perfect for Valentine’s Day, these boxes are incredibly adaptable. They can be used for birthdays, thank-you gifts, teacher appreciation, party favors, or any occasion where a small, sweet gesture is appropriate.
- Easy and Enjoyable: Despite their sophisticated appearance, these boxes are surprisingly simple to construct, making them a fun and rewarding craft project for adults and even older children with supervision.
- Perfectly Portioned: Designed to hold exactly nine chocolates, they offer a delightful treat without overwhelming the recipient.
More Than Just Valentine’s: Endless Gifting Possibilities
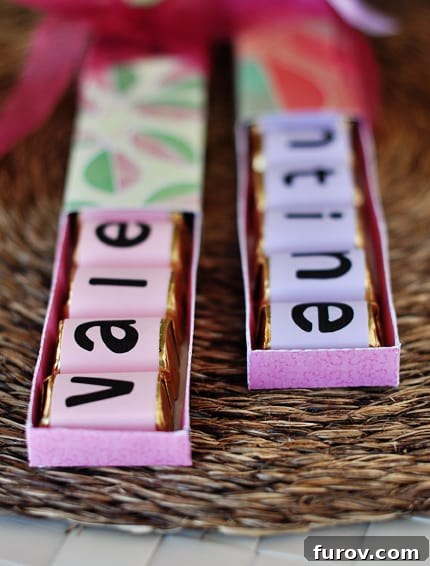
While the focus here is Valentine’s Day, the clever design of these chocolate boxes lends itself to countless other celebrations and tokens of gratitude. Imagine spelling out “THANK_YOU” with chocolates inside for a colleague or friend who went above and beyond. Or perhaps “HAPPY B-DAY” for a birthday surprise. The nine-chocolate capacity is perfect for short, sweet messages. I’ve personally used these boxes for years to convey appreciation, celebrate friendships, and deliver simple happy birthday wishes. Their elegant yet personal nature makes them suitable for a wide range of recipients, from teachers and neighbors to close family members and significant others.
Personalizing Your Valentine’s Day Chocolate Box
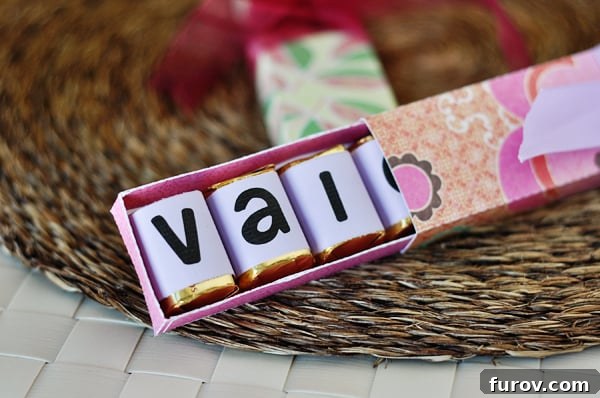
The beauty of these boxes truly shines in their potential for personalization. For Valentine’s Day, the word “VALENTINE” perfectly fits, utilizing all nine chocolate slots. This creates a charming surprise when the recipient slides out the chocolates to reveal the message. Here are some ideas to make your box extra special:
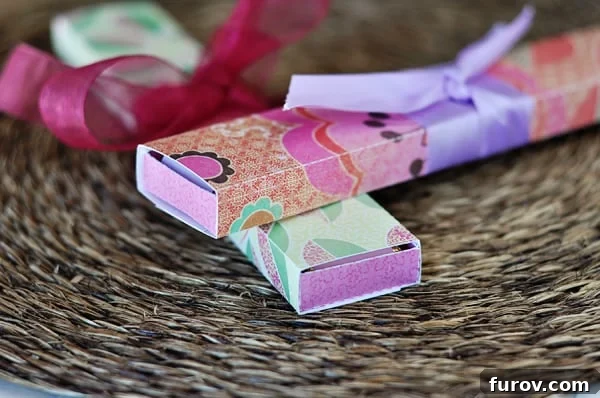
- Ribbon Embellishments: A simple, elegant ribbon tied around the center adds a touch of sophistication. Choose colors that match your paper or the recipient’s favorite hues.
- Hand-Decorated Charm: Let creativity flow! Use markers, glitter, stickers, or even small handmade drawings to adorn the box. This is especially fun if you’re making these with children for their teachers or friends.
- Themed Paper: Select cardstock or decorative paper with Valentine’s themes—hearts, florals, or classic reds and pinks. For other occasions, choose patterns that fit the celebration.
- Interactive Messages: Consider adding a tag to the top that reads “Be My…” allowing the recipient to open the box and find “VALENTINE” spelled out by the chocolates inside. This interactive element adds an extra layer of delight.
- Custom Tags: Attach a small, handwritten tag with a personal note or the recipient’s name.
This year, my boys and I are crafting these for their teachers. My plan is to cut out simple white boxes, providing a blank canvas for them to decorate with stickers and markers, creating truly unique and heartfelt gifts for their educators.
The Essential Ingredient: Hershey’s Nuggets
Let’s be clear: this project is about crafting the perfect *box*, not making chocolates from scratch. As much as I admire homemade confections, I’ll stick to what I do best, and for these boxes, Hershey’s Nuggets are the absolute perfect fit. Their size and shape are ideal for neatly arranging nine chocolates, and their classic appeal is universally loved. So, while this isn’t a recipe, it’s a testament to creative presentation!
Your Step-by-Step DIY Tutorial: Crafting Your Chocolate Box
Ready to get started? This DIY tutorial will walk you through creating these delightful chocolate boxes. It’s truly easy-peasy and promises a fun, unique Valentine’s gift. Get your craft on and let’s begin!
Materials You’ll Need (Beyond the Printables):
- A printer
- Sturdy cardstock (preferably 8.5 x 11 inches)
- Scissors or a craft knife
- Ruler (for scoring clean folds)
- Bone folder (optional, but highly recommended for crisp creases)
- Craft glue or double-sided tape
- Hershey’s Nuggets (9 per box)
- Ribbon, stickers, markers, glitter (for decoration)
Detailed Assembly Instructions:
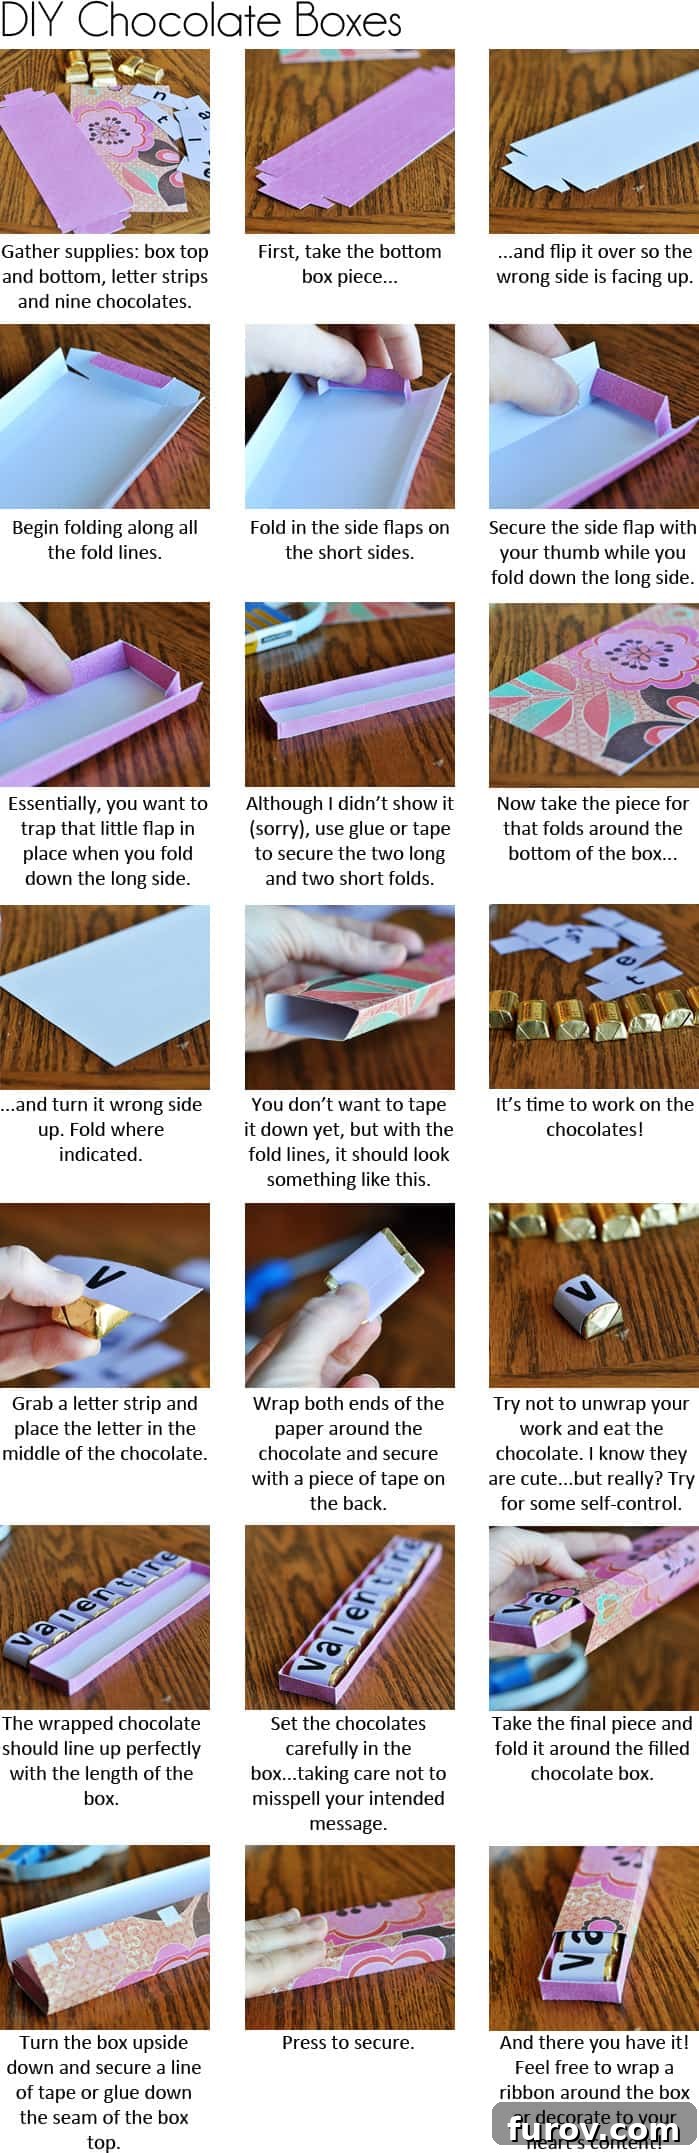
- Download and Print Your Files: Begin by downloading the “Box Bottom,” “Box Top Wrap-A-Round,” and “Letter Strips” files from the links provided below. Print them onto sturdy cardstock.
Important Printing Tip: When printing the PDF files, ensure that the “Page Scaling” option in your printer settings is set to “None” or “Actual Size.” If it’s set to “Fit to Page” or any scaling option, the box dimensions might be altered, and your chocolates won’t fit perfectly. This critical step ensures your box prints at the correct size. - Cut Out the Box Pieces: Carefully cut out the “Box Bottom” and “Box Top Wrap-A-Round” templates along the solid lines. Use sharp scissors or a craft knife and a cutting mat for precise edges.
- Score the Fold Lines: Using a ruler and a bone folder (or the dull side of a craft knife), score along all the dashed lines on both the “Box Bottom” and “Box Top Wrap-A-Round” pieces. Scoring creates clean, professional-looking folds and makes assembly much easier.
- Fold the Box Bottom: Fold all the scored lines inwards. You’ll notice tabs on the sides. Apply a thin line of craft glue or double-sided tape to these tabs. Carefully align and adhere the tabs to the adjacent sides to form the base of your box. Hold firmly until the glue sets, ensuring the box is square and sturdy.
- Assemble the Box Top Wrap-A-Round: The “Box Top Wrap-A-Round” is designed to slide over the bottom. Fold along all scored lines. You’ll have two longer sides and two shorter flaps. The shorter flaps will be glued to the inside of the longer sides to create a seamless sleeve. Apply glue or tape to these flaps, fold, and press firmly to create the top sleeve.
- Prepare the Letter Strips: Print and cut out the “VALENTINE” letter strips. If using the editable Word version, you can customize the font or message before printing.
- Arrange the Chocolates and Letters: Carefully unwrap your nine Hershey’s Nuggets. On each chocolate, place one letter from the “VALENTINE” strip. You can secure these with a tiny dab of glue stick or a small piece of double-sided tape to prevent them from shifting.
- Insert Chocolates into the Box: Once your chocolates are lettered, arrange them neatly inside the “Box Bottom” in the correct order to spell “VALENTINE.”
- Decorate the Box (Optional but Recommended!): Now for the fun part! Adorn your box top with ribbons, stickers, markers, or any other decorative elements you choose. If you’re doing the “Be My…” interactive message, make sure to add that tag to the exterior of the box top.
- Complete Assembly: Gently slide the decorated “Box Top Wrap-A-Round” over the “Box Bottom” containing the chocolates. Ensure it fits snugly but can still be easily removed by the recipient.
Files You’ll Need:
Here are all the downloadable files to help you create your beautiful DIY chocolate boxes. Choose the PDF version for straightforward printing or the Word version if you wish to customize the text.
Letter Strips
PDF Version (not editable) or Word Version (editable)
*The font I used in the Word version is Howser, a free download is available HERE*
Box Bottom
**Important Note! Thanks to Kenzie, a reader, for figuring this out, but if you are printing from the .pdf files make sure that the drop-down box next to the Page Scaling option says “none” – otherwise, the box will print too short to fit the 9 chocolates. Thanks for the help, Kenzie!
PDF Version
Box Top Wrap-A-Round
**Important Note! Thanks to Kenzie, a reader, for figuring this out, but if you are printing from the .pdf files make sure that the drop-down box next to the Page Scaling option says “none” – otherwise, the box will print too short to fit the 9 chocolates. Thanks for the help, Kenzie!
PDF Version
Silhouette SD Files
If you own a Silhouette SD cutting machine, you’re in luck! These files will make the cutting process even faster and more precise.
Click HERE to download the Silhouette SD cut files for the chocolate boxes.
Don’t forget the star of the show! Nine of the delicious Hershey’s Nuggets fit perfectly in each box, making for a truly delightful treat.
Conclusion: A Heartfelt Gift Awaits
These DIY Valentine chocolate boxes are a testament to the power of thoughtful, handmade gifts. They combine simplicity with personalization, creating a memorable present that speaks volumes. Whether for a teacher, a friend, a family member, or that special someone, these boxes are more than just a holder for chocolates; they’re a vessel for your affection and creativity. So gather your materials, follow these easy steps, and craft a gift that will undoubtedly bring a smile to anyone’s face this Valentine’s Day. Happy crafting!