
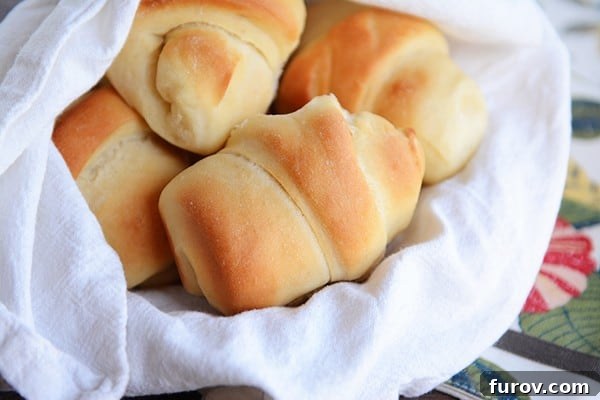
These buttermilk dinner rolls are a revelation – exceptionally light, wonderfully fluffy, and bursting with a rich, nuanced flavor that only real buttermilk can provide. The best part? The dough can be prepared in advance and refrigerated, making them the ultimate convenience for any meal!
Irresistible Make-Ahead Buttermilk Dinner Rolls: Your Guide to Fluffy Perfection
For years, this recipe has been a cherished staple, tucked away in my kitchen archives, yet always resurfacing to steal the spotlight at every dinner table. While the original photos might have been, shall we say, less than appetizing (a humble beginning for such a magnificent roll!), the recipe itself has consistently delivered pure delight. Every single time I bake these tender buttermilk rolls, the sentiment is the same: “Wow, these are truly incredible!” This unanimous appreciation from everyone who tries them signaled it was high time this beloved post received a fresh, updated look and a well-deserved spotlight.
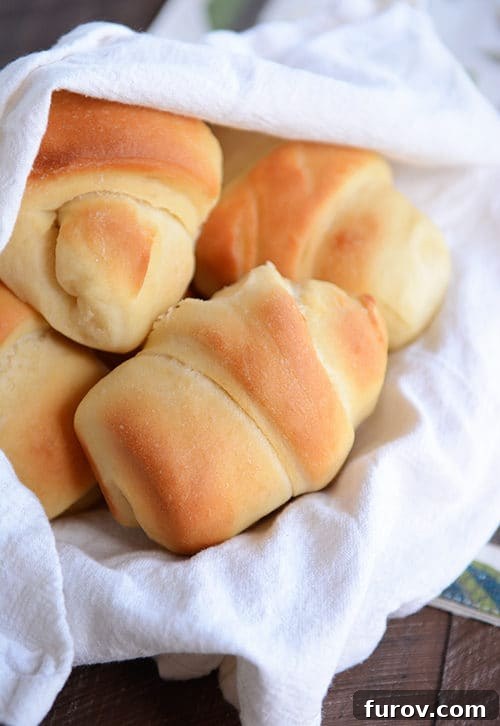
If you’re still searching for that elusive “perfect roll recipe” to simplify your crazy menu planning, especially as holidays or busy weeks approach, then your quest might just end here. These buttermilk dinner rolls aren’t just good; they are truly magnificent. They embody everything you could ever want in a homemade roll: a soft, pillowy interior, a delicate crust, and a depth of flavor that complements any meal, from a simple weeknight dinner to a grand holiday feast.
The Magic of Make-Ahead: Prep Today, Bake Later!
One of the most remarkable features of this recipe – and a true game-changer for busy home bakers – is the incredible make-ahead capability of the dough. Unlike many yeast doughs that require immediate shaping and baking, this buttermilk roll dough can be safely refrigerated for up to seven days. This extended cold ferment isn’t just a convenience; it’s a secret weapon for flavor development. The longer the dough rests in the refrigerator, the more complex and nuanced its taste becomes. When you finally pull it out of the fridge, shape, and bake, the resulting rolls are just as delicious, if not even tastier, than if they had been made from start to finish on the same day.
Imagine the ease of holiday meal preparation: you can prepare the dough days in advance, freeing up precious time on the main event day. Simply take the dough out, shape your rolls, allow them a final rise, and bake. Fresh, warm, homemade rolls with minimal stress – it’s a dream come true for hosts and hostesses, allowing you to focus on other dishes or simply enjoy the company of your guests. This make-ahead functionality also makes these rolls perfect for weekly meal prep, ensuring you always have fresh bread ready to go with soups, stews, or sandwiches throughout the week.
The Secret Ingredient: Why Buttermilk Reigns Supreme
At the heart of these rolls’ exceptional texture and flavor is buttermilk. It is the key ingredient, and frankly, there are no acceptable substitutions if you want to achieve that signature light, tender crumb and incredible taste. Please, pretty please, stick with real buttermilk! While store-bought buttermilk is perfectly fine, making your own homemade buttermilk (using milk and a touch of acid like lemon juice or vinegar) is completely acceptable and works beautifully in this recipe. You can find a comprehensive guide on how to make homemade buttermilk here.
So, what makes buttermilk so magical? Its acidity plays a crucial role in tenderizing the gluten in the flour, resulting in a softer, more delicate roll. This acidity also reacts with the baking soda in the recipe, creating carbon dioxide bubbles that contribute to the rolls’ airy texture and magnificent rise. Beyond the scientific benefits, buttermilk imparts a subtle tang and richness that elevates the flavor profile, making these rolls truly unforgettable. There’s just nothing quite like a pillowy, soft dinner roll, especially one infused with the unique character of buttermilk. Whether it’s for Thanksgiving, Christmas, or just an ordinary Tuesday, if homemade rolls are on the menu, I’m there!
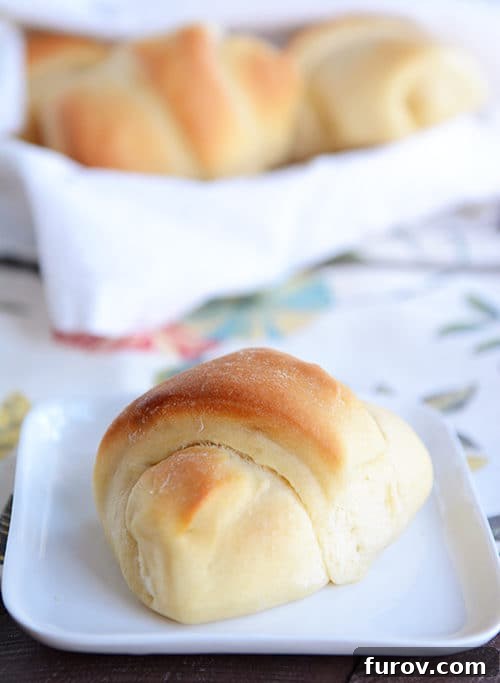
Crafting Your Perfect Rolls: Expert Tips for Success
Achieving bakery-quality dinner rolls at home is entirely within reach, especially with this forgiving make-ahead buttermilk dough. Here are some detailed tips to ensure your rolls turn out perfectly light, fluffy, and delicious every time.
Understanding Your Yeast and Flour
For this recipe, instant yeast is specified, which means it can be mixed directly with the dry ingredients without prior activation. However, ensuring your yeast is fresh and active is paramount for a good rise. If you’re unsure, you can always “proof” a small amount in warm liquid (from the recipe) with a pinch of sugar to see if it becomes foamy. For the flour, the recipe provides a weight measurement, which is always more accurate than volume. Humidity, temperature, and even altitude can affect how much flour your dough needs. Instead of strictly adhering to the volume measurement, rely on the dough’s texture: it should be soft, pliable, and clear the sides of the bowl without being overly sticky.
The Art of Kneading
Kneading develops the gluten in the flour, which gives the rolls their structure and chewiness. Knead the dough for about 7 minutes using a stand mixer until it is smooth and elastic. If kneading by hand, this might take closer to 10-12 minutes. A properly kneaded dough will spring back slowly when poked and will stretch without tearing easily. Don’t over-knead, as this can make the rolls tough, but ensure it’s sufficiently kneaded to build good gluten structure.
Shaping Your Buttermilk Rolls
The beauty of this dough is its versatility in shaping. Whether you prefer elegant cloverleaf rolls, classic round dinner rolls, or delicate crescent shapes, this dough handles them all beautifully. For **cloverleaf rolls**, pinch off small pieces of dough (about 3/4-inch diameter) and place three balls into each greased muffin tin cup. For **crescent rolls**, divide the dough into thirds, roll each section into a 10- or 11-inch circle, brush with melted butter, and cut into 8 or 12 wedges before rolling them up from the wide end. For **classic dinner rolls**, simply roll 2-3 ounce portions of dough into taut balls and arrange them in a greased 9×13-inch baking dish or on a large baking sheet. Uniform shaping ensures even baking.
The Rise to Perfection: Proofing Your Dough
After shaping, the rolls need to rise until doubled in size. This “proofing” stage is critical for light and airy rolls. Cover your shaped rolls with greased plastic wrap to prevent them from drying out. If using freshly made dough, this usually takes about an hour in a warm, draft-free place. For dough taken from the refrigerator, expect a longer rise time, typically 2-3 hours, as the dough needs to warm up and become active again. Patience during this stage is key for maximum fluffiness.
Baking for Golden Glory
Preheat your oven to 375 degrees Fahrenheit. The baking time will vary depending on the shape and size of your rolls. Cloverleaf rolls usually bake in about 11 minutes, crescent rolls in 15-16 minutes, and larger classic dinner rolls in around 16 minutes. The rolls should be golden brown on top and baked through. If you have a kitchen thermometer, the internal temperature should reach about 200-210°F (93-99°C). For an extra touch of flavor and a beautiful sheen, brush the warm rolls with melted butter immediately after removing them from the oven.
Troubleshooting Common Issues
- **Dense Rolls:** Likely due to inactive yeast, insufficient rising time, or not enough buttermilk/too much flour.
- **Dry Rolls:** Often caused by too much flour or over-baking. Ensure the dough is soft and slightly sticky, and avoid baking past golden brown.
- **Sticky Dough:** A bit of stickiness is good, but if it’s unmanageable, gradually add a tablespoon of flour at a time until it’s workable. Remember, too much flour will make rolls dry.
- **No Rise:** Check yeast expiration date, ensure liquids are not too hot (killing the yeast) or too cold (slowing it down too much).
Make-Ahead Buttermilk Dinner Rolls
36 Rolls
3 hrs 20 mins
16 mins
3 hrs 36 mins
Pin Recipe
Ingredients
- 3 cups buttermilk at room temperature
- 3 cups (426 g) flour
- 1 tablespoon instant yeast
- ½ cup (106 g) granulated sugar
- 3 large eggs
- 2 teaspoons salt
- ½ cup oil
- 1 teaspoon baking soda
- 6-7 cups (about 852 to 994 g) flour, more or less
Instructions
- In a large bowl or in the bowl of a stand mixer, mix the buttermilk, 3 cups flour, and yeast together. Cover and let stand at room temperature until puffy and bubbly, 2-3 hours.
- Add the sugar, eggs, salt, oil, and baking soda. Mix well and gradually add the remaining flour until a soft dough is formed that clears the sides of the bowl and is smooth without being overly sticky. Knead for about 7 minutes.
- At this point, you have two options: you can either roll out the dough immediately, or cover and refrigerate it for up to seven days. If refrigerating, place the dough in a large container or bowl, as it will expand slightly even in the cold.
- To use immediately: Shape the dough into your desired rolls. For cloverleaf rolls, place three small (about 3/4-inch diameter) balls into each greased muffin tin. For crescent rolls, divide the dough into thirds, roll each section into a 10- or 11-inch circle, brush with butter, and cut into 8 or 12 sections to roll up. For classic dinner rolls, roll about 2-3 ounces of dough into a taut ball and place them in a 9×13-inch baking dish or on a large baking sheet. Cover the shaped rolls with greased plastic wrap and let rise until doubled in size, approximately an hour or so.
- Bake at 375 degrees F (190°C) until golden brown and baked through. Exact time will depend on the shape: cloverleaf rolls typically take about 11 minutes, crescent rolls about 15-16 minutes, and classic dinner rolls around 16 minutes.
- For refrigerated dough: Pinch off the desired amount and shape your rolls. If the dough is very cold and hard to work with, let it rest, covered, at room temperature for 30-45 minutes before shaping.
- Once shaped (from refrigerated dough), cover with greased plastic wrap and let the rolls rise until doubled in size. This will take longer than fresh dough, typically 2-3 hours, as the chilled dough needs to warm up and become active again. Bake according to the instructions above, based on your chosen shape.
- Remove from the oven and, if desired, brush the tops with melted butter for extra richness and shine.
Notes for Optimal Results
Buttermilk Temperature: Room temperature buttermilk is ideal for yeast activation. If you usually keep your buttermilk refrigerated and forget to take it out in advance, a quick hack is to pour it into a liquid measuring cup and microwave it for about 45 seconds (microwave times vary). Stir well to ensure there are no warm spots. For making your own, refer to this guide for buttermilk substitutions.
Accurate Flour Measurement: When working with yeast doughs, consider the flour amount as a guideline rather than a strict rule, especially if a weight measure isn’t provided. Factors like humidity, temperature, and altitude significantly impact the hydration of dough. I recommend using a kitchen scale for precision, but if using volume, spoon the flour into your measuring cup and level it off. Always judge when to stop adding flour by the dough’s texture and feel—it should be soft, slightly tacky but not overly sticky, and pull cleanly from the sides of the bowl. For more guidance, this tutorial on working with yeast can help you understand what a perfectly floured dough should feel like.
Mel
Bread
American
Bake
Nutrition Information
Serving: 1 Roll,
Calories: 170kcal,
Carbohydrates: 28g,
Protein: 4g,
Fat: 4g,
Saturated Fat: 1g,
Cholesterol: 16mg,
Sodium: 187mg,
Fiber: 1g,
Sugar: 4g
Recommended Products
Recipe Source: This cherished recipe comes from my sister-in-law Erin and her sister, Melanie – a true family treasure that we are delighted to share!
Serving Suggestions & Storage Solutions
These make-ahead buttermilk dinner rolls are incredibly versatile and pair beautifully with a wide array of dishes. Serve them warm with a knob of butter alongside hearty stews, comforting soups, roasted meats, or any holiday meal. They’re also fantastic for soaking up gravies and sauces. Leftover rolls, if there are any, can be stored in an airtight container at room temperature for up to 2-3 days. To reheat and bring them back to their fresh-baked glory, simply warm them gently in the oven at 300°F (150°C) for 5-10 minutes, or a quick zap in the microwave for a few seconds. You can also freeze baked rolls for longer storage; just thaw at room temperature and reheat as desired.
Frequently Asked Questions About Buttermilk Dinner Rolls
Got questions? We’ve got answers to help you master these delightful rolls!
- Can I use active dry yeast instead of instant yeast? Yes, you can. If using active dry yeast, you’ll need to “proof” it first. Dissolve the yeast in a small portion of the room temperature buttermilk (from the recipe) along with a pinch of sugar, and let it sit for 5-10 minutes until foamy before adding it to the rest of the ingredients.
- What if I don’t have buttermilk? As emphasized, buttermilk is truly key for this recipe’s unique tenderness and flavor. While you *can* make a substitute by adding a tablespoon of lemon juice or white vinegar to regular milk and letting it sit for 5 minutes, the texture and taste won’t be quite the same as genuine buttermilk. For the best results, we strongly recommend using actual buttermilk.
- How do I know when the dough is kneaded enough? A well-kneaded dough should be smooth, elastic, and pass the “windowpane test.” To perform this test, pinch off a small piece of dough and gently stretch it between your fingers. If you can stretch it thin enough to see light through it without it tearing, it’s properly kneaded.
- Can I freeze the dough or baked rolls? Yes to both! You can freeze the unshaped dough after its initial rise for up to a month. Thaw it in the refrigerator overnight, then proceed with shaping and rising as usual (it might take slightly longer to rise). Baked and cooled rolls can also be frozen for up to 2-3 months in an airtight freezer bag. Thaw them at room temperature and reheat gently.
- Why didn’t my rolls rise? The most common culprits are inactive yeast (check the expiration date!), liquid that’s too hot (killing the yeast) or too cold (inhibiting yeast activity), or insufficient kneading which prevents gluten development. Ensure your kitchen is warm and draft-free during the rising process.
Explore More Delicious Roll Recipes:
If you’ve fallen in love with homemade rolls, be sure to check out these other fantastic recipes: