

Embark on a culinary adventure and discover the unparalleled satisfaction of crafting your own homemade yogurt. This comprehensive guide provides all the knowledge and tools you need to create creamy, delicious yogurt right in your kitchen!
Mastering Homemade Yogurt: Your Ultimate DIY Guide to Creamy Perfection
In our increasingly fast-paced world, the simple act of creating something from scratch can be incredibly rewarding. For me, living in a charming, albeit remote, northern Minnesota town has reinforced the value of self-sufficiency. Access to a vast array of specialty groceries, like the seventeen varieties of organic Greek yogurt I once took for granted, is no longer a given. This shift has ignited a resourceful spirit within me, inspiring a journey to “make it ourselves or do without.” And when it comes to wholesome, delicious food, making it ourselves is always the preferred option.
This culinary exploration led me to homemade yogurt, a revelation that has transformed our family’s diet. Over the past few months, I’ve perfected a DIY yogurt method that’s become a weekly ritual, much like baking our own bread – a leap I made years ago that now feels like second nature. Once you get the hang of it, this process is surprisingly simple, almost meditative. I’ve streamlined it to a science: start in the late afternoon, let it incubate overnight, and by the next afternoon, you’ll have perfectly strained, devour-worthy yogurt.
Beyond the undeniable deliciousness and superior creaminess that rivals any store-bought variety, making your own yogurt offers significant benefits. For those living in areas with inflated grocery prices, it’s remarkably cost-effective. But more than that, it’s about control – over ingredients, flavor, and texture. This detailed post, complete with a step-by-step tutorial and essential notes gleaned from countless batches, will empower you to create your own exquisite homemade yogurt. So, settle in, read thoroughly, and prepare to elevate your kitchen skills and your palate!
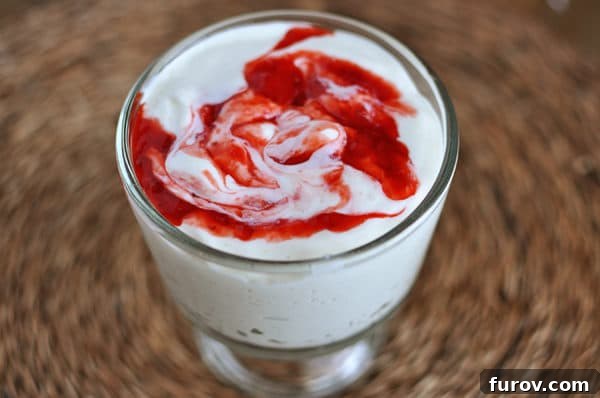
Why Make Your Own Yogurt? The Irresistible Benefits
If you’re still on the fence about diving into the world of homemade yogurt, consider these compelling reasons that will make you a believer:
- Unmatched Taste and Texture: Seriously, this yogurt is a game-changer. It boasts an incredible creaminess and fresh flavor that often surpasses commercial brands, whether you prefer regular or thick Greek-style yogurt. You control the tanginess and richness to suit your taste.
- Significant Cost Savings: Yogurt can be an expensive staple, especially if you consume it regularly or opt for organic and Greek varieties. Making it at home, especially in larger batches, dramatically cuts down on your grocery bill.
- Control Over Ingredients: Ever wished your yogurt had less sugar, no artificial additives, or specific cultures? When you make it yourself, you dictate every ingredient. Choose your preferred milk fat content, decide whether to add dry milk for extra protein, and sweeten it naturally or not at all.
- Reduced Waste: Homemade yogurt typically means less plastic waste from individual containers, contributing to a more sustainable kitchen.
- A Sense of Accomplishment: There’s a deep satisfaction that comes from producing your own food. This DIY project is not just practical; it’s incredibly empowering and enjoyable.
Essential Equipment for Your Yogurt-Making Journey
Before you begin, gather these fundamental tools. Most are likely already in your kitchen, making this an accessible project for almost everyone:
- Slow Cooker: A 5-quart slow cooker is ideal for a gallon of milk, providing consistent, gentle heat. If you don’t have one, a heavy-bottomed saucepan on the stovetop will also work, though it requires more watchful temperature monitoring.
- Food Thermometer: Absolutely crucial! Precision in temperature is key to successful yogurt. You’ll need it to ensure the milk reaches 180°F and then cools to the optimal temperature range of 112-120°F for introducing the starter cultures. An instant-read thermometer is highly recommended.
- Whisk: For smoothly incorporating the powdered milk (if using) and the starter yogurt into the warm milk.
- Large Bowl or Pot: To set your colander over when straining the yogurt.
- Colander or Fine-Mesh Strainer: Essential for separating the whey if you desire thicker, Greek-style yogurt.
- Cheesecloth: Lines your colander or strainer, allowing the whey to drain while keeping the yogurt solids intact. Several layers of cheesecloth work best, or you can use a clean, thin kitchen towel.
- Storage Containers: Airtight containers for storing your finished yogurt in the refrigerator.
The Yogurt Making Process: A Step-by-Step Guide to Perfection
This method focuses on using a slow cooker for ease and consistency, but notes for stovetop preparation are included. Following these steps carefully will lead you to perfectly cultured, creamy homemade yogurt.
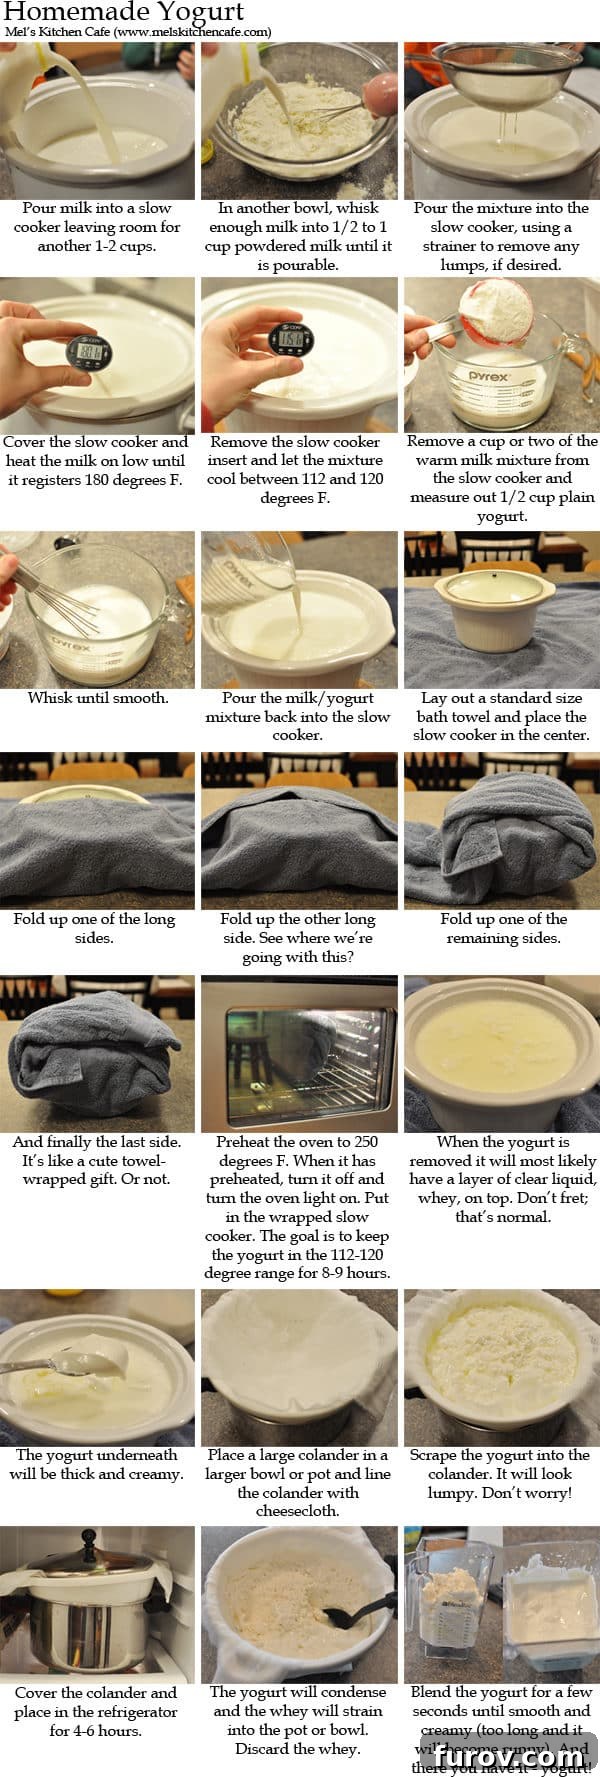
Phase 1: Heating the Milk
- Prepare the Milk: Pour one gallon of milk into your 5-quart slow cooker, ensuring there’s enough room for about 1-2 cups of additional liquid. If you’re using a different sized slow cooker, adjust the milk quantity accordingly.
- Add Dry Milk (Optional but Recommended): For extra protein and a creamier texture, whisk ½ to 1 cup of nonfat dry milk powder into a cup of the fresh milk until smooth. Strain this mixture into the slow cooker to prevent lumps.
- Heat to 180°F: Cover the slow cooker and set it to low heat. Heat the milk until it reaches precisely 180°F. This step, known as pasteurization, kills any undesirable bacteria in the milk and denatures milk proteins, creating a firmer, thicker yogurt. In a slow cooker, this typically takes 2-3 hours, but monitor with your thermometer as heating times vary.
Phase 2: Cooling and Culturing
- Cool the Milk: Once the milk reaches 180°F, remove the slow cooker insert from the heating element. Allow the milk to cool undisturbed to a temperature between 112°F and 120°F. This cooling phase is critical; if the milk is too hot, it will kill the yogurt cultures, and if it’s too cool, the cultures won’t activate. This usually takes 1-2 hours without stirring. Stirring can speed up the cooling process if you’re in a hurry.
- Prepare the Starter: While the milk cools, measure out ½ cup of plain yogurt that contains live and active cultures (look for Lactobacillus bulgaricus and Streptococcus thermophilus on the ingredient list). In a small bowl, whisk about 1 cup of the warm, cooled milk into your starter yogurt until it’s smooth and fully incorporated. This tempers the starter and prevents shocking the cultures.
- Introduce the Starter: Gently whisk the tempered yogurt-milk mixture back into the main batch of cooled milk in the slow cooker. Ensure it’s thoroughly combined.
Phase 3: Incubation
- Insulate for Warmth: Lay out a standard bath towel. Place the covered slow cooker (with the cultured milk inside) in the center of the towel. Fold each side of the towel tightly around the slow cooker, creating a snug, insulated package. This helps maintain a consistent warm temperature during incubation.
- Incubate in the Oven: Preheat your oven to 250°F. Once it reaches temperature, turn the oven off immediately. Turn on the oven light; this small amount of heat helps maintain a stable, warm environment. Place the towel-wrapped slow cooker into the warm oven.
- Wait Patiently: Allow the pot to sit undisturbed in the warm oven for 8-12 hours. The goal is to keep the milk/yogurt mixture within the 112-118°F range for this entire period. This sustained warmth is what allows the live cultures to ferment the lactose in the milk, transforming it into yogurt.
Phase 4: Straining and Finishing
- Check for Set: After 8-12 hours, carefully remove the pot from the oven, unwrap the towel, and lift the lid. The mixture should be thick and set, possibly with a layer of clear liquid (whey) on top. If it’s still too runny, return it to the warm oven for a few more hours. If your oven doesn’t hold warmth well, you might need to briefly reheat it to 250°F and turn it off every couple of hours, but usually, the initial preheat and oven light are sufficient.
- Strain for Thickness (Optional): Line a colander or fine-mesh strainer with several layers of cheesecloth and place it over a large pot or bowl. Pour the cultured yogurt into the lined strainer. The yogurt may appear lumpy, but it will strain perfectly. Whole milk often yields less whey and may not require extensive straining, while lower-fat milk will produce more whey and benefit from longer straining.
- Refrigerate and Drain: Place the entire straining setup (colander over a pot) in the refrigerator and let it drain for 4-6 hours, or even overnight for very thick Greek yogurt. A significant amount of whey will collect in the bottom pot; this can be discarded or saved for other culinary uses (see notes).
- Final Touches: Scrape the strained yogurt from the cheesecloth into a clean bowl or airtight container. Whisk it thoroughly to achieve a smooth consistency. If your yogurt still has small lumps, like cottage cheese, transfer it to a blender and blend for a few seconds. Be careful not to over-blend, as this can make the yogurt too runny.
Your homemade yogurt is now ready! Store it in the refrigerator for 1-2 weeks. Remember to reserve ½ cup of this fresh batch as your starter for your next delicious homemade yogurt. Just ensure you set aside the starter before adding any fruits or sweeteners.
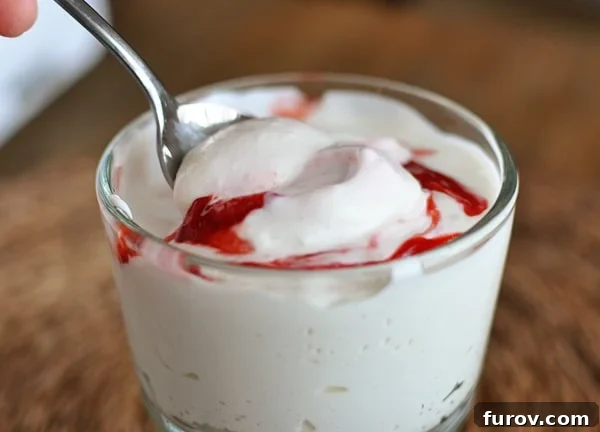
Troubleshooting Common Homemade Yogurt Issues
Even with careful steps, occasionally things don’t go as planned. Here are some common issues and how to resolve them:
- Runny Yogurt:
- Temperature issues: The most common culprit. Milk was too hot (killed cultures) or too cold (cultures didn’t activate) when the starter was added. Ensure your thermometer is accurate.
- Incubation time/temperature: Not enough time in a warm environment, or the temperature dropped too low during incubation. Ensure your oven light is working, or consider the cooler bag method.
- Inactive Starter: Your store-bought starter yogurt might not have had strong enough live cultures. Try a different brand next time.
- Not Strained Enough: If you prefer thick yogurt, it simply needs more time to drain the whey.
- Lumpy Yogurt: A few lumps are normal and can be smoothed out with a whisk or a quick blend. Excessive lumps might indicate the milk was overheated and curdled, or the starter wasn’t fully incorporated.
- Too Tangy: Longer incubation times generally result in tangier yogurt. If you prefer a milder taste, reduce the incubation period slightly (e.g., 8 hours instead of 12).
- Separation (Excessive Whey): Some whey is normal. If you get a lot of separation, it can be due to milk being too hot when the starter was added, or too long an incubation period.
Customizing Your Homemade Yogurt: Flavors and Uses
The beauty of plain homemade yogurt is its versatility. You can enjoy it as is, or easily customize it to your liking:
- Sweeteners: Stir in a drizzle of honey, maple syrup, or a touch of sugar.
- Fruit Syrups: For a vibrant, natural fruit flavor, make a simple fruit syrup. Simmer 2 cups of fresh or frozen fruit (berries work wonderfully), ¼ cup sugar (adjust to taste), 1 tablespoon cornstarch, and 2 teaspoons lemon juice for 5-7 minutes until thickened. This amount is perfect for one batch of yogurt.
- Fresh Fruit: Add sliced bananas, berries, peaches, or any fruit you desire.
- Granola & Nuts: Sprinkle with your favorite granola, chopped nuts, or seeds for added texture and nutrition.
- Savory Applications: Unsweetened homemade yogurt is an excellent substitute for sour cream in savory dishes, dressings, or dips.
DIY Homemade Yogurt Recipe

DIY Homemade Yogurt
4.75 stars (4 ratings)
Pin Recipe
Ingredients
- 1 gallon milk
- ½ to 1 cup nonfat dry milk powder, optional (for added protein and creaminess)
- ½ cup plain yogurt with live and active cultures, ensure it includes Lactobacillus bulgaricus and Streptococcus thermophilus
- Fruit syrup, if desired (recipe in notes)
Instructions
- Pour one gallon of milk into a 5-quart slow cooker, leaving room for 1-2 cups more liquid. Whisk about a cup of milk into ½ to 1 cup powdered milk until smooth; pour this into the slow cooker. Cover and heat on low until milk reaches 180°F (2-3 hours).
- Remove the slow cooker insert and let the milk cool to between 112-120°F (1-2 hours, stirring helps cool faster).
- Measure ½ cup plain yogurt into a small bowl and whisk in about 1 cup of the warm milk. Whisk this mixture back into the main batch of milk in the slow cooker.
- Place the covered slow cooker in the center of a bath towel. Fold the towel around the pot to insulate it completely.
- Preheat oven to 250°F, then turn it off. Turn on the oven light. Place the towel-wrapped slow cooker in the warm oven for 8-12 hours.
- After 8-12 hours, remove the pot. The mixture should be thick and set, possibly with whey on top. If too liquidy, return to the warm oven for longer.
- Line a colander or strainer with cheesecloth and set it over a large pot. Pour the yogurt into the strainer and refrigerate for 4-6 hours to drain whey (longer for Greek yogurt). Discard or save the whey.
- Scrape yogurt into a bowl, whisk to recombine. For extra smoothness, blend briefly in a blender (do not over-blend). Store in the refrigerator for 1-2 weeks. Reserve ½ cup for your next starter.
Notes
- Milk: This recipe works well with 1% milk and above, including 2% and whole milk, which will result in an even creamier yogurt. Skim milk has not been tested.
- Milk Powder: Adding nonfat dry milk powder enhances protein content and creaminess without significantly altering the taste. It can be omitted if preferred.
- Slow Cooker: A 5-quart slow cooker is recommended. Adjust milk quantity for smaller slow cookers; for larger 6-8 quart models, feel free to scale up all ingredients. For stovetop preparation, heat milk in a saucepan, constantly monitoring temperature as it heats much faster. The incubation period in the oven remains the same. A typical schedule is to start heating milk around 4:00 p.m., then put it into the oven to incubate between 10:00-10:30 p.m., and it will be ready to strain between 6:00-8:00 a.m. the next morning.
- Sweetener: This recipe yields plain yogurt, excellent as a sour cream substitute. Sweeten with honey or the fruit syrup recipe provided below.
- Fruit Syrup: To make a simple fruit syrup, simmer 2 cups of fresh or frozen fruit, ¼ cup sugar, 1 tablespoon cornstarch, and 2 teaspoons lemon juice for 5-7 minutes until thickened. Adjust sugar to taste. This makes enough for one batch of yogurt.
- Updated Incubation Method (2/21/2013): Many readers have found success with heating milk on the stovetop for quicker results (requires babysitting the milk to prevent scorching). After cooling and adding the starter, the milk mixture can be portioned into quart-size canning jars with lids and rings. These jars can be incubated using the oven light method, or placed in a thermal cooler bag with 3-4 quart-sized jars filled with very hot water (with lids) for 8-12 hours. Even with whole milk (used for babies), straining for a couple of hours often results in a better, thicker consistency.
- Whey: The liquid separated during straining is whey, a nutritious byproduct. It can be used in smoothies, baking (replacing water or milk in recipes), or to water plants.
Recommended Products
Serving: 1 Cup, Calories: 316kcal, Carbohydrates: 38g, Protein: 26g, Fat: 7g, Saturated Fat: 4g, Cholesterol: 36mg, Sodium: 344mg, Sugar: 39g
Yogurt Inspiration: This homemade yogurt recipe is a culmination of methods inspired by various reliable sources, including Annie’s Eats and Jillee, along with many other community insights.
Making your own yogurt isn’t just about saving money; it’s about reclaiming a piece of your kitchen, connecting with the food you eat, and enjoying a product that’s truly superior. Give it a try, and I promise you’ll wonder why you didn’t start sooner. Welcome to the homemade yogurt club – you’re going to love it!