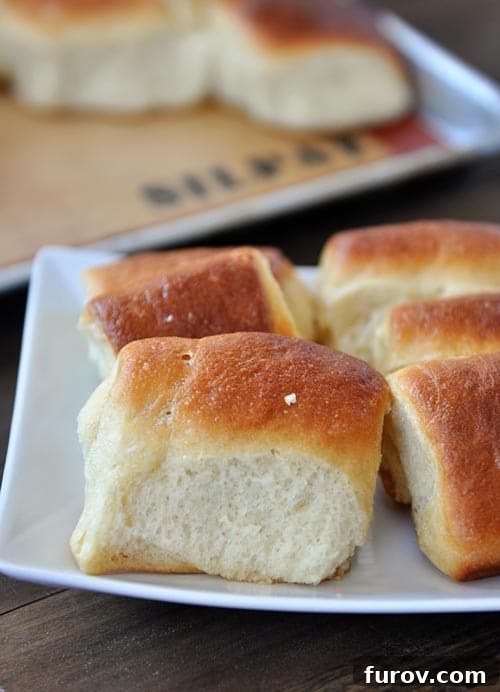
These incredibly fluffy Parker House Rolls are a true delight, offering a soft, tender texture and rich flavor that can be ready in under three hours. Widely recognized as one of the simplest yet most delicious roll recipes, they are perfect for both novice bakers and seasoned pros alike. Experience the joy of baking these irresistible homemade rolls that are sure to impress!
There’s a reason some recipes become family legends, passed down through generations. This particular Parker House roll recipe hails directly from my beloved Aunt Marilyn, whose culinary wisdom is unparalleled. When it comes to baking, her recipes are an absolute guarantee of success, and this one is no exception. She shared this cherished roll recipe with me years ago, and it quickly earned its place among our most requested dishes. Each time, these rolls emerge from the oven as a testament to her excellent taste and simple, effective methods.
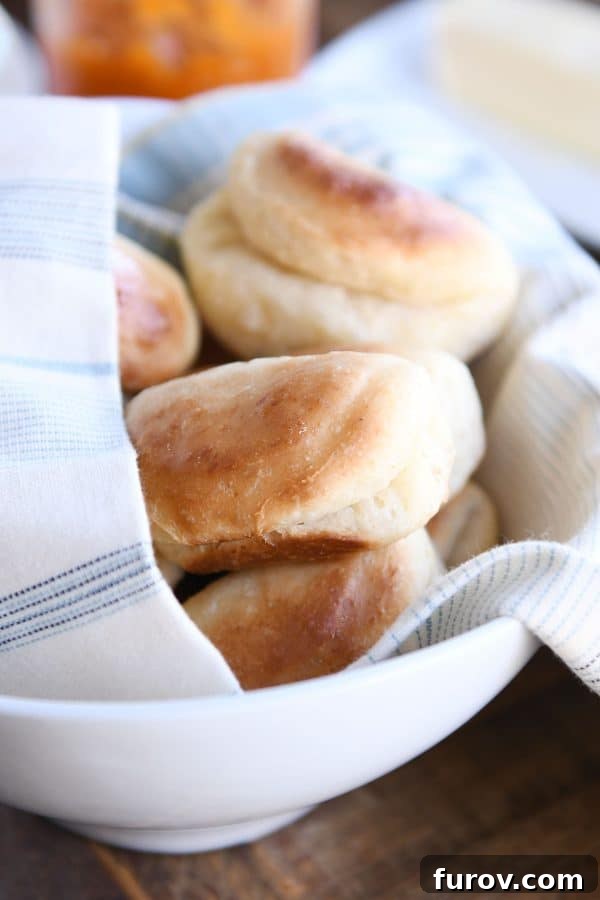
These fluffy Parker House rolls are truly incredible, distinguished by their uniquely soft and tender dough. They possess a hint of sweetness that sets them apart from many other dinner roll varieties we adore. This delicate sweetness makes them exceptionally versatile, pairing beautifully with savory dishes like a smoky ham, a perfectly roasted turkey, or rich salted pork. Moreover, their comforting sweetness makes them an indispensable addition to any Thanksgiving feast, transforming leftover turkey sandwiches into an extraordinary culinary experience. Imagine sinking your teeth into a warm, buttery roll, slightly sweet, perfectly complementing the rich flavors of your holiday meal. This recipe ensures you can create that magic in your own kitchen.
Mastering the Quick and Easy Dough for Fluffy Parker House Rolls
One of the most appealing aspects of this Parker House roll recipe is how remarkably quickly the dough comes together. Forget about complicated mixing techniques or obscure ingredients; this recipe prioritizes simplicity without sacrificing flavor or texture. All the ingredients are combined simultaneously, streamlining the entire process. Simply toss everything into your stand mixer – or mix by hand if preferred – and let it work its magic. The mixer will knead the dough until it achieves a beautifully soft and smooth consistency. You’ll know it’s ready when the dough begins to pull away cleanly from the sides of the bowl, yet still feels wonderfully soft and slightly tacky to the touch. This smooth, pliable dough is the foundation for truly extraordinary, melt-in-your-mouth dinner rolls.
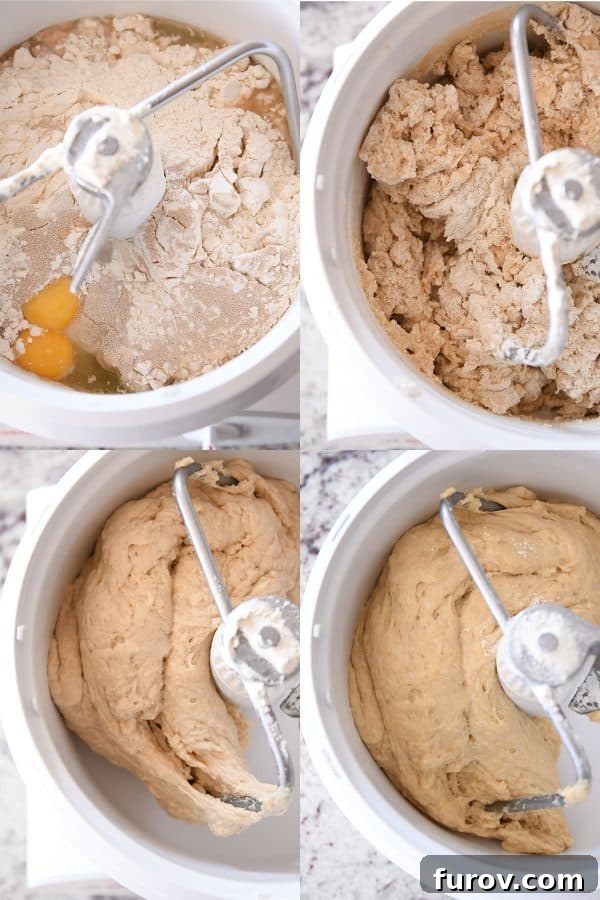
Once your dough is perfectly kneaded, the convenience continues. There’s no need to transfer it to a separate bowl for proofing. The dough can rise right in the mixer bowl, saving you extra cleanup. This initial rise is surprisingly swift, typically taking about an hour. However, remember that dough proofing is sensitive to temperature. If your kitchen is on the cooler side, the dough might require a bit more time to reach its full potential. The key is to watch for visual cues: you want the dough to puff up substantially, ideally doubling in size, indicating that the yeast is active and creating that signature light, airy texture. A well-risen dough is crucial for the ultimate fluffy Parker House rolls.
After the first rise, you have a couple of straightforward options for shaping your rolls. You can either press or roll out the dough to an even thickness and then use a circle cutter to create traditional round rolls. I typically opt for a 3-inch circle cutter, which yields generously sized rolls, but feel free to adjust slightly smaller or larger based on your preference. Alternatively, for a more rustic or simply quicker approach, you can roll the dough into a rectangle and then slice it into strips, resulting in charming square-shaped rolls. Both methods are easy and produce equally delicious results, allowing you to choose the style that best suits your aesthetic or time constraints.
Effortless Shaping: How to Create Classic Parker House Rolls
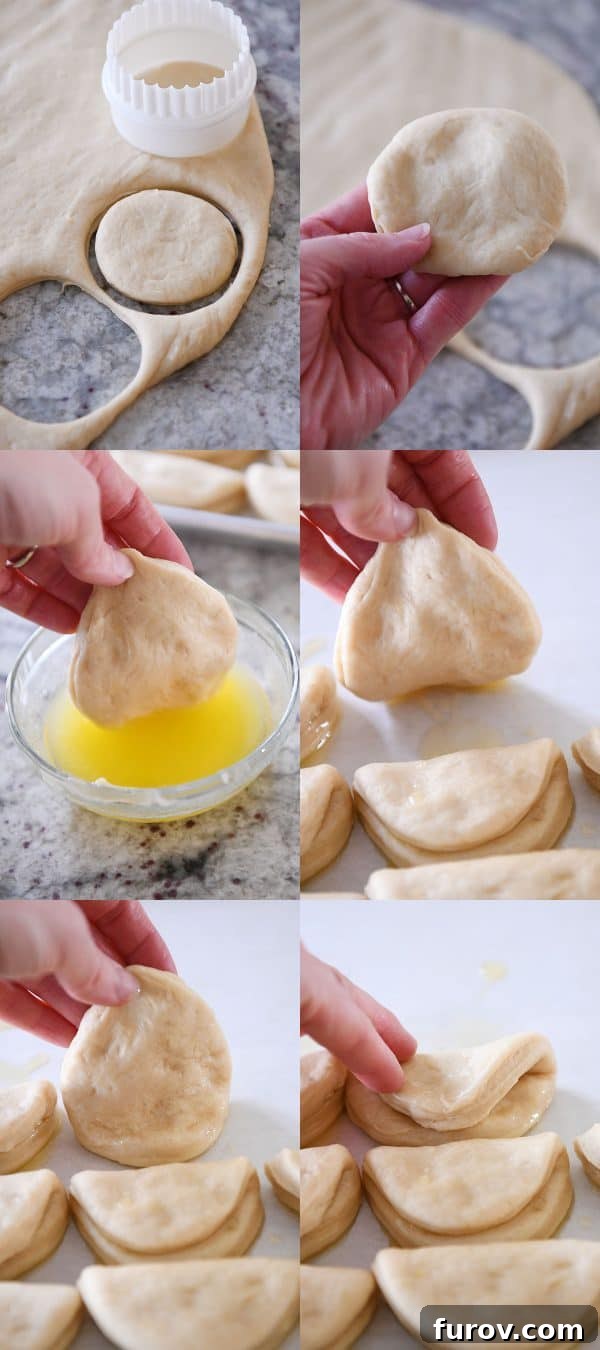
Achieving the iconic folded-over shape of Parker House rolls is much simpler than it might appear. This distinctive shape not only adds to their charm but also creates pockets for butter, making them even more delectable. The process involves a few easy steps. First, you’ll cut your risen dough into your desired shapes, whether round or square. Next, you’ll dip each piece halfway into a pool of melted butter – this is where the magic begins! Then, gently brush the buttered part of the roll forward across your prepared baking sheet. Finally, you’ll flip the roll over and fold it in half, creating that classic crease. This method ensures each roll is infused with rich buttery flavor and sports its characteristic look.
Feeling a little confused by the description? Don’t worry, it’s easier to see than to explain. I’ve included helpful visuals below to guide you through each step of the shaping process. These images will clearly demonstrate how to dip, brush, and fold your dough to perfection, ensuring your homemade Parker House rolls look as fantastic as they taste.
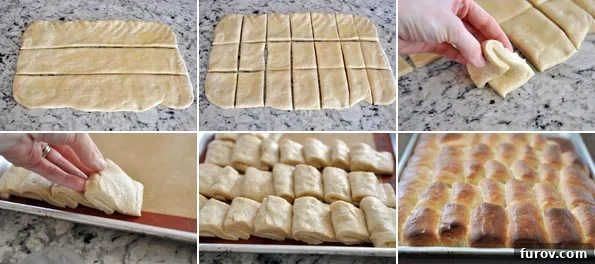
For those who prefer not to use a cookie cutter, or simply want a different look, here’s a quick visual guide on how to transform your dough into square or rectangle Parker House rolls. This method is incredibly efficient and results in beautiful, pull-apart rolls perfect for any occasion. Simply pat your dough into an even rectangle and slice it into uniform strips. The beauty of this technique is its rustic simplicity and the charming irregularity of each hand-cut roll.
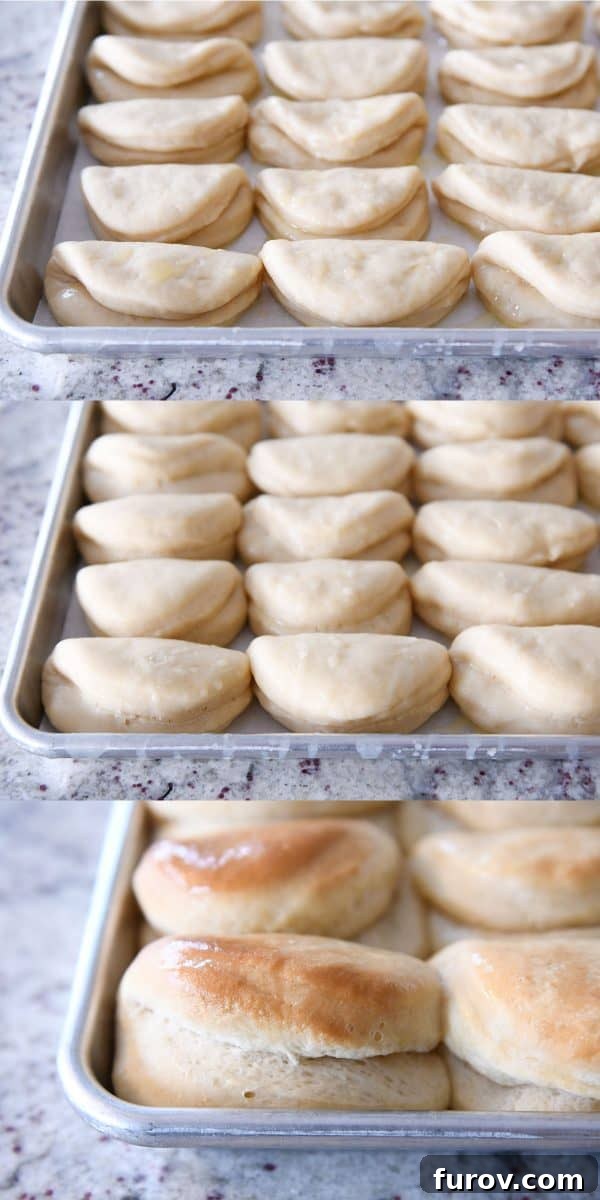
Once shaped, arrange your Parker House rolls fairly close together on the baking sheet. This proximity is intentional; as they rise and bake, they will gently touch and create soft, pull-apart sides, a hallmark of traditional dinner rolls. They’ll undergo a second rise, expanding until they are noticeably puffy and almost touching. Then, they bake until they achieve a gorgeous golden-brown hue, indicating a perfectly cooked exterior and a wonderfully soft interior. The aroma alone will be enough to make your mouth water, signaling that a truly extraordinary batch of homemade fluffy rolls is nearly ready to be enjoyed.
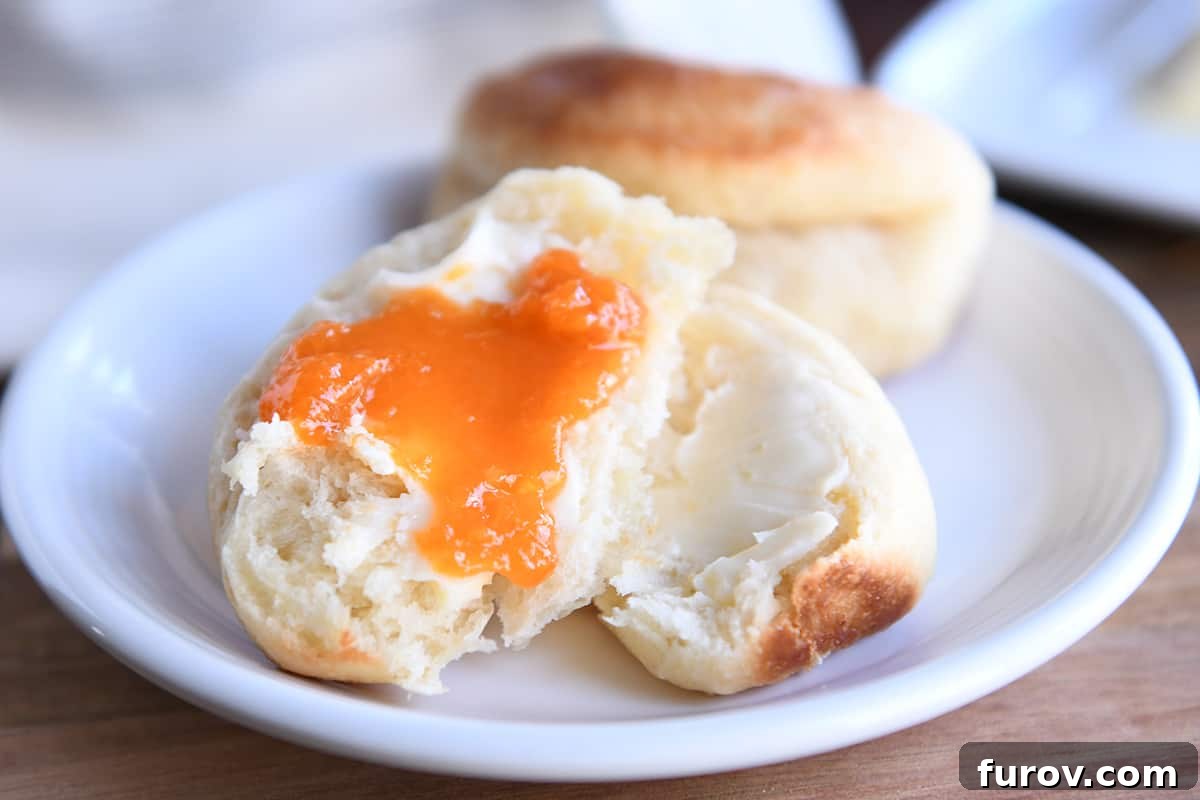
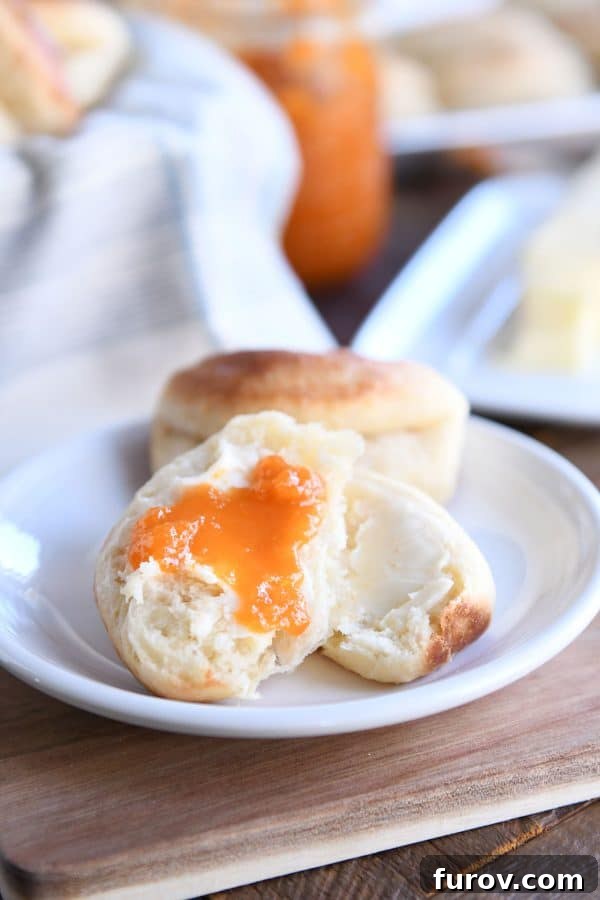
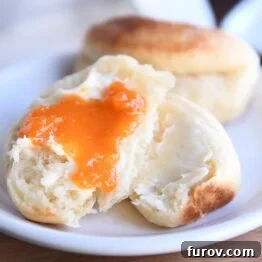
Honestly, these Parker House rolls are among the best I’ve ever made, consistently ranking as one of our family’s most frequently prepared bread recipes. Their ease of preparation makes them absolutely perfect for beginners venturing into the world of yeast baking, yet their incredible taste satisfies even the most discerning palates. The subtle sweetness inherent in this recipe is something we particularly love, making these rolls versatile for various uses. This hint of sweetness perfectly complements savory sandwiches of any kind, from classic deli meats to a hearty Thanksgiving turkey, elevating a simple meal into something special. Beyond sandwiches, they are pure perfection served simply with a smear of salted butter and a dollop of your favorite jam. The combination of fluffy texture, rich butter, and sweet jam is an absolute dream – YUM!
If you prefer a less sweet roll to accompany your meals, you can easily adjust the amount of sugar in the recipe. The beauty of homemade baking is the ability to tailor recipes to your personal taste. However, we find the current level of sweetness to be just right, offering a delightful contrast to savory dishes and a wonderful standalone treat. Experimentation is encouraged to find your perfect balance!
Fluffy Parker House Rolls
30 -40 rolls
1 hr 45 mins
20 mins
2 hrs 5 mins
Pin
Ingredients
- 2 cups hot water
- ½ cup (106 g) granulated sugar
- ½ cup neutral-flavored oil
- 7 to 7 ½ cups (994 to 1065 g) all-purpose flour or bread flour
- 2 large eggs
- 1 ½ teaspoons salt
- 2 tablespoons instant yeast
- ¼ cup (57 g) butter, melted, for shaping rolls
Instructions
-
In the bowl of an electric mixer (or a large mixing bowl if mixing by hand), combine the hot water, granulated sugar, and neutral-flavored oil. Beat these ingredients together until well combined and the sugar is dissolved. Next, add 2 cups of the all-purpose or bread flour, the large eggs, salt, and instant yeast to the mixture. Mix thoroughly until these ingredients are fully incorporated. With your mixer set to a low speed, gradually continue adding the remaining flour, about ½ cup at a time, until a soft dough forms. The dough should clear the sides of the bowl, meaning it pulls away cleanly from the edges, but it will still be somewhat soft and slightly sticky to the touch. Avoid over-kneading at this stage; gentle mixing until the dough comes together is sufficient.
-
Once the dough is formed, cover the mixer bowl tightly with plastic wrap or a clean kitchen towel. Place the bowl in a warm spot in your kitchen and let the dough rise until it has visibly doubled in size. This process typically takes about an hour, but can vary depending on the ambient temperature of your home. A slightly cooler environment might require a little extra time, so always gauge by appearance rather than strict timing.
-
After the first rise, gently punch down the dough to release the air. Divide the dough in half for easier handling. Lightly grease your countertop or a large clean surface with a touch of oil. Take one portion of the dough and, using a rolling pin or your hands, roll or pat it out until it is approximately ¼-inch thick. A slightly thicker dough is acceptable, but ensure it’s not too thick, as very thick rolls might struggle to stay folded during the final rise and baking. Repeat with the second dough portion.
-
Now it’s time to shape your rolls. You have two primary options: Option 1 (Round Rolls): Use a 3-inch circle cutter to cut rounds from the rolled-out dough. Option 2 (Square/Rectangle Rolls): Instead of using a cutter, pat the dough into a neat rectangle and then use a knife or pastry cutter to cut it into uniform strips, creating square or rectangular shapes (refer to the pictures in the post for visual guidance on this method). As you cut, gather any dough scraps, gently press them together, and re-roll as needed. Be aware that rerolled dough can sometimes shrink back when cut or folded; if this occurs, simply let the dough rest for about 15 minutes to relax the gluten before attempting to cut or fold again.
-
Prepare a baking sheet by lightly greasing it or lining it with parchment paper. Take each cut piece of dough and dip it halfway into the melted butter. This butter adds flavor and helps create the signature folded texture. Next, place the buttered side of the roll onto the baking sheet and gently brush it across the surface. Then, flip the dough piece over and fold it in half, creating the classic Parker House roll shape (again, consult the post’s images for a clear demonstration). Arrange the rolls fairly close together on the baking sheet; they will expand as they rise and bake, creating a soft, pull-apart effect. For square or rectangle rolls, a slight overlap is fine.
-
Once all the rolls are shaped and placed on the baking sheet, cover them lightly with plastic wrap or a clean kitchen towel. Allow them to rise for a second time for approximately 30-45 minutes, or until they are noticeably puffy and almost touching each other. Preheat your oven to 375°F (190°C). Bake the rolls for 16-18 minutes, or until they are beautifully golden brown on top and cooked through. For an extra touch of richness and shine, you can brush the tops of the hot rolls with additional melted butter immediately after they come out of the oven, if desired. Serve warm and enjoy your perfectly fluffy Parker House rolls!
Notes
Yeast Tutorial: For those new to working with yeast, or if you’d like a more in-depth understanding of dough consistency, this tutorial on yeast baking can be a valuable resource to help you identify what a perfectly floured and proofed dough should look and feel like. It offers great tips for ensuring your yeast is active and your dough is ready for its delicious transformation.
Recipe Updates: This recipe has been thoughtfully updated to enhance its flavor and reliability. Specifically, the salt content has been increased from 1 teaspoon to 1½ teaspoons, which helps to balance the sweetness and deepen the overall taste profile of the rolls. Additionally, the flour amount was adjusted slightly upwards, as I consistently found myself using a bit more to achieve the perfect dough consistency. If you prefer a less sweet roll, feel free to slightly decrease the amount of granulated sugar, tailoring the recipe to your dietary preferences without compromising the delicious fluffy texture.
Mel
Bread
American
Bake
Recipe Source: from Aunt Marilyn
Recipe originally posted on August 2009; updated November 2019 with new pictures, recipe updates, etc.
There’s nothing quite like the comforting aroma and tender bite of freshly baked homemade rolls. These fluffy Parker House rolls embody the best of traditional baking with an approachable method that makes them a go-to recipe for any occasion. Whether it’s a weeknight dinner, a special holiday gathering, or simply a craving for warm bread, these rolls deliver every time. Their rich, slightly sweet flavor and incredibly soft texture make them irresistible on their own, or as the perfect accompaniment to your favorite savory meals.
Baking homemade bread might seem daunting, but this recipe for Parker House rolls simplifies the process, ensuring a successful outcome even for those new to yeast baking. The quick rise time means you can enjoy these delightful rolls without a full day of waiting, making them ideal for spontaneous baking adventures. Embrace the joy of creating something truly delicious from scratch, and watch as these fluffy, golden-brown rolls become a beloved staple in your kitchen. From dipping in butter to slathering with jam, every bite is a little piece of heaven. Give this easy Parker House roll recipe a try and discover your new favorite homemade dinner roll!