
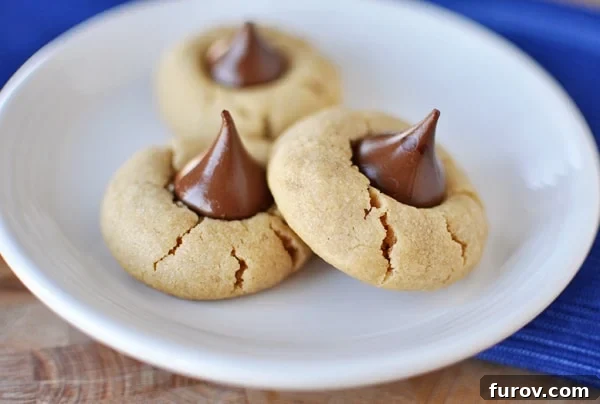
Experience the ultimate joy of baking with these remarkable Peanut Blossom Cookies, featuring an intense peanut flavor, a delightfully chewy and sturdy base, and the iconic Hershey’s Kiss that perfectly crowns each treat.
For years, I’d been browsing through my extensive cookie recipe collection, and it genuinely surprised me to realize that one of the most beloved and quintessential holiday cookies was missing: the classic Peanut Blossom. You know, those irresistible peanut butter cookies with a chocolate Kiss nestled right in the center? They’re a nostalgic favorite, evoking cherished memories of childhood baking and festive gatherings.
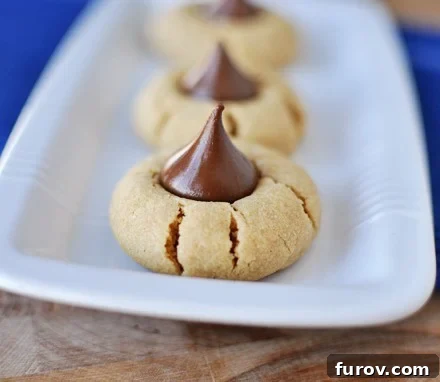
Growing up, these “babies” were consistently among my all-time favorite cookies. They’ve been a staple in American homes for what feels like forever, particularly around the holidays. My initial thought was that finding a reliable, fantastic recipe would be a breeze. After all, how complicated could a peanut butter cookie be? Simple, right? Oh, how wrong I was.
The Quest for the Perfect Peanut Blossom Cookie: A Journey of Delicious Frustration
My quest for the ultimate Peanut Blossom Cookie recipe turned into an unexpected odyssey filled with culinary misadventures. It was a humbling experience, to say the least. I systematically tried no less than four popular recipes, each promising perfection, and each delivering varying degrees of disappointment. One batch spread out flat and thin, losing its shape entirely. Another turned out dry, crumbly, and tragically tasteless, lacking the rich peanut punch I craved. A third attempt resulted in completely lacy, burned edges, a testament to its delicate nature and my dwindling patience.
The fourth try? Well, I’ll sheepishly admit that one was probably my fault. I had run out of peanut butter (a cardinal sin for a baker!) and, in a moment of desperation, decided to substitute Nutella. While Nutella is absolutely divine on its own and a pantry hero in many other contexts, it proved to be a terrible stand-in for peanut butter in this specific cookie. The flavor profile was off, the texture was wrong, and the resulting cookie bore little resemblance to the classic Peanut Blossom I was determined to recreate. Each failure chipped away at my confidence, making me question my baking skills. Was it me, or were these recipes just not up to par?
After these numerous setbacks and moments of despair in the kitchen, I finally turned to a trusted source: America’s Test Kitchen. I had come across their version before but had always shied away from it due to one particular step: the extra effort of grinding roasted peanuts. In my pursuit of simplicity, I’d mistakenly equated “easy” with “best.” This time, however, I was ready to face any challenge to achieve peanut blossom perfection.
The Secret Ingredient: Elevating the Peanut Flavor
I genuinely wish I had been less hesitant and tried their recipe sooner. Overcoming my initial laziness, I bit the bullet and incorporated that seemingly “extra” step—the 3-second grind of the roasted peanuts—into my baking routine. The result? Nothing short of miraculous. These cookies were, without exaggeration, the best Peanut Blossom Cookies I had ever tasted. No lies, no hyperbole. The difference was astounding, transforming a merely good cookie into an extraordinary one.
The secret truly lies in that intense peanut flavor, achieved by grinding roasted peanuts with a portion of the flour. This ingenious technique amplifies the nutty essence, creating a depth of flavor that traditional recipes often miss. Coupled with a delightful chewy yet sturdy cookie base that holds its shape beautifully, and topped with that iconic, adorable, and utterly delicious Hershey’s Kiss, these cookies are a symphony of texture and taste. What’s not to love about such a perfectly balanced, deeply satisfying treat?
After such a challenging quest, I am incredibly happy to have finally conquered the Peanut Blossom Cookie. Knowing I have this go-to recipe safely nestled in my archives allows me to sleep better at night. I hope it brings you the same joy and relief in your baking endeavors.
Expert Tips for Peanut Blossom Perfection
Achieving the perfect Peanut Blossom Cookie involves a few key steps and considerations that can elevate your baking from good to truly exceptional. Follow these tips to ensure your cookies are a resounding success every time:
- Don’t Skimp on the Peanuts: The recipe’s innovation of grinding roasted peanuts with flour is a game-changer. This step infuses the dough with an unparalleled depth of nutty flavor, far beyond what peanut butter alone can provide. Use good quality roasted, salted peanuts for the best results.
- Butter Temperature Matters: Ensure your butter is softened but still cool. This optimal temperature allows it to cream properly with the sugars, creating a light and fluffy base without being too warm, which can lead to greasy, spreading cookies.
- Chill the Dough: This is a crucial step! Refrigerating the dough for at least 30 minutes makes it much easier to handle and prevents the cookies from spreading too much during baking. A stiffer dough yields a chewier cookie. If your kitchen is warm, you might need to chill it longer.
- Uniform Balls for Even Baking: Rolling the dough into uniform 1-inch balls ensures consistent baking. Use a small cookie scoop if you have one, or just eyeball it carefully. Space them about 2 inches apart on your baking sheets to allow for slight spreading.
- Timing the Kiss: The moment you press the Hershey’s Kiss into the center of each cookie is critical. Remove the cookies from the oven when the outsides are just set and the edges are barely beginning to crack, typically after 9-10 minutes. Immediately press the Kisses in. This allows the residual heat of the cookie to soften the chocolate just enough to adhere without fully melting into a messy puddle.
- Post-Kiss Bake: A quick return to the oven for 1-2 minutes after adding the Kisses helps them set slightly and gives the cookies a beautiful golden hue, ensuring the chocolate is glistening but not completely liquefied.
- Cooling is Key: Allow the cookies to cool on the baking sheet for 3-4 minutes before transferring them to a wire rack to cool completely. This helps them firm up and prevents breakage, especially important with the soft chocolate Kiss.
Creative Variations and Customization Ideas
While the classic Peanut Blossom is perfect as is, there’s always room for a little creativity! Here are some ideas to customize your next batch:
- Different Kisses: Experiment with various Hershey’s Kiss flavors! Caramel Kisses, Cookies ‘n’ Creme Kisses, Mint Kisses, or even special holiday-themed Kisses can add a delightful twist.
- Nut Butter Alternatives: If you’re feeling adventurous or catering to dietary needs, try substituting almond butter or cashew butter for the peanut butter. Note that textures might vary slightly, and you might need to adjust flour quantities marginally.
- Add Sprinkles: Before baking, roll the dough balls in colorful sprinkles or coarse sugar for added visual appeal and a little extra crunch, especially festive for holidays.
- Chocolate Drizzle: Once the cookies are completely cooled, you can drizzle extra melted chocolate (dark, milk, or white) over them for an extra layer of indulgence and decoration.
- Spice It Up: A pinch of cinnamon or nutmeg in the dry ingredients can add a subtle warmth to the peanut flavor.
- Gluten-Free Option: With a reliable gluten-free all-purpose flour blend (one that includes xanthan gum), you can often adapt this recipe for a gluten-free version. Ensure your peanuts and other ingredients are certified gluten-free.
One Year Ago: Buttery Cornmeal Crescent Rolls
Two Years Ago: Schoolyard Cupcakes
Three Years Ago: Garlic Chicken Pasta with Spinach
Peanut Blossom Cookies
Yield: 24 Cookies (2-3 dozen depending on size)
Prep Time: 20 mins
Cook Time: 10 mins
Total Time: 30 mins
Average Rating: 4.57 stars (39 ratings)
Pin Recipe
Ingredients
- 2 ¾ cups (391 g) all-purpose flour
- ½ teaspoon salt
- ½ teaspoon baking soda
- ½ teaspoon baking powder
- 1 cup roasted salted peanuts
- 1 cup (227 g) butter, softened but still cool
- ¾ cup (159 g) packed dark brown sugar
- ¾ cup (159 g) granulated sugar
- 1 cup (255 g) creamy peanut butter
- 2 large eggs
- 2 teaspoons vanilla extract
- 1-2 bags of Hershey’s Chocolate Kisses, any variety, wrappers removed
Instructions
- Preheat the oven to 350 degrees F (175 C) and ensure an oven rack is positioned in the middle. Line two aluminum rimmed baking sheets with parchment paper, Silpat liners, or lightly grease with cooking spray. Set aside.
- In a medium bowl, whisk together 1 ¾ cups flour, salt, baking soda, and baking powder. In a food processor or blender, process the remaining 1 cup flour and 1 cup peanuts together until finely ground and well-combined. Stir this peanut flour mixture into the bowl with the other dry ingredients.
- In a large bowl, beat the butter and sugars together with an electric mixer (hand mixer or stand mixer) until the mixture is light and fluffy, about 1-2 minutes. Add the peanut butter and continue to beat until thoroughly combined. Add the eggs, one at a time, beating well after each addition until fully incorporated (about 30 seconds per egg). Then, beat in the vanilla extract, scraping down the sides of the bowl as needed. Reduce the mixer speed to low and gradually add the flour mixture in two batches, mixing just until incorporated. Cover the bowl and refrigerate the dough for about 30 minutes until it is fairly stiff.
- Roll the chilled dough into 1-inch balls and space them 2 inches apart on the prepared baking sheets. Bake the cookies for 9-10 minutes, or until the outsides are set and the edges are just barely beginning to crack. Working quickly, remove the sheet from the oven and press one Hershey’s Kiss into the center of each cookie. Return the baking sheet to the oven and bake for another 1-2 minutes, until the cookies are lightly golden and the Hershey’s Kiss is glistening (but crucially, not completely melted into a puddle).
- Let the cookies cool on the baking sheet for 3-4 minutes before carefully removing them to a cooling rack to cool completely. Repeat with any remaining dough and Hershey’s Kisses.
Notes
Cookie Size: The original recipe suggests a yield of 4-8 dozen cookies. However, my batches typically result in about 30 cookies, which I find to be a perfect, more substantial size. If you prefer smaller cookies, you can make the dough balls smaller and will, of course, yield more cookies and require additional Hershey’s Kisses.
Author: Mel
Course: Dessert
Cuisine: American
Method: Bake
Nutrition Facts
Serving: 1 Cookie
Calories: 298kcal
Carbohydrates: 30g
Protein: 7g
Fat: 18g
Saturated Fat: 7g
Cholesterol: 37mg
Sodium: 210mg
Fiber: 2g
Sugar: 17g
Recommended Products
Recipe Source: Adapted slightly from America’s Test Kitchen