
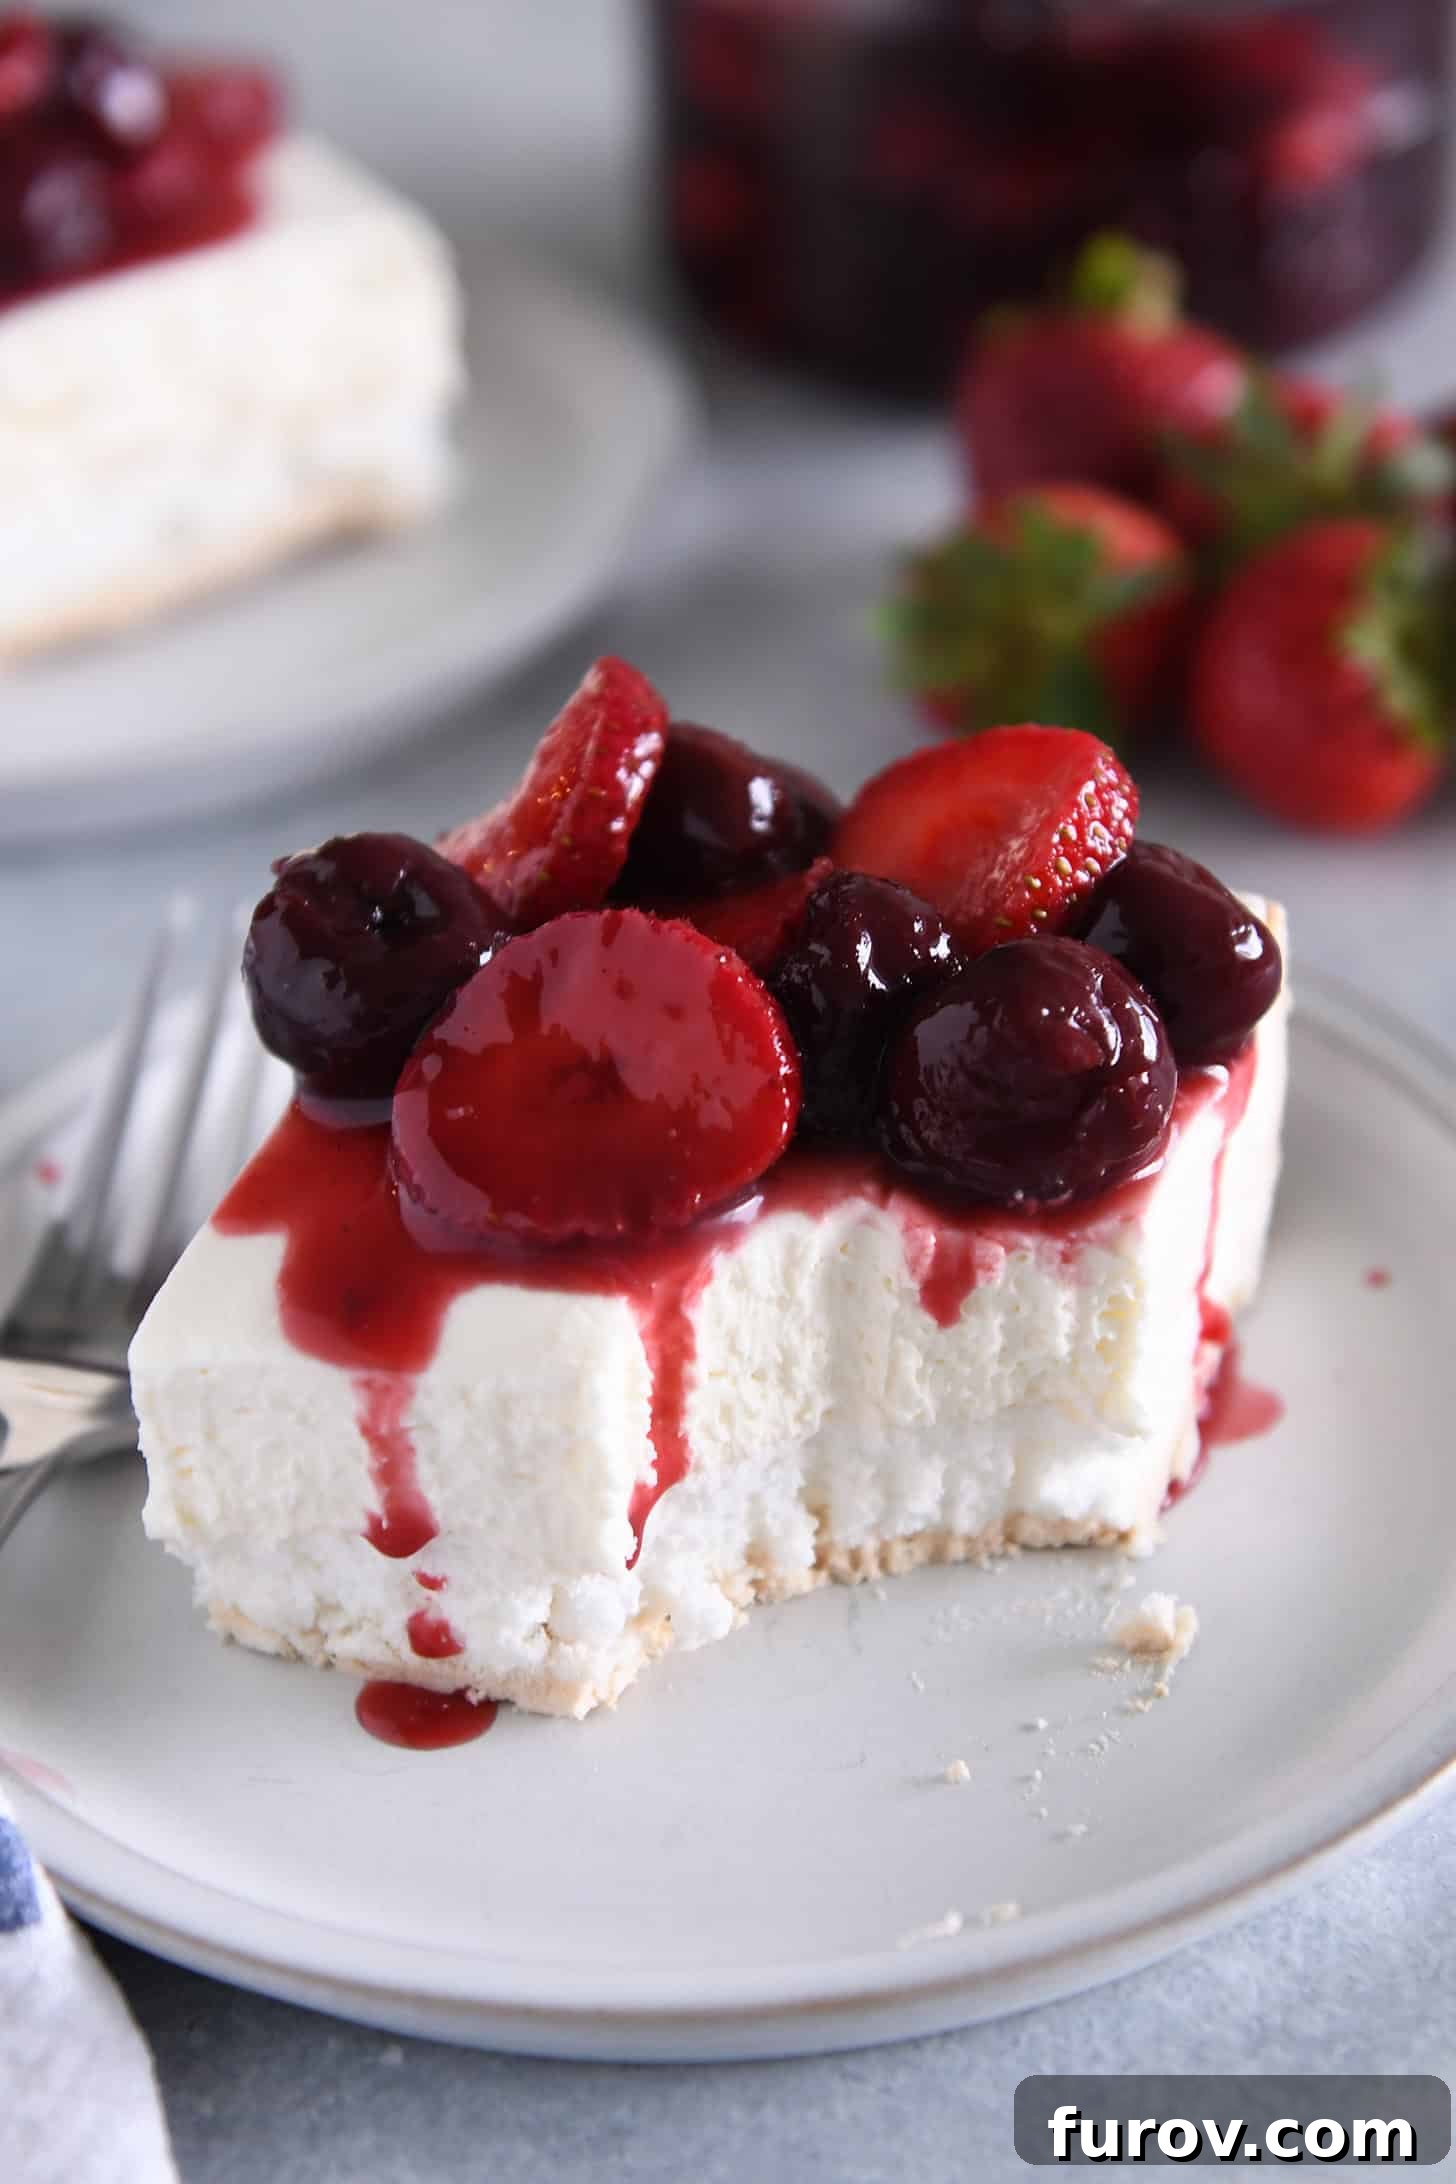
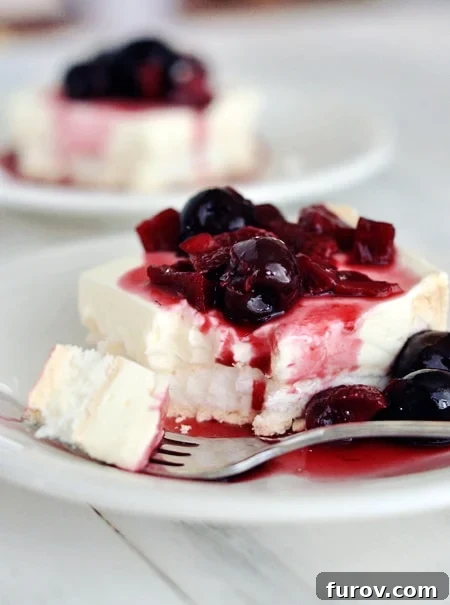
Luscious, creamy cheesecake is layered on a sweet, light-as-air meringue base and crowned with vibrant berries in this exquisite “Berries on a Cloud” dessert. It’s a truly incredible culinary experience that promises to delight every palate!
This refreshing and uniquely textured dessert has quickly become one of our most beloved treats. While it perfectly captures the essence of summer, its delightful flavors make it a fantastic choice any time of the year. For cheesecake enthusiasts and anyone seeking a show-stopping yet surprisingly simple dessert, this “Berries on a Cloud” recipe is an absolute dream come true. Its harmonious blend of crisp, soft, and creamy textures, combined with the bright zest of fresh fruit, ensures it stands out on any dessert table.
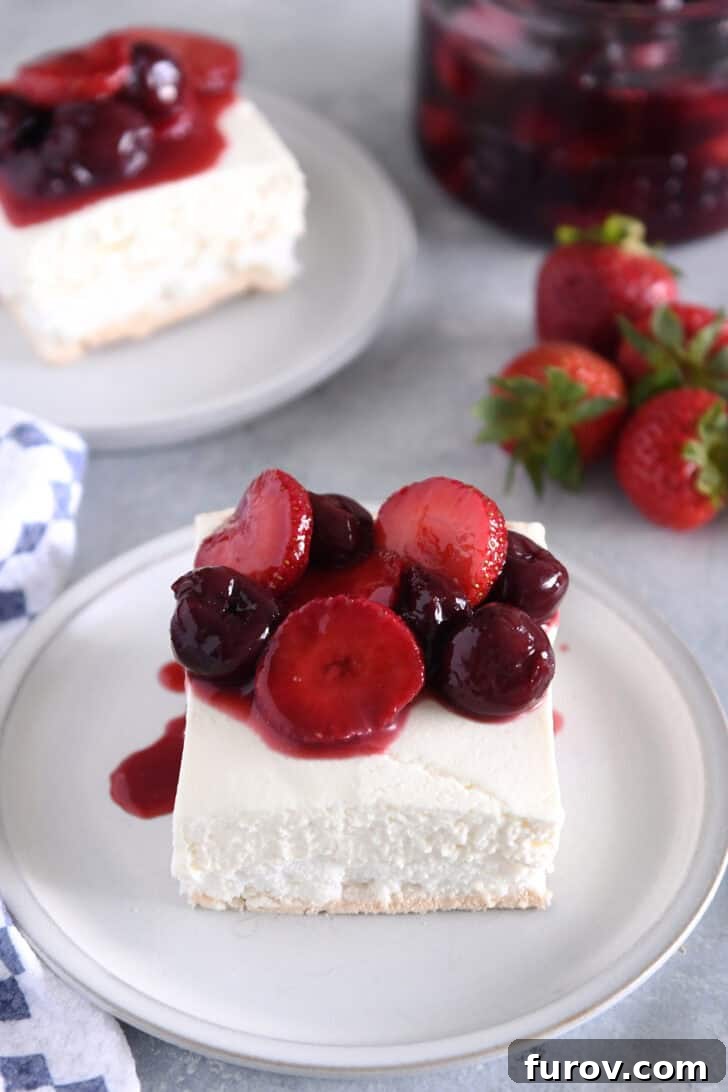
How to Master the Meringue: Your Cloud-Like Base
The very heart of this heavenly dessert, the “cloud,” is its soft, ethereal meringue layer. Achieving a perfect meringue at home might seem like a challenge for some, but with a few key tips and precise steps, it’s remarkably straightforward. This delicate, airy base is absolutely essential for the dessert’s unique textural symphony, providing a light, crisp counterpoint to the rich, creamy cheesecake. It’s what gives the dessert its signature melt-in-your-mouth quality and irresistible charm.
Crafting the Perfect Meringue: A Step-by-Step Guide
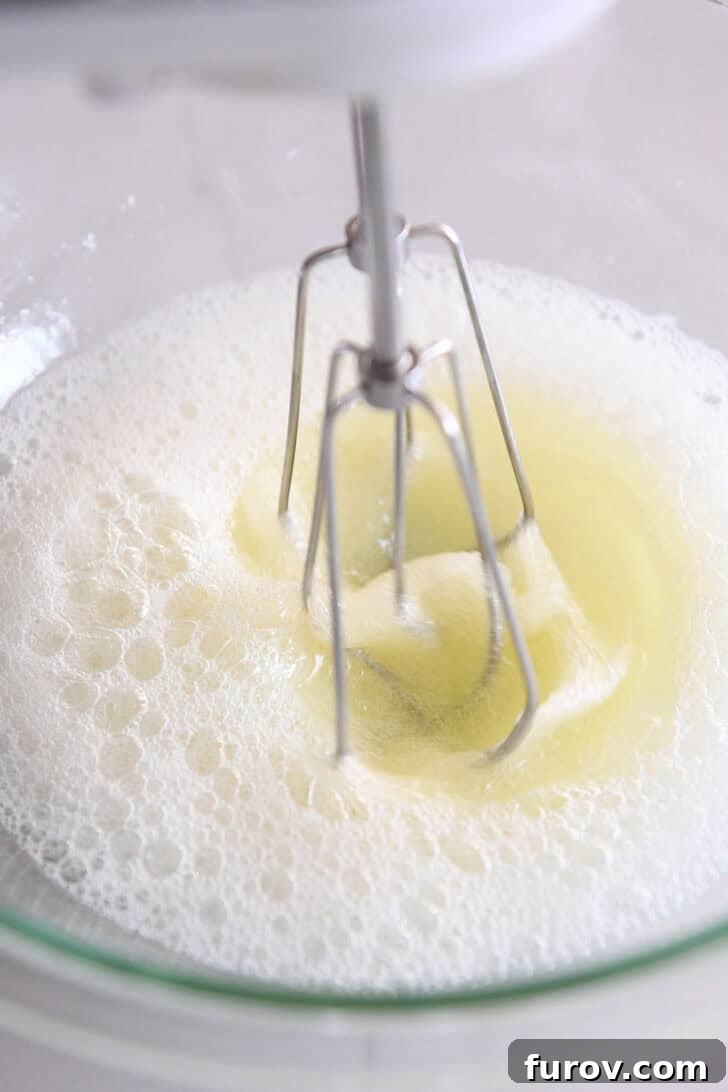
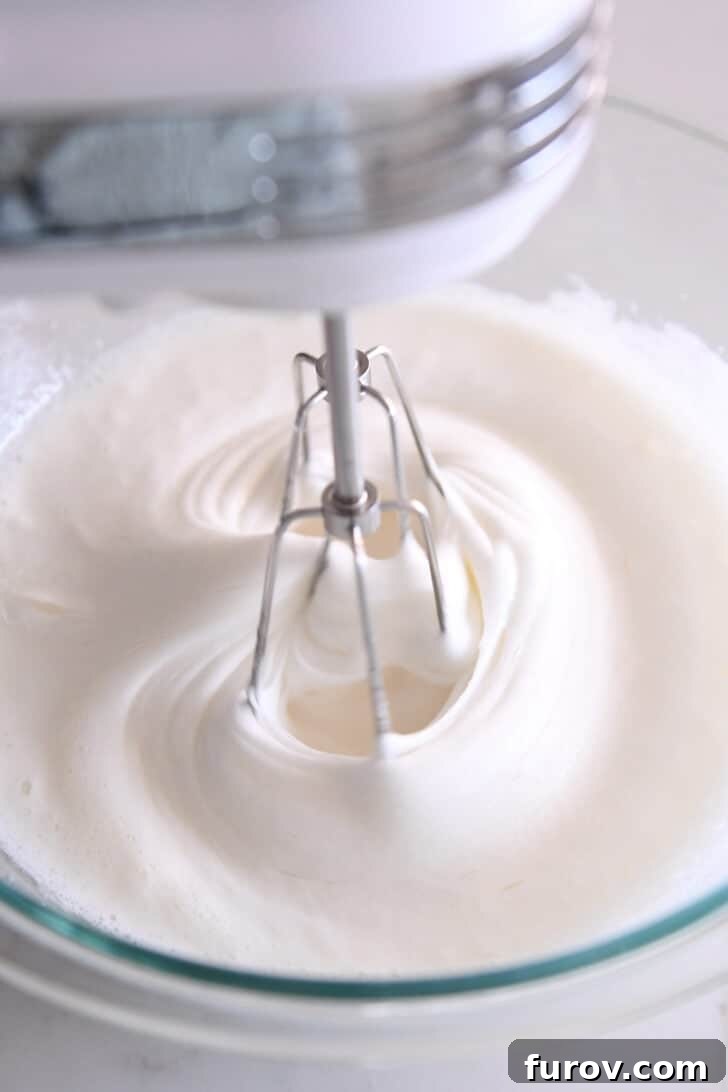
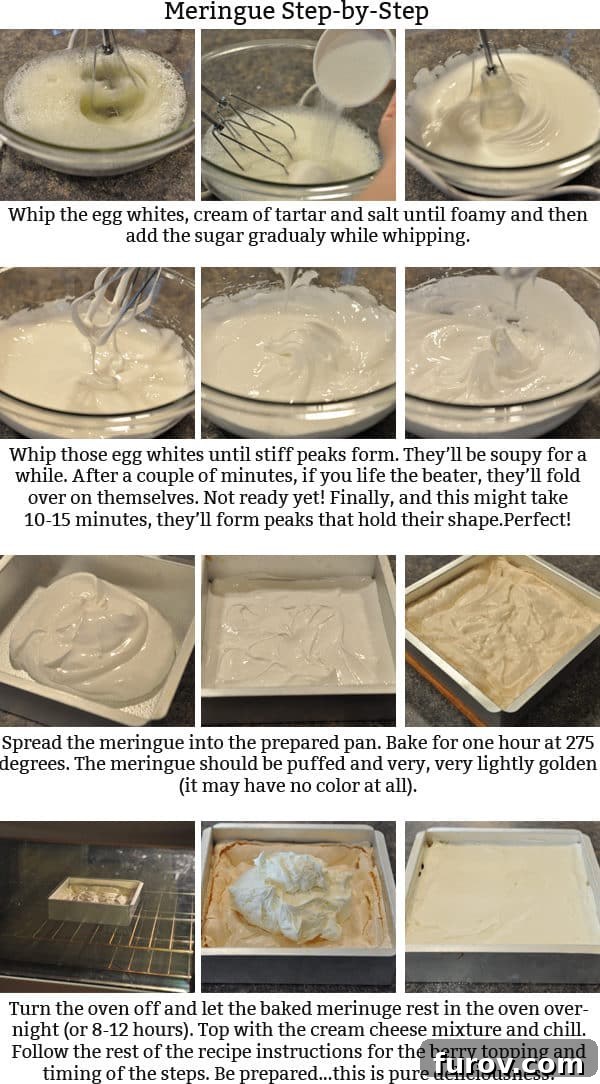
- **Prepare Your Egg Whites:** Success begins with preparation. Ensure your mixing bowl and beaters are impeccably clean and completely free of any grease or oil. We recommend using a glass, metal, or ceramic bowl, as plastic can sometimes retain fatty residues. Begin by beating the large egg whites with cream of tartar and salt on a medium speed. The cream of tartar is a vital stabilizer here, helping the egg whites whip up to their full volume and hold their structure beautifully. Continue beating until the mixture becomes visibly frothy and light.
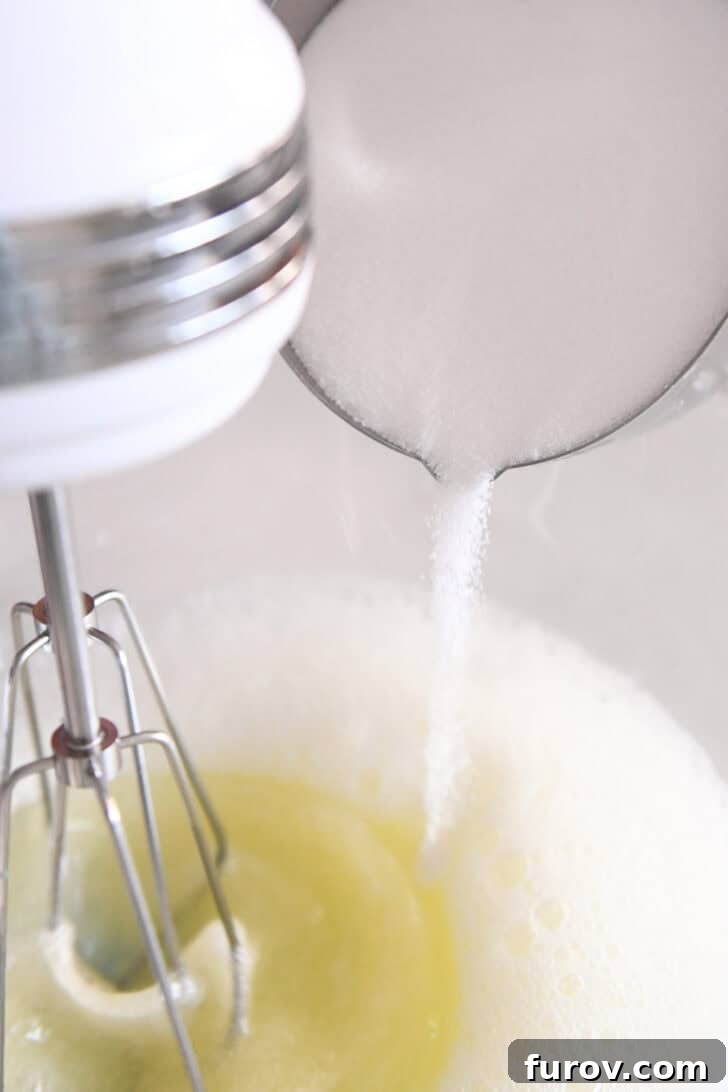
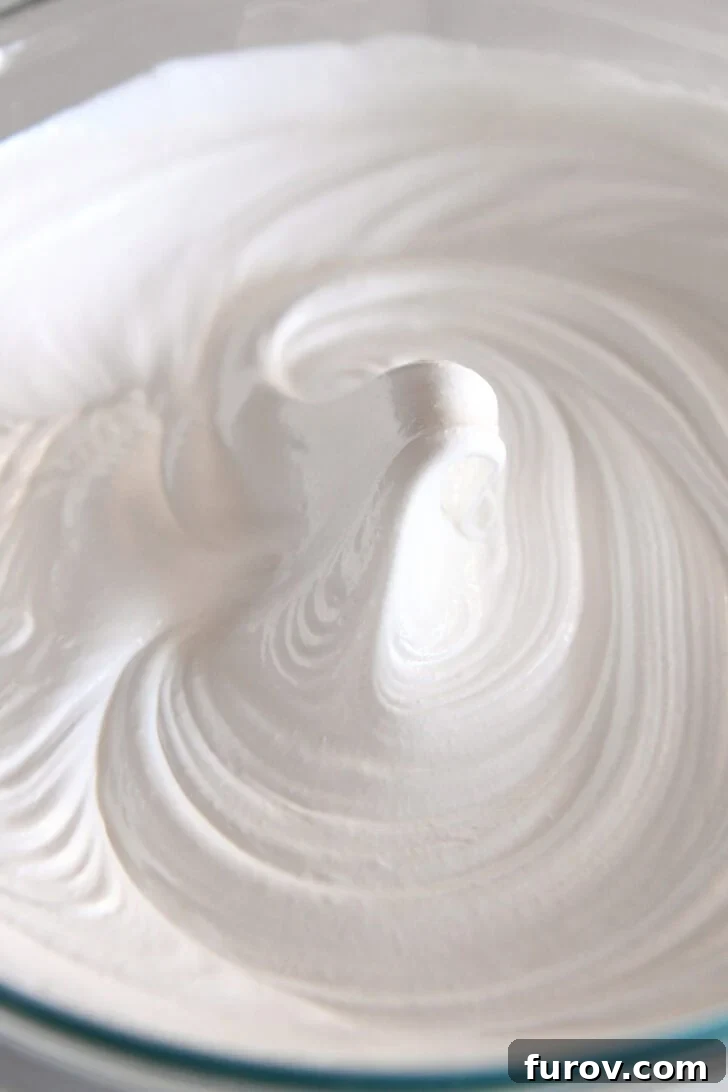
- **Gradually Add Sugar for Stiff Peaks:** Once your egg whites are frothy, it’s time to introduce the sugar. Increase your mixer speed to high and, very gradually, stream in the granulated sugar, about one tablespoon at a time. This slow and steady addition is crucial; it allows the sugar to dissolve completely into the egg whites, resulting in a smooth, stable, and glossy meringue. Continue beating vigorously until the mixture forms **stiff, unyielding peaks**. When you lift the beaters, the meringue should stand tall and firm without any hint of drooping. Remember, undermixing will lead to a flat meringue that won’t set correctly, while overmixing can make it grainy and brittle, so pay close attention to this stage.
Baking and Cooling for Optimal Meringue Texture
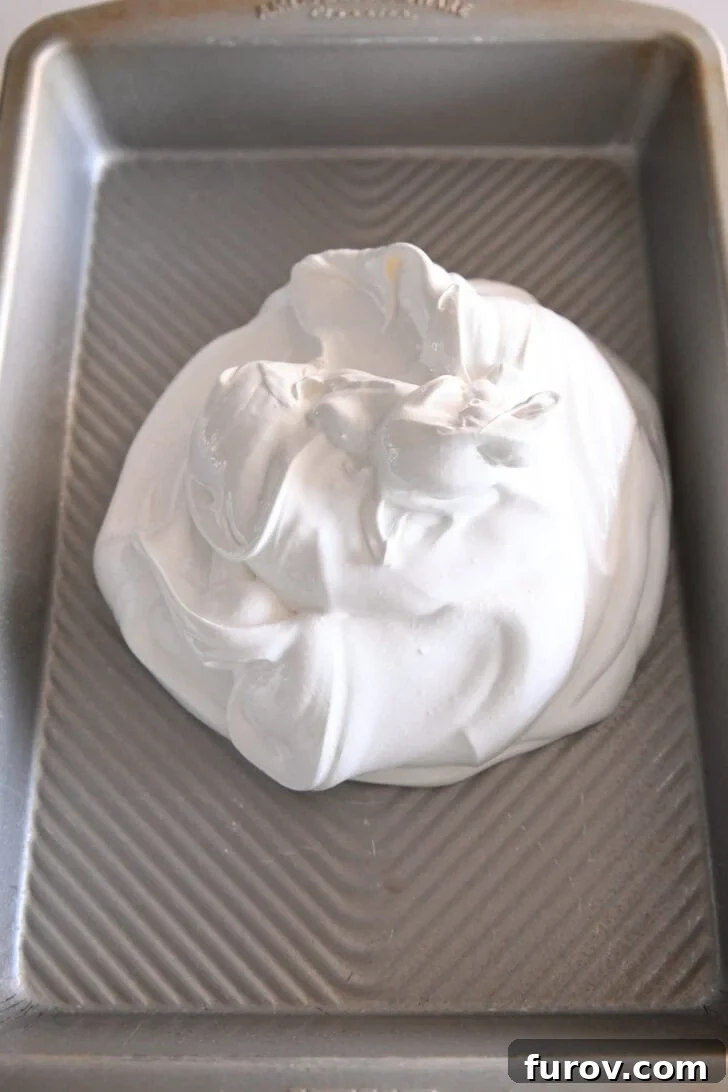
For this delightful “Berries on a Cloud” recipe, we’ll bake the meringue in a standard 9×13-inch baking pan. This creates a generous, light, and airy foundation that serves as the perfect canvas for the creamy cheesecake topping and luscious berry sauce. The baking process for meringue is unique and absolutely crucial for achieving its signature texture.
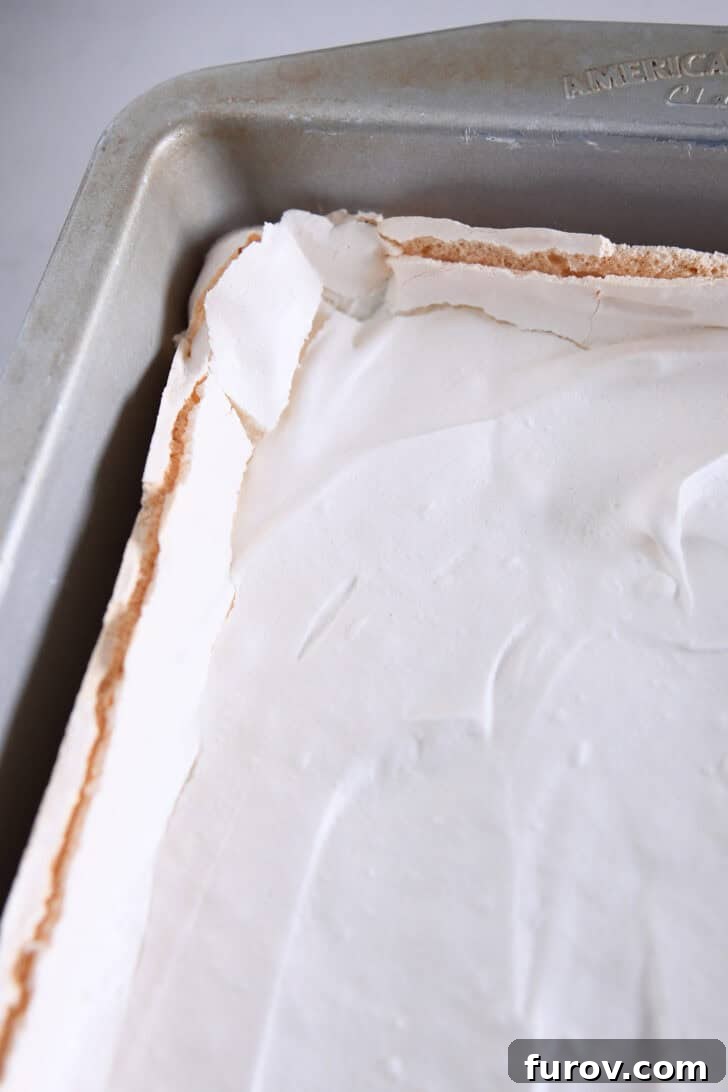
The meringue bakes at a relatively low temperature for precisely one hour. However, the work isn’t done there. After the initial baking time, a critical step follows: you must turn off the oven completely and leave the pan of meringue inside for an extended period – ideally 10 to 12 hours, or even overnight. This slow, gradual cooling within the ambient warmth of the oven is vital. It allows the meringue to dry out thoroughly, setting its delicate internal structure and developing that coveted crisp exterior with a slightly chewy, marshmallow-like interior. This patient cooling process is key to preventing the meringue from cracking excessively or collapsing, which can happen if it’s exposed to a sudden drop in temperature.
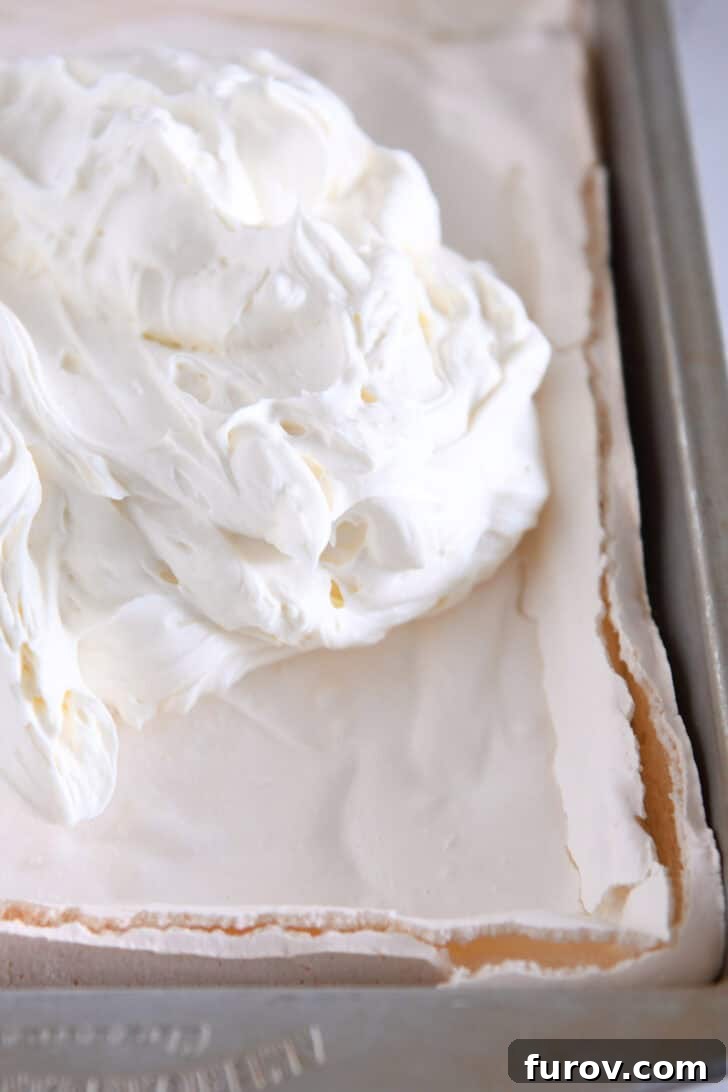
It’s perfectly normal, and even expected, for the center of the meringue to fall slightly as it cools, creating a charming dip. Similarly, the edges will likely pull away from the sides of the pan and may develop small cracks. These are not signs of failure but rather characteristic features of a homemade meringue, adding to its rustic appeal. Rest assured, these minor imperfections will not detract from the incredible taste or texture once layered with the rich cheesecake and vibrant berries.
The Creamy No-Bake Cheesecake Layer: A Perfect Contrast
Once your meringue base is perfectly set, cooled, and ready, it’s time to prepare the incredibly easy, no-bake cheesecake layer. This creamy, tangy topping offers a magnificent contrast to the crisp, sweet meringue, perfectly balancing the flavors and introducing a luxurious richness to every single bite. The true beauty of this layer lies in its simplicity – no oven time required, just a few high-quality ingredients whipped together to perfection, making it a stress-free addition to your dessert masterpiece.
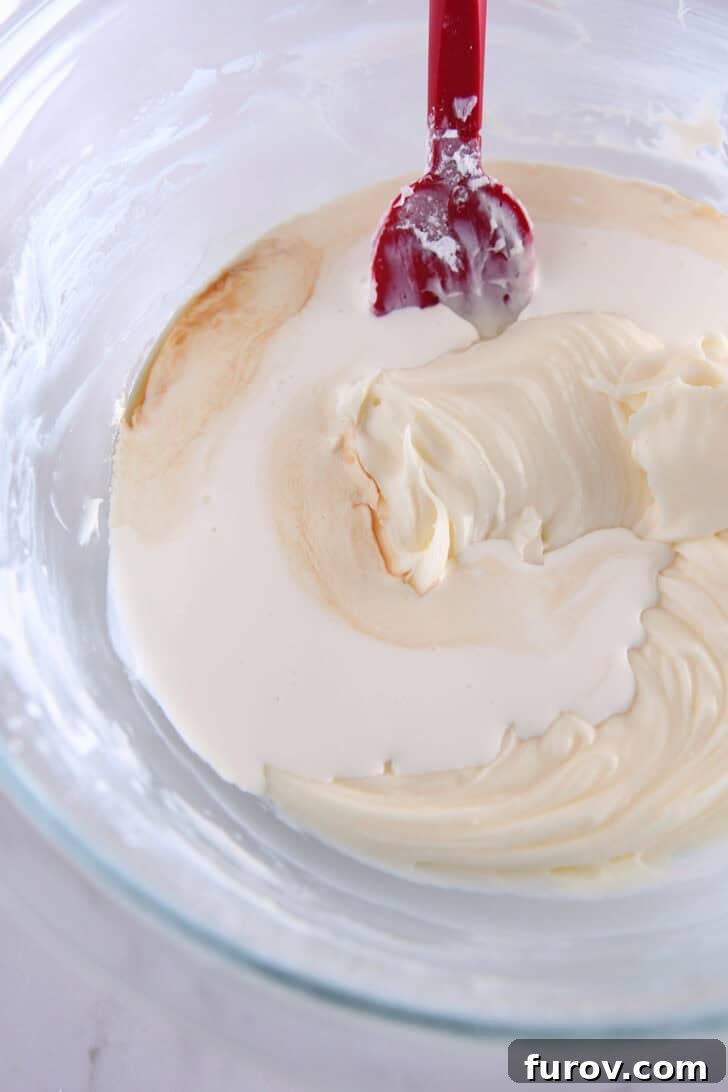
To assemble this delectable layer, begin by whipping softened cream cheese with powdered sugar and a touch of vanilla extract until the mixture is utterly smooth, light, and airy, with no lumps in sight. Next, gradually pour in cold heavy whipping cream. Start whipping on a low speed to prevent any splattering, then steadily increase the speed to high. Continue to beat the mixture vigorously until it transforms into a thick, fluffy, and beautifully spreadable cheesecake delight that holds soft peaks. This process typically takes about 5-7 minutes, ensuring a light yet indulgently rich consistency. Once this creamy perfection is achieved, gently and evenly spread the glorious cream cheese topping across the entire surface of your cooled meringue base, making sure it reaches from edge to edge to create a uniform layer.
The Vibrant Berry Topping: A Burst of Freshness
To complete this symphony of textures and flavors, a homemade berry topping provides a bright, refreshing, and utterly essential finish. This isn’t just any fruit topping; it’s a vibrant, slightly tart sauce that perfectly cuts through the sweetness of the meringue and the richness of the cheesecake, making each and every bite a beautifully balanced and utterly delightful experience. While frozen sweet cherries are specified in the base recipe for their convenience and robust flavor, you have the flexibility to easily adapt this to a delightful mix of your favorite berries, whether fresh or frozen, depending on seasonality and your personal preference. Imagine the possibilities with raspberries, blueberries, or a medley of all!
The berry topping is carefully cooked down with granulated sugar, a measure of cold water, and a hint of fresh lemon juice to deeply intensify its natural flavors and create a rich, glossy sheen. A small amount of cornstarch is incorporated to ensure it thickens beautifully into a spoonable sauce that clings elegantly to the dessert without being overly sticky or unpleasantly runny. After the sauce has cooked and cooled to room temperature, vibrant, fresh sliced strawberries are gently folded in. This thoughtful addition provides another wonderful layer of texture and a burst of raw berry freshness, ensuring that you enjoy the full spectrum of berry goodness – both the concentrated richness of the cooked sauce and the crisp, juicy snap of uncooked fruit.
A Wonderful Make-Ahead Dessert for Effortless Entertaining
One of the most incredibly appealing aspects of the “Berries on a Cloud” dessert is its outstanding make-ahead potential. This feature alone makes it an absolutely perfect choice for entertaining guests, hosting dinner parties, or simply when you desire to prepare a truly spectacular treat without the stress of last-minute rushing. The entire dessert – encompassing the delicate meringue, the creamy cheesecake layer, and the vibrant berry topping – can be thoughtfully prepared several days in advance, allowing ample time for the individual flavors to meld harmoniously and the diverse textures to perfectly integrate, resulting in an even more magnificent final product.
Strategic Planning for Perfect Assembly and Optimal Results
Due to its specific requirements, you intrinsically *need* to make the meringue base ahead of time. This is primarily because of its extended cooling period in the oven, which typically takes 10 to 12 hours. Therefore, it is ideal to bake the meringue the day before you plan to assemble the rest of the dessert. Once the meringue is completely ready and cooled, and the luxurious creamy cheesecake layer has been carefully spread across its surface, the assembled dessert requires another significant chilling period of 4 to 8 hours – and can even be extended up to a full 24 hours. This prolonged chilling process is essential for two primary, interconnected reasons:
- **Cheesecake Setting:** The extended refrigeration allows the no-bake cheesecake layer to fully set and firm up. This is crucial for achieving clean, precise slices when serving, ensuring each piece holds its shape beautifully.
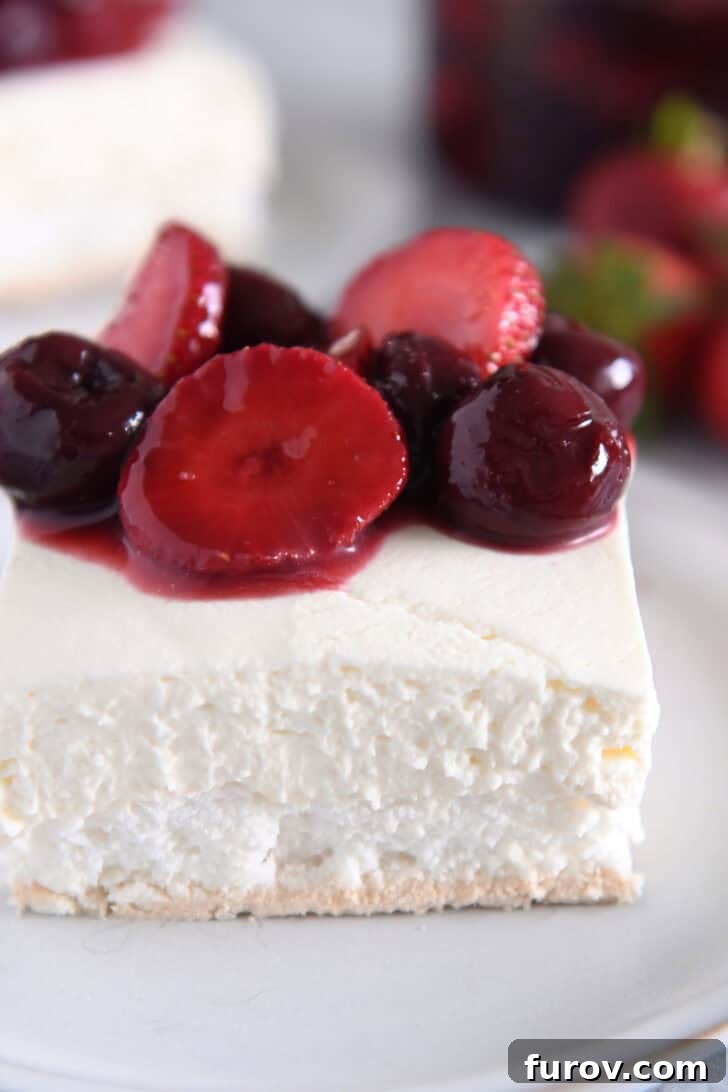
- **Texture Harmonization:** More uniquely and perhaps surprisingly, this chilling period gives the cheesecake enough time to gently and subtly soften the very top layer of the crisp meringue. This delicate softening creates an utterly seamless, glorious texture where the two main layers almost melt into each other, rather than presenting as distinct, separate entities that might be challenging to cut through. The result is a unified, melt-in-your-mouth experience.
The vibrant berry sauce is also a fantastic component to prepare well in advance. It can be made days ahead, stored securely in an airtight container in the refrigerator, and then simply spooned over individual pieces of the dessert just before serving. This smart, phased approach to preparation means you can effortlessly pull together a stunning, complex-tasting dessert for virtually any occasion without feeling rushed or overwhelmed. It leaves you with more precious time to genuinely enjoy your guests, the festivities, and, of course, the cascade of compliments that are sure to follow your culinary triumph.
Rave Reviews: Why Everyone Loves This Dessert
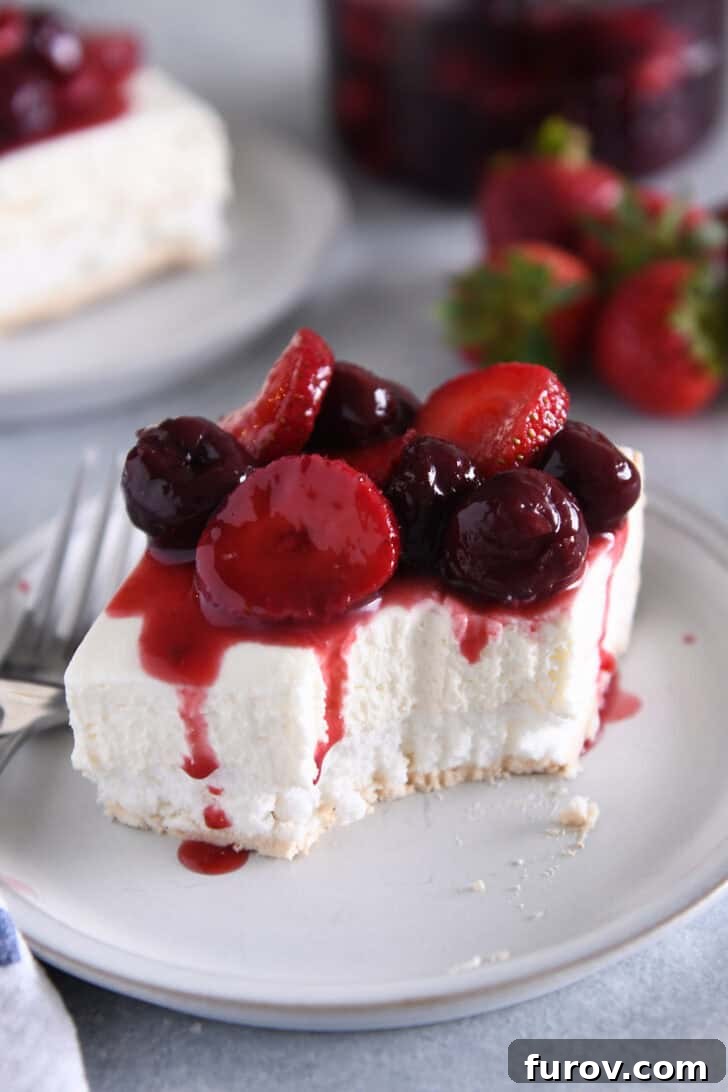
The “Berries on a Cloud” dessert isn’t merely a recipe; it’s a culinary sensation that consistently garners magnificent praise and delighted exclamations. There’s truly no other way to accurately describe the enthusiastic reception it receives every single time it’s served. It has rightfully earned its esteemed place as an all-time favorite in our family, particularly for Brian, and never, ever fails to impress guests at every single gathering, from casual brunches to formal dinner parties. Its truly unique and masterful combination of textures – the crisp, satisfying chew of the meringue, the incredibly smooth, rich creaminess of the cheesecake, and the bright, fresh, slightly tart burst of the berries – creates an unforgettable eating experience that leaves people utterly captivated and constantly craving more.
⭐️⭐️⭐️⭐️⭐️ “Still the most requested dessert in my family—we all absolutely adore it! The balance of flavors and textures is simply perfect, making it a staple for all our celebrations.” -Rachel
⭐️⭐️⭐️⭐️⭐️ “I decided to make this for Easter dessert and it was nothing short of amazing! I was quite nervous about attempting meringue for the very first time, as it seemed so delicate. But I was so pleasantly surprised by the finished product – it turned out absolutely perfect, fluffy, and everyone raved about it endlessly!” -Emily
⭐️⭐️⭐️⭐️⭐️ “Whoa, this was ridiculously good! Having never made meringue before, I was a little apprehensive when the sides puffed up much higher than the center, but it was incredibly easy to slice regardless, which was a relief. Instead of frozen cherries, I creatively used a medley of different frozen berries I had on hand, and it worked wonderfully, adding a fantastic mix of flavors. I prepared it for my parents and grandparents, and we practically devoured the entire pan! They all unanimously declared it one of the best desserts they’ve ever tasted, high praise indeed!” -Anna
These heartfelt and enthusiastic testimonials speak volumes about the dessert’s universal and undeniable appeal. Its remarkable ability to transform first-time meringue makers into confident, proud bakers, and its consistent showering of high praise from diverse palates, undeniably solidifies its status as a truly special and indispensable recipe. Whether it’s the comforting familiarity and richness of cheesecake, the intriguing and delicate lightness of meringue, or the refreshing, vibrant burst of fresh berries, this dessert truly offers something extraordinary for everyone, making it an indispensable and cherished addition to your culinary repertoire. Prepare to be showered with compliments and requests for the recipe!
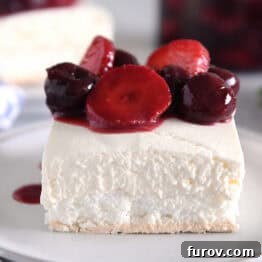
Berries on a Cloud Dessert
Yield: 8 Servings
Prep Time: 45 mins
Cook Time: 1 hr 15 mins
Additional Time: 12 hrs
Total Time: 14 hrs
Ingredients
Meringue:
- 6 large egg whites
- ½ teaspoon cream of tartar
- ¼ teaspoon salt
- 1 ½ cups (318 g) granulated sugar
Cheesecake Layer:
- 8 ounces (227 g) cream cheese, softened
- 1 ¼ cups (143 g) powdered sugar
- 1 teaspoon vanilla extract
- 2 cups heavy whipping cream
Berry Topping:
- 16 ounces (454 g) frozen sweet cherries (pitted)
- ½ cup (106 g) granulated sugar
- ¾ cup cold water
- 1 tablespoon fresh lemon juice
- 1 tablespoon cornstarch (see note for thicker sauce)
- 2 cups sliced fresh strawberries
Instructions
- **Prepare for Meringue Baking:** Preheat your oven to 275 degrees F (135 degrees C). Lightly grease a 9×13-inch baking pan; this will help prevent the meringue from sticking too much.
- **Whip the Meringue:** In a large, impeccably clean glass, metal, or ceramic bowl (avoid plastic as it can harbor grease), beat the egg whites with the cream of tartar and salt until the mixture is visibly foamy. While continuing to beat at high speed, gradually add the granulated sugar, about one tablespoon at a time. This slow addition allows the sugar to fully dissolve, creating a stable and glossy meringue. Continue beating until the egg whites form firm, stiff peaks. It’s critical not to underbeat, as the meringue needs to be stiff to hold its shape during baking and cooling.
- **Bake and Cool the Meringue:** Carefully spread the whipped meringue mixture evenly into the prepared 9×13-inch baking pan. Bake for 1 hour. After the baking time is complete, turn off the oven completely. **Leave the meringue inside the oven overnight, or for a minimum of 10-12 hours**, without opening the door. This extended cooling period is vital for the meringue to set properly and develop its signature crisp-chewy texture without collapsing.
- **Prepare the Berry Topping:** While the meringue is cooling, or at least 4-6 hours before serving the dessert, you can prepare the berry topping. In a medium saucepan, combine the frozen sweet cherries (pitted), granulated sugar, cold water, fresh lemon juice, and cornstarch. Stir well to combine all ingredients.
- **Cook and Chill Berry Sauce:** Place the saucepan over medium-low heat and bring the mixture to a gentle simmer, stirring occasionally. Cook for 10-20 minutes, or until the sauce has slightly thickened to your desired consistency. Pour the cooked berry mixture into a clean bowl and allow it to cool at room temperature for about 20-30 minutes.
- **Add Fresh Strawberries & Chill:** Once the berry sauce has cooled slightly, gently stir in the sliced fresh strawberries. Cover the bowl and refrigerate until the berry topping is thoroughly chilled. This can be done a day in advance.
- **Assemble the Cheesecake Layer (4-6 Hours Before Serving):** When you are ready to assemble the main dessert, remove the completely cooled meringue from the oven. In a separate medium bowl, whip together the softened cream cheese, powdered sugar, and vanilla extract until the mixture is completely smooth and free of lumps.
- **Whip in Heavy Cream:** Pour the cold heavy whipping cream into the cream cheese mixture. Start whipping on low speed initially to prevent splattering, then gradually increase to high speed. Continue to whip until the mixture becomes thick, fluffy, and holds soft peaks – this usually takes about 5-7 minutes. Spread this rich cream cheese topping evenly over the cooled meringue base.
- **Final Chill:** Cover the assembled dessert loosely with plastic wrap and refrigerate for at least 4 hours, or ideally overnight (up to 24 hours). This chilling period allows the cheesecake layer to set firmly and subtly softens the top of the meringue, creating a harmonious texture that is easier to cut and delightful to eat.
- **Serve and Enjoy:** When it’s time to serve, cut the chilled dessert into individual pieces. Top each piece generously with a spoonful of the prepared, chilled berry mixture. Serve immediately and savor this incredible Berries on a Cloud dessert!
Notes
Make Ahead: This dessert is a dream for planning! The meringue base can be baked and cooled up to 2 days in advance. The cream cheese filling can be prepared and spread over the meringue up to 24 hours ahead of time and refrigerated. The berry mixture can also be made a day in advance and stored in the refrigerator. Assemble the day before for best results.
Cornstarch: The fruit sauce, as written in the recipe, yields a slightly thinner consistency. For a thicker, more spoonable sauce, feel free to increase the cornstarch to 1 1/2 to 2 tablespoons. Adjust according to your preference for sauce thickness.
Berry Variations: While sweet cherries and strawberries are classic, feel free to experiment with other berries like raspberries, blueberries, or a mixed berry blend for your topping. Adjust sugar slightly based on the sweetness of your chosen fruits.
Storage: Store any leftover Berries on a Cloud dessert covered in the refrigerator for up to 3-4 days. The meringue will gradually soften over time but remains delicious.
Author: Mel
Course: Dessert
Cuisine: American
Method: Bake, No-Bake, Chill
Nutrition Facts
(Approximate values per serving)
- Serving: 1 Serving
- Calories: 635 kcal
- Carbohydrates: 85g
- Protein: 6g
- Fat: 32g
- Saturated Fat: 19g
- Cholesterol: 113mg
- Sodium: 230mg
- Fiber: 2g
- Sugar: 79g
Recommended Products
Recipe Source: This cherished recipe was generously shared by our friend, Ursala, and has been thoughtfully adapted from a classic Betty Crocker recipe. Our adaptations include a careful reduction in sugar for both the meringue and the filling, a modification of the cherry filling to utilize readily available frozen cherries instead of canned pie filling, the judicious omission of marshmallows (to prevent any excessive sweetness and allow natural flavors to shine), and a desirable increase in the cream cheese content for an even richer and more luxurious cheesecake layer.
Recipe originally posted June 2013; extensively updated in October 2024 with refreshed, high-quality photos, significantly enhanced recipe notes, and more detailed preparation insights to vastly improve user experience and clarity for home bakers.
In conclusion, the “Berries on a Cloud” dessert transcends being merely a sweet treat; it is a profound celebration of textures, flavors, and culinary artistry. From the ethereal crunch and chewiness of the meringue to the smooth, cool creaminess of the cheesecake, and the bright, invigorating tang of the berry topping, each meticulously crafted element coalesces to create a truly unforgettable and harmonious eating experience. Its unparalleled make-ahead convenience positions it as an ideal and stress-free choice for any gathering or special occasion, ensuring that you can fully enjoy your time with loved ones while still serving a dessert that earns universal adoration and admiration. Whether it’s destined for a grand celebration, a cozy family dinner, or simply to satisfy a craving for something truly extraordinary, this “Berries on a Cloud” dessert promises to be a beloved and frequently requested addition to your cherished recipe collection, consistently delivering a slice of pure, unadulterated joy with every single serving.