
Mastering Flour Measurement for Perfect Baking Results: The Ultimate Guide
Are your baked goods consistently inconsistent? The culprit might be how you measure your flour. Discover the science behind accurate flour measurement and transform your baking forever.
Baking is often described as a science, and like any science, precision is paramount. While some aspects of cooking allow for creative improvisation, baking demands accuracy, especially when it comes to fundamental ingredients like flour. A slight deviation in the amount of flour can dramatically alter the texture, rise, and overall success of your culinary creations. From cookies that spread too much to cakes that turn out dry and dense, many common baking frustrations stem from one often-overlooked step: how you measure your flour.
Have you ever wondered if it truly matters whether you dip and sweep, dip and shake, or carefully spoon your flour into a measuring cup? The answer is an unequivocal yes! The method you employ can lead to significant variations in the actual amount of flour incorporated into your recipe, ultimately determining whether your cookies are perfectly chewy or disappointingly crumbly, your bread soft and airy or stiff and heavy, and your cakes moist and tender or frustratingly dry.
The Gold Standard: Why a Kitchen Scale is Your Best Baking Friend
When it comes to achieving unparalleled accuracy and consistent results in the kitchen, especially for baking, nothing beats a reliable kitchen scale. Weighing your ingredients, particularly flour, eliminates the inconsistencies inherent in volume measurements. Different flours have different densities, and even the same flour can compact differently based on storage and handling. A cup of flour can vary by as much as 25% in weight depending on how it’s measured using volume methods. A scale removes this guesswork entirely, providing the exact amount every single time.
Investing in a kitchen scale is one of the smartest decisions any serious baker can make. You don’t need a professional-grade, expensive model; a simple digital kitchen scale will suffice. Many affordable options are available that are highly accurate, easy to use, and compact for storage. Look for features like a tare function (to zero out the weight of your bowl), clear digital display, and the ability to switch between grams and ounces. Using a scale not only ensures perfect results but also makes cleanup easier, as you can often measure multiple ingredients into the same bowl without needing numerous measuring cups.
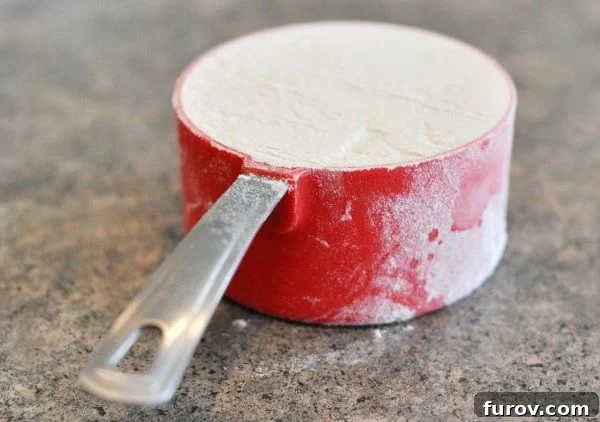
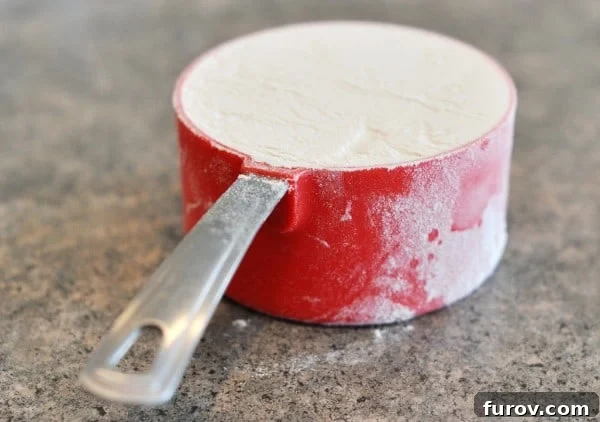
While scales are fantastic, their utility often depends on two factors: a) whether you own one, and b) whether your recipe provides ingredient weights alongside traditional cup measurements. Unfortunately, many recipes still rely solely on volume measurements. If you find yourself in this situation, and without a kitchen scale (or a recipe that includes weights), the next best thing is to ensure you’re using the most accurate volume measurement technique possible. To demonstrate this, I conducted a simple, yet highly illuminating, experiment in my own kitchen.
The Flour Measurement Experiment: Unveiling the Differences
To illustrate just how much your measuring method impacts the quantity of flour, I weighed one cup of all-purpose flour using three common techniques. The results speak volumes about the importance of precision in baking.
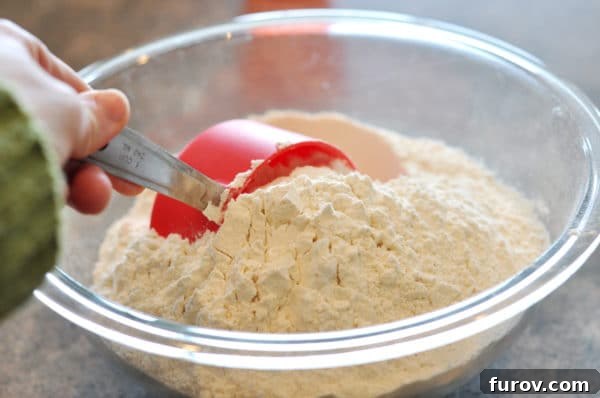
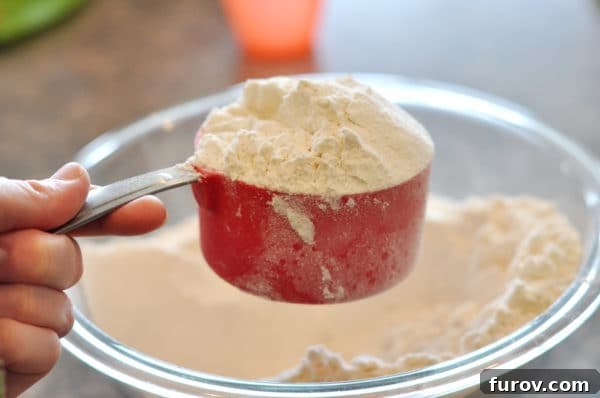
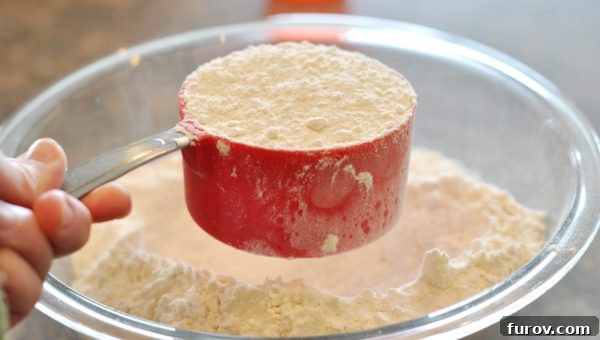
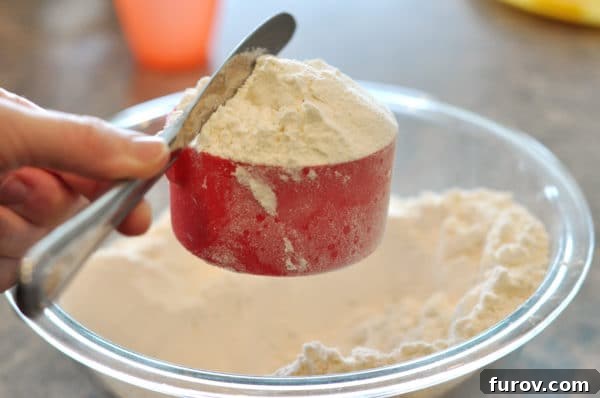
Method 1: Dip and Shake
This method often feels intuitive but can lead to over-packing. Here’s how it typically goes:
- Gently scoop your measuring cup directly into the flour bin or bag.
- Scoop deeply until the flour is visibly piled high above the rim of the cup, ensuring it’s generously overfilled.
- Once overfilled, tap or shake the cup until the flour levels off and any excess falls away. The shaking action tends to compact the flour significantly.
Method 2: Dip and Sweep
This technique is a widely recommended standard for volume measurement, aiming to capture flour with minimal compaction.
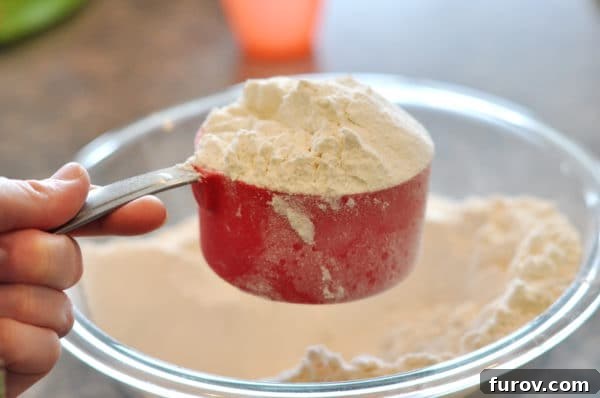
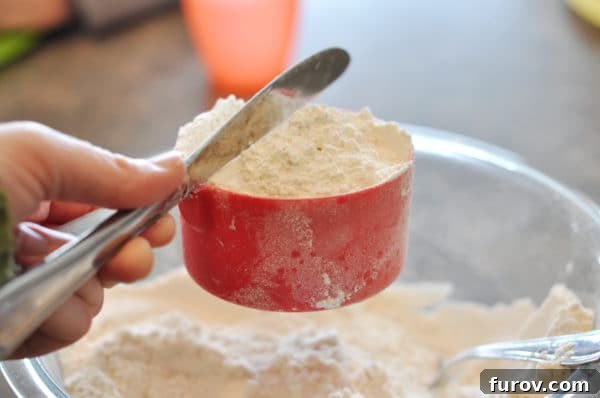
- Again, gently dip the measuring cup into the flour until it’s overfilled. The key here is “gently” – avoid slamming the cup into the flour, which can pack it down too much.
- Without tapping or shaking the cup, use a flat edge (such as the back of a knife or a straight-edged spatula) to sweep across the top of the cup, leveling the flour precisely.
Method 3: Spoon and Sweep
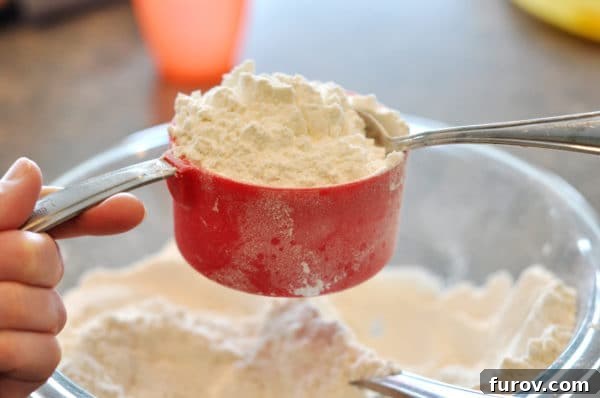
This method aims to incorporate the maximum amount of air into the flour before measuring, mimicking a “sifted” effect to some extent.
- Using a separate spoon, gently spoon the flour into your measuring cup until it’s slightly mounded over the top. The goal is to keep the flour as light and airy as possible, avoiding compaction.
- Once overfilled, use a flat edge to sweep across the top of the cup, leveling the flour.
The Eye-Opening Results
After carefully performing each method, I weighed the contents of the cup. The differences were significant:
- The Dip and Shake method produced a cup of flour that weighed approximately 6 ounces (about 170 grams).
- The Dip and Sweep method yielded a cup of flour weighing about 5 ¼ ounces (approximately 149 grams).
- The Spoon and Sweep method resulted in a cup of flour that weighed around 4 ounces (roughly 113 grams).
To put these results into perspective, most reputable recipes written with weight measures specify a cup of all-purpose flour as weighing around 5 ounces (or 142 grams), give or take a small fraction. As you can clearly see, the Dip and Sweep method came closest to this standard. The “Dip and Shake” method resulted in 20% more flour, while the “Spoon and Sweep” method resulted in 20% less flour compared to the standard.
This variation isn’t just a minor difference. An ounce or even half an ounce of flour can be a truly monumental variable in the outcome of your baked goods. For instance, different types of flour (like cake flour, bread flour, or whole wheat flour) have distinct densities, and their standard weights per cup will vary. But for the all-purpose flour used in this experiment, the 5-ounce benchmark is key.
The Impact of Incorrect Flour Measurement on Your Baking
Understanding the weight differences is one thing; comprehending their impact is another. The quantity of flour directly affects the gluten development, moisture content, and overall structure of your baked goods. Here’s how common baking items can suffer from improper flour measurement:
- Cookies: Too much flour will result in cookies that are crumbly, dry, and don’t spread properly, remaining thick and cakey. Conversely, too little flour can make them spread excessively thin, greasy, and prone to breaking.
- Cakes and Muffins: An excess of flour leads to dense, dry, and tough cakes that lack the desired moist crumb. If there’s insufficient flour, cakes may sink in the middle, become overly crumbly, or lack the structural integrity to hold their shape.
- Breads: Over-flouring bread dough can make it stiff, difficult to knead, and resistant to rising, resulting in a dense, heavy loaf with a poor crumb structure. Too little flour, on the other hand, makes the dough excessively sticky and challenging to handle, leading to weak gluten development and a flat, underdeveloped loaf.
- Pies and Pastries: The delicate balance of flour and fat in pie crusts is crucial. Too much flour results in a tough, dry, and difficult-to-roll crust, while too little can make it greasy and prone to shrinking or falling apart.
These subtle changes can turn a promising recipe into a kitchen disaster, leading to wasted ingredients, time, and culinary frustration. So, what’s a home baker to do with this critical information?
Essential Recommendations for Accurate Flour Measurement
Based on scientific principles and practical experience, here are my top recommendations for measuring flour, designed to help you achieve consistently delicious results:
1. Prioritize a Kitchen Scale Whenever Possible
This cannot be stressed enough. If a recipe provides weight measurements for flour (and other ingredients), always use them. A digital kitchen scale offers the highest level of precision, eliminating the variables of compaction and density that plague volume measurements. It’s a small investment that pays dividends in baking success, ensuring your baked goods turn out perfectly every single time. If a favorite recipe doesn’t list weights, consider weighing the flour after using the “dip and sweep” method to establish your own consistent weight for that specific recipe.
2. Master the “Dip and Sweep” Method for Volume Measurements
For all those beloved recipes that only list volume measurements, or if you simply don’t have a kitchen scale, the “Dip and Sweep” method is your best bet for accuracy. This technique is widely endorsed by culinary experts and test kitchens, including the highly reputable Cook’s Illustrated, which further validates its effectiveness. It strikes the ideal balance between incorporating enough flour without over-compacting it, closely approximating the standard weight of a cup of all-purpose flour.
To perfect the “Dip and Sweep” technique:
- Fluff Your Flour: Before measuring, lightly aerate your flour in its container using a spoon or fork. This helps break up any compaction from storage.
- Gentle Scoop: Use your measuring cup to gently scoop into the flour until it overflows. Do not pack it down, tap the cup, or shake it. The goal is to allow the flour to settle naturally into the cup.
- Level with Precision: Use the straight, flat edge of a knife, a spatula, or even a ruler to sweep across the top of the measuring cup. This removes any excess flour, leaving you with a perfectly level cup.
It might comfort your flour-measuring soul to know that this is precisely the method I personally employ when a recipe doesn’t provide weight measurements. All the baked good recipes featured on this site without specific weights have been tested, baked, and perfected using this very technique. By consistently using the “Dip and Sweep” method, you significantly increase your chances of replicating the intended results of most standard recipes.
3. Consider Sifting When Required
Some recipes specifically call for “sifted flour.” Sifting flour aerates it, breaks up lumps, and results in a lighter, more consistent measure. If a recipe says “1 cup sifted flour,” you sift the flour *before* measuring. If it says “1 cup flour, sifted,” you measure the flour first using the dip and sweep method, then sift it.
Special Considerations: Yeast Doughs and Personal Baking Styles
While precision is generally key, there are exceptions. When working with yeast doughs, the final texture and feel of the dough often supersede strict adherence to flour measurements. Factors like humidity, flour type, and even the hydration of other ingredients can influence how much flour a dough needs. Many experienced bakers of yeast goods rely on visual cues and the dough’s elasticity and tackiness rather than a rigid flour quantity. You can learn more about working with yeast doughs and developing this intuitive feel here.
Added Disclaimer: Your Kitchen, Your Rules (Mostly!)
I understand that every baker develops their own rhythm and techniques. If you’ve been using a flour measuring method different from what I’ve recommended, and your baked goods consistently turn out perfectly, then there’s absolutely no pressure to change! Baking is also an art, and personal touch plays a role. My recommendations are based on extensive testing and widely accepted culinary science to provide a reliable baseline for success, especially for those encountering inconsistencies. However, if your unique “dip-twirl-shake-spoon-level-hula” method works wonders for you, by all means, stick with it! The ultimate goal is delicious results, and the preferred method is simply the one that consistently delivers them in your kitchen. Just remember, my highly scientific research (and many other credible sources) strongly points to the “Dip and Sweep” as a foundational and preferred method for volumetric flour measurement.
Conclusion: Bake with Confidence and Consistency
The journey to becoming a confident and consistent baker often begins with mastering the fundamentals. Accurate flour measurement is undeniably one of these crucial steps. By understanding the impact of different measuring techniques and choosing the most precise methods – a kitchen scale for ultimate accuracy, or the “Dip and Sweep” method for reliable volume measurements – you empower yourself to create baked goods that are consistently delicious, beautifully textured, and always a joy to share.
No more dry cakes, dense breads, or flat cookies. Embrace these simple yet powerful tips, and prepare to elevate your baking to new heights of perfection. Happy baking!