
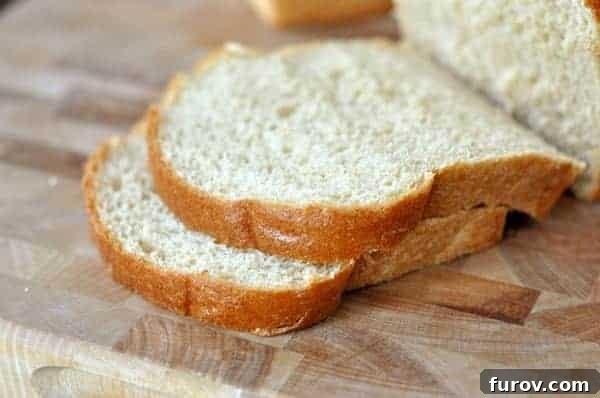
Mastering Homemade Whole Wheat Bread: 3 Irresistible Recipes & Expert Tips
Embark on a culinary journey to transform your kitchen into a personal bakery. This comprehensive guide offers not one, but three tried-and-true, healthy, unprocessed, and utterly delicious whole wheat bread recipes. Discover the unparalleled satisfaction and superior taste that comes from baking your own bread, alongside essential tips for consistent success.
The Joy and Benefits of Baking Your Own Whole Wheat Bread
For years, our family has cherished the wholesome goodness of homemade bread, a tradition that has seamlessly integrated into my weekly routine. What once seemed like a formidable task has now evolved into a smooth, almost effortless process, barely making a ripple in my day. In approximately two hours, from the initial mixing to the final golden-brown loaf, I can produce a batch of nourishing bread that far surpasses any store-bought alternative.
Beyond the simple act of baking, there are compelling reasons to embrace homemade bread:
- Unmatched Flavor and Freshness: The enchanting aroma of freshly baked bread is a sensory delight. Each slice boasts a tender crumb and a rich, authentic flavor that commercial breads simply cannot replicate.
- Complete Nutritional Control: Baking at home grants you full command over every ingredient. You can meticulously select high-quality, unprocessed whole wheat flour, precisely manage sugar and fat content, and confidently avoid the preservatives, artificial additives, and hidden ingredients often found in mass-produced loaves. This ensures your family consumes truly healthy and nutritious bread.
- Significant Cost Savings: While there might be an initial investment in quality ingredients and essential baking tools, homemade bread proves to be considerably more economical in the long run compared to purchasing artisan or even standard whole wheat options from the grocery store.
- Customization to Your Liking: Homemade bread allows for endless customization. Adjust the level of sweetness, incorporate wholesome additions like seeds or nuts, or experiment with various flour blends to craft the perfect loaf tailored to your family’s preferences.
- A Rewarding and Therapeutic Process: There’s a profound sense of accomplishment and satisfaction in kneading dough, watching it rise, and finally pulling warm, beautifully browned loaves from your oven. It’s a therapeutic and creative outlet that culminates in delicious, tangible rewards.
Mastering Storage: Keep Your Homemade Bread Fresh and Delicious
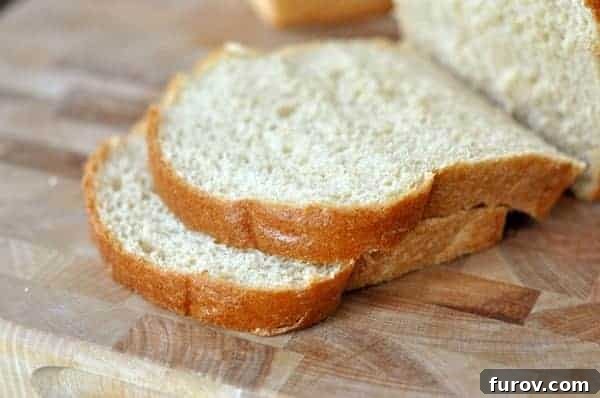
One of the most effective strategies I’ve discovered for extending the life and maximizing the enjoyment of homemade bread is proper freezing. After baking and ensuring the loaves have cooled completely, I immediately slice them before carefully placing them into freezer bags. This simple step yields significant benefits:
- Convenient Single Servings: Pre-slicing allows you to effortlessly retrieve just one or two slices as needed, preventing unnecessary waste and making meal prep a breeze.
- Preserves Texture and Prevents Crumbliness: My children, like many, often complain about dry or crumbly homemade bread in their sandwiches. Freezing pre-sliced loaves helps to lock in moisture, maintaining their tender texture and avoiding that less-than-ideal “homemade bread phenomenon.”
- Instant Freshness on Demand: Need a quick slice for a sandwich or a piece of toast? A mere 25 seconds in the microwave at 50% power (or a quick pop in the toaster) revitalizes a frozen slice, bringing it back to a perfectly tender, fresh state, ready for your favorite spread, jam, or sandwich fillings. It’s truly a game-changer!
Essential Tips for Consistently Perfect Whole Wheat Bread
Through countless baking sessions and a commitment to refining my technique, I’ve compiled a collection of invaluable tips that can dramatically enhance your bread-making success and the overall quality of your loaves. These insights have streamlined my routine and ensured my bread is consistently delicious.
-
Mastering Instant Yeast and the Efficient Single-Rise Method
For optimal results with these recipes, I highly recommend utilizing instant yeast. Unlike traditional active dry yeast, instant yeast eliminates the need for prior proofing in warm water, saving valuable time and effort. Crucially, instant yeast performs exceptionally well in a single-rise environment. This means that immediately after kneading your dough, you can proceed directly to shaping it into loaves and placing them into your prepared pans. Allow them to rise just once in the pans until they are beautifully domed and have approximately doubled in size. Then, carefully transfer them to a cold oven. Turning the oven on to 350°F (175°C) from a cold start and baking for around 32 minutes consistently yields stunningly golden, perfectly baked loaves with an inviting, even crust, without any risk of burning. This “cold oven” technique is a revelation for many home bakers, offering a more controlled rise and an ideal bake.
Important Oven Calibration Note: Keep in mind that every oven possesses unique characteristics. While 350°F for 32 minutes works perfectly for my oven, yours may require slight adjustments. I strongly encourage you to observe your bread closely, especially during your initial attempts, to pinpoint the ideal temperature and baking duration that consistently produces a perfect loaf in your particular oven.
-
The Unparalleled Performance of the Chicago Metallic Commercial Bread Pan
When assembling your baking arsenal, investing in a high-quality loaf pan is absolutely paramount. I enthusiastically endorse The Chicago Metallic Commercial Bread Pan (specifically, the standard 1-pound size, which measures approximately 8½-inch by 4½-inch). My personal experience, supported by numerous side-by-side comparisons with various other pan types—including non-stick, dark-coated, and glass options—has consistently demonstrated the superior results achieved with Chicago Metallic. Its robust, heavy-duty construction ensures exceptionally even heat distribution throughout the baking process, effectively preventing burnt edges and promoting a gorgeously uniform, golden-brown crust. Furthermore, finished loaves effortlessly slide out, leaving no stubborn, crusty remnants behind. This pan’s durability means it will be a reliable workhorse in your kitchen for years to come. Investing in these pans is a decision you will undoubtedly appreciate; they truly are a cornerstone for achieving perfect homemade bread.
Discover the Chicago Metallic Commercial Bread Pan on Amazon.
-
Optimal Storage Solutions: King Arthur Flour Bread Bags
Effective storage is critical for preserving the peak freshness of your homemade loaves. I previously grappled with the frustration of ill-fitting plastic bags, but my discovery of the perfect bread bags from King Arthur Flour has been a game-changer. These bags are precisely sized for standard loaves, transforming the freezing and storage process into a seamless task. They provide excellent protection against freezer burn and are instrumental in maintaining the bread’s delightful texture for extended periods. This seemingly small detail can significantly enhance your long-term enjoyment of your homemade bread.
(On a related note, I also consistently procure my vital wheat gluten—a crucial ingredient for many whole wheat recipes that enhances elasticity and rise—from King Arthur Flour, a brand renowned for its exceptional quality baking ingredients.)
-
Choosing the Ideal Flour: White Whole Wheat vs. Red Whole Wheat
While any good quality whole wheat flour will yield satisfying results in these recipes, I personally lean towards white whole wheat flour. It imparts a notably lighter texture and a milder, slightly sweeter flavor profile compared to its red whole wheat counterpart. This characteristic makes it particularly appealing for individuals new to whole wheat baking or for families whose palates might be more accustomed to white flour, yet desire the nutritional benefits of whole grains. Importantly, both types of whole wheat flour offer comparable nutritional value, but white whole wheat provides a subtle enhancement in taste and mouthfeel. For those who embrace the craft of baking, grinding your own flour at home ensures unparalleled freshness and maximum nutrient retention. I’ve had positive experiences with both a Nutrimill wheat grinder and my current Wolfgang Flour Mill, both representing excellent choices for home milling enthusiasts. If you’re considering investing in a flour mill or wish to delve deeper into the nuances of various wheat types, I highly recommend exploring these supplementary resources:
- Wheat Grinding 101: A Comprehensive Review of Popular Grinders
- Wheat and Wheat Grinding 101: Understanding Types, Sourcing, and Culinary Uses
The dedication involved in making homemade bread is truly a labor of love that is profoundly rewarded. There’s no greater satisfaction than hearing my son, a notorious sandwich-averse eater, enthusiastically declare his preference for “Mom’s bread” over school French Toast Sticks. It’s these heartwarming moments that unequivocally underscore the immense joy, health benefits, and sheer value of this effort.
Unveiling Our Favorite Whole Wheat Bread Recipes
Now, let’s get to the heart of the matter: the recipes! Each of these has been carefully tested and perfected, guaranteeing a delightful baking experience and mouthwatering results. Whether you prefer a slightly lighter texture or a robust, classic whole wheat flavor, you’ll find a recipe here that perfectly suits your palate and baking style.
Darcy’s Whole Wheat Bread My Most Used Recipe
Prep Time: 1 hr 30 mins
Cook Time: 25 mins
Total Time: 1 hr 55 mins
Pin Recipe
Ingredients
- 15-17 cups wheat flour (about 80 ounces)
- 2 tablespoons instant yeast
- ½ cup vital wheat gluten
- 1000 mg Vitamin C, crushed (or 1 tablespoon lemon juice or white vinegar)
- 6 ½ cups very warm water
- ⅔ cup oil
- ⅔ cup honey or sugar
- 2 tablespoons salt
Instructions
- In a large bowl (or stand mixer, like the almighty Bosch), combine 5 cups of wheat flour, yeast, vital wheat gluten, and Vitamin C (or lemon juice or vinegar). Add the warm water and mix thoroughly. Incorporate the oil and honey (or sugar) and mix again until well combined.
- Cover the bowl and allow the mixture to rest for 10 minutes. Add the salt and begin mixing (either with a stand mixer or by hand), gradually adding the remaining flour until the dough pulls away from the sides of the bowl, forming a soft, pliable dough. Remember, you may not need to use all the flour! Judge the dough’s consistency by feel—it should be slightly sticky but still hold its shape—rather than strictly by the measured amount of flour.
- Knead the dough for 7 minutes in a stand mixer (or 15 minutes by hand). Divide and shape the dough into 5 equal loaves (suitable for 8½ x 4-inch loaf pans) and place them into greased bread pans. Allow the loaves to rise until they reach about 2 inches above the top of the bread pan.
- Bake at 350 degrees F (175 C) for 25 minutes. (Alternatively, you can let the bread rise 1 inch above the top of the pans, then place the pans in a cold oven. Turn the oven on to 350 degrees F and bake for 32 minutes.)
Notes
Flour Amount: As with all yeast doughs, the specified flour amount in any recipe should be treated as a guideline, not a rigid rule (unless a precise weight is given, in which case a kitchen scale is recommended). Factors such as humidity, ambient temperature, altitude, and even the specific type of flour can significantly impact how much flour your dough will actually need. Therefore, always gauge when to stop adding flour by the dough’s texture, appearance, and feel, rather than by strictly adhering to the recipe’s stated quantity.
Yeast: For a deeper understanding of working with yeast and achieving optimal dough consistency, this tutorial on yeast offers helpful guidance.
Shaping the Dough: For visual assistance on how to perfectly shape the dough into loaves, refer to this step-by-step guide with pictures and a video.
Author: Mel
Course: Bread | Cuisine: American | Method: Bake
Recommended Products
LuAnn’s Whole Wheat Bread With My Adaptations
Prep Time: 2 hrs 30 mins
Cook Time: 38 mins
Total Time: 3 hrs 8 mins
Pin Recipe
Ingredients
- 5 ½ cups warm water
- ½ cup sugar
- ½ cup oil
- 2 tablespoons instant yeast
- 2 tablespoons salt
- 2 tablespoons vital wheat gluten
- 2 tablespoons nonfat dry milk
- 2 cups (284 g) white flour
- 8-10 cups (1136 to 1420 g) whole wheat flour
Instructions
- Lightly spray bread pans with cooking spray and set them aside.
- In the bowl of an electric mixer (or a large bowl if mixing by hand), combine the water, sugar, oil, yeast, salt, vital wheat gluten, and nonfat dry milk. Add the white flour and mix thoroughly until well combined.
- Continue gradually adding the whole wheat flour until the dough begins to pull away cleanly from the sides of the bowl, forming a soft but not overly sticky dough.
- Knead the dough for 10 minutes until it becomes soft and smooth. Lightly grease your hands and countertops with oil or cooking spray, then divide the dough and form it into 4 equal loaves.
- Place the formed loaves into the prepared bread pans and cover them with lightly greased plastic wrap to keep them moist. Allow them to rise until the dough has risen approximately 1½ inches above the top of the bread pan.
- Carefully place the bread pans into a cold oven. Turn the oven on to 350°F (175°C) and bake for 38 minutes.
- Remove the bread from the oven and immediately turn the loaves out onto a wire rack to cool completely. Ensure they are fully cooled before placing them into bags for freezing.
Notes
Flour Amount: As highlighted for all yeast doughs, the precise amount of flour listed in a recipe should be considered a guide rather Prethan an absolute rule (unless a weight measure is provided, in which case using a kitchen scale is recommended). Various environmental factors such as humidity, temperature, and altitude, along with other variables, can significantly influence the actual quantity of flour needed for your dough. Therefore, always assess the dough’s texture, appearance, and feel to determine when to cease adding flour, rather than strictly adhering to the recipe’s numerical flour quantity.
Author: Mel
Course: Bread | Cuisine: American | Method: Bake
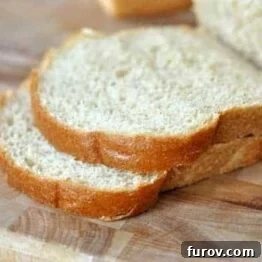
Bosch Foolproof Whole Wheat Bread
Prep Time: 2 hrs 30 mins
Cook Time: 38 mins
Total Time: 3 hrs 8 mins
Pin Recipe
Ingredients
- 6 cups warm water
- 2 ½ tablespoons instant yeast
- 2 tablespoons salt
- ½ cup oil
- ⅔ cup honey
- 2 tablespoons vital wheat gluten
- 12-15 cups whole wheat flour
Instructions
- In the bowl of an electric mixer (or a large bowl if mixing by hand), combine 8-9 cups of fresh wheat flour and 2½ tablespoons of instant yeast. Add 6 cups of warm water and mix until it forms a paste-like consistency.
- Cover the bowl and allow the mixture to “sponge” for 10-15 minutes. This allows the yeast to activate and develop flavor.
- Add the salt, honey, oil, and vital wheat gluten to the sponged mixture. If using an electric mixer, turn it to speed 1 or 2 (or a low speed that the motor can handle comfortably) and gradually add additional flour until the dough cleanly pulls away from the sides of the bowl. Be careful not to add too much flour; the dough should be soft. Let the mixer knead the dough for five minutes. (If kneading by hand, continue for 10 minutes.)
- Lightly grease your hands with oil or cooking spray to prevent sticking, then divide the dough into six equal portions and form them into loaves.
- Immediately transfer the dough from the bowl to lightly greased (or nonstick) loaf pans, filling each pan approximately ½ to ⅔ full. Cover the pans with lightly greased plastic wrap to maintain moisture. Allow the bread to rise until it has doubled in size, reaching about 1½ inches above the top of the pan.
- Carefully place the bread pans into a cold oven. Turn the oven on to 350°F (175°C) and bake for 38 minutes. After baking, remove the loaves from the oven and turn them out onto a wire rack to cool completely. Ensure they are fully cooled before packaging them in bags for freezing.
Notes
Flour Amount: As consistently advised for all yeast doughs, the flour quantity specified in the recipe should be viewed as a flexible guide, not an unbreakable rule (unless precise weight measurements are provided, in which case a kitchen scale is indispensable). Atmospheric conditions such as humidity, ambient temperature, and altitude, alongside other subtle factors, can significantly alter the amount of flour truly required for your dough. Consequently, the ultimate decision on when to cease adding flour should always be based on the dough’s observed texture, visual appearance, and tactile feel, rather than a strict adherence to the recipe’s numerical value.
Author: Mel