
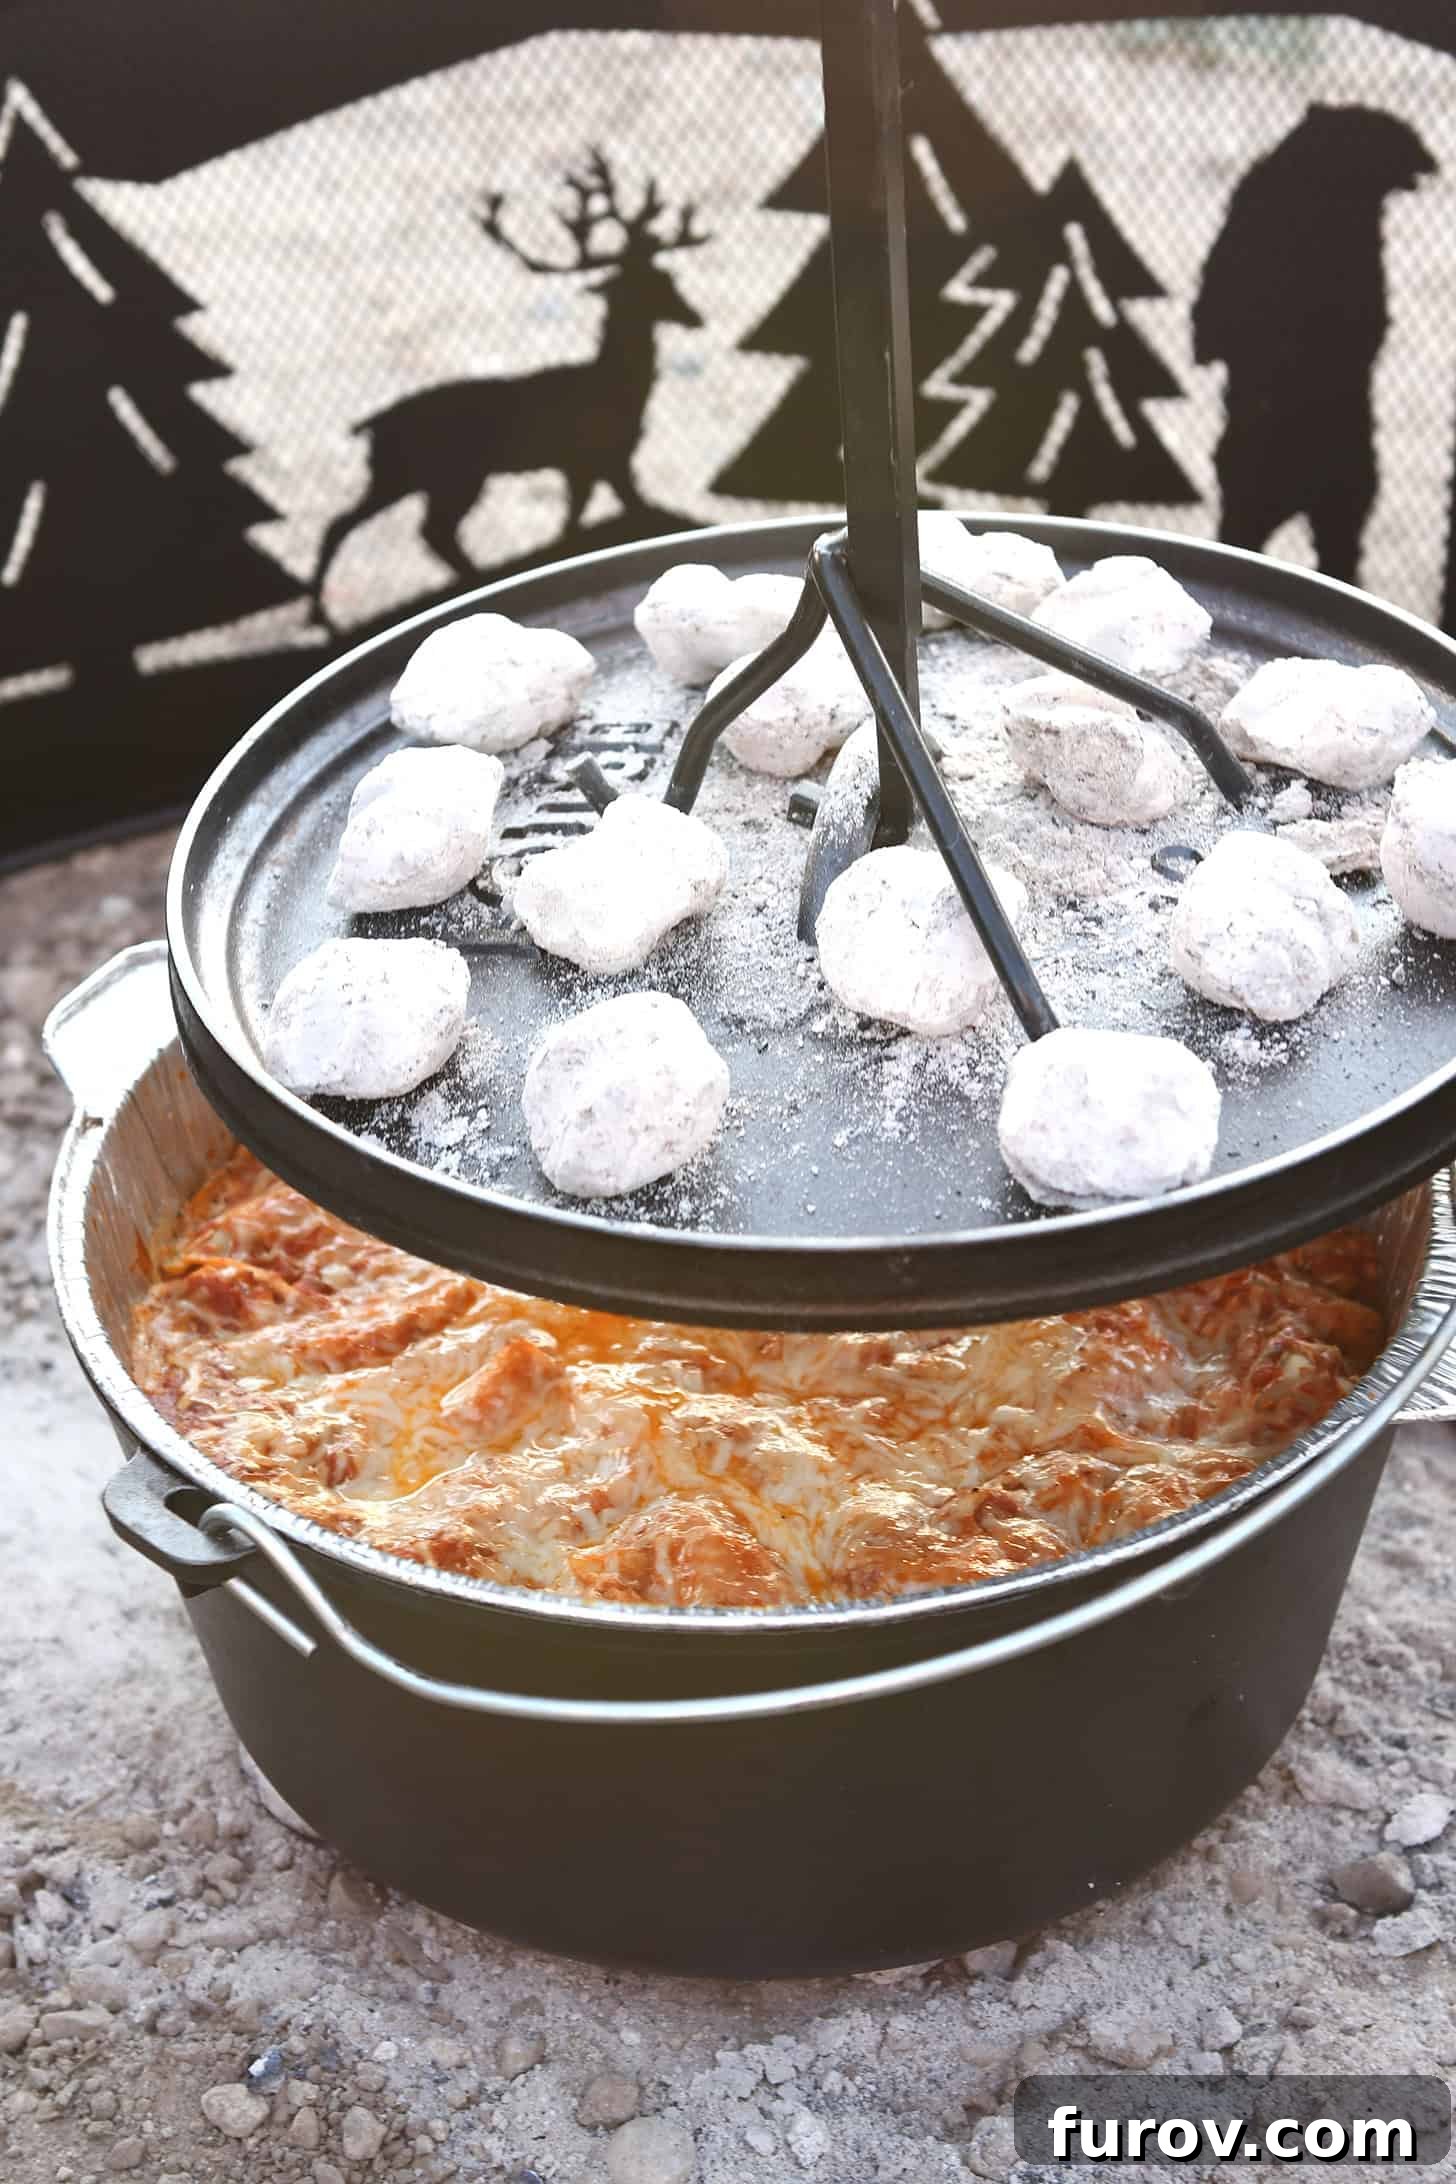
Embark on an unforgettable culinary adventure with our incredible Dutch Oven Lasagna recipe – the ultimate make-ahead meal perfect for camping trips, backyard gatherings, or any outdoor cooking endeavor. This robust and satisfying lasagna brings together rich flavors, gooey cheese, and hearty meat in a single, easy-to-manage pot. Say goodbye to complicated camp cooking and hello to a legitimately fantastic, cheesy masterpiece that will quickly become your family’s most anticipated meal!
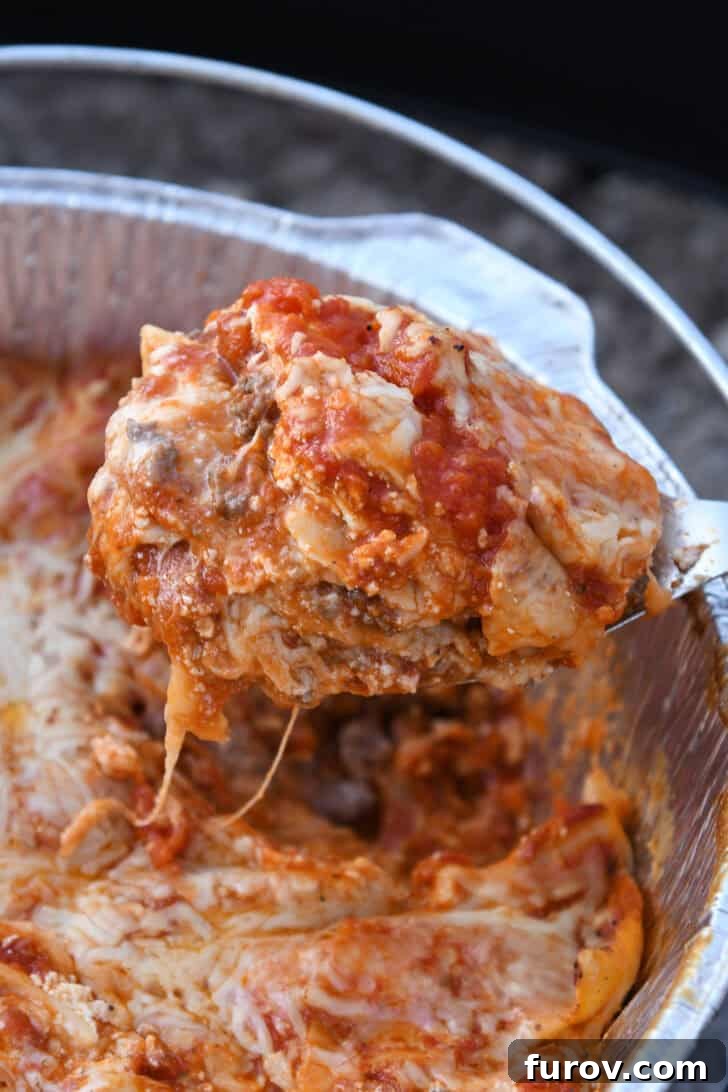
Why Dutch Oven Lasagna is the Ultimate Outdoor Meal
There’s something uniquely magical about savoring a delicious, home-cooked meal under the open sky, especially when you’re deep in the wilderness or simply enjoying your own backyard. Our Dutch Oven Lasagna takes this experience to an unparalleled level. It’s more than just a meal; it’s a memory in the making. The even heat distribution of a Dutch oven ensures every layer cooks to perfection, resulting in a deeply flavorful, bubbly, and tender lasagna that tastes even better when shared around a campfire.
This recipe is designed for maximum enjoyment and minimal fuss, making it ideal for those who love to explore without sacrificing gourmet flavors. Forget the endless pots and pans; this one-pot wonder simplifies the cooking process, allowing you to spend more time with loved ones and less time cleaning up. Plus, the robust nature of lasagna means it travels well and reheats beautifully, solidifying its status as a camping staple.
Mastering the Make-Ahead Dutch Oven Lasagna for Stress-Free Cooking
One of the most significant advantages of this Dutch oven lasagna recipe is its incredible versatility for advance preparation. This feature transforms potentially hectic camp cooking into a seamless, enjoyable process. By doing most of the work at home, you minimize on-site chores, ensuring more relaxation and less stress during your outdoor adventure.
- Component Prep: All individual components—the savory meat mixture, the creamy cheese filling, and the shredded cheeses—can be prepared days in advance. Store each in separate airtight containers or heavy-duty resealable bags. This not only saves precious time at your campsite but also simplifies portioning and assembly.
- Full Assembly (with a Liner): For ultimate convenience, you can assemble the entire lasagna ahead of time within a Dutch oven liner. Once assembled, cover it tightly with foil or the liner’s lid and refrigerate. If heading out camping, keep it in a well-iced cooler. This method allows you to simply drop the liner into your Dutch oven and start cooking upon arrival. We strongly advise against assembling the lasagna directly in your metal Dutch oven for prolonged storage, as it can be difficult to clean and may affect the pan’s seasoning over time.
Beyond the Campfire: A Versatile Meal for Any Occasion! While this recipe shines in outdoor settings, don’t limit its potential to just camping. It’s a fantastic choice for any occasion where you crave flavorful food cooked outdoors, even in your own backyard. You can also assemble the ingredients in a traditional baking dish and bake it in your conventional oven for an incredibly easy, comforting meal at home. This recipe adapts beautifully to indoor cooking when the weather isn’t cooperating.
The three core elements that benefit most from advance preparation are: blending the smooth, creamy cheese filling, cooking the flavorful meat and onion mixture, and portioning/shredding all the cheeses. This methodical approach ensures efficiency and freshness for your outdoor feast.

Assembling Your Dutch Oven Lasagna, Layer by Layer
Assembling this Dutch oven lasagna is a straightforward process, especially when you’ve done the prep work ahead of time. I cannot overstate the convenience and absolute game-changing nature of Dutch oven liners. For anyone who’s ever battled stubborn, baked-on food in a Dutch oven with limited water and tools at a campsite, these liners are a revelation. They transform cleanup from a dreaded chore into a simple task, letting you focus on the joy of outdoor cooking rather than the aftermath. Seriously, my ancestors might judge my lack of “pioneer spirit,” but I embrace the modern convenience these liners offer. They are truly life-changing!
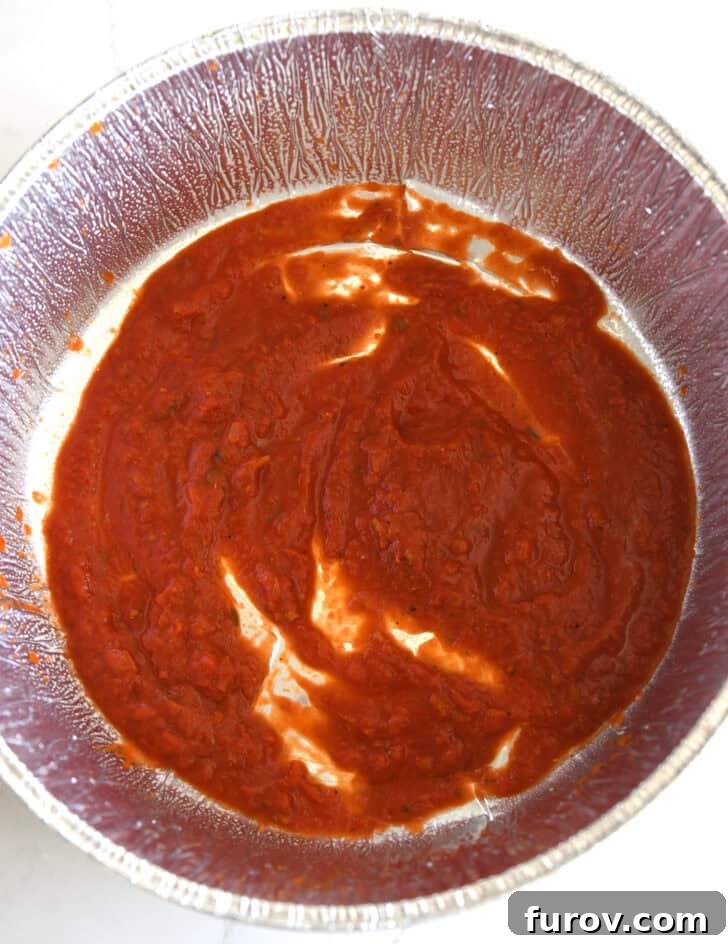
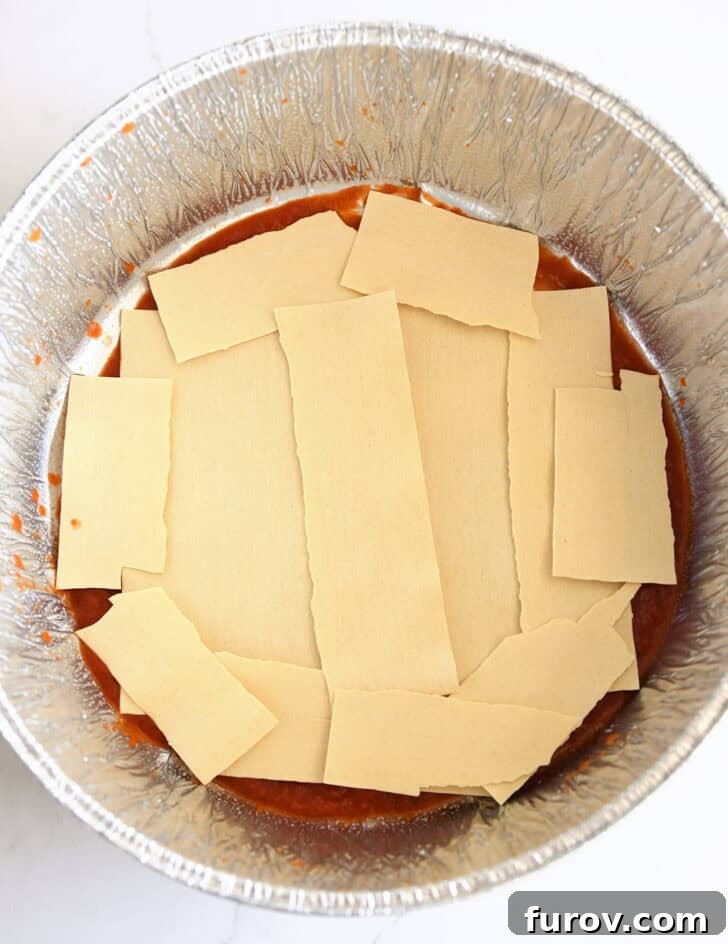
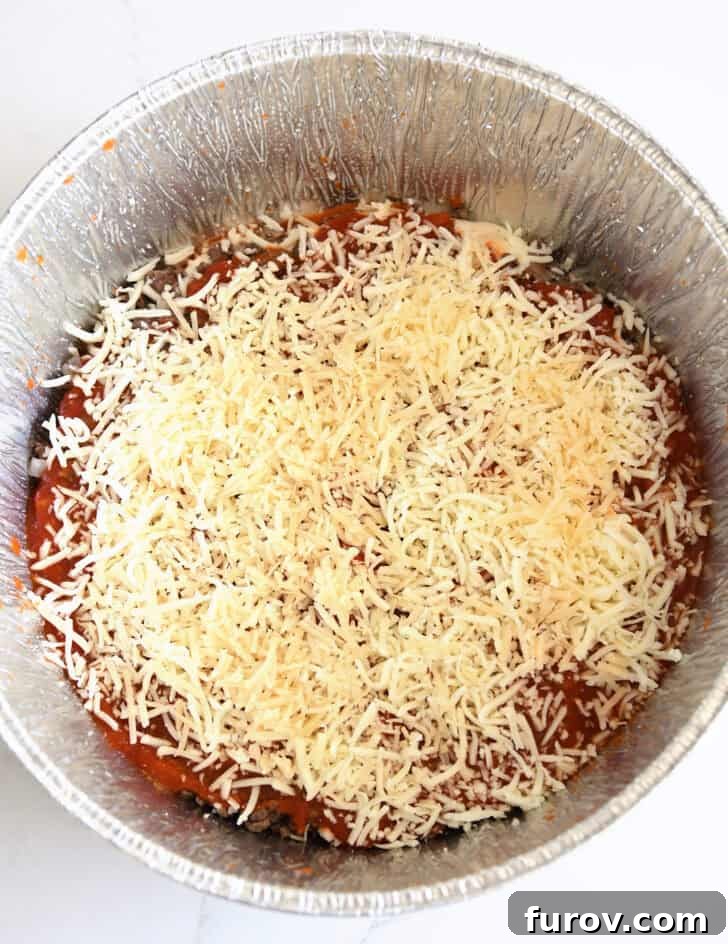
To begin the assembly, lightly grease your chosen liner (or directly grease the Dutch oven if you’re cooking immediately). Spread about a cup of your favorite pasta sauce evenly across the bottom of the pan to prevent sticking and add a foundational layer of flavor. Then, build your lasagna with these delicious layers:
- Approximately 5 no-boil lasagna noodles, broken as needed to cover the bottom entirely. Perfection isn’t required – just ensure good coverage.
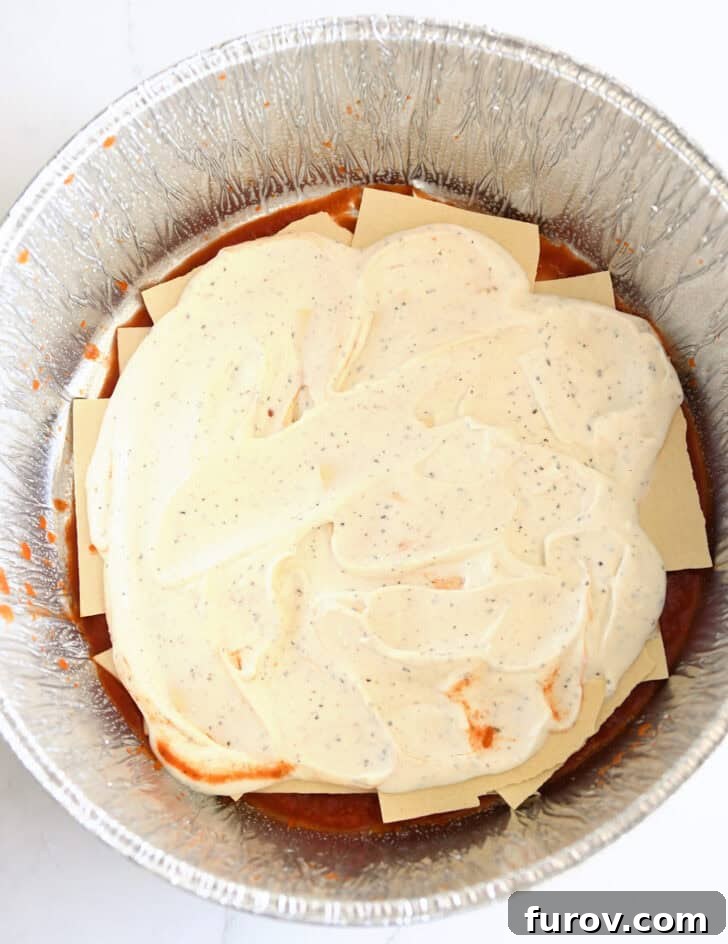
- One-third of your blended creamy cottage cheese mixture, spread gently over the noodles.
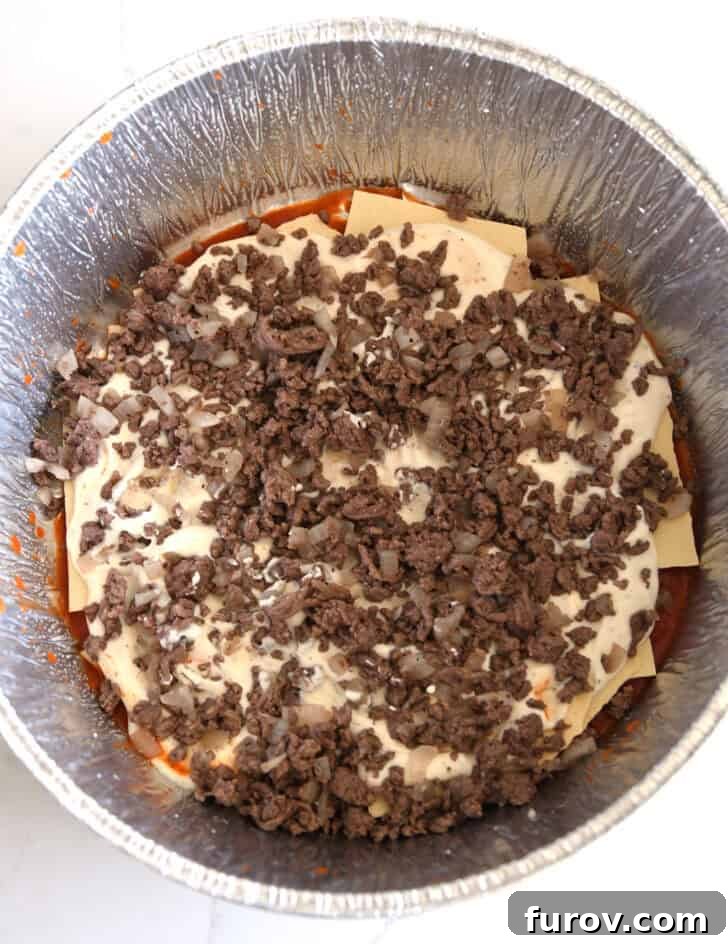
- Half of the seasoned meat mixture, evenly distributed.
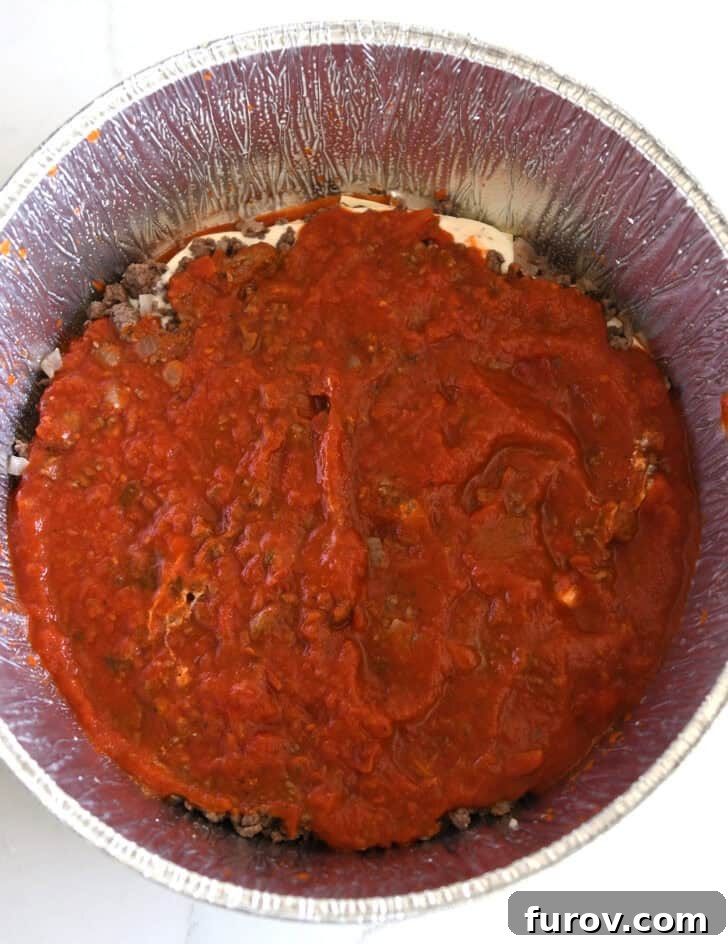
- One-third of the remaining pasta sauce, drizzled generously.
- One-third of the shredded mozzarella and Parmesan cheese blend, sprinkled for cheesy goodness.
Repeat these layers two more times. Note that the meat mixture will only be layered one more time, ensuring two hearty meat layers in total. If you’re using a Dutch oven liner, simply place the assembled liner into your Dutch oven, ready for cooking.
Simplify with No-Boil Noodles and Quality Jarred Sauce: Our recipe champions ease and flavor by relying on no-boil lasagna noodles and your favorite jarred pasta sauce. The quality of your sauce will significantly impact the overall taste, so choose wisely! Popular choices like Rao’s or Trader Joe’s marinara sauces are excellent. For no-boil noodles, Barilla and Trader Joe’s brands consistently deliver fantastic results, ensuring a perfectly cooked, tender lasagna without the extra step of pre-boiling.
How to Cook Food in a Dutch Oven Using Charcoal Briquettes
Dutch oven cooking opens up a world of possibilities for outdoor culinary enthusiasts. While there are many ways to generate heat, for consistent and reliable results, I wholeheartedly recommend using charcoal briquettes combined with a chimney starter. This method provides excellent temperature control and predictable heat, crucial for baking items like lasagna. Proper management of your briquettes is key to a perfectly cooked meal.
Preparing Briquettes for Optimal Dutch Oven Performance:
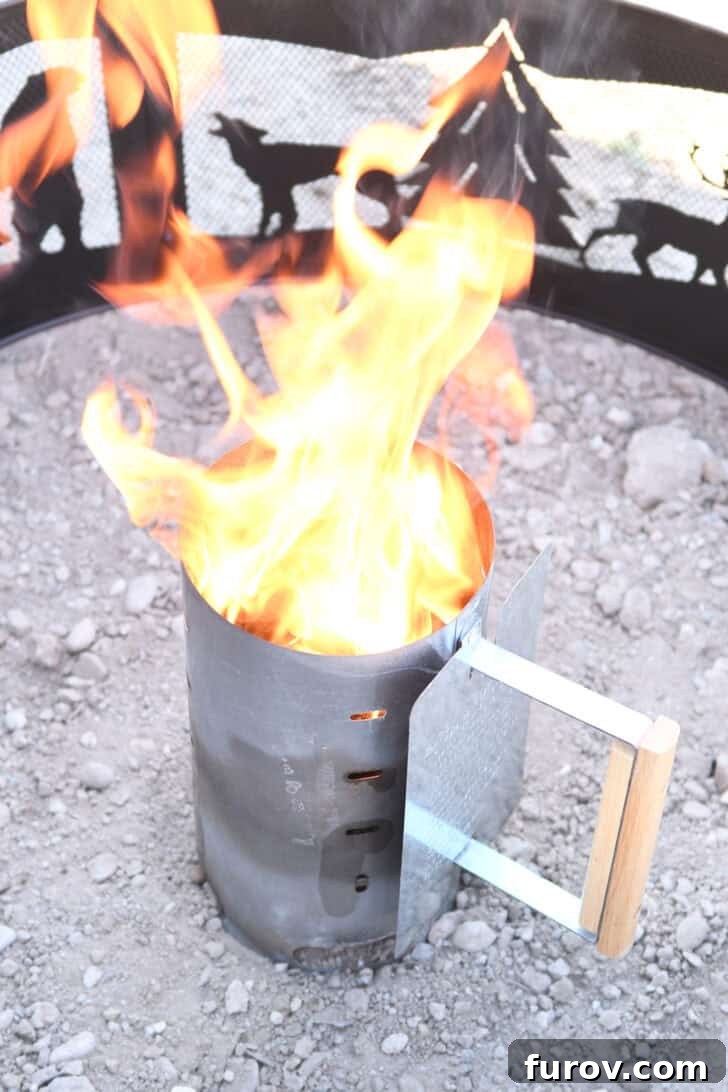
- Load the Chimney Starter: Carefully place your desired number of briquettes into the chimney starter. Crumple a small amount of paper (newspaper works well) and tuck it under the base of the chimney.
- Ignite: Light the paper in several spots around the bottom of the chimney starter. The flames will naturally rise, igniting the charcoal. You can use a bit of lighter fluid on the paper if needed, but avoid directly dousing the briquettes.
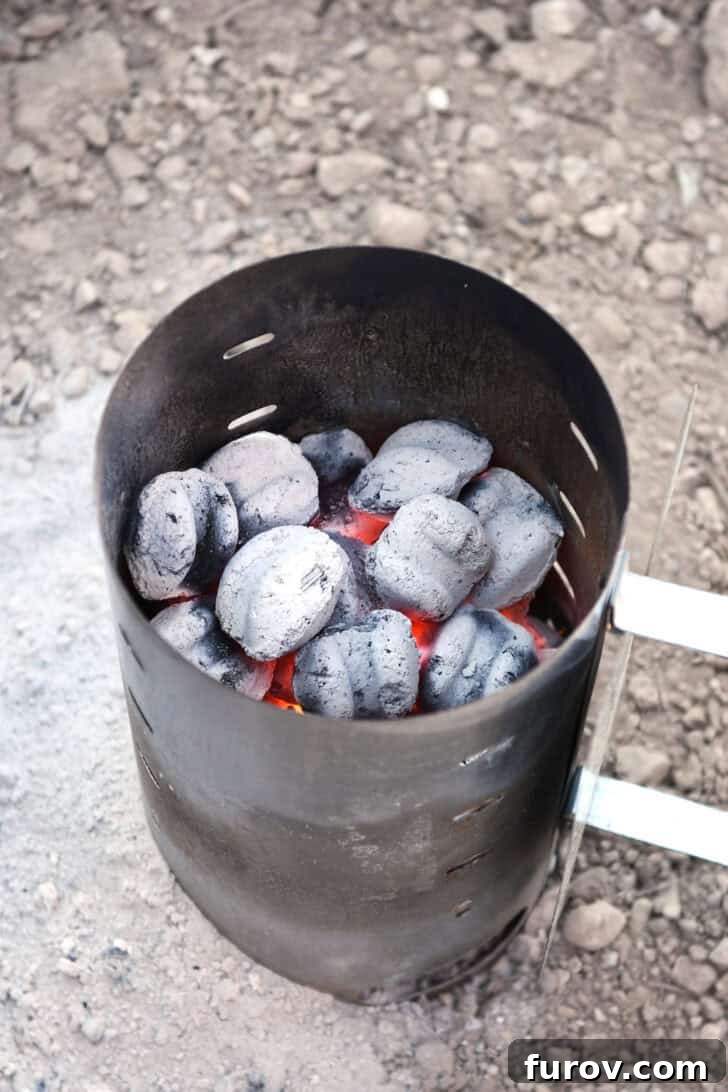
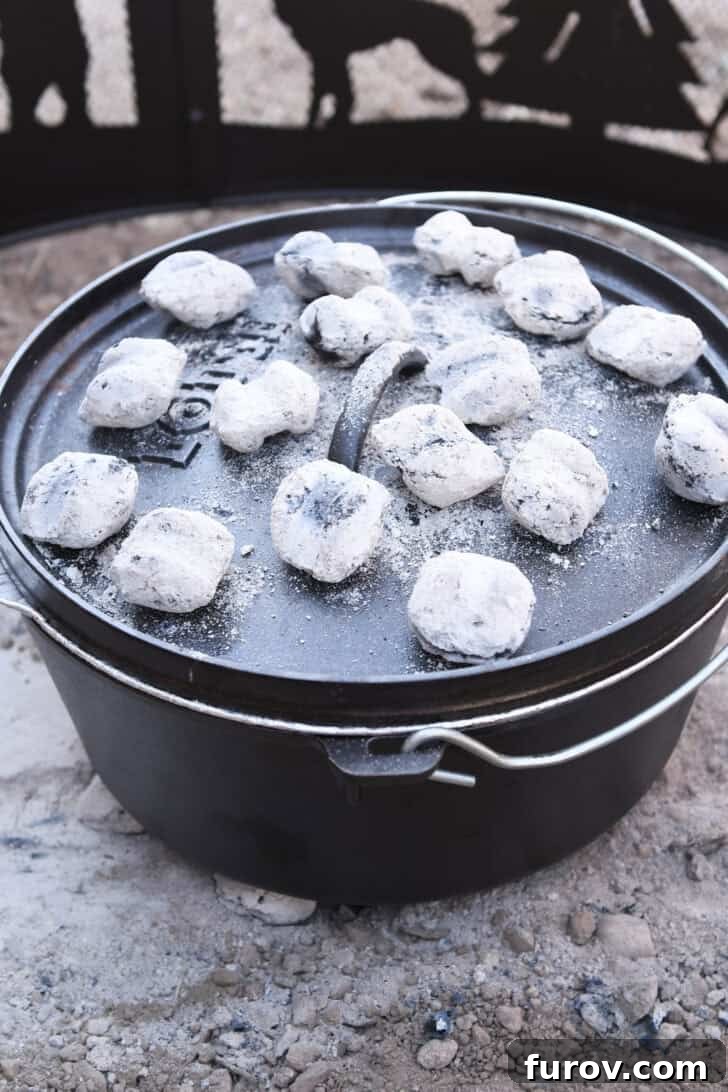
- Heat Until Ashy: Allow the briquettes to heat for approximately 15-20 minutes. They are ready for cooking when they are mostly covered in a light gray ash. Be careful not to let them heat for too long, as they can crumble and lose their structural integrity when you try to move them.
- Coal Count Considerations: The exact number of briquettes you’ll need is flexible and depends on several factors: the size and depth of your Dutch oven, the ambient temperature, wind conditions, and direct sunlight. Colder or windier weather typically demands more coals, while a hot, sunny day might require fewer to prevent overcooking.
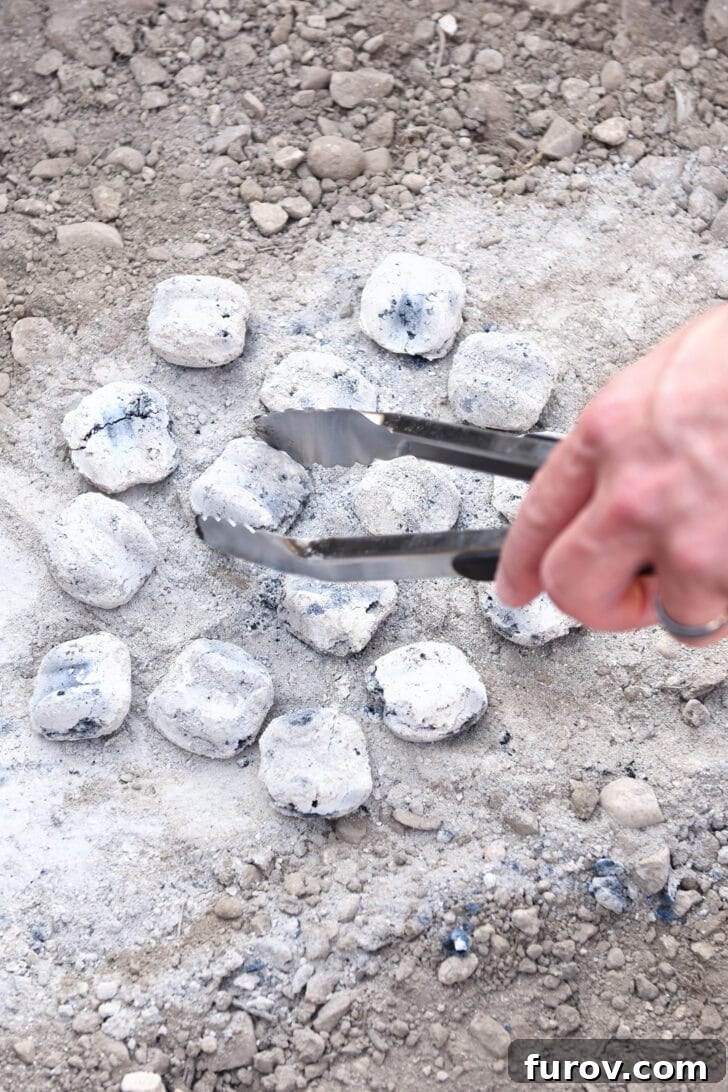
- Distribution for a 12-inch Dutch Oven: For a standard 12-inch diameter Dutch oven (whether 6-quart or a deep 8-quart), a good starting point is about 16-18 briquettes placed evenly on top of the lid and 10-12 briquettes arranged in a slightly smaller circle beneath the Dutch oven. This distribution creates even top and bottom heat, essential for baking. Adjust cooking time based on Dutch oven size and environmental factors.
Adapting This Lasagna Recipe for Various Dutch Oven Sizes
This particular Dutch oven lasagna recipe is specifically designed for a deep 8-quart Dutch oven with a 12-inch diameter, which offers ample space for generous layers and ensures thorough cooking. However, the beauty of Dutch oven cooking lies in its adaptability. You can easily adjust the recipe to suit different sizes of Dutch ovens with a few considerations.
For Smaller Dutch Ovens: If you’re using a smaller Dutch oven, such as a 6-quart (12-inch diameter) model, you’ll need to scale down the ingredients. A 6-quart Dutch oven is typically a couple of inches less deep than an 8-quart. A good rule of thumb is to reduce all ingredients by about one-third. You might assemble the lasagna in two thicker layers or three slightly thinner layers, depending on your pot’s depth. While the ingredient quantities will change, a 6-quart Dutch oven of the same 12-inch diameter will generally use a similar number of briquettes as indicated in the recipe for heat distribution. However, anticipate a shorter cooking time due to the shallower depth.
For Larger Dutch Ovens or Multiples: If you have a larger Dutch oven, or if you’re planning to double or triple the recipe for a big group (which we highly recommend for family reunions or church camps!), simply scale up the ingredients proportionately. Having multiple Dutch ovens and using liners will be your best strategy for large-scale cooking and easy cleanup. Remember to adjust the number of briquettes to maintain the desired temperature for your larger pot.
Embrace the Art of Dutch Oven Cooking: Dutch oven cooking can be a journey of trial and error, whether you’re a seasoned pro or just starting out. Variables like weather, elevation, and the quality of your coals can all influence cooking times and temperatures. Don’t be afraid to adjust the number of briquettes during cooking – adding more if the temperature drops or removing some if it gets too hot. This hands-on approach is part of the charm! It’s a highly rewarding way to cook, offering a unique connection to your food and environment. Not only will you feel like an outdoor culinary rockstar, but the food that emerges from a Dutch oven often tastes next-level amazing, infused with a distinct, smoky flavor profile that simply can’t be replicated indoors.
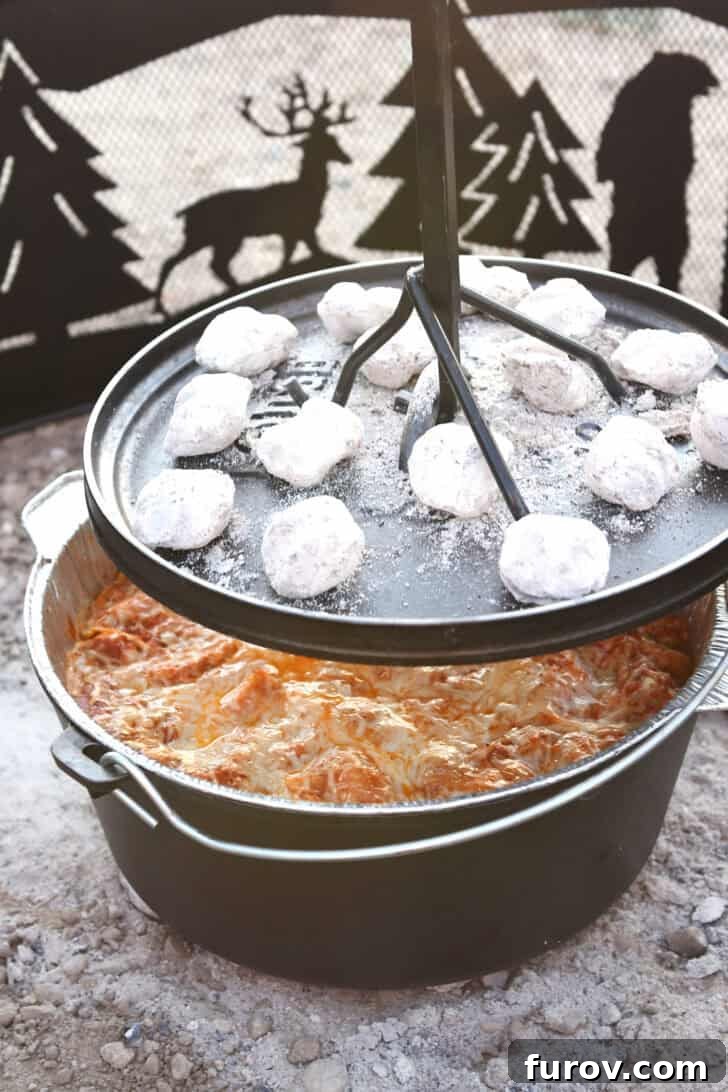
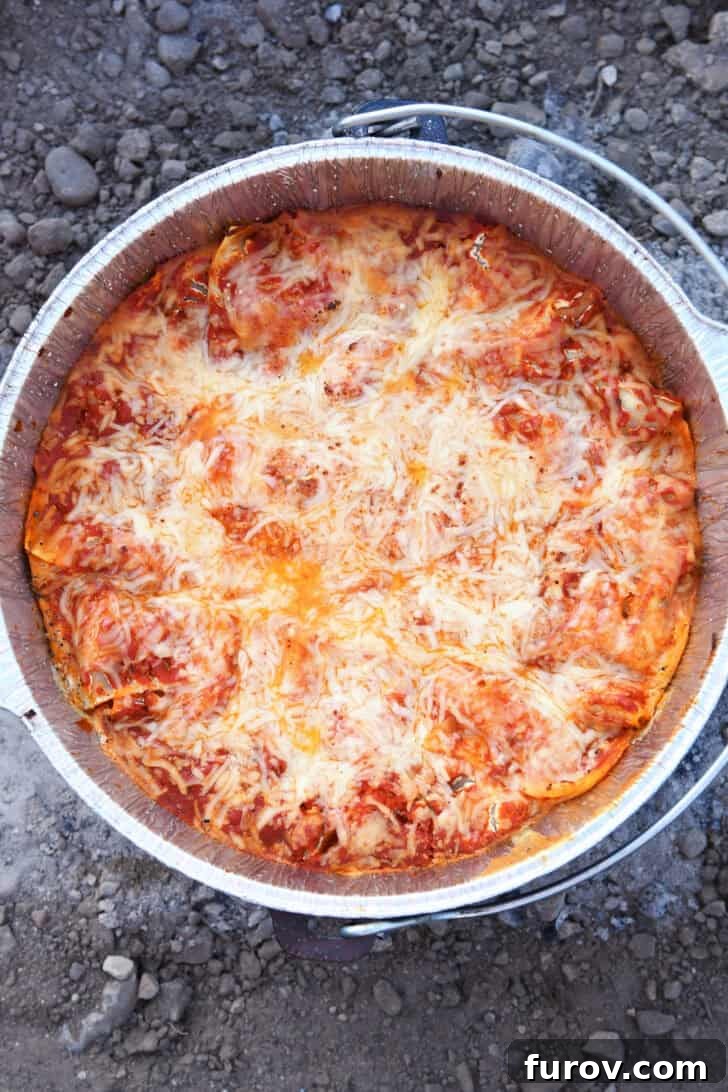
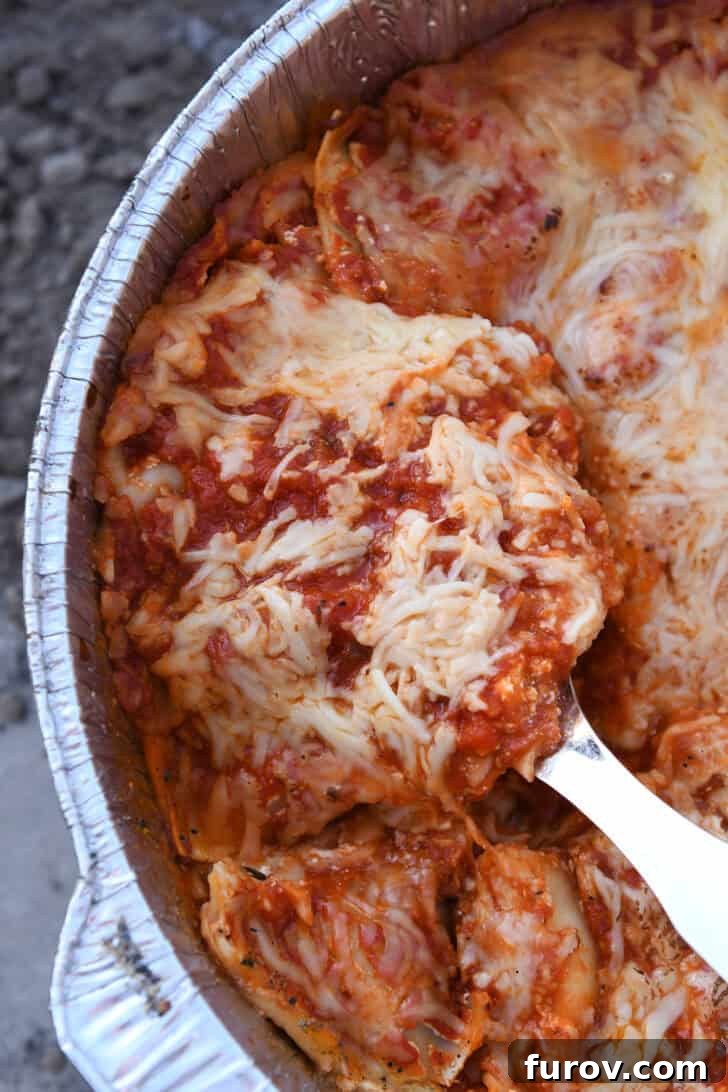
This Dutch oven lasagna recipe truly delivers on its promise: it’s incredibly easy to prepare, bursting with cheesy goodness, and tastes absolutely spectacular. It’s a hearty, comforting meal that transcends the ordinary, making every bite feel like a celebration.
It’s the perfect centerpiece for memorable campouts, festive family reunions, or feeding a hungry crowd at larger group camps, like church retreats. The versatility to easily double, triple, or even quadruple the recipe across multiple Dutch ovens makes it a fantastic option for any gathering. In such scenarios, those indispensable Dutch oven liners will undoubtedly be your best friends, making cleanup a breeze even with a mountain of hungry campers.
Our family cherishes the time spent camping together, and even more so, the joy of eating exceptionally well while immersed in nature. My goal is to share more of our go-to outdoor cooking recipes soon, including some truly amazing chicken bacon ranch foil packets that are absolutely to-die-for. Until then, I sincerely hope this incredible Dutch oven lasagna brings as much joy and deliciousness to your adventures as it does to ours!
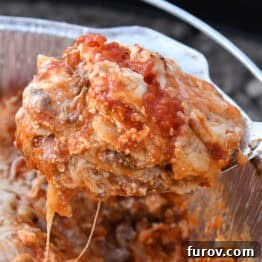
Dutch Oven Lasagna
8
to 10 servings
45
1
1
45
Pin
Ingredients
-
1 ½
pounds
lean ground beef -
1
cup
chopped onions -
½
teaspoon
salt -
¼
teaspoon
black pepper -
4
cups
cottage cheese or ricotta cheese -
2
large
eggs -
1
teaspoon
dried basil -
1
teaspoon
dried oregano -
2
jars (28-ounces each)
marinara or pasta sauce (see note) -
1
box (9-ounces)
no-boil lasagna noodles (see note) -
3 to 4
cups
shredded mozzarella cheese -
1
cup
shredded Parmesan cheese
Instructions
-
In a 12-inch skillet over medium heat, cook the ground beef, onions, salt, and pepper. Break the meat into small pieces until it is no longer pink, typically 5 to 7 minutes. Drain any excess grease. Set aside to cool. If preparing ahead of time, let the meat mixture cool completely, then store it in a resealable bag or covered container in the refrigerator or a cooler with ice.
-
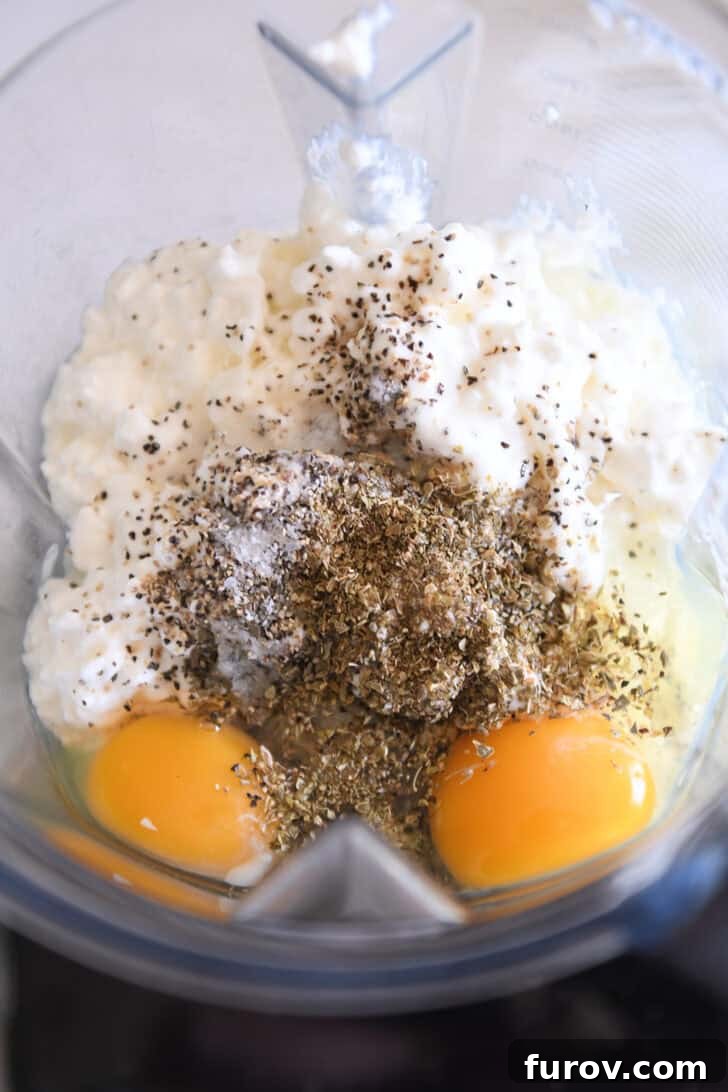
Add the cottage cheese (or ricotta), eggs, basil, oregano, and a pinch of salt and pepper to a blender. Blend until the mixture is smooth and creamy. Set aside. If preparing ahead of time, transfer the mixture to a covered container or resealable bag and store it in the refrigerator or a cooler with ice.
-
*If you plan to cook the lasagna immediately, begin preparing your briquettes/coals approximately 20 minutes before you start assembling the lasagna. Refer to the “Preparing Briquettes for Optimal Dutch Oven Performance” section above for a detailed how-to guide.*
-
To assemble the lasagna, lightly grease an 8-quart Dutch oven (see notes for adapting to alternate sizes) or, for easier cleanup, lightly grease an appropriately sized Dutch oven liner. Spread about one cup of your chosen pasta sauce evenly across the bottom of the pot.
-
Layer the following ingredients in this sequence:
- Approximately 5 no-boil lasagna noodles (break them as needed to fit and cover the bottom, it doesn’t have to be perfect).
- One-third of the blended cottage cheese mixture.
- One-half of the cooked meat mixture.
- One-third of the remaining pasta sauce.
- One-third of the shredded mozzarella and Parmesan cheeses.
-
Repeat the layers (noodles, cottage cheese mixture, sauce, cheese) two more times. Note: the meat mixture will only be layered one more time, resulting in two meat layers in total. If you are using a Dutch oven liner, carefully place the assembled liner into your Dutch oven. Place the lid securely on top to cover.
-
Arrange 10 to 12 hot coals in a circle slightly smaller than the diameter of the bottom of the Dutch oven. Carefully place the Dutch oven directly on top of these coals. (This step is easier to manage in a fire pit or a cleared dirt area where the Dutch oven can settle securely on the coals.)
-
Distribute 15 to 18 hot coals evenly across the top of the Dutch oven lid. Cook the lasagna for 45 to 60 minutes, or until it is hot, bubbly, and cooked through with the cheese melted and lightly golden. When removing the lid, do so carefully to prevent any ash from falling into your delicious lasagna.
-
Serve immediately for a fresh, hot meal, or allow it to rest for a few minutes to set up a bit more, which makes for cleaner slices.
Notes
Lasagna Noodles: For this recipe, we utilize no-boil lasagna noodles to streamline the cooking process. My preferred brands for consistent results are Barilla and Trader Joe’s no-boil lasagna noodles.
Preparing Briquettes: While many methods exist for preparing coals or briquettes for Dutch oven cooking, I consistently rely on charcoal briquettes and a chimney starter for ease and efficiency. To prepare: Place the briquettes in the chimney starter, then tuck a piece of paper underneath and light it. The flames will ignite the charcoal. If desired, a small amount of lighter fluid can be used to accelerate this process. The briquettes will be ready in about 15-20 minutes when they are mostly covered in ash. Be careful not to let them burn too long, or they will become brittle and crumble when moved.
The precise number of coals or briquettes needed for cooking is variable. It largely depends on the size and depth of your Dutch oven, as well as environmental factors like ambient temperature, wind, and direct sunlight. Colder or windier conditions will typically require more coals, while hot, sunny weather may demand fewer to prevent overcooking.
Dutch Oven Sizes: This recipe is specifically designed for a deep 8-quart (12-inch diameter) Dutch oven. If you plan to use a smaller Dutch oven, such as a 6-quart (12-inch diameter) model which is shallower, you’ll need to adjust the ingredient quantities accordingly (a reduction of about one-third is a good starting point). You can assemble the lasagna in two thicker layers or three thinner layers. A 6-quart Dutch oven of the same diameter will generally use a similar number of coals, but the cooking time will likely be shorter.
Trial and Error: Dutch oven cooking is an art that often involves some trial and error, whether you’re a beginner or have years of experience. Be prepared to make small adjustments to the number of coals during the cooking process if needed. Embrace this learning curve, as the highly rewarding experience of cooking delicious food outdoors makes it all worthwhile!
Mel Gunnell
Main Course
Italian
Bake
Serving:
1
serving
,
Calories:
299
kcal
,
Carbohydrates:
4
g
,
Protein:
39
g
,
Fat:
13
g
,
Saturated Fat:
8
g
,
Cholesterol:
111
mg
,
Sodium:
914
mg
,
Fiber:
0.1
g
,
Sugar:
3
g
Recommended Products
Recipe Source: Mel’s Kitchen Cafe