
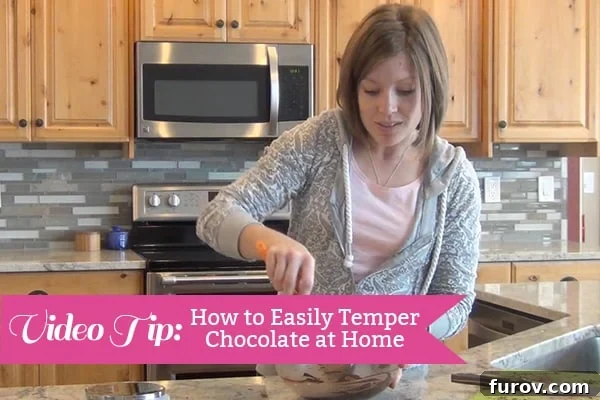
Unlock the secrets to perfectly tempered chocolate right in your own kitchen! This comprehensive guide (including a handy video tutorial) will show you exactly how to achieve that professional, glossy finish and delightful snap every time.
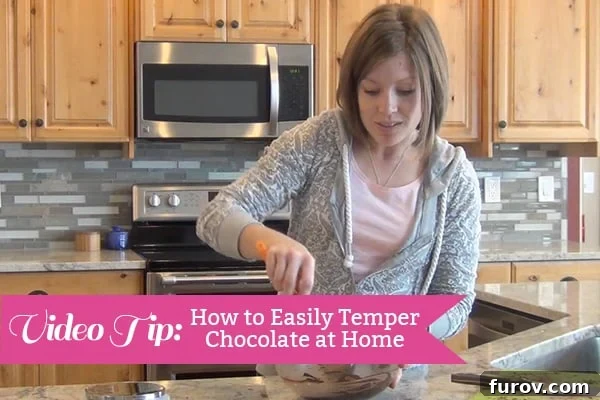
Mastering Chocolate Tempering at Home: Your Ultimate Guide for Glossy, Smooth Treats
Have you ever spent time meticulously melting chocolate, only to have it cool with disheartening white or gray streaks, a dull finish, or an unappealing spotty appearance? This common culinary mishap, known as “blooming,” is a clear sign that your chocolate wasn’t melted or cooled correctly. While still perfectly edible, bloomed chocolate significantly lacks the aesthetic appeal and satisfying texture we crave in high-quality confections.
Professional chocolatiers understand that achieving that coveted glossy sheen, firm snap, and smooth mouthfeel requires a precise process: chocolate tempering. This isn’t just a fancy, optional technique; it’s a fundamental step that stabilizes the cocoa butter crystals within the chocolate. While the traditional method involves careful heating, cooling, and rewarming to specific temperatures, many home cooks find this intimidating. But what if there was an easier, reliable way?
In this ultimate guide, we’ll demystify chocolate tempering, explaining its critical importance, exploring common methods, and providing practical tips. We’ll also dive into a simplified, yet incredibly effective, “amateur” method that consistently yields perfect results – glossy, smooth chocolate with that delightful snap you’ve always dreamed of!
What Exactly Is Chocolate Tempering?
At its heart, tempering is the process of precisely controlling the temperature of chocolate to stabilize the cocoa butter crystals. Cocoa butter, the primary fat component in chocolate, can crystallize in several different forms, each with unique melting points and textures. Only one of these forms, known as Beta V crystals, is highly desirable for confectionery work.
When chocolate is melted and then allowed to cool haphazardly, the cocoa butter forms various unstable crystal structures. These unstable crystals lead to a dull finish, a crumbly texture, and are highly prone to blooming. Tempering specifically ensures that the chocolate cools with a predominance of the stable Beta V crystals, resulting in all the desirable characteristics we associate with premium chocolate: a beautiful shine, a crisp snap, and a smooth, luxurious mouthfeel.
Why Temper Chocolate? The Indispensable Benefits
Tempering chocolate isn’t just about showing off; it’s crucial for achieving superior results in your homemade treats. Here’s why it’s a step absolutely worth mastering for any chocolate enthusiast:
- Stunning Glossy Finish: Tempered chocolate boasts a beautiful, reflective sheen that makes your confections look professional and incredibly appealing. This visual appeal significantly enhances the perception of quality.
- The Perfect “Snap”: Bite into properly tempered chocolate, and you’ll experience a satisfying crisp snap, rather than a soft, crumbly break. This distinct sound and feel are hallmarks of well-made chocolate.
- Smooth, Melt-in-Your-Mouth Texture: The stable crystal structure ensures a silky-smooth texture that melts beautifully and evenly on the tongue, creating a truly luxurious experience.
- Resists Blooming: Properly tempered chocolate is highly resistant to both fat bloom (the unsightly white streaks) and sugar bloom (grainy spots), keeping your treats looking pristine and fresh for longer periods.
- Longer Shelf Life: The stabilized fat structure helps to preserve the chocolate, extending the shelf life of your finished products and maintaining their quality over time.
- Easier to Work With: Tempered chocolate sets quickly and cleanly at room temperature, making it ideal for dipping, molding, and creating intricate decorations without a sticky mess or long waiting times.
Understanding and Avoiding Chocolate Bloom
Chocolate bloom is the most common visual defect you’ll encounter in untempered or improperly melted chocolate. It can be disheartening to see your hard work marred by these imperfections. It primarily comes in two forms:
Fat Bloom
This is the familiar white or grayish streaking and dull appearance you often see on chocolate bars or confections. It occurs when unstable cocoa butter crystals separate from the chocolate solids and rise to the surface, recrystallizing in larger, visible clumps. Fat bloom is primarily caused by:
- Overheating chocolate beyond its recommended melting point.
- Rapid and extreme temperature fluctuations during cooling or storage.
- Incorrect tempering (or a complete lack of tempering).
Sugar Bloom
Less common but equally undesirable, sugar bloom appears as grainy, rough spots or a dusty white coating on the chocolate surface. This happens when moisture (e.g., condensation from humidity or sudden temperature changes) comes into contact with the chocolate. The moisture dissolves tiny sugar crystals on the surface, and as the moisture evaporates, the sugar recrystallizes in larger, visible particles, creating a rough texture.
While bloomed chocolate is always safe to eat and its flavor is not fundamentally altered, it significantly detracts from the sensory experience, both visually and texturally. Proper tempering is your best defense against fat bloom, while careful handling to avoid any moisture prevents sugar bloom.
The Science Behind the Snap: Cocoa Butter Crystallization Explained
To truly appreciate the art and science of tempering, it helps to understand the fascinating changes happening within the cocoa butter. Cocoa butter is polymorphic, meaning it can solidify into various crystal structures (typically labeled Form I to VI). Each form has a different melting point, stability, and contributes to distinct textural and visual properties:
- Forms I-IV: These are unstable and undesirable. They melt easily, result in a dull finish, and contribute directly to fat bloom. You want to avoid these.
- Form V (Beta V): This is the “gold standard” crystal form! It’s the most stable, melts precisely around body temperature (giving that smooth, clean melt-in-your-mouth feel), and most importantly, produces a beautiful glossy finish and a firm, audible snap when broken.
- Form VI: Even more stable than Form V, but it’s very difficult to achieve intentionally and often only forms during very long storage, potentially leading to an excessively brittle texture.
Tempering, therefore, is essentially about guiding the cocoa butter to predominantly form and align the stable Beta V crystals. This critical process is achieved by systematically melting all existing crystal forms, then carefully cooling the chocolate down to a specific temperature range where Beta V crystals readily form and grow, and finally, slightly warming it back up to a working temperature while keeping these desirable stable crystals perfectly suspended within the melted chocolate.
Traditional Tempering Methods: A Glimpse into Professional Techniques
While we’ll focus on an easier home method, it’s valuable to be aware of the more traditional and precise techniques used by professional chocolatiers and confectioners:
1. The Seeding Method
This is arguably the most common professional method and serves as the fundamental basis for many home-friendly variations. It involves introducing already tempered chocolate (the “seed”) into melted, untempered chocolate to kickstart the formation of stable crystals:
- Initial Melting: Gently melt about two-thirds of your finely chopped chocolate or callets in a double boiler until it reaches a temperature of 115-120°F (46-49°C) for dark chocolate, or 105-110°F (40-43°C) for milk and white chocolate. At this stage, all existing crystal structures are completely destroyed.
- Cooling & Seeding: Remove the chocolate from the heat. Immediately add the remaining one-third of finely chopped, untempered chocolate (your “seed” chocolate) to the melted chocolate. Stir continuously with a rubber spatula. The seed chocolate, containing stable Beta V crystals, will gradually melt while simultaneously cooling the overall batch and inoculating it with desirable crystal structures.
- Achieving Working Temperature: Continue stirring until all the seed chocolate is fully melted and the entire mixture cools down to your target working temperature: 88-91°F (31-32°C) for dark chocolate, 86-88°F (30-31°C) for milk chocolate, and 82-84°F (28-29°C) for white chocolate.
- Maintain Temperature: Once the working temperature is reached, maintain the chocolate at this range, reheating gently over warm water or with a heat gun if it starts to thicken, ensuring it never exceeds the upper limit of the working temperature range.
2. The Tabling Method (Marble Slab Method)
This visually impressive method requires a large, cool surface like a marble slab and a steady, practiced hand. It’s often favored by those making large batches:
- Initial Melting: Melt all your chocolate in a double boiler to the same initial temperatures as the seeding method (115-120°F / 46-49°C for dark, 105-110°F / 40-43°C for milk/white).
- Tabling: Pour about two-thirds of the total melted chocolate onto a clean, cool marble slab. Using a metal scraper and a spatula, continuously work and spread the chocolate across the slab, bringing it back together. This active movement helps to quickly cool the chocolate and encourages the formation of stable crystals. Continue this until the chocolate cools and starts to thicken slightly, reaching approximately 80°F (27°C) for dark chocolate, or 77°F (25°C) for milk and white chocolate.
- Combining & Warming: Swiftly scrape the chocolate from the slab back into the bowl with the remaining one-third of warm chocolate that you reserved. Stir thoroughly until the mixture reaches the desired working temperature (88-91°F / 31-32°C for dark, etc.). The warmer chocolate helps bring the cooled, crystal-rich chocolate back up to the optimal working temperature, and the already formed stable crystals propagate throughout the entire batch.
The “Amateur” Way: Easy & Reliable Chocolate Tempering at Home
Forget the intimidating marble slabs and overly complex temperature charts for a moment. My “amateur” method simplifies the traditional seeding technique, making it incredibly accessible for home cooks while still delivering those perfect, glossy results with a satisfying snap. This is the quick and easy way demonstrated in the accompanying video tip!
Essential Equipment You’ll Need:
- Good quality chocolate (chips, callets, or finely chopped bars – choose a brand you love and that contains real cocoa butter!)
- Microwave-safe bowl or a double boiler setup (a heatproof bowl nested over a saucepan with gently simmering water)
- Rubber spatula (for consistent stirring and scraping)
- (Optional but highly recommended for precision) Digital thermometer (instant-read is best)
Step-by-Step Guide to Easy Tempering:
- Prepare Your Chocolate: Start with approximately 8-10 ounces of good quality chocolate. Reserve about 2-3 ounces of this chocolate, ensuring it’s finely chopped or in convenient callet form, to use as your “seed” chocolate. Place the larger portion (6-7 ounces) into your microwave-safe bowl or the top of your double boiler.
- Gentle Melting:
- Microwave Method: Heat the chocolate in short, controlled bursts of 20-30 seconds, stirring exceptionally well after each interval. Continue this until approximately two-thirds of the chocolate is melted and smooth. The key here is not to overheat! It should feel comfortably warm to the touch, but never scorching hot. Aim for a temperature roughly around 105-110°F (40-43°C) for dark chocolate, and slightly lower for milk or white chocolate.
- Double Boiler Method: Place the bowl containing the chocolate over gently simmering water (ensure the bottom of the bowl does not directly touch the water). Stir constantly until two-thirds of the chocolate is melted and smooth. Remove the bowl from the heat immediately once this stage is reached.
- Introduce the Seed Chocolate: Remove the bowl from the heat (if using a double boiler) or from the microwave. Add the reserved 2-3 ounces of finely chopped, unmelted chocolate directly into the melted chocolate.
- Stir Until Smooth and Cooled: Stir continuously and vigorously with your rubber spatula. The residual heat from the melted chocolate will slowly melt the seed chocolate, while the solid seed chocolate simultaneously cools down the entire batch. Keep stirring until all the seed chocolate is fully melted and the mixture is perfectly smooth, homogeneous, and slightly thickened. The chocolate should now feel just warm to your lip or the back of your wrist, not hot. If you’re using a thermometer, you’re aiming for a final working temperature of 88-91°F (31-32°C) for dark chocolate, 86-88°F (30-31°C) for milk, and 82-84°F (28-29°C) for white chocolate.
- Test Your Temper: This is a crucial diagnostic step! Dip the tip of a clean spoon, a knife, or a small strip of parchment paper into the tempered chocolate. Set it aside at room temperature (ideally 68-70°F or 20-21°C). Within 3-5 minutes, the chocolate on the spoon/paper should set completely, look beautifully glossy, and be firm to the touch with a clean snap when broken. If it sets dull, takes much longer, or is soft, it indicates that it’s not properly tempered, and you may need to adjust by adding more seed chocolate or gently reheating and re-seeding.
- Maintain Working Temperature (if needed): If your chocolate starts to cool too much and thicken significantly before you’re finished using it, you can very gently warm it. This can be done either over a very warm (not hot) water bath or with extremely short bursts in the microwave (5-10 seconds), stirring thoroughly after each burst. Be vigilant to ensure it absolutely does not go above its desired working temperature, as this will destroy the temper.
Crucial Tips for Tempering Success: Universal Advice
Regardless of the tempering method you choose, these universal tips will significantly increase your chances of success and help you achieve consistent, professional results:
- Use Good Quality Chocolate: The quality of your ingredients matters. High-quality chocolate (especially couverture chocolate, which has a higher cocoa butter content) is inherently easier to temper and consistently yields superior results. Avoid compound chocolate (confectionery coating), as it contains vegetable fats instead of cocoa butter and therefore cannot be tempered.
- Avoid Water At All Costs: This cannot be stressed enough. Even a single tiny drop of water can cause chocolate to seize, turning it into a grainy, unworkable, clumpy mess. Ensure all your bowls, spatulas, and the surrounding environment are meticulously clean and completely dry.
- Chop Finely (for Seeding Methods): If you’re using a chocolate bar for your seed chocolate, chop it very finely. Smaller pieces melt more quickly and smoothly into the main batch, promoting even cooling and crystal formation.
- Patience and Gentle Heat: Never rush the melting process by using high heat. Low and slow heat is the absolute key to preventing scorching and avoiding the formation of undesirable, unstable crystal structures.
- Stir, Stir, Stir: Consistent and thorough stirring is vital. It promotes even melting, uniform cooling, and ensures proper distribution and formation of the desired Beta V crystals throughout the entire batch.
- Use a Thermometer (Optional but Highly Recommended): While the “amateur” method can be guided by feel, a digital thermometer provides invaluable accuracy and builds confidence, especially as you’re learning. It helps you hit precise temperature targets reliably.
- Work in a Cool, Dry Environment: A warm or humid kitchen can make tempering considerably more difficult. Aim for a comfortable room temperature, ideally around 68-70°F (20-21°C), with low humidity.
Common Tempering Mistakes to Avoid
Many beginners inadvertently make these common errors. Learning to identify and avoid them will save you significant frustration and wasted chocolate:
- Overheating: This is the single most common culprit for tempering failures. Too much heat destroys all desirable crystal forms, and it becomes exceedingly difficult to reform them correctly without starting over or using extremely precise cooling techniques.
- Not Stirring Enough: Insufficient stirring leads to uneven temperatures within the chocolate and poor distribution of the stable crystals, resulting in an inconsistent temper.
- Using Chocolate Not Designed for Tempering: Certain chocolates, especially some brands of chocolate chips designed to hold their shape during baking, may not temper well due to their specific fat content or composition. Always opt for couverture chocolate or good quality baking bars explicitly intended for melting and tempering.
- Introducing Cold Spots: If your mixing bowl is too cold, or if you add very cold ingredients (like frozen fruit) directly into your melted chocolate, it can shock the chocolate and cause uneven setting or even seize it.
- Not Testing the Temper: Skipping the temper test is a surefire way to encounter disappointment. Always test a small amount to confirm success before you commit your entire batch to dipping or molding.
What Can You Create with Perfectly Tempered Chocolate?
The possibilities are truly endless once you master the art of tempering! Here are just a few inspiring ideas for utilizing your beautifully tempered chocolate, transforming simple treats into professional-grade confections:
- Elegant Dipped Treats: Elevate fresh fruits (like strawberries, grapes, or orange segments), pretzels, nuts, cookies, marshmallows, and homemade truffles with a shiny, impeccably smooth, and snappy coating.
- Gourmet Chocolate Bark: Spread your tempered chocolate thinly onto parchment paper, then generously sprinkle it with your favorite toppings such as toasted nuts, dried fruits, crushed peppermints, or sea salt, and break into delicious, impressive shards.
- Molded Chocolates & Bonbons: Pour your perfectly tempered chocolate into silicone molds to create homemade candies, exquisite bonbons, or festive shapes for holidays and special occasions.
- Intricate Chocolate Decorations: Pipe intricate designs onto parchment paper for elegant cake garnishes, delicate chocolate curls, or stunning chocolate sculpture elements that will impress any guest.
- Professionally Enrobed Confections: Give your homemade caramels, nougat, fudge, or peanut butter cups a professional, glossy finish that not only looks appealing but also extends their shelf life and improves their texture.
See It in Action: Your How-To Video!
Sometimes, seeing a process unfold visually makes all the difference in understanding and mastering a new technique. The video below provides a clear, step-by-step demonstration of the quick and easy “amateur” method for tempering chocolate, guiding you visually through each crucial stage to ensure your success. Pay close attention to the consistency of the chocolate and how it should behave at different points in the process.
Remember, all of my helpful video tips, including this essential guide to chocolate tempering, can be conveniently found on my dedicated Video Tips page. For even more delicious culinary inspiration, practical demonstrations, and mouth-watering recipes, be sure to subscribe to the official Mel’s Kitchen Cafe YouTube channel.
Ready to Achieve Chocolate Perfection?
With this comprehensive guide and the accompanying video tutorial, you now possess all the essential tools, knowledge, and confidence to successfully temper chocolate right in your own kitchen. Say goodbye forever to dull, bloomed chocolate and welcome a world of shiny, snappy, and truly professional-looking treats that will undoubtedly impress everyone who tastes them. Don’t be afraid to experiment, practice, and most importantly, enjoy the rewarding process – the unparalleled satisfaction of perfectly tempered chocolate is truly worth every effort!