
Unlock the secrets to successful home baking with yeast! This comprehensive guide answers all your questions, empowering you to create delicious breads and rolls with confidence.

For many, the idea of baking with yeast can feel a bit daunting. Perhaps you’ve heard stories of dough refusing to rise, or maybe you’ve had a less-than-perfect experience in the past. If you find yourself intimidated by yeast, know that you are absolutely not alone! It’s a very common sentiment I frequently encounter through comments and emails.
However, I also hear countless inspiring success stories from those who’ve taken the leap, trying their hand at homemade bread or cinnamon rolls for the first time and emerging feeling like a true baking rockstar. That’s why it’s my mission to demystify the process and make the wonderful world of yeast baking accessible to everyone. With just a few simple tricks and a bit of understanding, you’ll discover that baking with yeast is not only surprisingly easy but also incredibly rewarding.
This guide is designed to equip you with the fundamental knowledge you need to bake with yeast successfully at home. We’ll cover everything from understanding different yeast types to troubleshooting common issues, ensuring you gain the confidence to create your own delightful baked goods.
Understanding Yeast: Instant vs. Active Dry
When you head to the grocery store, you’ll typically find a couple of different types of dry yeast. (While fresh yeast, also known as cake yeast, exists, it’s less common for home bakers and isn’t usually called for in the recipes you’ll find here, so we’ll focus on dry varieties today.)
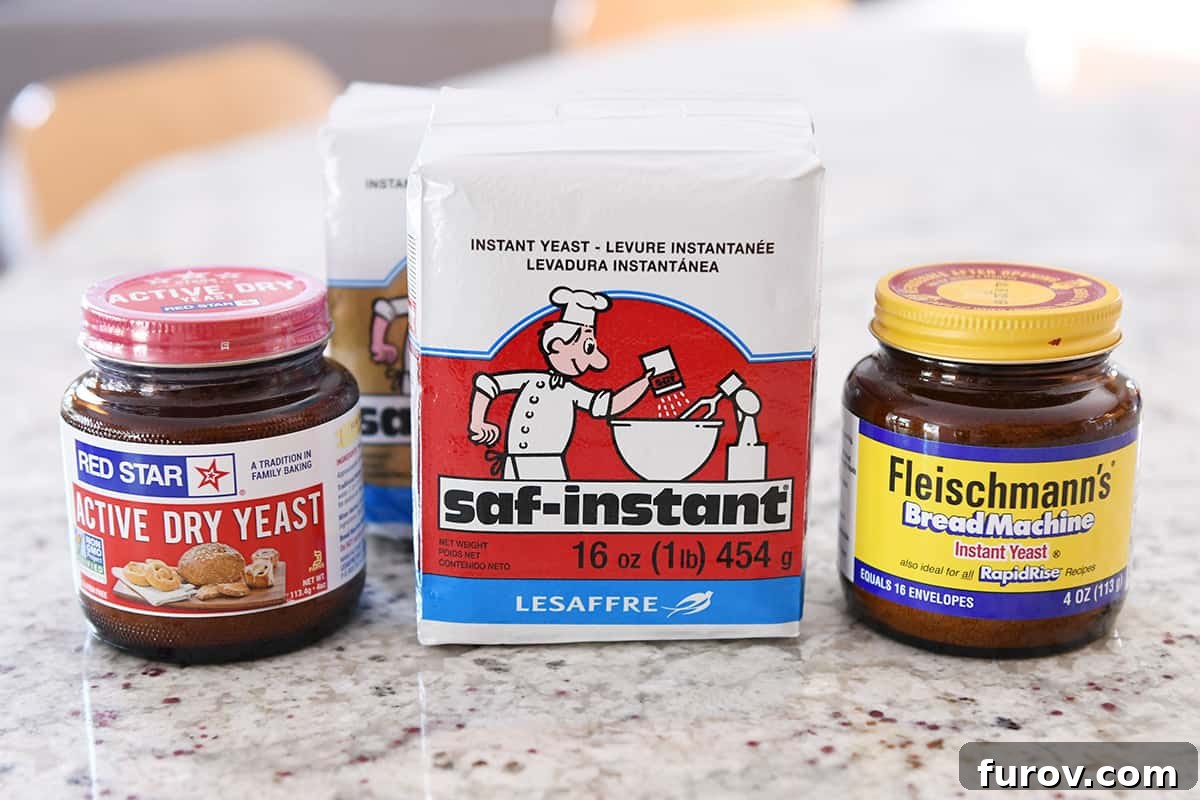
The two primary types of dry yeast are active dry yeast and instant yeast. It’s important to note that any yeast labeled “rapid rise yeast” or “bread machine yeast” is essentially the same as instant yeast and can be used interchangeably. Knowing this can save you a trip to the store!
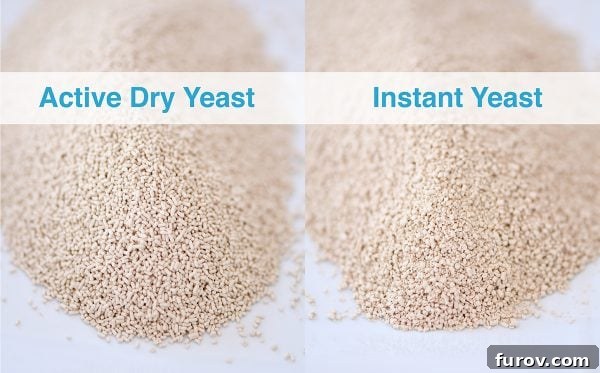
Visually, active dry yeast granules are slightly larger than those of instant yeast, as illustrated in the image below.
What’s the Functional Difference?
Beyond granule size, the key distinction lies in how they’re used. Active dry yeast requires a preliminary step: it must be “proofed” or dissolved in warm water before being incorporated into your recipe’s other ingredients. This process essentially “wakes up” the yeast and confirms its viability.
Instant yeast, on the other hand, is a baker’s best friend for its convenience. It can be added directly to either the dry or wet ingredients of a recipe without prior proofing. This is why I personally gravitate towards instant yeast about 99.9% of the time – it streamlines the baking process significantly.
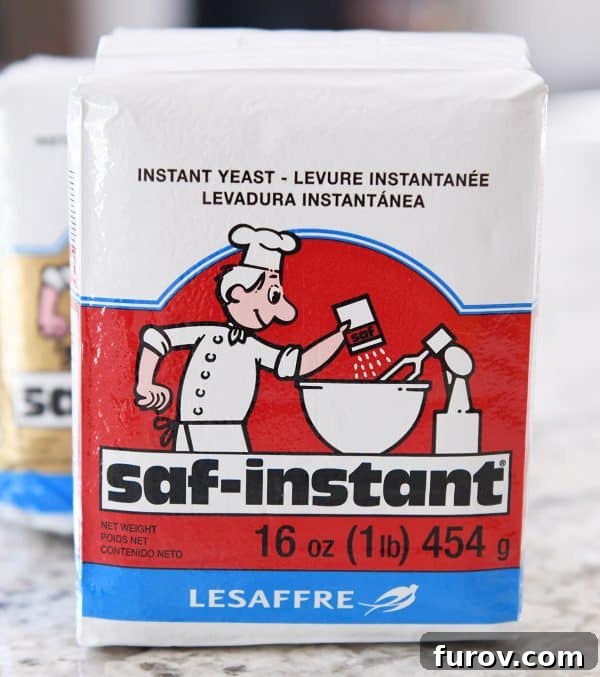
My go-to brand is Saf-Instant yeast (available in red or gold packages); I often purchase it on Amazon when my local stores don’t stock it. I’ve also achieved excellent results with other reputable brands like Red Star and Fleischmann’s.
Substituting Yeast Types: A Simple Guide
Yes, you absolutely can substitute active dry yeast for instant yeast, and vice versa! It’s a common question, and thankfully, the process is straightforward.
Swapping Instant for Active Dry Yeast:
If a recipe specifies instant yeast, but you only have active dry on hand, you’ll need to use slightly more active dry yeast and proof it first. Here’s how:
- **Quantity Adjustment:** Use about 1 1/4 times the amount of active dry yeast compared to instant yeast. For example, if the recipe calls for 1 tablespoon of instant yeast, use 1 1/4 tablespoons of active dry yeast. For 2 teaspoons of instant yeast, use 2 1/2 teaspoons of active dry yeast.
- **Proofing:** Dissolve the active dry yeast in approximately 3-4 tablespoons of warm water (around 105-115°F or 40-46°C). A pinch of sugar can optionally be added to speed up the activation. Let it sit for about 5-10 minutes until it becomes bubbly and foamy. This tells you your yeast is alive and ready!
Swapping Active Dry for Instant Yeast:
If your recipe calls for active dry yeast but you prefer to use instant yeast, the substitution is even simpler:
- **Quantity Adjustment:** You can typically use the same amount of instant yeast as active dry. While some experts suggest reducing instant yeast by about 25% due to its higher activity, I often use a 1:1 ratio with excellent results, as the slight difference rarely impacts the final product negatively in home baking.
- **Integration:** Simply add the instant yeast directly to your other dry ingredients, or mix it with the wet ingredients as per your recipe’s instructions. No proofing step is needed!
The Art of Proofing Yeast
As mentioned, proofing is essential for active dry yeast, but optional (though still possible) for instant yeast. It’s your way of checking if your yeast is still alive and potent. If it doesn’t foam, it means your yeast is likely expired or has been killed by too hot water, and won’t make your dough rise.
To proof active dry yeast: Sprinkle the yeast granules over a small amount of warm water (refer to the temperature section below for ideal range). Stir gently to dissolve the yeast completely. Then, let it rest undisturbed for about 5-10 minutes. During this time, the yeast will “activate.” You’ll observe it transforming from a granular state into a foamy, bubbly mixture that rises to the surface. Once you see this tell-tale foam, your yeast is active and ready to be incorporated into your recipe ingredients.
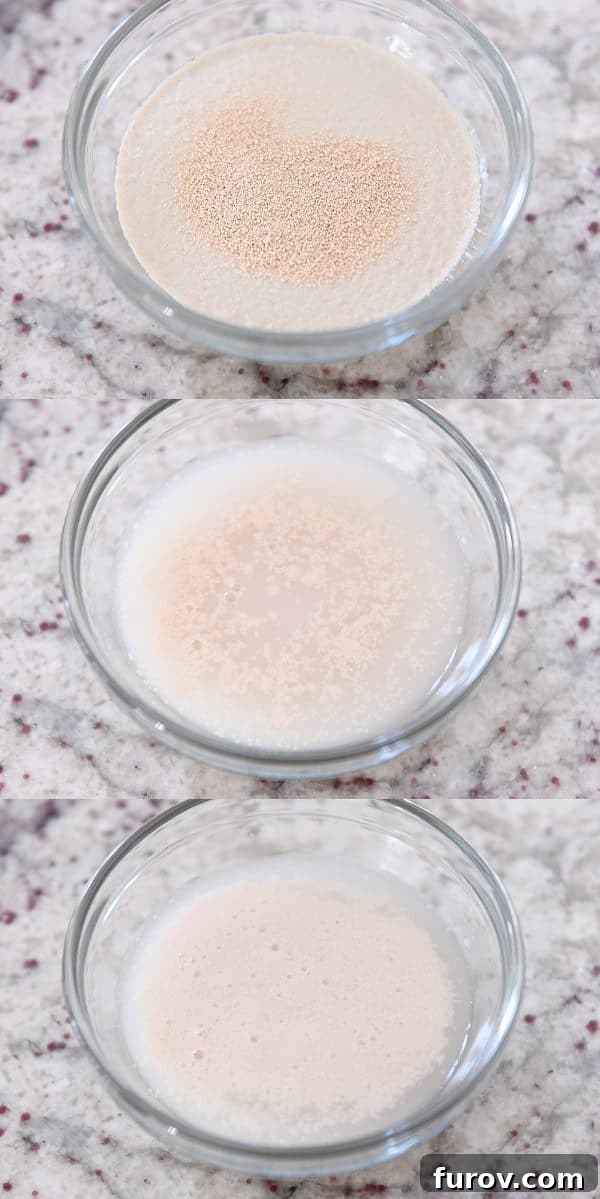
The Perfect Water Temperature for Yeast
Water temperature is critical for yeast activity. Too hot, and you risk killing the yeast; too cold, and it may not activate properly, leading to a very slow or nonexistent rise. Most yeast recipes will specify a water temperature, ranging from hot for some quick-rise recipes to lukewarm or even room temperature for slower-rise methods.
The “sweet spot” for optimal yeast activity is typically between **105-115°F (40-46°C)**. This range is warm enough to encourage yeast growth without being so hot that it damages the delicate yeast cells. You can use an instant-read thermometer to be precise. However, don’t fret if you don’t have one! My preferred method is simply to “eyeball” it: run the tap water and test it with your hand. If it feels like a comfortably warm bath – not scalding hot, but definitely warm – it’s usually just right.
In my experience, it takes extremely hot, almost unbearable-to-the-touch water to kill yeast. So, aim for genuinely warm water, and you’ll likely be fine. The key is to avoid extremes.
Storing Your Yeast for Longevity
Proper storage is essential to keep your yeast active and extend its shelf life. Once opened, packages of yeast should always be stored in an airtight container to protect them from moisture and air. I personally prefer to store my opened yeast in a mason jar in the freezer. When I’m ready to bake, I simply take the jar directly from the freezer and measure out the yeast – there’s no need to bring it to room temperature first, which saves time and effort.
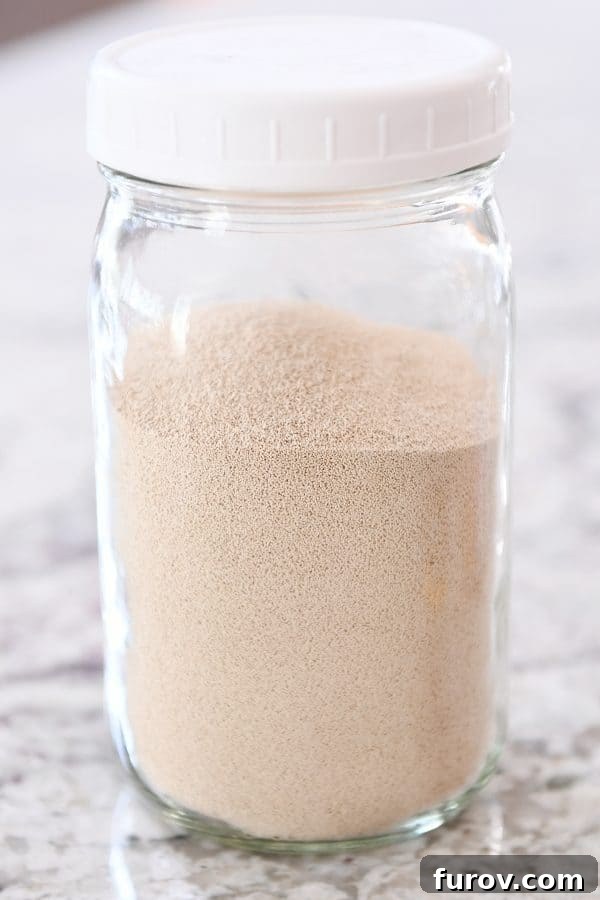
While the freezer offers the longest storage duration, the refrigerator is also an acceptable option. Always check the expiration date on your yeast package. If the packaging is gone, or you’re unsure if your yeast is still good, perform a quick proofing test: sprinkle about a teaspoon of yeast into 1/4 cup of warm water with a pinch of sugar. If it foams and bubbles after 5-10 minutes, your yeast is still active and ready to use!
Mastering Flour Quantity in Yeast Doughs
This is perhaps one of the most crucial and often misunderstood aspects of yeast baking. Unlike many other baking recipes which demand precise measurements, the amount of flour in yeast doughs (especially on my site) should be treated as a **guideline**, not an absolute rule. The exact quantity of flour you’ll need can vary significantly due to factors like humidity (even a rainy day can affect it!), elevation, and even how you measure your flour. This concept can be challenging when you’re used to the exact science of cake or cookie recipes, where an extra half-cup of flour would be disastrous. But yeast doughs are different.
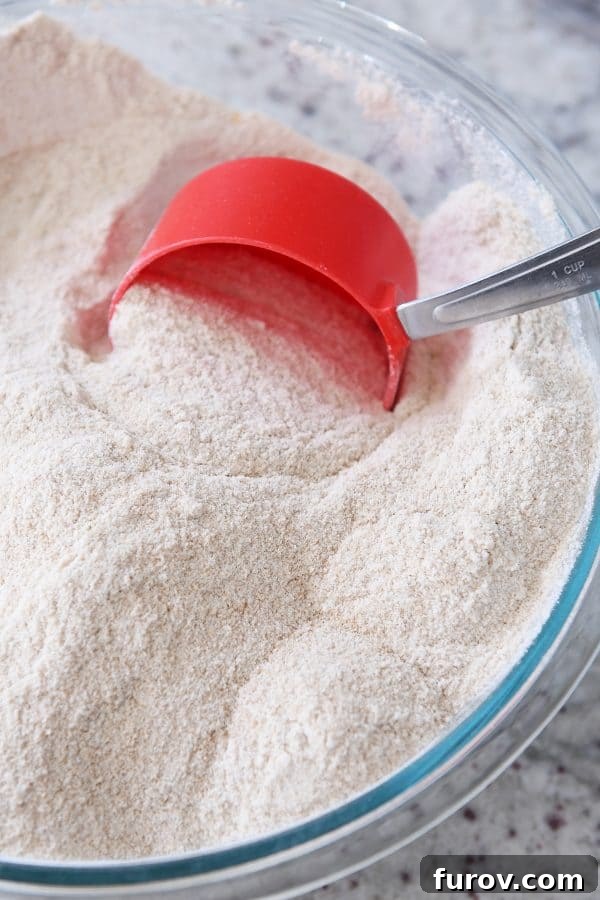
Consider this white sandwich bread recipe, for example, which calls for 6 1/2 to 7 1/2 cups of flour. While I typically add around 7 cups, many readers report perfect results using only 6 1/2 cups, while others find they need up to 8 cups. The key is understanding the *feel* of the dough rather than sticking rigidly to a number.
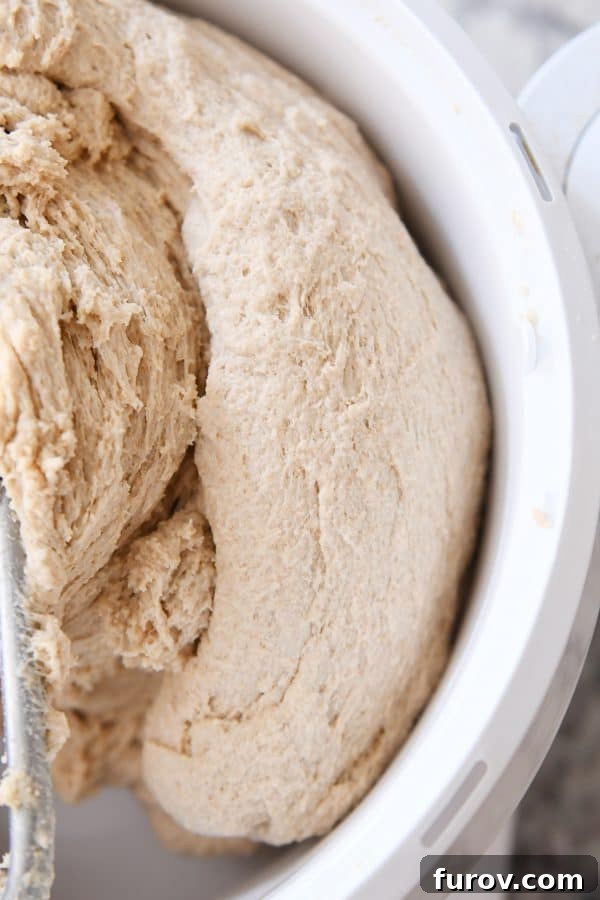
When I’m making a familiar dough, I often don’t even track the precise flour measurement. Instead, I observe the dough in my mixer, continuing to add flour until it forms a soft, slightly sticky ball that pulls away cleanly from the sides and bottom of the mixing bowl. The goal is a dough that is soft and pliable, not stiff and dry.
Avoiding Common Flour Mistakes:
- **Too Much Flour:** This is a common pitfall. Over-flouring will result in dense, dry, and tough bread or rolls, hindering a proper rise.
- **Too Little Flour:** Conversely, too little flour leaves you with an overly sticky, unmanageable mess that struggles to hold its structure, often spreading outwards rather than rising upwards.
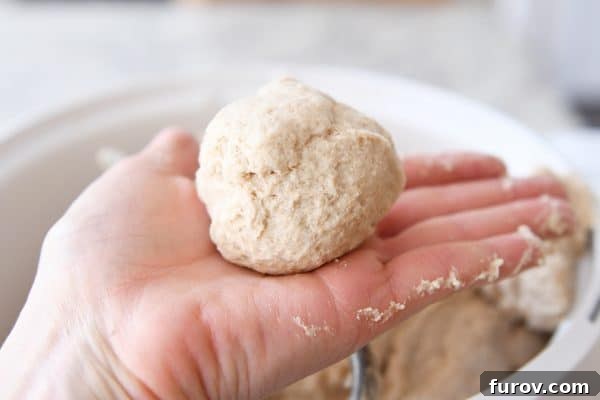
The image below shows dough that has cleared the sides of the bowl after several minutes of kneading, yet it leaves a sticky residue on my fingers when I touch it. Resist the urge to panic and add more flour immediately!
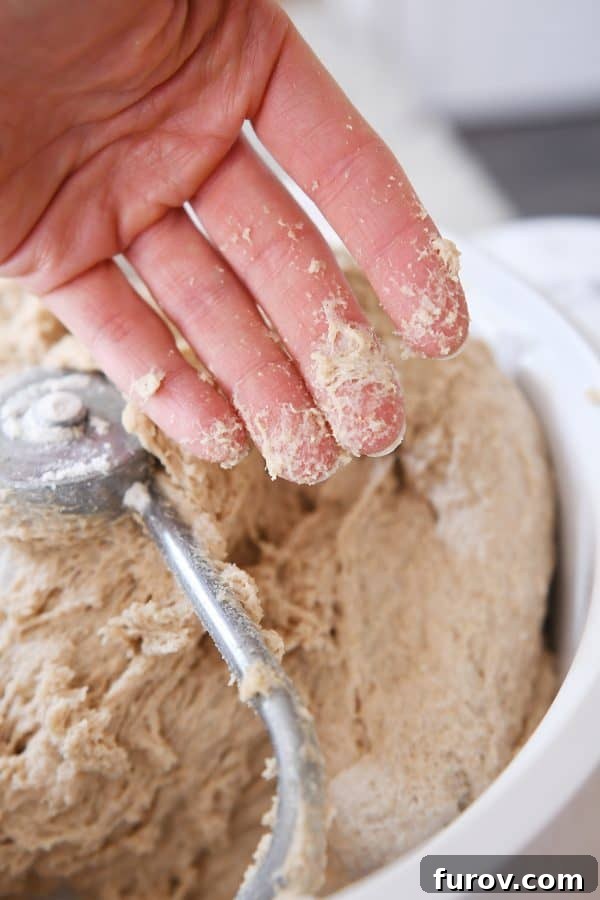
To truly test the flour content, take a small piece of dough and roll it gently between your hands. If it forms a soft ball without becoming a gummy, excessively sticky mess, and feels tacky to the touch (leaving minimal residue), it likely has enough flour. The dough pictured above, despite its initial stickiness in the bowl, passes this hand-rolling test.
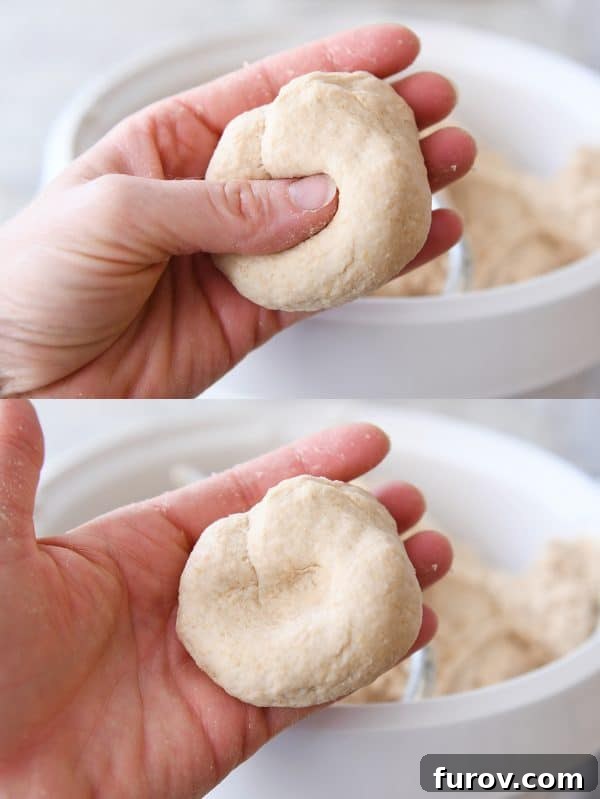
Another reliable test is the “finger indentation” test. Gently press a finger into the dough ball. Your finger should pull away cleanly, and the indentation should remain. When you become accustomed to the feel of perfectly floured dough, it feels truly magical: incredibly soft, delightfully squishy, and wonderfully pliable.
To Mixer or Not to Mixer: Kneading Your Dough
Many yeast doughs, with the exception of very wet varieties like ciabatta or English muffin bread, can be successfully made either by hand or with a stand mixer. While hand-kneading is a classic and satisfying method, I almost always reach for my Bosch Universal stand mixer for yeast doughs. It makes the bread-making process incredibly easy and efficient. Other stand mixers can certainly work too; if you’re curious about different models, I’ve shared a detailed (unsponsored) comparison of the Bosch versus KitchenAid here, complete with a highly informative comment section!
Making yeast dough by hand requires a bit more practice and patience, particularly when dealing with sticky doughs. It’s easier to inadvertently add too much flour when hand-kneading compared to letting a mixer do the heavy lifting. However, with a good technique and attention to the dough’s feel, hand-kneading definitely yields fantastic results.
The Importance of Kneading Duration
Kneading is not just a step; it’s fundamental to achieving light, airy, and fluffy bread. Its primary purpose is to **develop the gluten** in the dough. Gluten is the protein network that gives bread its structure and elasticity, allowing it to trap gases produced by the yeast and rise beautifully. Insufficient kneading will result in a weak gluten structure, leading to a crumbly, dense, or tough finished product that may not rise well.
The best guideline for kneading time comes directly from your recipe. Generally, sweeter doughs (like those for cinnamon rolls) often require less kneading than denser doughs, such as those made with whole wheat flour. Some whole wheat bread recipes, for example, may call for kneading times upwards of 6-9 minutes to properly develop the gluten in the coarser flour. A good rule of thumb: if a recipe is written for a stand mixer and you are hand-kneading, you’ll typically need to double the specified kneading time to achieve the same gluten development.
The Windowpane Test:
For a foolproof way to check for sufficient kneading, try the “windowpane test.” Take a small piece of dough and gently stretch it between your fingers. If you can stretch it thin enough to see light pass through without tearing, creating a translucent “window,” your gluten is well-developed. If it tears easily, keep kneading!
Troubleshooting: Why Isn’t My Dough Rising?
It can be disheartening when your dough doesn’t rise as expected, but most rising problems have straightforward solutions. Here are the most common reasons your dough might be struggling, along with potential fixes:
- **Expired or Inactive Yeast:** The most common culprit. Always check the expiration date and perform a proofing test if unsure (see “Proofing Yeast” section).
- **Water Temperature Extremes:**
- **Too Hot Water:** Water that’s too hot will kill the yeast, preventing any rise. Aim for 105-115°F (40-46°C).
- **Too Cold Water:** Cold water or liquids can inhibit yeast activity, leading to a very slow or stalled rise. Ensure liquids are adequately warm.
- **Enriched Doughs:** Ingredients like butter, milk, and eggs can slow down yeast activity, causing dough to rise more slowly than leaner doughs. Be patient!
- **Insufficient Kneading:** Without proper gluten development, the dough lacks the structure to trap gases and rise effectively, resulting in a dense product.
- **Cold Kitchen Environment:** Yeast thrives in warmth. If your kitchen is too cool, your dough will rise very slowly or not at all. Find a warm spot (like a slightly warmed oven turned off, or near a sunny window) for optimal rising.
- **Over-floured Dough:** Too much flour makes the dough stiff and heavy, preventing it from expanding easily.
- **Under-floured Dough:** Dough that is too wet lacks sufficient structure, often leading it to spread outwards rather than rising upwards.
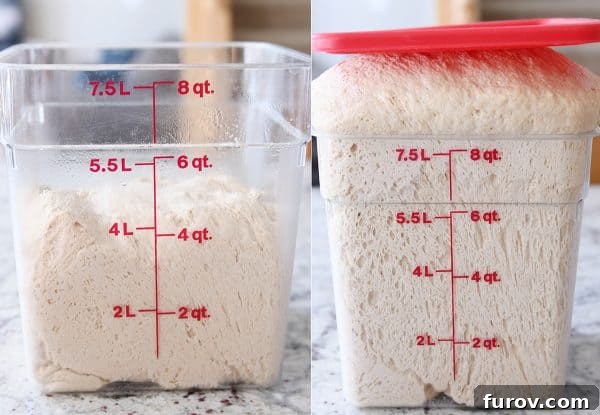
It’s also important to note that **dough can over-rise**. If dough proofs for too long on the counter, it can exhaust the yeast and gluten structure, causing it to collapse or deflate when it hits the heat of the oven. A general rule of thumb is to let dough double in size, not triple.
Ready to Bake? Easiest Yeast Dough Recipes to Start With
Feeling more confident about baking with yeast? Here are some fantastic and incredibly easy recipes perfect for beginners, though even seasoned bakers will adore them:
- Divine 1-Hour Breadsticks: Quick, satisfying, and perfect for dinner.
- Easy Homemade French Bread: A classic that proves homemade bread isn’t complicated.
- Small Batch Whole Wheat Bread: Ideal for smaller households, delivering wholesome goodness.
- French Bread Rolls: Soft and tender, a great accompaniment to any meal.
- Small Batch Cinnamon Rolls: A sweet treat that’s simpler to make than you think!
And for those days when you want even less fuss, here are some of my favorite no-knead, no-mixer bread recipes:
- Super Easy Focaccia Bread: Incredible flavor with minimal effort.
- Buttery Flaky Make-Ahead Dinner Rolls: Prepare ahead for stress-free entertaining.
- Rustic Crusty Bread: Achieve artisan-quality bread right at home.
- Overnight Cinnamon and Sugar Sweet Rolls: Wake up to a delicious breakfast with minimal morning prep.
Beyond the Basics: Other Factors to Consider for Yeast Baking Success
While this guide focuses on the fundamentals, the world of yeast baking is vast and exciting! There are many other elements that can influence your baking, such as experimenting with different types of flour (like whole wheat or other whole grains), diving into the fascinating realm of sourdough starters and how they interact with commercial yeast, or even understanding the subtle impacts of different fats and sugars on dough structure and flavor.
For now, this post aims to provide a solid foundation for beginner yeast bakers and a helpful refresher for those who just need to brush up on the essentials. Ultimately, the goal is to empower you to approach bread making at home with confidence and creativity. You absolutely can become a champion bread baker!
Do you have a burning question I didn’t cover, or a favorite yeast baking tip of your own? Please feel free to share your thoughts in the comments below! Your insights help make this a richer resource for everyone.
Disclaimer: I am a participant in the Amazon Services LLC Associates Program, an affiliate advertising program designed to provide a means for me to earn fees by linking to Amazon.com and affiliated sites. As an Amazon Associate I earn from qualifying purchases.