
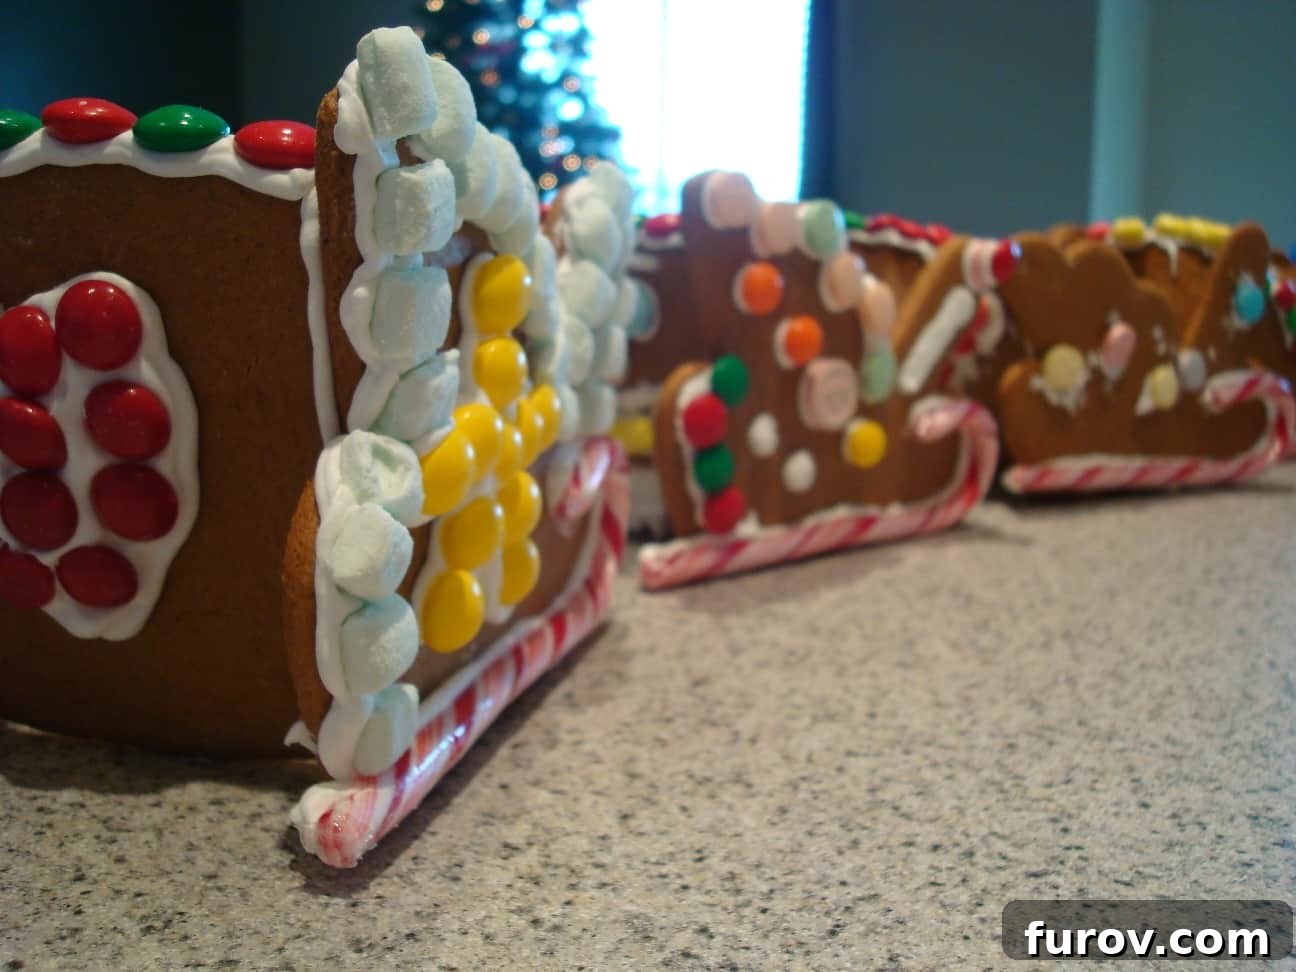
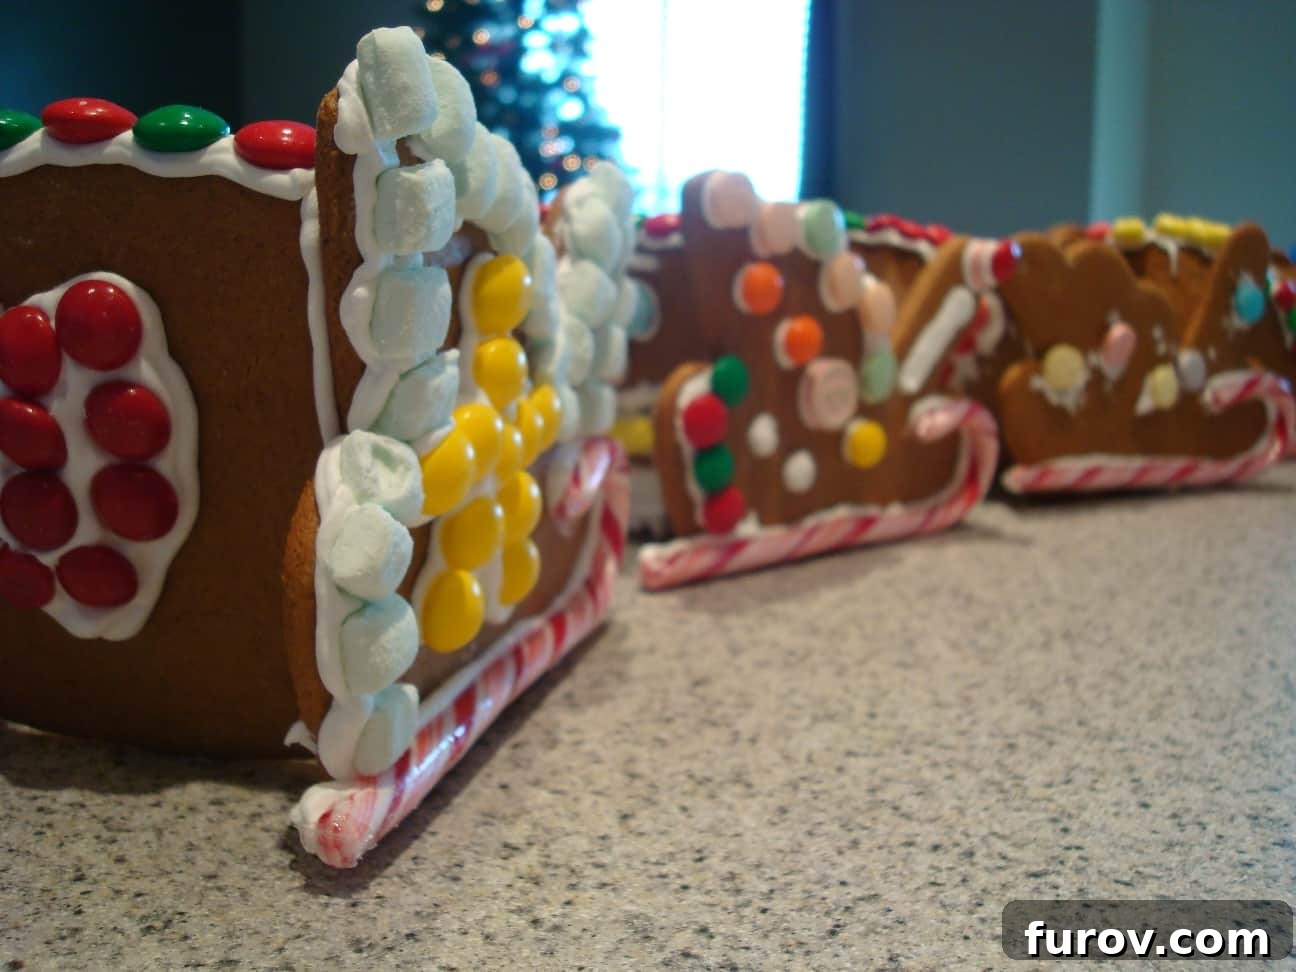
What’s more festive during the holidays than making gingerbread “something”? Some people make gingerbread houses, we make gingerbread sleds!
Gingerbread Sleds: A Cherished Holiday Baking Tradition
The holiday season unfailingly brings with it a symphony of familiar scents—pine, cinnamon, and, for many, the irresistible aroma of freshly baked gingerbread. While gingerbread houses stand as a quintessential symbol of Christmas craftsmanship and gingerbread men bring simple joy, our family tradition has always carved out a special niche for something truly unique: gingerbread sleds. These delightful, edible creations, meticulously crafted and adorned, have been the heart of our festive celebrations for generations, infusing our holiday gifting and gatherings with an extra touch of magic and personal charm.

The Enduring Magic of a Unique Family Tradition
Growing up, the days leading up to Christmas were steeped in the comforting, spicy fragrance of ginger and cinnamon as my mother wholeheartedly embraced her annual gingerbread sled project. This wasn’t merely baking; it was a profound labor of love, demanding immense dedication and a generous measure of patience. The process began with preparing the rich, deeply fragrant gingerbread dough, followed by the meticulous task of rolling it to an exact thickness. Then came the delicate, often tedious, cutting of each individual sled component using cherished paper patterns, culminating in the crucial, careful assembly of these intricate pieces.
For us children, these sleds were far more than simple baked goods; they were enchanting vessels brimming with holiday joy. We would eagerly await our turn to transform them with vibrant royal icing and a colorful assortment of candies, inevitably sneaking a few sugary treats ourselves in the process. Once splendidly adorned, these miniature edible sleighs would be lovingly filled with an array of additional goodies and personally delivered to our cherished neighbors and friends. Each sled became a tangible token of our family’s holiday spirit, a sweet gesture that deepened community bonds and created lasting memories.
Yet, like many deeply rooted traditions, this one was not without its inherent challenges. My first attempt to recreate my mother’s elaborate feat in the early years of my marriage quickly revealed the sheer amount of effort involved. The precise cutting, the delicate balancing act of assembly, and the essential, often lengthy, drying times made me seriously contemplate retiring the tradition altogether. I distinctly remember calling my mother to express a newfound, profound appreciation for her years of tireless work, now truly understanding the dedication behind each sled. However, spurred by my husband’s encouragement and as our own children grew old enough to genuinely participate and revel in the process, I found myself joyfully rekindling this cherished holiday ritual. Despite my occasional playful grumbles during the dough-rolling and cutting stages, the unparalleled delight on my children’s faces and the sheer happiness these handmade sleds bring to others make every ounce of effort profoundly worthwhile.
Crafting Your Gingerbread Sleds: From Dough to Decoration
One of the most significant aspects of crafting gingerbread sleds has always been the precision required for cutting the intricate shapes. For countless years, my mother faithfully relied on simple paper patterns and a sharp paring knife. While this method was undeniably effective, it was also time-consuming and prone to slight inconsistencies. Seeking a more efficient and streamlined approach for my own baking endeavors, I embarked on a quest for innovation. My research led me to discover a company specializing in custom cookie cutter kits, a revelation that truly changed the game! I was able to design and create my very own set of bespoke gingerbread sled cookie cutters, which completely revolutionized the cutting process, making it much faster, more consistent, and considerably less daunting.
However, for those who appreciate the charm of the traditional method or simply prefer not to invest in custom cutters, there’s absolutely no need to worry! I am thrilled to share the exact, age-old paper patterns that my mother utilized for decades. These patterns have proven their reliability through countless holiday seasons, consistently yielding beautifully shaped gingerbread sled components. To use them, simply enlarge the provided pattern image to 8 1/2 x 11 inches (standard letter size), and you will have the correct dimensions to carefully cut around with a small, pointed knife. Whichever method you ultimately choose, the result is guaranteed to be a truly festive, deliciously aromatic, and visually stunning holiday centerpiece or a deeply personal gift.
CLICK HERE FOR A PDF OF THE CUT-YOURSELF GINGERBREAD SLED PATTERN.
Classic Gingerbread Sled Recipe
Yield: Approximately 6-8 gingerbread sleds
Prep Time: 4 hours (includes chilling time)
Cook Time: 15 minutes
Total Time: 4 hours 15 minutes
Ingredients
For the Sturdy Gingerbread Dough:
- 7 cups (994 g) all-purpose flour
- 2 teaspoons baking soda
- 1 teaspoon salt
- 1 teaspoon ground ginger
- 1 teaspoon ground cloves
- 1 teaspoon ground cinnamon
- 1 teaspoon ground allspice
- ⅓ cup vegetable shortening (or butter, softened)
- 1 cup (212 g) packed light or dark brown sugar
- 1 ½ cups (510 g) dark molasses
- ⅔ cup cold water
For the Royal Icing (for assembly and decoration):
- 3 large egg whites at room temperature
- 1 pound (approximately 4 cups) powdered sugar, sifted
- 1 teaspoon cream of tartar
Instructions for Gingerbread Sleds
- Prepare Dry Ingredients: In a large bowl, whisk together the flour, baking soda, salt, ground ginger, cloves, cinnamon, and allspice. Ensure all spices are evenly distributed. Set this dry mixture aside.
- Cream Wet Ingredients: In a separate, very large mixing bowl, use an electric mixer to beat together the shortening, brown sugar, and dark molasses until the mixture is light, fluffy, and thoroughly combined. This step is crucial for creating a smooth, rich base for your gingerbread dough. Gradually stir in the cold water.
- Combine Wet and Dry: Begin to add the dry flour mixture to the wet ingredients gradually, about a cup at a time, mixing on low speed. As the dough becomes thicker and stiffer, making it challenging for the mixer, switch to a sturdy wooden spoon or use your hands to incorporate the remaining flour. Knead gently until a cohesive, firm dough forms.
- Chill the Dough: Divide the firm dough into two or three manageable flat discs. Wrap each disc tightly in plastic wrap to prevent drying. Chill the dough in the refrigerator for at least several hours, or ideally overnight. This chilling process is essential for the dough to firm up, making it significantly easier to roll and cut cleanly without sticking, and it helps prevent the cookies from spreading too much during baking.
- Roll and Cut Dough: Preheat your oven to 350°F (175°C). Lightly flour a clean work surface. Take one disc of chilled dough at a time, keeping the rest refrigerated. Roll the dough out evenly to a thickness of approximately 1/8 to 1/4 inch. The thickness can affect the final texture and sturdiness: 1/8 inch yields a crisper sled, while 1/4 inch provides a more robust structure. Place your chosen pattern (either the provided PDF or custom cookie cutters) on the rolled dough and carefully cut out the sled pieces using a small, pointed knife or your cookie cutters. Remember to reverse the pattern for the second side of each sled to ensure you have symmetrical left and right pieces.
- Bake Gingerbread Pieces: Carefully transfer the cut gingerbread pieces to greased and floured cookie sheets (or sheets lined with parchment paper). Leave a little space between pieces. Bake for approximately 15 minutes, or until the edges are firm and lightly browned. Baking time may vary slightly depending on the thickness of your dough and the calibration of your oven.
- Cool and Dry: Once baked, immediately transfer the gingerbread pieces to a wire cooling rack. Allow them to cool completely. For optimal structural integrity—which is vital for assembly—let the pieces stand uncovered for several hours, or even a few days, to thoroughly dry out and harden. This crucial step prevents them from bending or breaking during assembly. **Tip: Rolling the dough to about 1/8-inch thick typically yields enough pieces for around 8 sleds per batch.
- Prepare Royal Icing: In a clean, dry bowl (ensure no grease is present, as it will prevent the egg whites from whipping), beat the room temperature egg whites with an electric mixer until frothy. Gradually add the sifted powdered sugar and cream of tartar. Continue beating on high speed for 8-10 minutes, or until medium-stiff peaks form and the icing is thick, glossy, and holds its shape. This royal icing will serve as the strong “glue” for your sleds and will dry to a hard finish. Keep the bowl covered with a damp cloth or plastic wrap when not in use to prevent the icing from hardening.
- Assemble the Sleds: Using the prepared royal icing, carefully “glue” the gingerbread pieces together to form your sleds. Pipe a line of icing along the edges where pieces meet and gently hold them in place for a moment until the icing begins to set. It is highly recommended to assemble the sleds the night before you plan to decorate them. This allows ample time for the royal icing glue to set completely and harden, typically requiring 5-6 hours or, ideally, overnight. Once assembled, store the sleds in a cool, dry place. Any leftover royal icing can be stored in an airtight container in the refrigerator, with plastic wrap pressed directly onto its surface, for later use in decorating.
Author: Mel
Course: Dessert
Cuisine: American
Method: Bake
Estimated Nutrition Facts (per sled, for 6 sleds)
- Calories: 1321 kcal
- Carbohydrates: 287 g
- Protein: 17 g
- Fat: 13 g
- Sodium: 826 mg
- Fiber: 4 g
- Sugar: 173 g
Note: Nutrition facts are estimates and may vary based on specific ingredients and preparation methods.
Recommended Baking Tools
Decorating Your Gingerbread Sleds: A Canvas for Holiday Creativity
Once your gingerbread sled pieces are perfectly baked, thoroughly dried, and expertly assembled, the true holiday magic begins: the decoration! This stage is where you can unleash your artistic flair and personalize each sled, transforming them into truly unique holiday gifts or stunning festive table centerpieces. Royal icing, meticulously prepared as described in the recipe above, will be your primary artistic medium. Its unique property of drying to a firm, hard consistency makes it ideal for piping intricate details, creating elegant designs, and securely attaching a myriad of candies and edible embellishments.
Royal Icing Techniques and Creative Tips:
- Precision Piping: Utilize various piping tips to create fine lines, elegant swirls, delicate dots, or even realistic “snow” drifts along the edges and surfaces of your sleds. For a polished, smooth finish, first outline the sled’s structure with a thicker line of icing, then “flood” the enclosed areas with a thinner consistency icing.
- Vibrant Coloring: Divide your royal icing into several smaller bowls and use high-quality gel food coloring to create a vibrant and diverse palette. Classic holiday hues like rich reds, deep greens, and crisp whites are always popular, but feel free to explore frosty blues, glistening silvers, and even gold accents for a truly dazzling winter wonderland theme.
- Candy Embellishments: For best adhesion, gently press candies onto the sled while the icing is still wet but not overly runny. Mini candy canes, colorful gumdrops, sparkling silver dragees, a sprinkle of festive edible glitter, chocolate chips, and even small chocolate-covered pretzels can effortlessly elevate your sleds into edible masterpieces. Consider creating a distinct theme for each sled – perhaps a cozy candy forest, a sparkling snowy mountain scene, or a simple yet elegant festive pattern.
- Patience for Drying: This is a crucial step that cannot be rushed! Allow ample time for your decorated sleds to dry completely, typically several hours or even overnight, especially if you have applied generous amounts of icing or intricate layers. Proper drying prevents smudging, ensures your delicate decorations remain intact, and allows the sleds to be handled and transported without damage.
Decorating gingerbread sleds is far more than just an artistic endeavor; it’s a delightful and engaging activity that brings families together, igniting imagination and forging cherished, lasting memories. Children, in particular, adore this hands-on part of the process, often surprising everyone with the most whimsical, imaginative, and joy-filled designs.
Gifting and Displaying Your Festive Gingerbread Creations
Gingerbread sleds transcend the realm of mere delicious treats; they are heartfelt embodiments of holiday cheer, making them exceptionally perfect for thoughtful gifting. Once beautifully decorated and completely dry and firm, meticulously fill each sled with an inviting assortment of small candies, gourmet chocolates, or even other mini-sized cookies. To protect their delicate beauty and showcase their festive allure, individually wrap each sled in clear cellophane bags, tied elegantly with festive ribbons or natural twine.
- Neighborly Delights: The act of hand-delivering these unique gingerbread sleds, filled with sweet delights, to your neighbors and friends is an exceptionally warm and personal way to extend holiday goodwill and express sincere appreciation.
- Thoughtful Hostess Gifts: These artisanal sleds make charming, memorable, and deeply thoughtful gifts for holiday party hosts, leaving a lasting impression.
- Stunning Table Centerpieces: Elevate your holiday table by arranging a few artfully decorated sleds on an elegant platter. Enhance the display with fresh evergreen sprigs, fragrant cinnamon sticks, and twinkling fairy lights for a truly stunning and edible centerpiece that will be the talk of your gathering.
- Edible Decorations: Incorporate them into your broader festive decor. Position them on a mantelpiece, a windowsill, or within a holiday vignette, adding a layer of charming, edible artistry to your home’s festive ambiance before they are eventually enjoyed.
The personal effort and love invested in crafting these gingerbread sleds genuinely shines through, transforming them into a memorable and highly anticipated gift that stands out distinctively from more conventional holiday cookies or store-bought treats.
Troubleshooting Common Gingerbread Sled Challenges
Even the most seasoned bakers can occasionally encounter minor hiccups in the kitchen. Here are some common challenges you might face when making gingerbread sleds and practical tips on how to effectively tackle them, ensuring your holiday baking experience remains as smooth and enjoyable as possible:
- Dough Too Sticky to Roll: If your gingerbread dough feels overly sticky and difficult to manage, it almost certainly requires additional chilling time. Ensure it is wrapped very tightly in plastic wrap and allow it to chill for at least 4 hours, or ideally, overnight. When rolling, you can lightly dust your rolling pin and work surface with a minimal amount of flour, but be cautious not to incorporate too much extra flour directly into the dough itself, as this can lead to tough, dry cookies.
- Dough Spreads Excessively During Baking: This issue can typically be attributed to insufficient chilling of the dough or rolling it out too thinly. Always ensure your dough is well-chilled before rolling. For better structural integrity and less spreading, try rolling the dough closer to 1/4 inch thick rather than 1/8 inch. Also, baking at a slightly lower temperature for a longer time can sometimes help.
- Sled Pieces Break Too Easily After Baking: Fragile gingerbread pieces are often a result of the dough being rolled too thinly or the cookies being overbaked, leading to an overly crisp or brittle texture. Aim for a dough thickness of at least 1/8 to 1/4 inch. Closely monitor baking times to avoid overbaking. Crucially, allowing the baked pieces to dry out for a full day or two after cooling helps them firm up and become more resilient without becoming overly brittle.
- Royal Icing Not Setting Firmly: For royal icing to set to its characteristic hard finish, it needs both sufficient time and the correct consistency. Ensure you beat the egg whites, powdered sugar, and cream of tartar for the full 8-10 minutes until distinct medium-stiff peaks form. High humidity in your environment can also impede drying time, so if possible, choose a dry day for icing and allow ample time for setting.
- Difficulties with Sled Assembly: Using freshly made royal icing as your “glue” is paramount. If your icing begins to harden in the bowl during assembly, add a tiny drop of water (literally a drop!) and mix thoroughly to restore its workability. When joining pieces, apply a steady bead of icing to the edges, press them together firmly, and hold them in place for a few moments. You can also use small props, such as cans or bottles, to support the vertical pieces until the icing sets enough to hold them independently.
Conclusion: Embrace the Enchanting Gingerbread Sled Tradition
Creating gingerbread sleds is an incredibly beautiful, uniquely rewarding, and deeply heartwarming holiday tradition that offers a truly enchanting alternative to the more common gingerbread creations. It’s a journey that takes you from preparing fragrant, spiced dough to crafting delightful, intricately decorated keepsakes that perfectly embody the very spirit of giving and festive joy. Whether you choose to streamline your process with custom cookie cutters or embrace the nostalgic charm of cherished family paper patterns, the entire endeavor presents a wonderful opportunity for unleashing creativity, fostering family connection, and spreading immense happiness.
This holiday season, we wholeheartedly encourage you to embrace the magical world of gingerbread sleds. They are far more than just delicious cookies; they are precious memories in the making, destined to become a beloved, signature part of your family’s festive heritage for years to come.
Explore More Festive Gingerbread Recipes: