
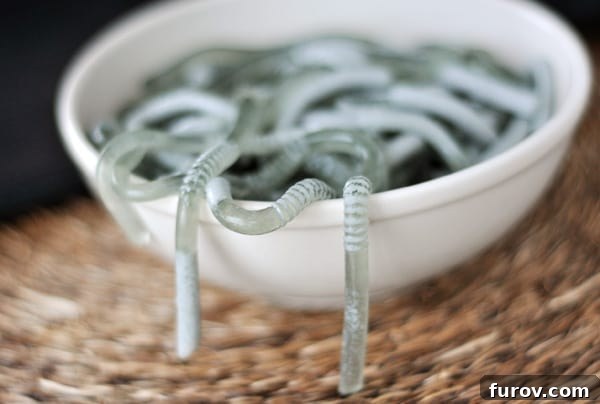
Spooky & Slimy Jello Worms: The Ultimate Gross-Out Halloween Treat for Kids!
Get ready for shrieks of delight and playful disgust with these Jello worms – an absolutely slimy, gross, and hilariously unforgettable Halloween treat! Perfect for parties or a fun activity with the kids, these creepy crawlies are guaranteed to be the hit of your spooky celebrations.
Halloween has a peculiar way of awakening our inner child, especially when it comes to food. While I typically lean towards wholesome, less processed options, the spirit of this holiday beckons for something wonderfully wacky and deliciously defiant of dietary norms. It’s the time of year when hot dogs become mummified and vibrant, jiggly gelatin transforms into something delightfully repulsive. After years of avoiding the processed sweetness of Jello, my household has discovered a newfound, albeit temporary, affection for its wiggly charm, all thanks to these outrageously fun Jello worms.
These aren’t just any Jello molds; they are a full sensory experience designed to illicit squeals and giggles. The premise is brilliantly simple yet incredibly effective: you’ll meticulously pack dozens of bendy-neck straws into a container, fill them with a specially concocted gelatin mixture, refrigerate until firm, and then, with a satisfying squeeze, extract dozens of perfectly formed, squiggly worms. It’s a bit of a messy process, but the payoff in pure Halloween joy is immeasurable.
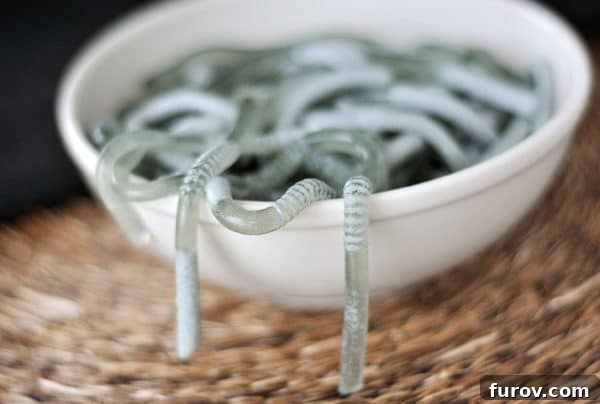
The moment these Jello worms made their debut, my children went absolutely wild. Their excitement was palpable, a mix of genuine delight and theatrical revulsion. “Look, I’m eating a worm! Aaah!” became the enthusiastic mantra of the afternoon, a phrase that, remarkably, never lost its charm, even after countless squirmy, jiggly treats had been devoured. It’s the kind of edible illusion that makes Halloween so magical for kids, turning a simple snack into an adventurous culinary challenge.
I’ll confess, for me, the experience was slightly different. I summoned my courage for one bite, and it was nearly my undoing. The texture, the chilling sliminess, and the uncanny resemblance to actual earthworms (despite my batch being more grey than brown) were a formidable combination. Every fiber of my being recoiled. But, as any parent knows, sometimes the greatest joy is in witnessing the unbridled enthusiasm of your children, even if it means conquering a few personal culinary phobias. Luckily, my boys had no such reservations and made quick work of these gelatinous “decomposers.” If you dare to venture into making these, I salute you – may your stomach be sturdier than mine!
Why Jello Worms Are a Must-Have for Your Halloween Bash
Halloween is a time for playful scares, creative costumes, and, of course, delightfully themed treats. Jello worms fit perfectly into this festive framework, offering a unique blend of gross-out fun and simple preparation that makes them a standout choice for any spooky gathering. Here’s why these wiggly wonders deserve a spot on your Halloween menu:
Unforgettable Fun for All Ages
There’s something inherently thrilling about eating something that looks utterly disgusting but tastes sweet and fruity. Jello worms leverage this playful paradox perfectly. Kids, in particular, are captivated by the idea of consuming slimy, squirming creatures, transforming a simple snack into an imaginative game. They’ll love showing off their “worms” and playfully grossing out friends and family. This interactive element makes Jello worms more than just a treat; they’re a memorable experience that will have everyone talking long after the party is over.
Simple, Budget-Friendly, and Highly Customizable
One of the greatest appeals of Jello worms is their incredible simplicity. You don’t need fancy equipment or advanced culinary skills. With just a few basic ingredients – gelatin, whipping cream, and food coloring – you can create a large batch of these spooky snacks without breaking the bank. The recipe is also wonderfully versatile. Want pink worms? Go for it! Blue? Absolutely! You can experiment with different Jello flavors and food colorings to match your Halloween theme or simply to create a rainbow of creepy crawlies. This adaptability makes them a fantastic choice for any Halloween host looking for maximum impact with minimal effort.
Perfect for Themed Presentations
The visual appeal of Jello worms is undeniable. Their realistic, segmented appearance makes them ideal for creating eerie Halloween scenes. Imagine a bowl of these worms nestled on a bed of crushed Oreos, mimicking freshly dug earth, or emerging from a “graveyard” adorned with cookie tombstones. They can be presented in clear glass bowls to highlight their slimy texture or arranged artfully on a platter for a truly unsettling display. This inherent “grossness” makes them a fantastic centerpiece, drawing immediate attention and sparking conversation at any Halloween party.
Essential Tips for Crafting Perfect Jello Worms
Achieving truly convincing and easy-to-extract Jello worms requires a few key techniques. Follow these essential tips to ensure your batch of creepy crawlies turns out perfectly, ready to delight and disgust your Halloween guests:
Choosing and Preparing Your Straws
The type of straws you use is paramount to success. **Bendable straws are crucial.** Their accordion-like necks, when straightened, create the segmented texture that makes the worms look so realistic. Aim for at least 100 straws for a good yield. Before packing, fully extend each straw, ensuring the bendable neck part is facing downwards, flush with the bottom of your container. This ensures the jello fills the entire length and you get a full worm.
Selecting the Right Container
The container for your straws is another critical element. It should be able to hold at least 4 cups of liquid and, ideally, be **tall and completely straight-sided, or have a slightly wider top than the bottom.** A container that is taller than it is wide works best, as it allows the straws to be submerged deeply enough to form long worms. Pack the straws as tightly as possible; the tighter they are, the less leakage you’ll have and the more defined your worms will be. If your container has a slightly wider top, consider using a rubber band around the upper portion of the packed straws to help keep them snug during pouring.
Mastering the Gelatin Mixture
The key to realistic Jello worms lies in the color and consistency of your gelatin mixture. Combining flavored gelatin (purple is excellent for a ‘decaying’ look, but green or red can also be spooky) with unflavored gelatin creates a sturdier worm that holds its shape. When adding boiling water, stir until both types of gelatin are fully dissolved, leaving no granules. Crucially, allow the mixture to cool for about 15 minutes until it’s slightly warm but not yet setting. This prevents the whipping cream from curdling and ensures a smooth, opaque liquid. The whipping cream is essential for creating an opaque, “earthy” texture, making the worms look less like translucent candy and more like genuine creepy crawlies. For the color, green food coloring is a great start. My worms turned out a greyish-brown, which I achieved with about 10 drops of green. You might experiment with a touch of red or even blue to get that perfect “muddy” or “rotting” aesthetic. Don’t be afraid to play around until you achieve your desired level of grossness!
Packing the Straws and Gentle Pouring
Once your straws are tightly packed into the container, place the entire container in a larger dish or baking tray. This acts as a catch-all for any potential spills, making cleanup much easier. When pouring the cooled gelatin mixture, do so gently and slowly over the straws. Don’t be alarmed if you see some of the mixture seeping up the sides of the container; as long as your straws are packed tightly and flush with the bottom, they will still fill correctly. The slow pour helps minimize air bubbles and ensures even distribution of the liquid within the narrow straw channels.
The Big Reveal: Extracting Your Worms
Patience is key for the setting phase; allow the Jello straws to chill for at least 8 hours, or preferably overnight, to ensure they are completely firm. When it’s time for the big reveal, remove the container from the refrigerator. To ease extraction, briefly run the sides of the container under warm water. This loosens the gelatin from the container walls, allowing you to gently pull out the entire blob of Jello-filled straws. Now for the messy, but fun, part! Carefully extract each individual straw from the Jello mass. Holding the top of a straw firmly with one thumb and forefinger, use your other thumb and forefinger to apply firm, steady pressure down the entire length of the straw. This action will propel the perfectly jiggly, segmented worm right out of the straw. It’s incredibly satisfying!
Once extracted, place your Jello worms on a baking tray lined with wax paper and refrigerate them again until you’re ready to serve. Serving them chilled in a cool bowl enhances their slimy, wiggly texture.
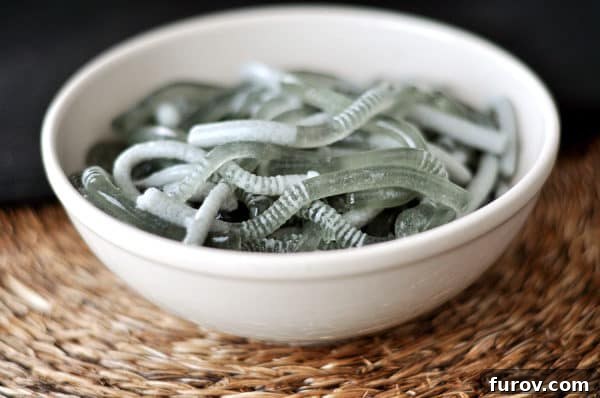
These Jello worms were an absolute smash hit with my kids, generating wild excitement and much laughter. They provide a unique blend of visual novelty and palatable fun that perfectly encapsulates the playful spirit of Halloween. Gather your ingredients, embrace the mess, and prepare for a truly memorable spooky snack experience that your kids will be talking about for years to come!

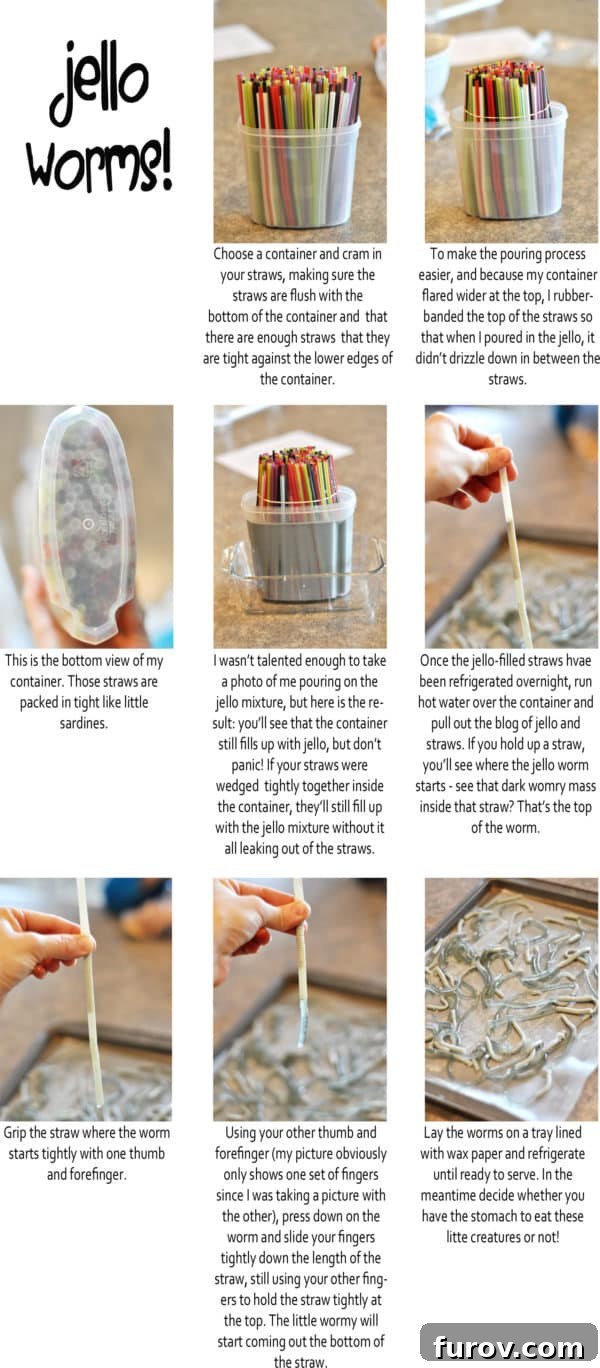
Click HERE for a PDF version of the step-by-step collage.
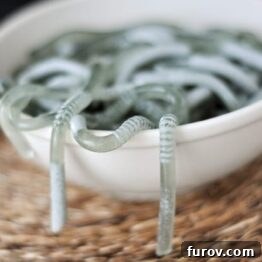
Jello Worms
Pin
Rate
Ingredients
- 1 (6-ounce) package purple gelatin/jello
- 3 envelopes (3/4 ounces) unflavored gelatin
- 3 cups boiling water
- ¾ cup whipping cream
- green food coloring, as needed
- 100 + plastic straws with bendable necks
Instructions
-
Choose a container that can hold at least 4 cups of liquid. It should be completely straight all the way up or have a slightly wider top than the bottom. Try to get a container as tall as it is wide and preferably even taller, otherwise the jello won’t fill the straws high enough. Extend each of the straws and pack the straws in as tightly as you can, adding more straws as needed to get a tight fit. Make sure that each straw is flush with the bottom of the container and that the bendable neck part (even though it is completely extended) is facing down. If your container is slightly wider on top than it is on the bottom, it may help, once the straws are packed tightly in, to rubberband the top of the straws to help when pouring in the jello.
-
In a medium, heat-safe mixing bowl, preferably with a pourable edge, stir together plain and flavored gelatin powders. Pour the boiling water over the gelatin, stirring until it is fully dissolved. Allow the gelatin to cool for about 15 minutes, until it is slightly warm but not beginning to set. Stir in the whipping cream. Stir in the green food coloring until you get the desired color. You can aim for a gray-brown shade by adjusting the drops of green food coloring, possibly adding a few drops of red or another dark color to achieve a realistic “earthy” tone.
-
Place your container of straws in a larger dish to catch any possible spills. With your container of straws prepped, gently pour the jello mixture over the straws. Don’t worry as you see the jello seeping up the sides of the container. If your straws are tightly packed in and flush with the bottom, they will still fill with jello, creating perfectly formed worms.
-
Chill the jello straws for at least 8 hours, or ideally overnight, to ensure complete setting. When the jello is set, remove the container from the refrigerator and run the sides under warm water for a few seconds until you can pull the straws and jello blob out of the container. This is the messy part – gently extract each straw from the mass. Holding the top of the straw tightly with one thumb and forefinger, use the other thumb and forefinger to tightly apply pressure down the entire length of the straw, thereby propelling the jiggly little worm from the straw.
-
Place the jello worms on a baking tray lined with wax paper and refrigerate until ready to serve. For the best experience, serve them in a chilled bowl.
Recommended Products
Recipe Source: This creative idea was inspired by a concept I discovered on Pinterest, proving that some of the best Halloween treats come from unexpected places!
Creative Variations & Serving Ideas for Your Jello Worms
While classic gray-brown Jello worms are fantastically gross, don’t hesitate to unleash your creativity! These simple treats offer endless possibilities for customization, allowing you to tailor them to any Halloween theme or simply to add more colorful (or gruesome) fun.
Expand Your Color & Flavor Palette
- Bloody Worms: Use red Jello for a vivid, gory effect. Serve them dripping from a “bloody” punch bowl for maximum shock value.
- Toxic Slime Worms: Opt for vibrant green or neon yellow Jello to create worms that look like they’ve crawled out of a toxic waste dump.
- Eerie Blue Worms: A deep blue Jello can mimic strange, otherworldly creatures from a murky lagoon, perfect for a monster-themed party.
- Rainbow Worms: For a less gross but equally fun option, make several batches in different bright colors (cherry, lime, orange) for a vibrant, wiggly rainbow.
Spooky Presentation Pointers
The way you present your Jello worms can significantly enhance their impact. Here are some ideas to make them even more “gross-tastic”:
- Dirt Pudding Bed: Crush chocolate sandwich cookies (like Oreos) to create a realistic “dirt” base in a large serving bowl. Arrange your Jello worms as if they are crawling out of or burrowing into the “earth.” This is a classic and highly effective presentation.
- Graveyard Scene: Expand on the dirt idea by adding gummy worms, candy tombstones (made from graham crackers or cookies), and perhaps a few candy bones to create a miniature edible graveyard.
- Witches’ Brew: Place the Jello worms in a clear punch bowl filled with a dark-colored, non-alcoholic “witches’ brew” (e.g., grape juice or dark soda). The worms will appear to be swimming in the potion.
- Spiderweb Platter: Arrange the worms on a dark platter and use white icing or melted white chocolate to draw a spiderweb pattern over them. Add a few plastic spider rings for extra creepiness.
- Test Tube Treats: For individual servings, gently place a few worms into clear plastic test tubes or small apothecary jars. This makes for a fun, scientific, and slightly unsettling presentation.
Pairing with Other Spooky Snacks
Jello worms are excellent on their own, but they also pair wonderfully with other Halloween treats. Consider serving them alongside:
- Mummy Dogs and Mummy Cookies: A classic combination of savory and sweet, keeping with the fun monster theme.
- Eyeball punch: A vibrant green or red punch with lychee “eyeballs” floating in it would complement the slimy worms perfectly.
- Spiderweb dip: A creamy dip (like a guacamole or a seven-layer dip) with a sour cream “spiderweb” piped on top, served with black tortilla chips.
No matter how you choose to make and present them, these Jello worms are a guaranteed conversation starter and a memorable highlight of any Halloween celebration. They embody the playful, spooky spirit of the holiday perfectly, proving that sometimes, the grossest treats are the most fun!